

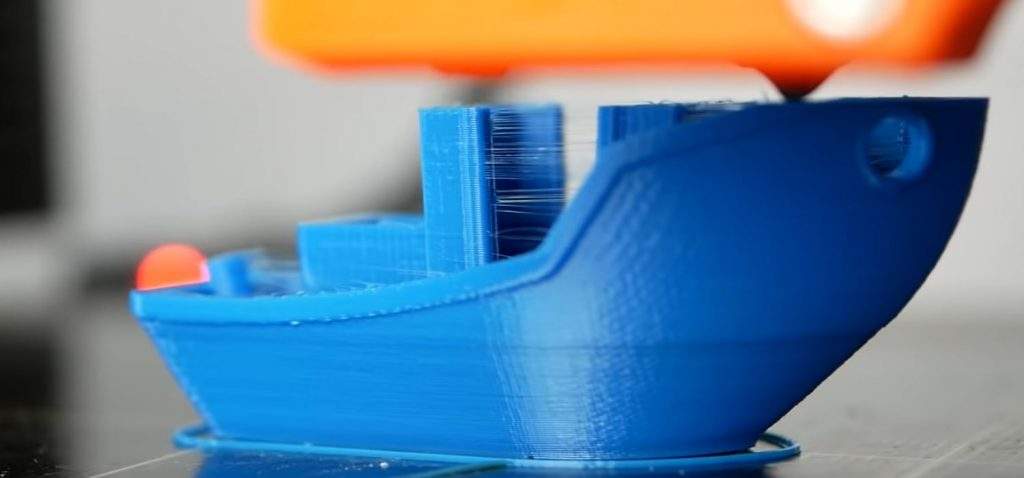
Have you ever seen wisps of plastic on your 3D prints that aren’t supposed to be there? That’s what we call stringing, and it’s a 3D printing issue that hurts the visual appearance of models as well as their dimensional accuracy.
I’ve spent tens of hours researching what causes stringing and have scoured the internet for the best solutions, testing each one on my own 3D printers.
The best way I’ve found to prevent 3D printer stringing is to adjust your retraction settings by increasing the retraction distance and speed. Additionally, you should try decreasing your printing temperature, cleaning the nozzle, and drying your filament.
Want to learn more about the causes of stringing and how, exactly, you can fix it? Read on!
Table of Contents
What Is Stringing on a 3D Printer?

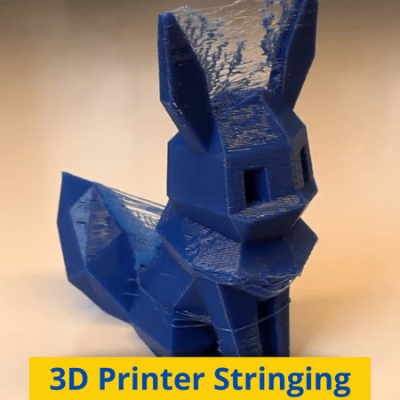
Stringing is a form of over-extrusion on a 3D printer, similar to zits and blobs, where too much filament is pushed out the nozzle. But, instead of the excess plastic appearing as unwanted blobs, it forms little strands that hang from the walls of a 3D print.
Stringing can happen to anyone, but it’s especially common if you’re using a Bowden extruder, PETG filament, or are printing a very complex model. Moreover, if your print has the nozzle going back and forth between two different structures, like the spikes in the image above, stringing is likely to show up.
This print quality issue also varies a lot in its severity. In some cases, a model may just have a few small wisps of plastic, while, in more severe cases, thick strings of plastic cover the entire surface of a print.
What Causes Stringing?
Stringing, as a form of over-extrusion, has many potential causes. Anything that would possibly make the printer push too much filament out of the nozzle might be the cause of stringing. In the sections below, we’ve described a few of the most popular causes:
1. High Nozzle Temperature
In all of my research and testing, the single most common cause of stringing was a high nozzle temperature. It’s important to note that the nozzle temperature is directly correlated with the print speed. Moreover, if you increase one, you have to increase the other.
That’s because the higher your nozzle temperature, the faster filament will be melted and come out of the nozzle. And, if your print speed isn’t fast enough to sustain the high printing temperature, then too much filament will be melted and extruded, causing over-extrusion issues like stringing.
2. Low Retraction Distance
A low retraction distance is a close second for the most likely cause of stringing.
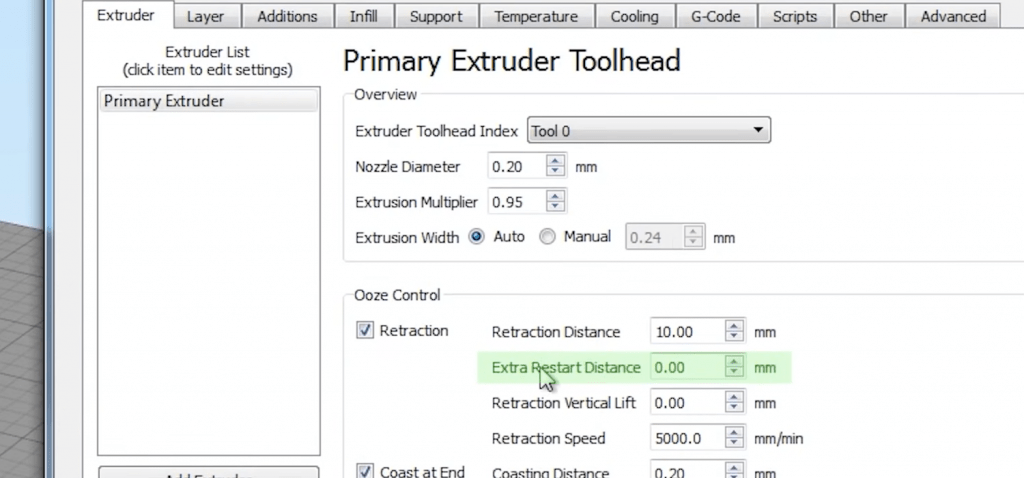
If you’re unfamiliar with the term, retraction is the process of the extruder pulling back filament from the nozzle to relieve the hot end of built-up pressure, which causes over extrusion. Retraction distance is a slicer setting that determines how much (in mm) filament is pulled back for every retraction move.
If this distance is set too low for your printer, then not enough filament will be pulled back to properly relieve the hot end of built-up pressure. If this pressure isn’t properly eliminated, then, even after the extruder stops pushing filament, a little extra filament will flow out the nozzle and leave its mark on your print in the form of stringing.
3. Slow Retraction Speed
Retraction speed controls how fast the extruder pulls back filament during a retraction move. And, if this speed setting isn’t high (fast) enough, then the built-up hot end pressure won’t be stopped in time for some extra, unwanted filament to flow out the nozzle and cause stringing.
4. Wet Filament
Wet filament is another popular cause of stringing on prints because when moisture seeps into the filament, it swells the diameter of the filament. And, if the filament diameter isn’t precise and consistent throughout the spool, then the extrusion of the filament will also be inconsistent, leaving marks of under and over extrusion, oftentimes including stringing.
5. Clogged or Unclean Nozzle
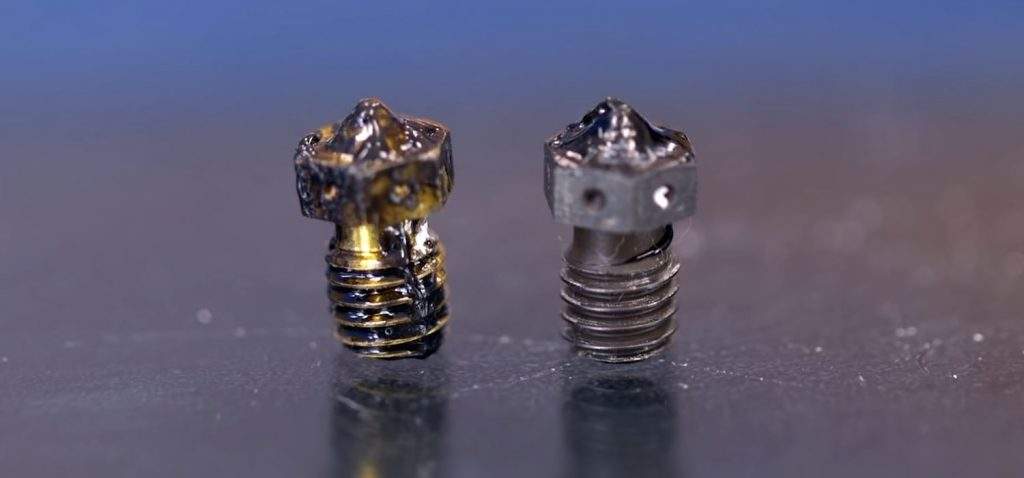
The last major cause of stringing on 3D printers hails from hot end town: the nozzle. The nozzle is the last place melted filament goes before being laid out on the print bed, and if it’s clogged or dirty, the extrusion will be impacted, causing problems like stringing.
Nozzle clogs happen when unwanted debris, such as metal shavings from the extruder, get lodged by the exit hole of the nozzle and limit how much filament comes out. Typically, nozzle clogs cause under extrusion (e.g. gaps in prints), which is kind of the opposite of stringing (a form of over extrusion). But, still, stringing is a possibility of nozzle clogs if the debris in the nozzle is positioned in a certain way.
How To Fix Stringing?
Now that you know what causes stringing let’s dive into the solutions. Note that you can employ multiple of these solutions at one time to prevent stringing, but, most of the time, one solution method works!
1. Increase Retraction Distance
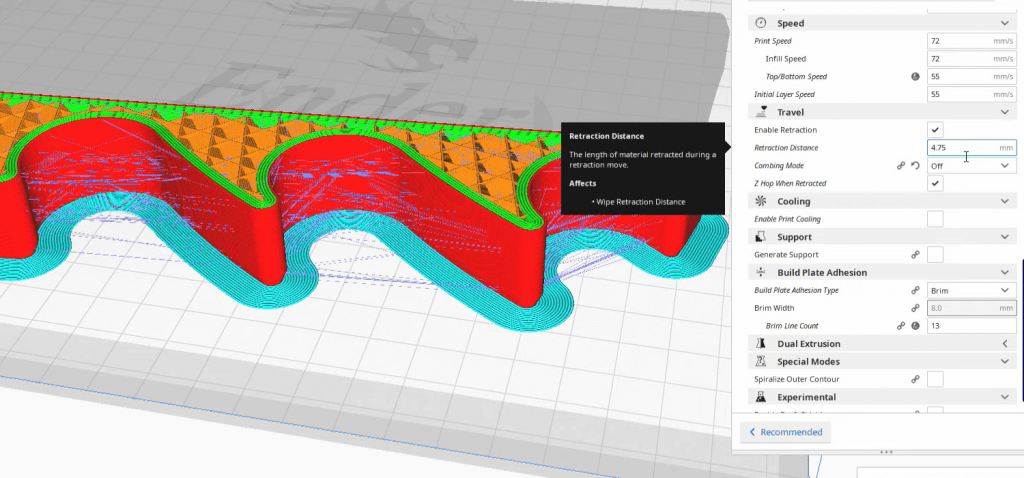
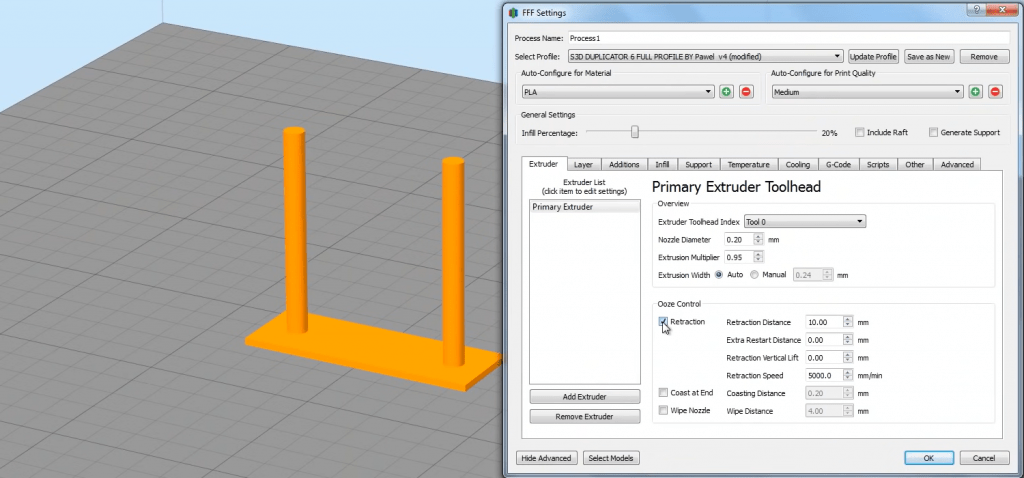
The best way I’ve found to combat 3D printer stringing is to fix your retraction settings, and you can start by increasing your retraction distance. This can be done in whatever 3D slicer program you use, such as Cura, PrusaSlicer, or Simplify3D. But the exact amount you should increase this distance setting depends on your printer.
If you have a 3D printer with a Bowden extruder configuration, such as the Creality Ender 3 (V2/Pro), try increasing your default distance by 1.0 mm. For direct drive printers, like the Ender 3 S1, an increase of 0.5 mm should do the trick. Depending on what the value was before, this increase should land you at a distance in the range of 4.5-6.5 mm for Bowden printers or 1-3 mm for direct drive printers.
And if the initial increase of the retraction distance doesn’t work, try going up further in increments of 0.25 mm (for both types of printers). But I’d suggest stopping at 7 mm for Bowden printers and 4 mm for direct drive printers because if you’ve reached these values and still are experiencing stringing, then the retraction distance probably isn’t the right solution.
You can try out your new retraction settings with a test print targeted towards 3D printer stringing, such as this Thingiverse model.
2. Increase Retraction Speed
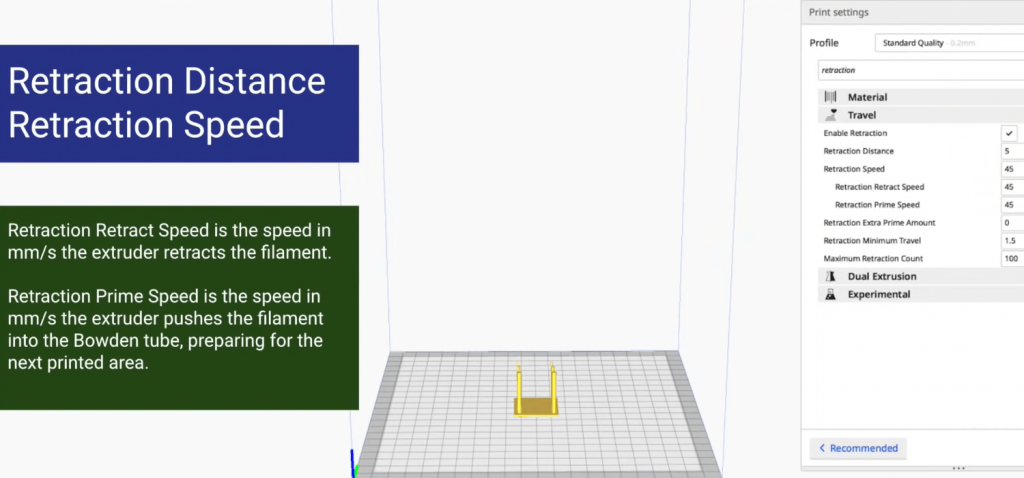
The retraction speed is the second most relevant setting for fixing stringing. A 45 mm/s retraction print speed is the default for most slicer profiles, but if you’re experiencing stringing, try going up to 50 mm/s. If this doesn’t work, keep going up until you hit 60 mm/s.
But try not to go past 60 mm/s because too high a retraction speed can cause jamming in the hot end or overheating the extruder motor.
3. Dry Filament
How do you solve wet filament to prevent 3D printer stringing!? Well, you dry it, of course!
Drying filament removes the moisture from the plastic so that it prints better and no longer causes extrusion issues like stringing.
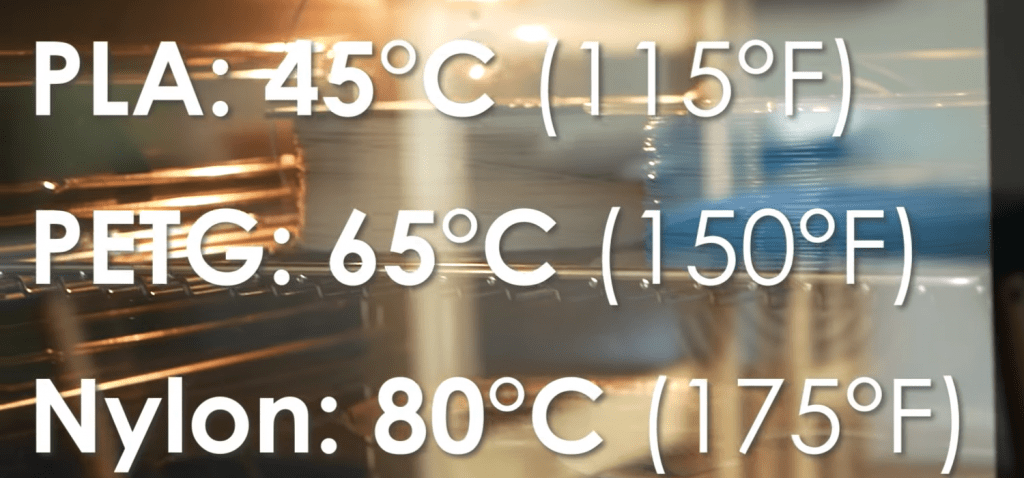
The best way to dry your filament is to heat it to 50-70 °C and let the spool sit for 4-6 hours. I like to do this on my conventional cooking oven because it’s free and super convenient. But, for an even better drying experience, you can get a filament dryer device, like the Sovol SH01, that’s meant for 3D printing.
Once you’ve dried out your filament, just stick it back in your printer and get started again. I also highly suggest leaving your filament spool in a dry box at all times (even when you’re using it) to prevent it from getting wet in the future.
4. Decrease Nozzle temperature
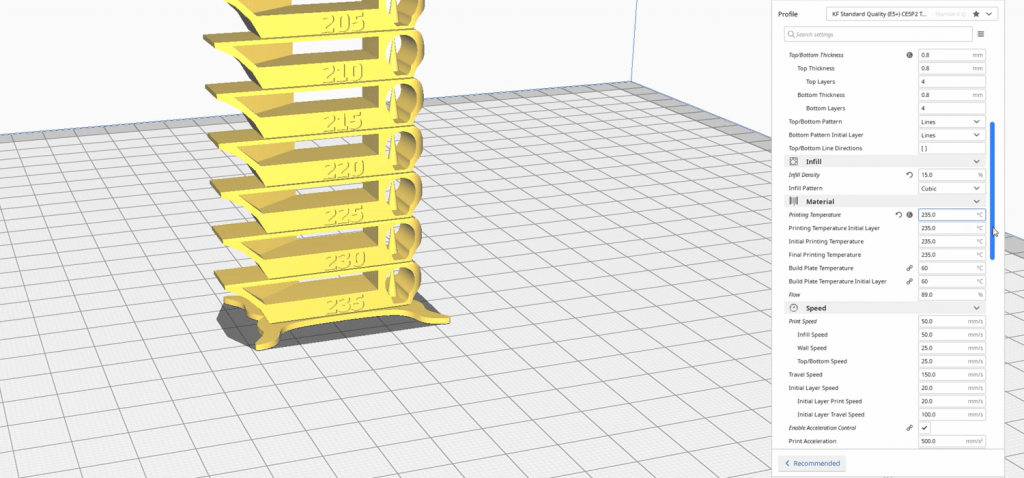
Decreasing the nozzle temperature by 5-10 °C in your slicer program also helps to prevent stringing. That’s because lowering the hot end temperature without changing the print speed will decrease extrusion, bringing you back to the right amount of filament flowing out of the nozzle.
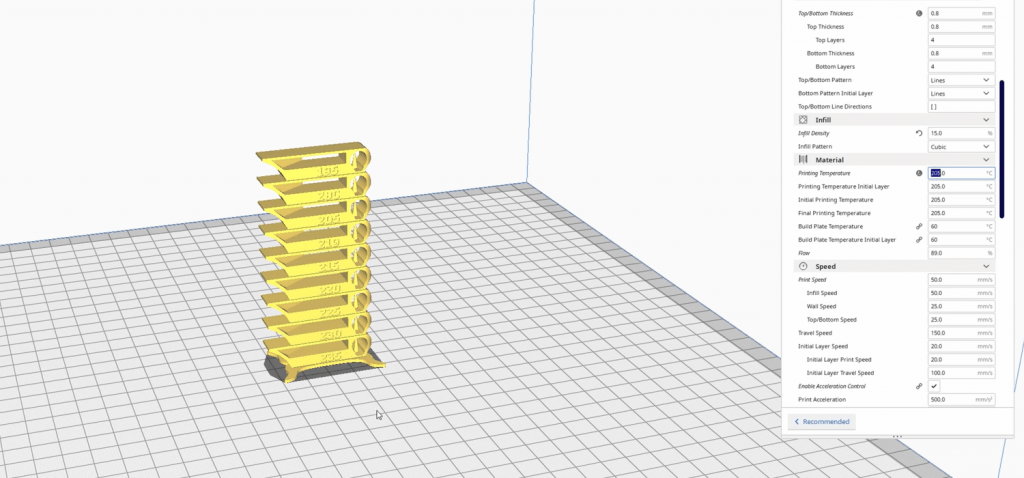
If you’re printing with PLA, try using a printing temperature of 200 °C if this is lower than what you usually use. Of course, the exact temperature you should use depends on your specific spool of filament, but I’ve always found that 200 °C gets the job done.
If you still see stringing after lowering the nozzle temp by 5-10 °C, drop it down by another 5 °C. Try not to veer more than 20 °C away from your typical printing temperature, though, because more than this amount will likely lead to other issues like brittle prints.
5. Clean Nozzle
Lastly, try cleaning your nozzle of any debris, whether it’s on the inside or outside of the nozzle.
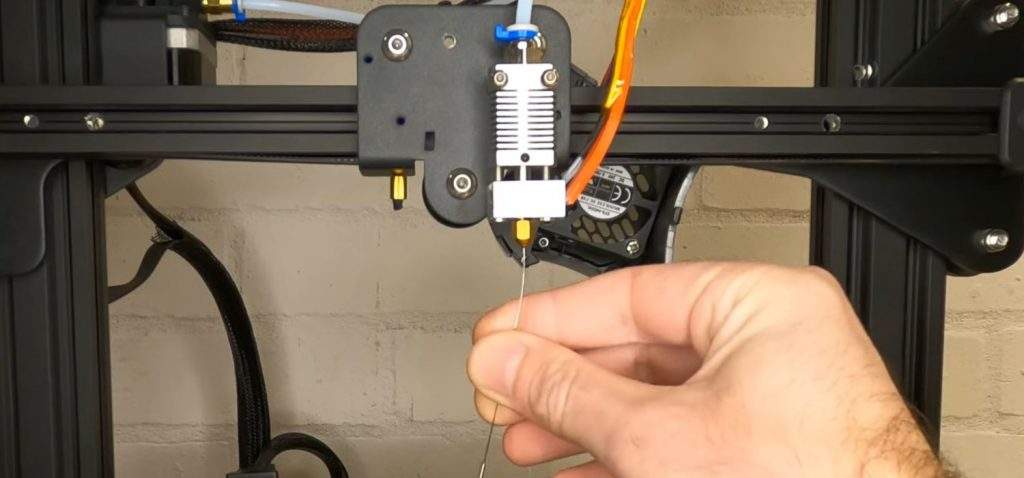
You can clean the inside of the nozzle by sticking a small metal needle up the exit hole and pushing it up and down repeatedly until the motion feels smooth. When you do this, make sure you first remove your filament from the hot end and leave the nozzle and your regular printing temperature.
Once you’ve cleaned the inside of the nozzle, it’s time to clean the outside. Leave the nozzle heated up and rub a metal bristle brush or a damp alcohol wipe against the sides of the nozzle until it’s spiffy clean.
Conclusion
So next time you run into stringing, don’t worry because now you know the solutions to fix it.
The first thing I’d recommend is to adjust the retraction settings and lower the printing temperature by 5 °C. This usually does the trick on all my printers, but if not, try drying your filament and cleaning your nozzle. Hope this helps!