5 Best 3D Printers for RC Parts in 2024

Are you looking for the best 3D printer for RC parts?

Thousands of companies are selling 3D printers, but not all of them are suitable for printing remote control parts. Getting the best printer can mean the difference between sturdy prints vs prints that don’t hold or break.

Don’t worry– if printing RC parts are what you’re after, we’ve done the research to determine exactly which printer to invest your time and money into for the durability you need. 

5 Best 3D Printers for RC Parts

So, what factors are important to look for in a 3D printer for your RC car parts project?

To help you choose the right one, here’s a review of the best 3D Printers on the market we found for this purpose. Our research included tests for the quality, strength, and features of each printer, so you can feel confident in your purchase!

3D Printer Type: FDM | Materials: PLA, PETG, ASA, ABS, PC, HIPS, Flex, Nylon, Carbon filled, Woodfill | Build Volume: 250 x 210 x 210 mm

The i3 MK3S+ is the flagship 3D printer from Prusa Research with several industry accolades, and it’s easy to see why the unit is one of the best 3D printers for RC modelers. You get the finest print quality you can expect from a desktop 3D printer at the price and size.

Adhesion problems are not an issue. The Prusa i2 MK3S+ does not wobble, while neodymium magnets provide the spring steel plate a snug fit.

You get a Simple mode that uses the unit’s filament material, printing speed, orientation, and other basic settings to offer an impeccable finish. There are also Advanced and Expert modes for your complex infill layers that require additional features, such as temperature regulation, in a specific RC part design.

The Prusa model boasts SuperPINDA, an upgraded sensor for ensuring automatic mesh bed leveling via nine points along the z-axis. Auto-leveling adjusts the print bed after each print, but you have the option of manual adjustment or leveling.

The Prusa i3 MK3S+ unit uses a direct drive extruder that’s resistant to clogging, stringing, and oozing. A shorter distance between the hot end and drive makes the 3D printer more responsive. Further, more flexible and delicate filaments are easier to work with while using the unit’s direct-drive extruder system.

This Prusa model works effortlessly with all company-approved and third-party PLA filaments. The Prusament filament range from the manufacturer includes PVB and PC filaments that are usable with the i3 MK3S+. Other filaments you can use include BVOH or PVA, PVA, PP, CPE, and PETG.

Smart features in the Original Prusa i3 MK3S+ include an 8-Bit Trinamic 2130 mainboard for excellent stepper motor control. An LCD and knob make controlling the smart feature a breeze.

Built-in IR sensor capability allows the unit to detect and pause a session when the filament runs out and trigger auto-loading. Three thermistors help regulate fan RPM, while Wi-Fi and Ethernet capability make controlling the i3 MK3S+ easy. USB connectivity makes downloading and installing firmware updates a piece of cake, too!

The Original Prusa i3 MK3S+ is an excellent choice for users who want a simple-to-use system, and it can print a variety of different projects and do it well.

Pros

Cons

3D Printer Type: FDM | Material: PLA, ABS, PETG, TPU, Nylon, Carbon Fiber & Polycarbonate | Build Volume: 270 x 200 x 200 mm

With the QIDI Technology X-Plus, you are getting a stable, good-looking unit for RC parts. The printer features four rubber feet holding up a metal structure with acrylic side covers. The design ensures steady movement of the tool head and drive mechanism.

X-Plus holds the filament spool on the side of the printer chamber and top. Mounting the coil inside the chamber ensures the filament benefits from a moisture-free environment and constant printing temperature. The holder at the top is ideal for PLA-like consumables and can hold up to three spools.

QIDI X-Plus has a custom build plate for easy removal of your successful RC parts prints, ensuring efficiency and minimizing damage during use.

The build plate features different coatings on both sides. Use common filaments such as TPU, PETG, ABS, and PLA on the light side. The dark side is ideal for your advanced filaments, including PC and Nylon Carbon Fiber.

You also get constant-temperature or ventilative 3D printing, depending on the material you use. Choose the standard 250-degree Centigrade extruder or the high-temperature.

This QIDI Technology model boasts a power-off recovery feature and end-of-filament sensor to prevent print failure in case of a sudden power supply loss or material run-out. 

There’s also Wi-Fi capability for unattended, standalone 3D printing. The 3D printer also features the latest software update for better operation convenience, while the slicing algorithm is constantly changing to improve print quality and speed. The software has lifetime free access and is compatible with all QIDI 3D printers.

Use the fitted touch screen to level the bed through quick or normal calibration modes. LED lighting helps illuminate the print chamber so you can check on the printing progress. The X-Plus also has a quiet filtered fan for keeping the print environment healthy.

In case of problems or questions, you can contact the QIDI one-to-one customer service for reportedly excellent support. You get a reply in 24 hours and a 1-year free warranty. 

The versatility of the QIDI Tech X-Plus makes it suitable for semi-professional applications.

Pros

Cons

3D Printer Type: FDM | Materials: (3 Pro) PLA, TPU, PETG | (3 S1)  PLA, TPU, PETG, ABS | Build Volume: (3 Pro) 220 x 220 x 250 mm | (3 S1) 220 x 220 x 270 mm

In the Best Value category of the best 3D printer for RC parts, we have two products from the same company; the Creality Ender 3 Pro and Ender 3 S1. Creality is a manufacturer with a reputation for producing high-quality 3D printers.

The Ender 3 Pro has a magnetic printing bed with an easy-to-remove and flexible sheet for taking prints off efficiently. 

Ender 3 Pro also has an aluminum extrusion for the Y-axis for increased stability and a sturdy foundation. Upgraded bearings help reduce friction between axis movements and improve the sturdiness of the printer.

The attached LCD has a clickable control wheel. You get the same interface as on other Creality 3D printers with differentiated settings that are user-friendly.

The Creality Ender-3 S1 features a light direct-drive and dual-gear extruder to minimize vibrations and jerky movements. The extruder supports various filaments, including TPU, PETG, ABS, and PLA.

Ender 3 S1 has an automatic bed leveling feature using CR-Touch, which is a 16-point technology that takes the manual work out of operating the printer. CR-Touch automatically calculates the bed level and calibrates measurements for you. All you have to do is manually enter the center calibration to ensure proper functioning.

A dual Z-axis motor and screw ensure synchronized, smoother movements for clean 3D prints without uneven ridges and lines. XY knob belt tensioners ensure straightforward operation by tightening or loosening the belts to your liking.

The Ender 3 Pro is an affordable and excellent tool for tinkerers, hobbyists, RC makers, and even educated beginners.

The Ender 3 S1 boasts easy-upgrade options and excellent print quality, making it perfect for a mid-level experienced user.

Pros

Cons

Pros

Cons

3D Printer Type: FDM | Materials: PLA, ABS & TPU | Build Volume: 210 x 210 x 205 mm

The Mega-S 3D printer is one of the most reliable units on the market that offers high-quality prints consistently. This printer is an upgrade of the i3 Mega Printer, with additional abilities and features.

Anycubic Mega S offers a full-color touchscreen with a multi-language menu and robotic mascot. The build volume is 210 by 210 by 205 mm. You get the Anycubic Ultrabase heated bed ensures prints stick to the heat bed and come off easily after job completion.

The Mega S from Anycubic has a useful power recovery feature that deals with power outages and shortages easily. After restoring power, the unit heats the hot end and resumes the print job without further disruption or delay.

A filament run-out feature ensures the printer stops working automatically when it runs out of filament and emits a loud alarm. The printer supports different filters, including TPU, PETG, PLA, and TPA. A titan extruder offers an excellent printing experience.

The Anycubic Mega S printer has a similar shape to the i3 Mega. You get a large sturdy all-metal frame that ensures consistent print quality. While many printers within the same price range offer a 100-micron resolution, the Mega S allows printing up to 50 microns resolution.

The company delivers the Mega S semi-assembled. This is great news for beginners who are not looking to build a product from scratch. The only things to worry about are three wires and eight screws to set up the 3D printer!

A 3D printer is an ideal unit for any RC enthusiast looking for a pocket-friendly, yet precise device.

Pros

Cons

3D Printer Type: FDM | Material: PLA, ABS, TPU & PETG | Build Volume: 220 x 220 x 250 mm

At first glance, this Voxelab Aquila X2 3D printer looks like a clone of the Ender 3. But digging a little deeper had us impressed enough to add it to this list of the best 3D printers for RC parts.

The Aquila X2 has a filament runout detection feature that will pause operations when you run out of filament. 

A large 4.3-inch display enables controlling the Aquila X2 printer settings and choosing the print file. The display is bright for easy viewing, while a control wheel makes selecting your options even easier.

Some options you get include loading or unloading filament, pre-heating, cooling down the printer, and disabling steppers. The Control section of the X2 allows adjusting the bed temperature and hot end temperature, print speed, and fan speed. You can also change steps per mm in the extruder and X, Y, and Z-axis.

The unit’s bed plate takes about five minutes to heat. An auto-resume printing feature saves the unit’s last print position in case of an outage or accidental power supply remover. The Aquila X2 resumes printing from the memory position after reconnecting power, so don’t waste filament and print time.

A tempered glass plate on the heated bed ensures you don’t incur warping issues with your 3D RC prints. The glass plate ensures all your prints have smooth bottoms. 

An adjustable, smooth pulley, stepper motors, and motherboard work together to offer a quiet print experience. The loudest thing on this Aquila X2 are the fans, but you can swap them out for quieter units.

A portable handle makes moving this 3D printer from one room to another easier. While many people don’t move their printers much, it’s a convenient feature when you need to. You can also remove the handle.

Assembly, set up, and the final print quality of the Voxelab Aquila X2 3D printer make it a worthy purchase for any beginner. 

Pros

Cons

How to 3D Print RC Parts

Making a finished remote control model using a 3D printer doesn’t require architecture or engineering skills. Understanding the tech and access to the machines is all you need.

Here’s a short guide on how to use one of the 3D printers above to make your first 3D RC models.

1. Get a CAD model

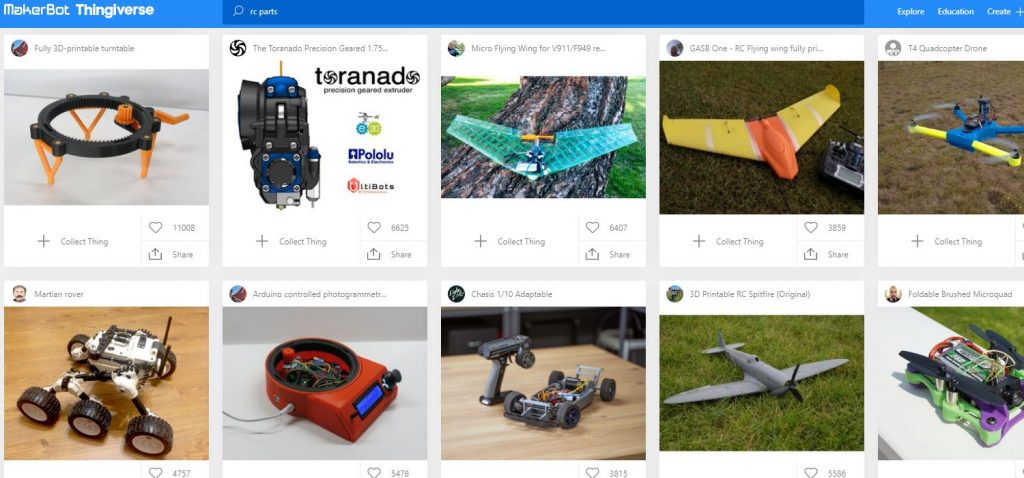
A Computer-Aided Design (CAD) is a critical part of printing parts you want. CAD brings your idea to life in the digital world while allowing you to test, refine, and manipulate virtual products before production.

You can get CAD models for RC parts for sites such as Thingiverse.

Another option is to create your models using CAD software. Using software helps visualize the part, construct, and optimize your design process. The best software to start with includes Tinkercad and FreeCAD.

2. Get Creative

Source: Youtube RC Propaganda

It’s time to let your imagination roam and build a functional model by designing each part yourself. However, the process can be profoundly tedious when you don’t have the skills.

Another option is purchasing ready-made kits and adding your unique touch. The market has kits for remote-controlled ships, RC cars, and even engines for the units. The only limit is your imagination!

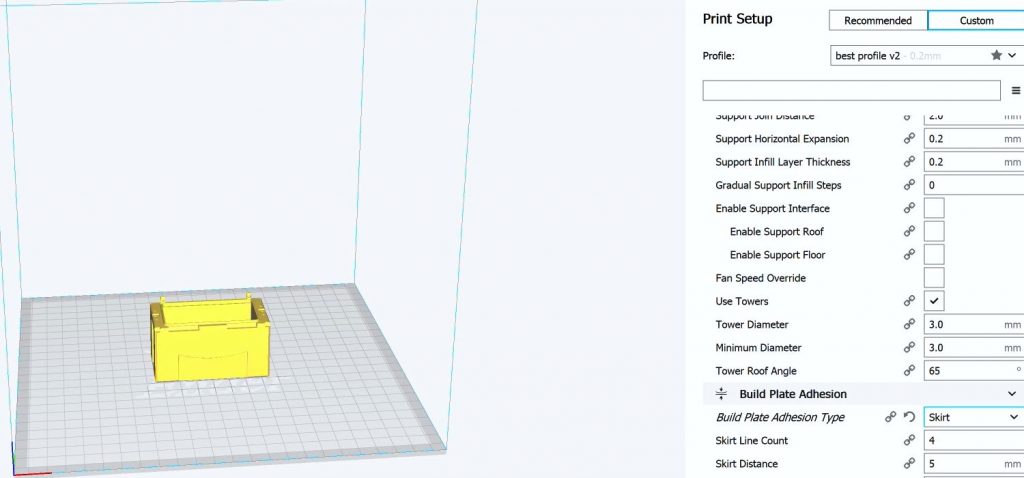
3. Transfer the CAD Design to the Printer

Source: Youtube RC Propaganda

Transfer your complete design to the 3D printer using a wireless LAN, USB, or microSD card. Make sure you account for the 3D printer dimensions when creating the designs.

4. Inspect Printed Parts

Source: Youtube RCDriver_Online

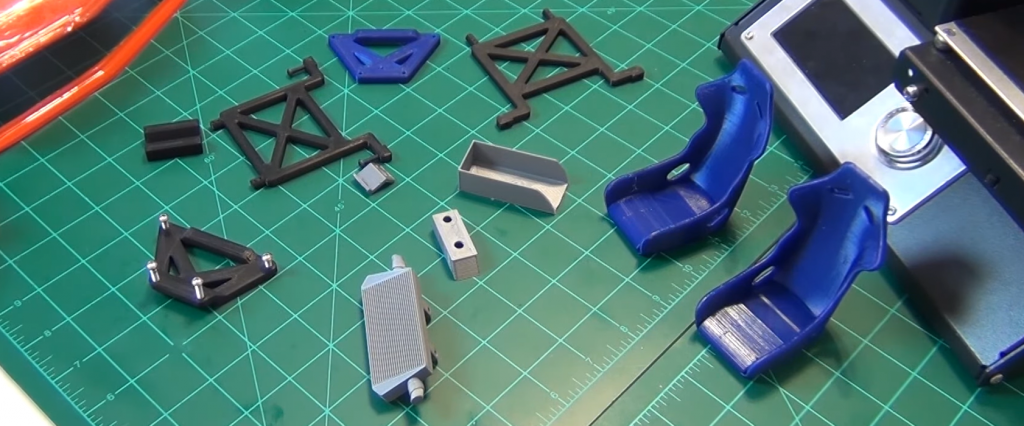
Because each part must fit flawlessly with another, inspect individual parts after printing them. You might have to rework some parts that don’t fit precisely or have fine irregularities. Some options include smoothing, polishing, or sanding the uneven edges.

5. Assemble Your RC Unit

Source: Youtube RCDriver_Online

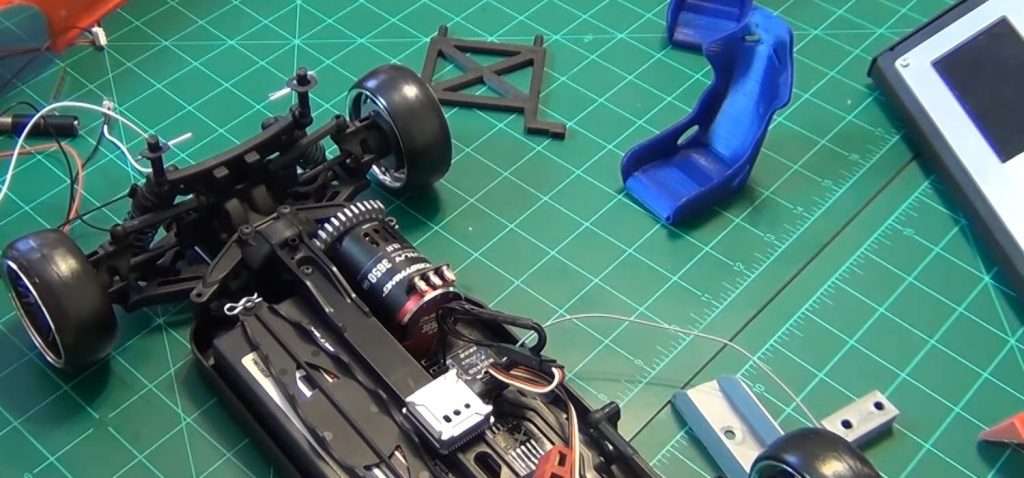
Now comes the fun part!

Put together all the parts. Again, you may have to rework parts that don’t fit or affect the running of your remote-controlled model.

Advantages of 3D Printing RC Models

Designing and printing RC models is the perfect blend of art and science. While 3D printing is not the best way to build all models, it is a noteworthy strategy with several benefits.

  • The materials and digital files for 3D printing RC parts are inexpensive
  • Assembly is simple using adhesives
  • Opens the door to unique concept model designs
  • Sanding, smoothing, and painting the parts yields excellent results
  • You can replace broken parts easily by printing
  • Printing RC parts are relatively hands-off

Filaments To Use in 3D Printing RC Parts

The best filament depends on the specific part of the model you’re building. Here’s a list of the recommended filament for different parts:

  • ABS filament — Chassis
  • PETG filament — Body
  • TPU filament — Wheels
  • Nylon filament — Bumpers and springs

Conclusion

All the 3D printers we’ve reviewed here are of the highest quality. So if you want the best 3D printer for RC parts, check out the products above. 

We recommend the Prusa i3 MK3S+ because it offers all you require for your next 3D project. If you’re looking for an affordable unit that produces excellent results, you will love Creality Ender 3 S1. And finally, we have the Voxelab Aquila X2 if you’re just starting out. 

Scroll to Top