

To bridge or not to bridge?
While Shakespeare didn’t say this, he very well might have if he had a 3D printer. Choosing to activate supports or to “bridge” the overhang areas on a 3D model is a common decision that makers have when slicing a 3D print, and it’s a very important one, too.
On one hand, using support structures on a 3D print is a safe choice that will likely yield a successful model. However, bridging, which involves not activating supports and letting the printer handle the overhangs as normal, will save you filament and lower the print time.
When faced with an overhang on a 3D model, my general rule is to utilize bridging techniques when the gaps measure less than 20 mm (in every direction), and to use supports for any larger overhang distances.
However, you can increase your printer’s maximum bridging distance to 100+ mm by employing a handful of techniques, like increasing the part cooling fan speed, lowering the nozzle temperature, and decreasing the flow rate.
Want to learn more about bridging on 3D printers and how to achieve long, high-quality bridges?
Well, just keep reading!
Table of Contents
What is Bridging?

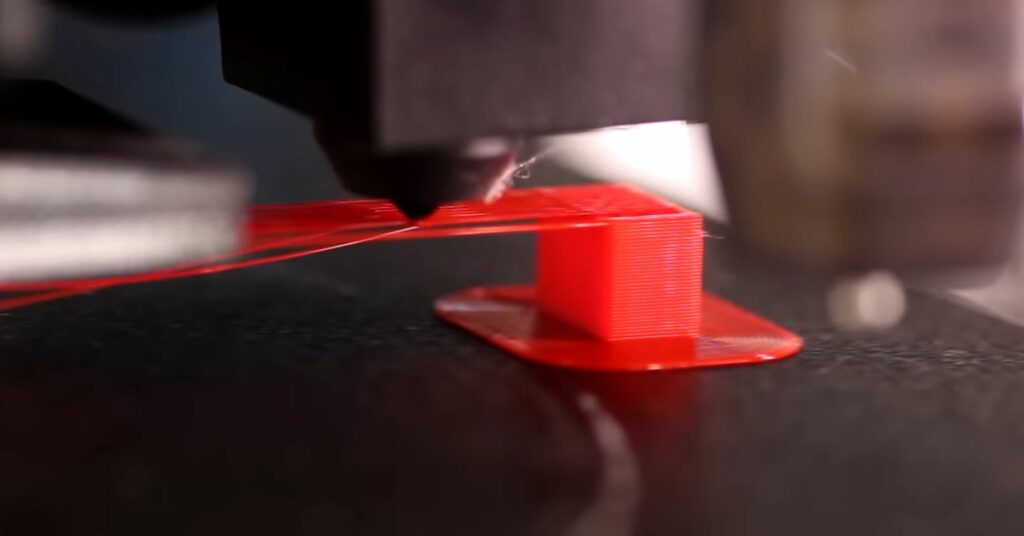
3D printer bridging refers to the process of printing a structure that spans a gap or overhang, such as a bridge or an arch, without supports.
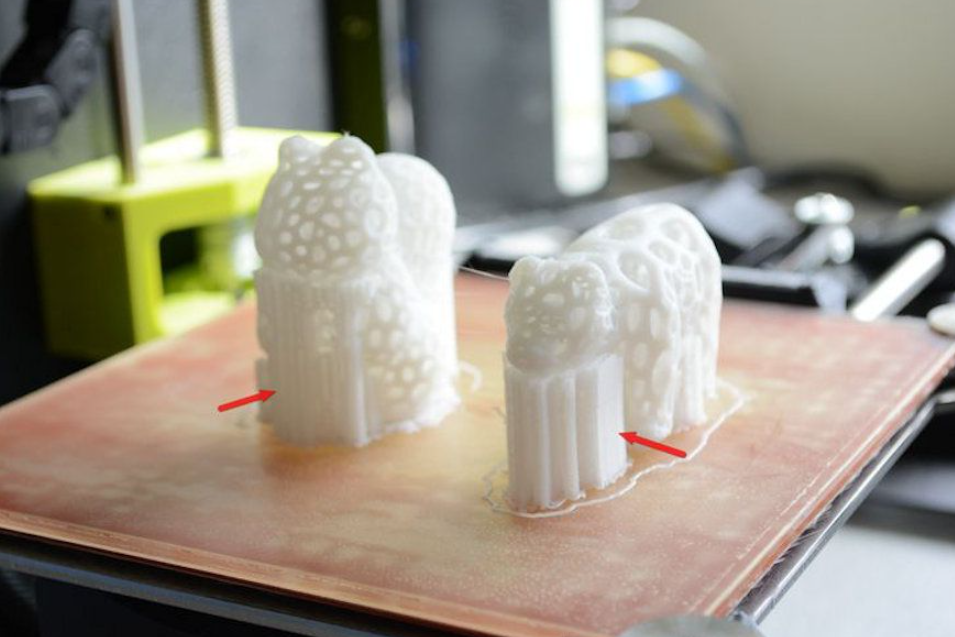
Of course, you could always use supports, the slicer-generated structures that hold up overhang areas from below. But many people don’t like activating supports as they consume more filament (which is thrown out), increase print time, and often lead to a rougher surface on 3D prints. As such, many 3D printer users choose to let their printer bridge the overhang gaps, especially smaller ones.
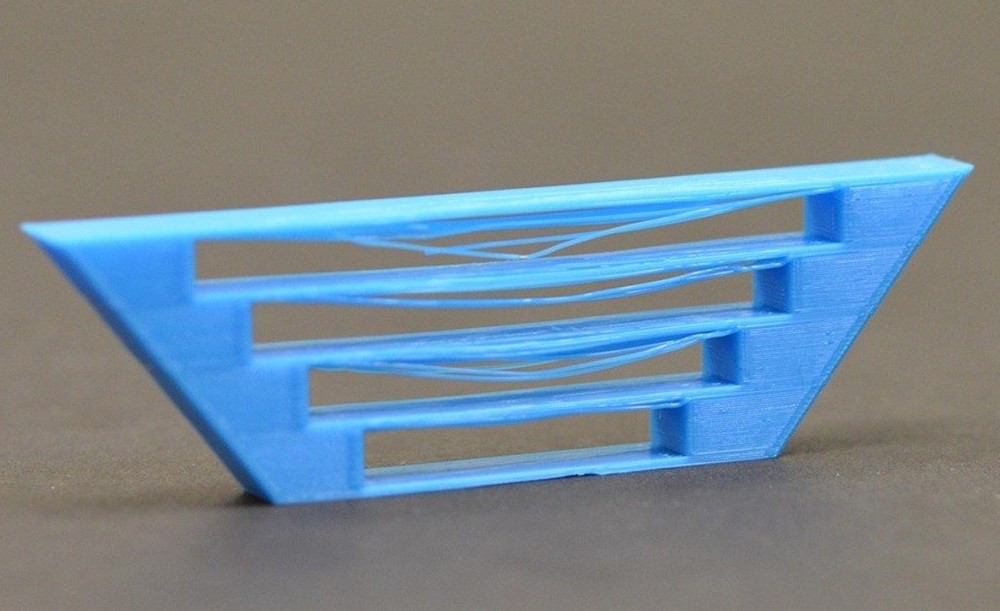
Sadly, bridging is a challenge for 3D printers because when the nozzle is printing the bridge structure, the melted filament material that comes out tends to droop or sag before it has a chance to solidify. This print quality issue is only exacerbated when the bridge structures are longer and span a larger area. That’s why people usually limit bridging to a minimum and activate support structures for larger gaps.
However, you can improve how your 3D printer bridges by adjusting certain slicer settings and making other changes. We’ll talk more about the different ways you can improve the quality of bridges and extend how far your printer can bridge later.
Typical Maximum Bridging Distance
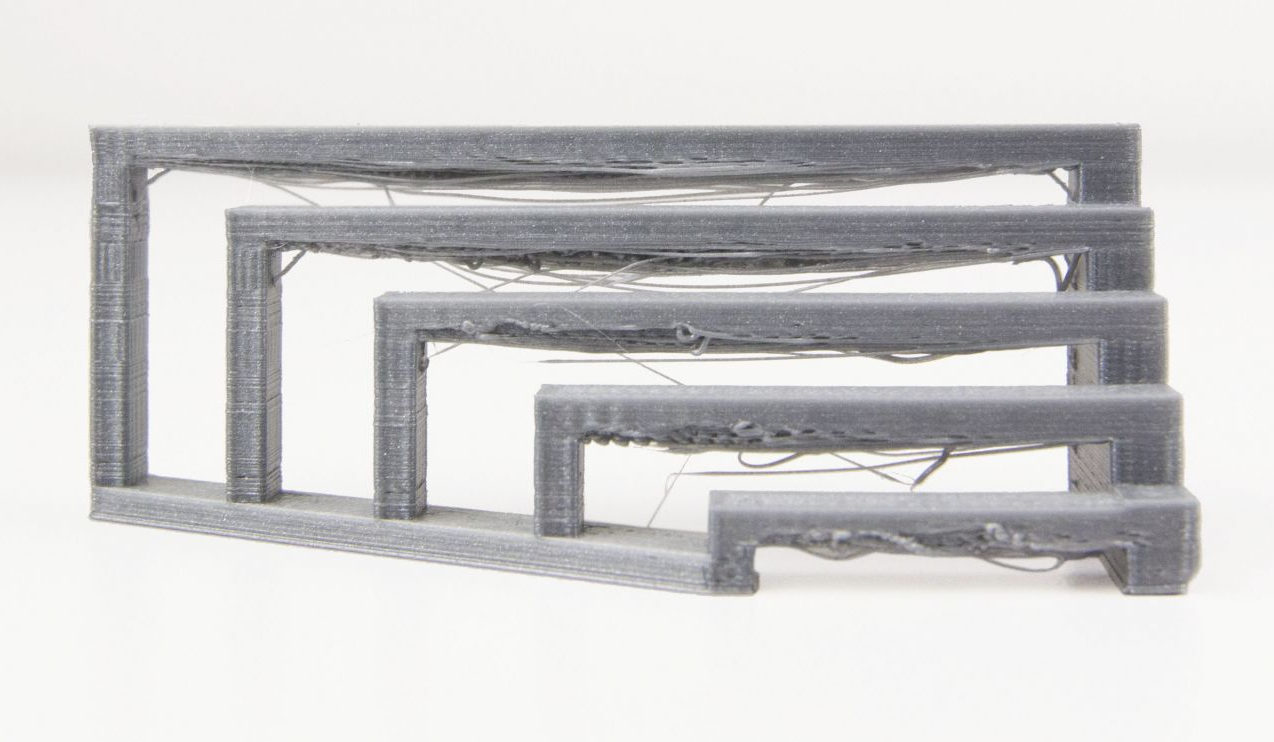
The typical maximum bridging distance on a 3D printer is difficult to estimate because many factors go into the true maximum bridging distance of a 3D printer, including the printhead configuration, nozzle size, and a handful of slicer settings. But, if I had to provide a general limit, I would say 20 mm, as basically, any stock 3D printer can achieve successful bridges as long as 20 mm in every direction.
But don’t think of 20 mm as your printer’s true limit. Tons of 3D printer users have been able to successfully bridge distances measuring 100+ mm, even on the most low-end machines. You too can achieve bridges longer than 20 mm; it just takes some adjustments to your printer’s slicer settings.
What Causes Poor Bridging?

Because bridging is a difficult maneuver for 3D printers, it’s not uncommon for these bridge structures to come out with terrible print quality. A handful of different factors can cause this, and I’ve briefly gone over the most common ones below:
1. Printing Temperature is Too High
The printing temperature, also known as the nozzle temperature, is the most significant setting related to the flow of filament. The higher the printing temperature, the more filament flows out of the nozzle. But too high a printing temp will cause over-extrusion on the print, which will decrease the quality of the bridge structures on your 3D model.
2. Flow Rate is Too High

The flow rate, sometimes referred to as the extrusion multiplier, is a slicer setting that controls what percentage of the estimated filament for a print is pushed through the extruder. It’s a little difficult to think about, but, essentially, the higher this percentage, the more filament will be pushed through the nozzle. And, similar to what I was saying in the previous section, any excess extrusion will cause poor bridging.
3. Print Speed is Too Fast
A high print speed can cause poor bridging on 3D printers for a handful of different reasons.
First off, a high print speed is more likely to lead to under-extrusion because the extruder is trying to push filament through the nozzle faster than it can be melted. And, if the printer’s extrusion isn’t precise, then the bridging structure will come out poorly.
Another reason a high print speed causes poor bridging is due to the vibrations associated with faster printhead movement. The higher the print speed setting, the faster the printhead moves on the 3D printer, which sends vibrations rampant throughout the frame of the machine. These vibrations not only make it more difficult for filament flowing out of the nozzle to adhere to the previous layer, but also increase the chances that the bridging section of the model fails.
Lastly, using a high print speed will mean less cooling for the molten filament flowing out of the nozzle. And, as cooling is key to achieving successful bridges on 3D prints, this will negatively impact how bridges on 3D prints turn out.
4. Low Quality Filament
Lastly, the quality of your filament can also lead to poor bridging on your 3D printer. If the filament you’re using is old or wet, it will likely have extrusion issues, such as over and under-extrusion. These extrusion-related issues are absolutely terrible for 3D printer bridging and will almost definitely cause the overhangs on your 3D model to come out poorly.
How to Improve Bridging?
Now that you know what causes poor bridging on 3D printers, it’s time to get into what changes you can make to improve bridging. And by “improve”, I mean not only increasing the print quality of these bridge structures on your 3D prints but also increasing the distance your printer is able to bridge before the print quality is unbearable.
I’ve spent tens of hours testing how to improve a 3D printer’s bridging abilities, and I’ve listed the most effective methods below:
1. Increase Part Cooling Fan Speed

Perhaps the most important factor for 3D printer bridging is cooling. Part cooling allows the melted filament flowing out of the nozzle to solidify quickly, so it doesn’t droop or sag when placed over a gap (bridge). You can increase part cooling on your 3D printer by increasing the part cooling fan speed in your 3D slicer.
This setting controls how fast your printer’s part cooling fan, which is different from the hot end fan, is spinning. In most slicers, the part cooling speed setting is expressed as a percentage of the fan’s maximum speed. But if it’s a raw number and not a percentage, 255 is typically the maximum value.
What fan speed you should use depends on a handful of factors, including how poorly your printer’s current bridging is as well as what filament material you’re printing. In general, though, I suggest increasing the part cooling fan speed setting in increments of 10% and printing a bridging test model each time to evaluate the effect of the adjustment.
2. Lower Print Speed
Next, lowering your print speed is another super effective way to improve your printer’s bridging abilities. By decreasing the print speed setting in your 3D slicer, filament will be extruded slower, which will give the filament more time to melt before it flows out the nozzle. This makes the extrusion on your printer more accurate, which helps with bridging as these structures must not be over- nor under-extruded.
Additionally, lowering the print speed means fewer vibrations will be sent throughout your printer’s frame. Because of this, the bridging structures will be laid down better, improving their quality and allowing you to bridge longer gaps on 3D models.
3. Lower Printing Temperature
The printing temperature (nozzle temp) is one of the most impactful slicer settings and has a direct correlation with filament extrusion. The higher the nozzle temperature, the faster filament will melt, and the more filament will flow out the nozzle. But, your printing temperature might be just a bit too high and cause some over-extrusion, so I suggest lowering this setting a bit.
Of course, you wouldn’t want under-extrusion, which can happen if you use too low of a printing temperature. But, lowering your current nozzle temperature by 5 or 10 °C might help.
4. Decrease Flow Rate
The flow rate, as I mentioned previously, controls the percentage of the estimated filament usage that’s actually pushed through by the extruder. Decreasing the flow rate is a great way to improve your printer’s bridging abilities because doing so can eliminate over-extrusion on prints, which will, in turn, improve the quality of bridges.
If you’re using your slicer’s default flow rate of 100% and your printer is struggling with bridges, I suggest trying 95% and seeing how that works. If the bridge structures are still not as good as you would like, consider going to 90% or even 85%. But, if you’ve gone as low as 85% and are seeing no improvements, I don’t advise going lower as a flow rate under 85% will likely cause other print quality issues.
5. Dry Filament Before Printing
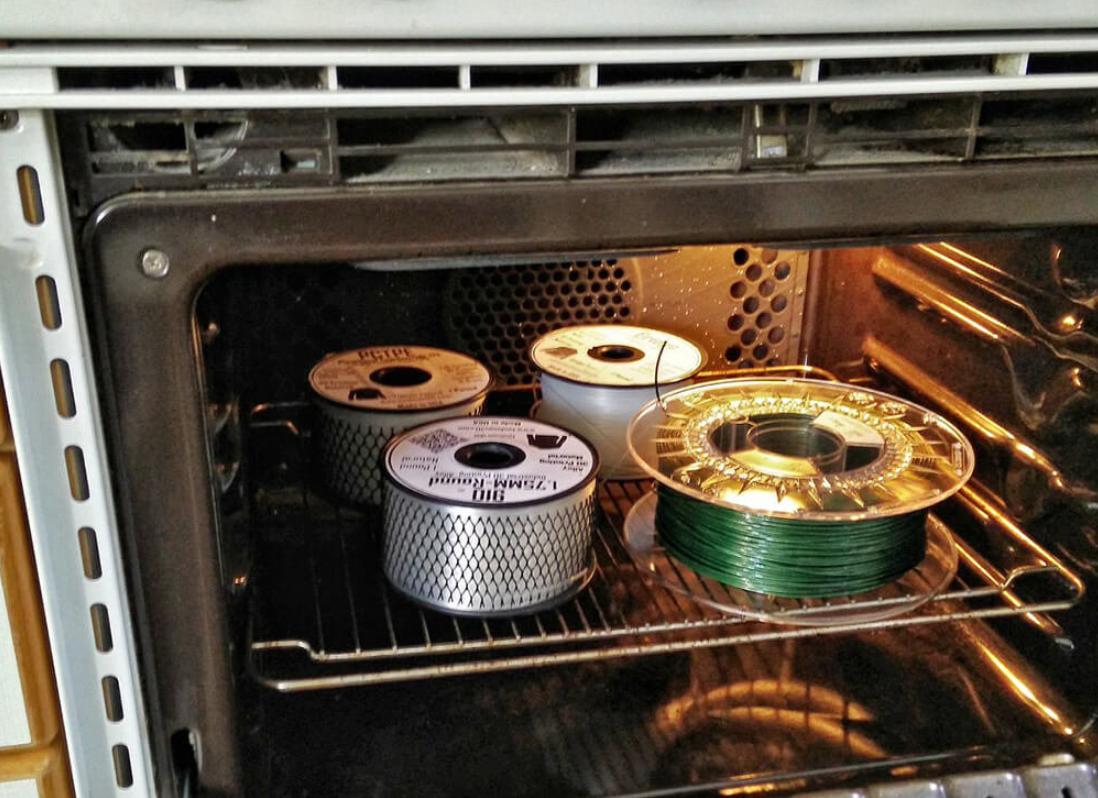
Lastly, if nothing else works, you should dry your filament. Over time your filament will absorb moisture from the air, and this can cause a host of extrusion issues which can negatively impact how your printer handles bridges. Drying your filament involves removing the moisture from the plastic to restore the material’s original printing performance.
There are a handful of ways you can dry your 3D printing filament, but the most convenient method is using a conventional kitchen oven. With this method, all you have to do is set your home oven to the lowest temperature possible (60-90 °C), place a few filament spools inside, and let them sit for a few hours. This should remove the moisture from the filament spool, and, hopefully, when you print with the dried filament, your bridging will be better.
Check out our article on the best filament dry boxes if you want a more dedicated solution.
When to Use Supports?
You should use supports on your 3D prints for overhangs and gaps that are longer than your printer’s maximum bridging distance. So, if you’ve tested your machine’s bridging abilities and found that it can maintain a high print quality for bridging overhangs up to 50 mm, then any overhangs that are longer (in any direction) than this distance should have support structures.
And, if you have a 3D model that has some small gaps that you want to bridge (without supports) but also some larger overhangs that require support structures, don’t worry; you don’t have to use supports for all of these gaps. Instead, you can use a tool called “Support Blockers” in your 3D slicer. These features, available in Cura, PrusaSlicer, and a handful of other slicer software, allow you to tell your printer where not to use supports.

To Bridge or Not to Bridge?
Bridging is an important part of the 3D printing process. After all, you wouldn’t want to use support structures for every single gap or overhang, especially the ones that are super small.
Most printers can naturally bridge gaps that are 20 mm or less (in every direction) without any adjustments to the slicer settings. But you can achieve much longer bridging distances by making a few simple adjustments to your slicer.
The most effective way to increase your machine’s maximum bridging distance is by increasing the speed of the part cooling fan. More cooling equals less time for the melted filament to solidify, improving not just the quality of bridge structures but also increasing how long bridges you can successfully print.
Lowering the print speed and decreasing the nozzle temperature also helps, especially if you are currently dealing with under or over-extrusion. I also suggest decreasing the flow rate and drying your filament before printing your 3D model.
Hope this helps!