
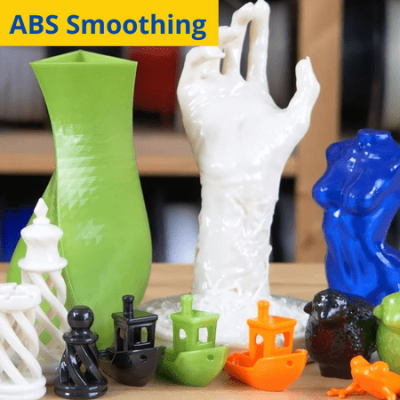

When someone hands you a 3D printed model, one of the first things you’ll notice is the layer lines all throughout the model.
Formed by the layer-by-layer approach of 3D printing, layer lines cause the exterior surface of 3D prints to be rough. This not only doesn’t feel super great but also doesn’t look as appealing as a smooth and glossy print.
Luckily, if you’re printing in ABS, there’s a way you can achieve a shiny and smooth surface finish on 3D prints, known as acetone vapor smoothing. While it may sound like a complex lab experiment, acetone vapor smoothing is fairly easy to do and is extremely effective in smoothing out the layer lines on your print.
So, if you’re looking to make those layer lines disappear on your print, read on where we’ll go over what ABS and acetone are and the exact steps for the smoothing process.
Table of Contents
What Is ABS?
Acrylonitrile Butadiene Styrene, or ABS for short, is a thermoplastic material that comes from oil and is one of the most popular plastics on the planet. While it’s not the most environmentally friendly of materials, it’s very cheap to make and can be found in interior car components, cheap toys, and…you guessed it, 3D printing filament!
When it comes to 3D printing, ABS filament isn’t known for being easy to print. In fact, quite the opposite. Due to the plastic’s sensitivity to temperature changes and other factors, you’ll need an enclosure around your printer and a tuned slicer profile to achieve high-quality prints in this material.
However, ABS isn’t all bad, and it offers many benefits when it comes to mechanical properties. Moreover, ABS is pretty strong compared to other filament materials, like PLA. Additionally, the filament is just a tad bit elastic, making parts printed in ABS filament somewhat impact-resistant.
Learn more about PLA vs ABS here.
Besides its low cost, wide availability, and strength, ABS is also soluble in a few different chemicals. This means that you can dissolve the plastic by applying certain substances that act as solvents to your ABS model.
With this in mind, let’s start talking about acetone!
What Is Acetone?
There are different solvent chemicals for different plastic materials. There are a handful that work for ABS, including Methyl Ethyl Ketone (MEK or Butanone), Methyl Isobutyl Ketone, Tetrahydrofuran, acetone, and more.
Of the very complex-named chemicals, the only one you probably have around your house is acetone.
If the name sounds familiar, it’s because acetone is the main ingredient in nail polish remover. Just like acetone can dissolve nail polish off your finger and regular paint off of wood, you can use it to dissolve ABS plastic to smooth the layers on a 3D print.
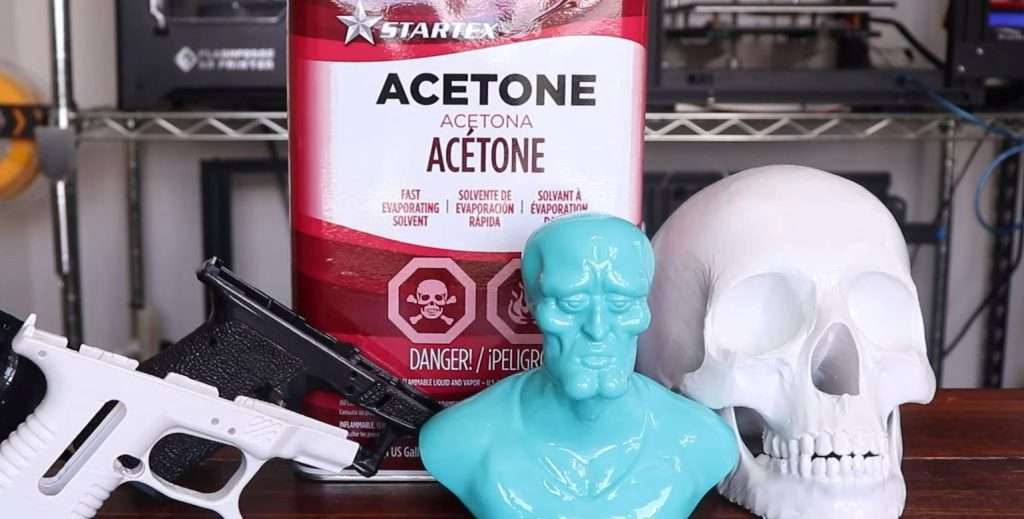
Acetone isn’t super expensive and you can usually find a bottle of liquid acetone at your local hardware store or online. While you can find acetone in nail polish removers and paint thinners, we suggest using 100% pure acetone for the vapor smoothing process. That’s because the additive substances mixed in with acetone in name-brand products could negatively affect the smoothing process.
Another notable characteristic about acetone is that, while it comes in liquid form, it very easily evaporates. Once you open the cap of a bottle of acetone, you’ll probably immediately smell the fumes.
For this reason, until you have to pour acetone for the smoothing process, we suggest keeping your bottle closed.
On another note, it’s also important to mention that acetone is not super human-friendly. We advise you to try not to touch the liquid and certainly don’t let it get on any clothes or towels as it can permanently alter the color. If you do get acetone on your hands or body, you should pour some water over the contacted area.
Acetone Vapor Smoothing
Now that you know about acetone, you might be wondering how it’s actually used to smooth a print.
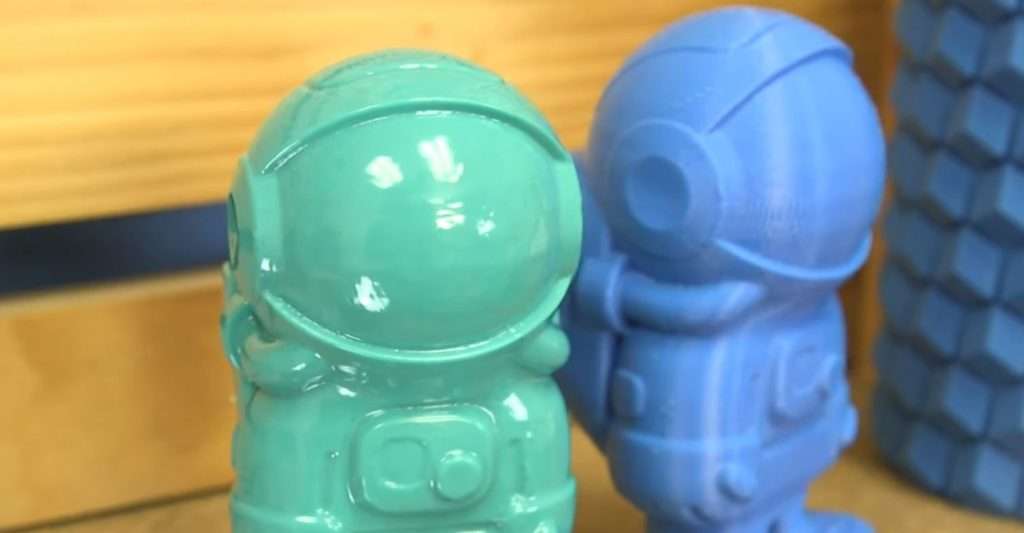
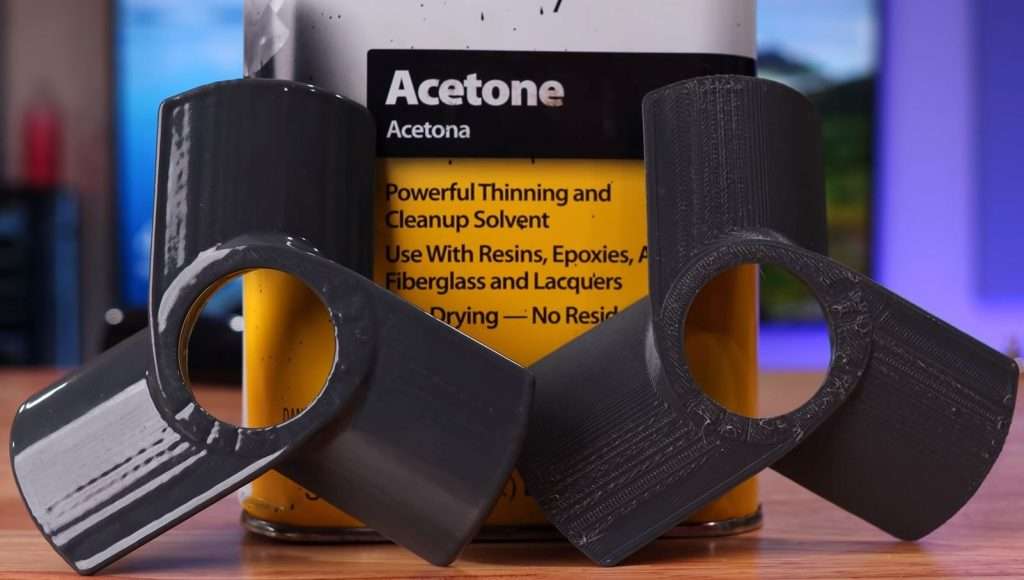
Acetone, as we mentioned, dissolves ABS plastic. When applied to the exterior surfaces of a print made out of ABS filament, the layer lines that give a 3D print its rough texture and appearance are blended together. This makes your model not only look smooth but feel super slick too!
Even though acetone almost always comes in a liquid form, many people use acetone vapors (air form) to smooth their ABS prints.
That’s because, in a liquid form, to apply the acetone to a print, you’d have to either pour or paint the liquid onto a print. This gives room for a lot of error because you might accidentally put too much acetone in one spot on your print, making that particular area stand out because it’s smoother than the other areas.
On the other hand, acetone fumes will more uniformly spread around your model. This yields a much more even and consistently smooth surface finish on your prints because there won’t be any signs of over-appliance or dripping. Additionally, you’ll save some time and energy because you can simply sit back and let gravity do the work to move the vapors.
So how do you turn liquid acetone into a vapor form?
Heat!
With some heat from the sun or a small oven/cooker, you can condensate the acetone. Of course, you don’t want to heat up the chemical too much as it’s highly flammable, but some light external heat (e.g. sunlight) can do the trick.
Finally, we can’t forget that you should use an airtight or almost-airtight container to perform the vapor smoothing process. This will ensure that evaporated acetone stays around your model to more effectively smooth it instead of floating away into the open air.
And, with that, let’s get into the actual process!
What You’ll Need
There isn’t much you need for the acetone vapor smoothing process, but there are a few essentials, which we’ve listed below:
- Bottle of acetone
- Airtight or almost-airtight containers, such as a tupperware box with a rubber-sealed lid
- Small cloth rags (alternative: paper towels)
- Small metal magnets (at least 20)
- Aluminum foil
All of these items can be purchased for a small sum at basically any hardware store. And, as long your acetone bottle isn’t empty, you can reuse them as many times as you want.
While the components we listed above are absolutely necessary for the smoothing process, there are a few more items that you might want around to improve the smoothing process.
Below, we’ve made a small list of these optional parts as well as their purpose:
- Fan: Acetone isn’t safe to breathe and it also has a very strong smell. Having a fan nearby will push the acetone fumes away so you don’t breathe them or smell them too much.
- Water: Rinsing your smoothed model in water after the process is finished will get rid of any remnants of the chemical on your model.
- Rice cooker: A rice cooker can be used as an alternative to an airtight container. This device will allow you to condensate your acetone without the sun because you can control its internal temperature.
- Paint brush: Although vapors provide a more uniform finish on models compared to painting a model with acetone, you still might want a paint brush on hand in case any spots were missed for some reason.
The Steps
Once you’ve gathered all the necessary supplies, it’s time to perform the acetone vapor smoothing process! In this section, we’ve gone over the process in a step-by-step form!
- Remove the lid of your container.
- Stack six small cloth rags or paper towels over each other.
- Go outside or in an open-air setting and open the lid of your acetone bottle.
- Pour a small amount of acetone on the top cloth. Make sure the liquid covers a decent portion of the cloth, but don’t pour too much that the cloth is soaked.
- Move the top napkin to the side and pour acetone on the second cloth in the stack.
- Repeat the previous two steps until you’ve added acetone to all six cloths.
- Place one cloth on each side of your container.
- Putting one magnet on the outside of the container and one on the inside, secure each cloth to the sides. You may need 2-4 sets of magnets to properly secure each cloth. No magnets are needed for the cloth on the bottom.
- Take a small amount of aluminum foil and crumple it up.
- Create a base piece out of the aluminum foil for your model to rest on.
- Put the aluminum foil base at the bottom of your container, on top of the cloth resting there.
- Place your model on the mount.
- Close the lid of your container.
- Place the container outside, under sunlight or another heat source.
- Wait and watch your container. Make sure that you’re seeing the condensation process occur (fog on the sides of the container).
- Every five minutes, look inside the container without opening it to see if your model is doing well. The amount of time you should leave your model inside the container depends on the size of the 3D print, how much acetone was poured, and how hot the environment is.
- If you’ve achieved the smoothness you want, remove the lid of the container. This is a good time to turn on the fan if you have one.
- Don’t touch your smoothed 3D print. Let your model sit to cure overnight (at least a few hours) because, while it might look normal, the exterior layer of your 3D print is very soft.
- If you have water, rinse your model in it after you’ve waited the proper amount of time.
And that’s it. You’ve acetone smoothed your model in under 20 steps!
Now is a good time to check your model to see that all of it is smoothed. If not, you can either repeat the process or perform some small touch-ups with a paint brush, dipping it into the acetone liquid.
Does Acetone Smoothing Make ABS Stronger?
A common question with the acetone smoothing process is “does it make my model stronger?”.
The short answer is yes!
Layer lines are the reason 3D prints are almost always more brittle than regular (e.g. injection molded) parts because the layers are separated. By blending the layer lines together to be basically one unison layer, acetone smoothing makes parts stronger.
However, it’s worth mentioning that this added strength is really only seen along the model’s Z-axis, and the X/Y plane strength stays about the same.
Conclusion
Overall, the acetone layer smoothing process is a great way to make your ABS 3D prints look and feel smooth as well as improve their Z-axis strength. Additionally, performing acetone vapor smoothing isn’t too difficult, and with just a few items, you can achieve super slick models without more than an hour of real work.