 We’ve all been scared of leaving a 3D printer running without anyone watching.
What if the part warps? What if the overhangs fail? What if my cat tries to touch the printhead, and it breaks my printer?
These are all questions I used to ask before I got a camera for my 3D printer!
A 3D printer camera is the perfect way to be able to monitor the status of your 3D prints without always being in the room. But not just any camera will do!
You need a camera that’s meant for streaming video, has a video resolution good enough for noticing the details of a 3D print and is compatible with your other hardware!
The Logitech HD Pro C920x is a terrific option, with HD video capabilities and a simple USB interface. But, if you have an OctoPrint server on a Raspberry Pi board, the Raspberry Pi Camera Module V2 is perhaps a better pick, with a Pi-compatible ribbon cable port and an adjustable lens.
Want to hear about more 3D printer cameras? Just keep reading!


First up, we’ve got the Logitech HD Pro C920x. Personally, I’m a big fan of Logitech, and this is one of their best USB webcams, as well as one of the best cameras for a 3D printer.
The C920x brings a great mix of frame rate and resolution of 1080p quality at 30 fps. This is pretty good for video feed, and it’s also worth pointing out that the C920x has autofocus, so don’t worry about adjusting any lens.
The C920x autofocus camera also has dual mics, so you’ll be able to hear your printer, like if the extruder is clicking.
The camera is a general-purpose webcam with a standard USB plug, making it the only camera on this list to have a USB interface. The USB connectivity allows you to use the camera on just about any 3D printer server computer (e.g. Pi boards), personal computer, or laptop.
On this note, you can run the Logitech camera on a PC or laptop using a software program that makes the video feed available over the internet (for remote access) if you don’t want to use a 3D printer server.
Compared to the Logitech C270, another popular option for a 3D printer camera, the video feed from the C920x is sharper, making it easier to see the small details on your 3D printer.
And, because the Logitech HD Pro C920x is decently popular, there are a handful of 3D printable mounts that you can use to position the camera. For example, there’s this mount for the Ender 5 frame, and one option from this set of mounts also works.
So, if you’re looking for a decent camera that will bring you video quality that’s more than enough for monitoring 3D prints and has autofocus, the Logitech HD Pro C920x is for you!

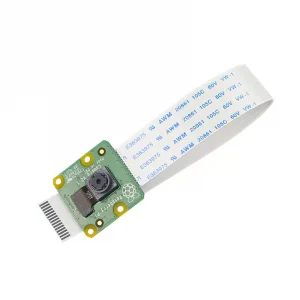
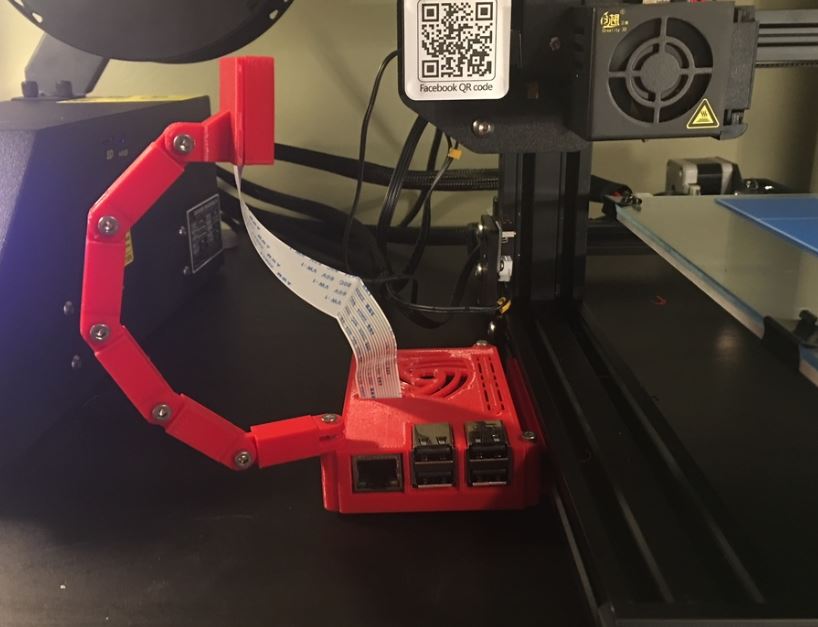
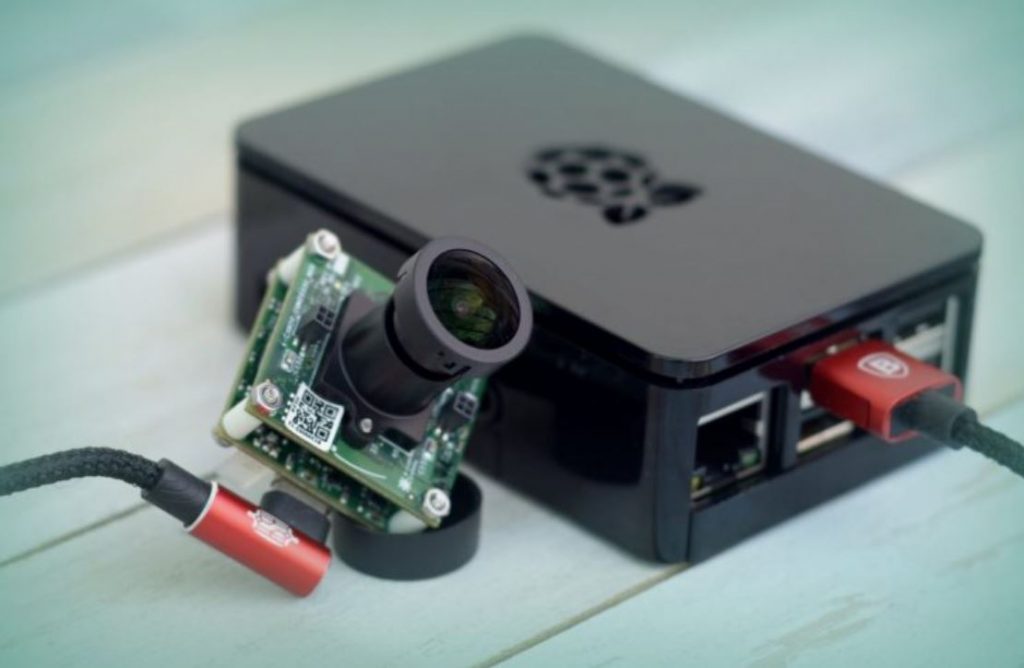
Most people looking to add a camera to their 3D printer setup already have an OctoPrint (or similar) server. Many of these servers run off of Raspberry Pi computer boards, which is why I made sure to include the Raspberry Pi Module V2.
The Pi Camera Module V2 is natively compatible with Raspberry Pi boards via its special ribbon cable. Moreover, no special configurations for the video feed are necessary if you’re using a Pi computer for the server.
As for video feed, like the C920x, the Pi Camera Module V2 can run 1080p at 30 fps. And, if you want to take still photos on this camera, you’re in luck because it can take 4K photos using the built-in Sony Exmor sensor.
Sadly, though. there’s no autofocus. Instead, the lens is factory-set and can only be adjusted by rotating the cylindrical lens part with pliers.
What I really love about the Pi Module V2 is its mounting abilities, though. On top of many 3D printable mounts available for this camera, there are also four easy mounting holes on the camera board, making it super easy to design your own custom mount if necessary.
The Pi Camera Module V2 is an overall great pick, especially if you’re looking for a good bang for your buck. It’s budget-friendly, offers decent video quality, and is natively compatible with Pi boards.

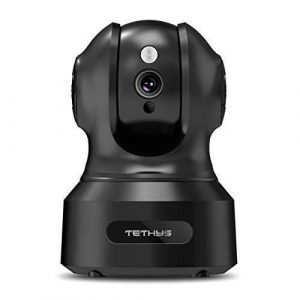
Next, the Tethys Security Camera is another great camera option for 3D printers, especially if you want a seamless installation experience.
Unlike the other two options, you don’t need to connect the Tethys camera to an existing server (e.g. OctoPrint). Instead, this camera runs on its own system: a mobile app called “MIPC”. And setting up the camera couldn’t be easier; all you have to do is plug it in, open the app on your phone, and connect the camera with a click of a few buttons!
Sadly, though, because this camera isn’t open-source, it doesn’t work with 3rd party apps. As such, you won’t be able to use the camera in special ways, such as making a timelapse or connecting it to your printer for an OctoLapse.
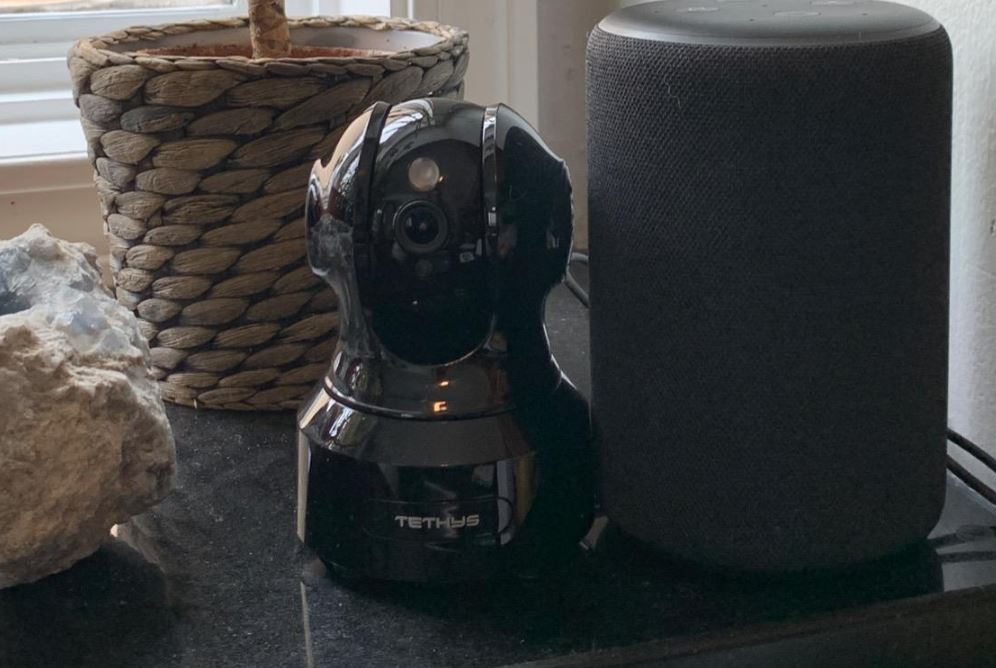
Regardless, you should still consider the Tethys Security Camera because of its movement abilities. This camera is attached to a dome movement system, allowing the lens to spin 350 degrees as well as point up and down (100 degrees on this plane). This is super useful for 3D printing because you can adjust the camera position to look at a certain area of the print bed.
The camera quality is also pretty great, with 1080p video resolution. There’s also a night vision mode that allows you to monitor your printer (and its surroundings) without turning on a light. The range of the video is up to 32 feet, which is incredible!
A few other great features about the Tethys Security Camera are its built-in 2-way microphone and its compatibility with Amazon Alexa!
So, whether you want an easy installation process, movement capabilities, or great video quality, the Tethys Security Camera is a great option for your 3D printer!

The Wyze Cam V3 is another camera option. Like the Tethys Security Camera, the Wyze Cam V3 runs on a proprietary app that allows you to remotely monitor the video feed from the camera.
Because it doesn’t need to be attached to a server or other system, it’s super easy to set up the Wyze Cam V3. Just download the app, power on the camera, and connect the two! As for mounting, the included mount makes it a breeze to position the camera in the perfect spot for your 3D printer!
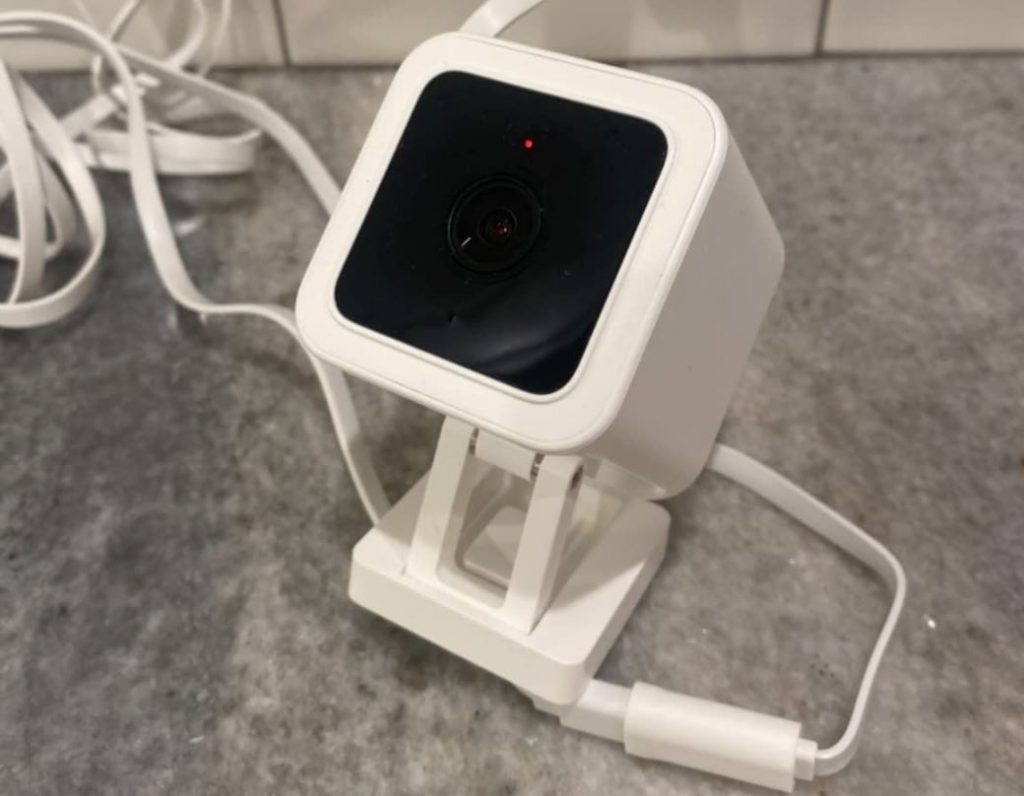
While the Wyze Cam V3 doesn’t move like the Tethys option, it’s got epic video quality, boasting 1080p HD video. And the camera is equipped with a Starlight sensor that allows you to see your printer in full color even when there’s no light! Plus, there’s a two-way microphone for communication if you ever need that.
So, if you want a high-quality video camera for your 3D printer, the Wyze Cam V3 is an excellent choice. It’s very budget-friendly and offers 1080p HD video, so you can see every detail of your prints!

Lastly, the Blink Mini is another camera, very similar to the Wyze Cam V3. The Blink Mini is developed by Amazon themselves, and this is amazing because it means the Blink camera is compatible with all of your Amazon devices, like an Alexa Echo or Echo Show.
But, besides its Amazon affiliation, the Blink Mini is a terrific camera for a 3D printer. It runs on a proprietary system, so the setup is easy.
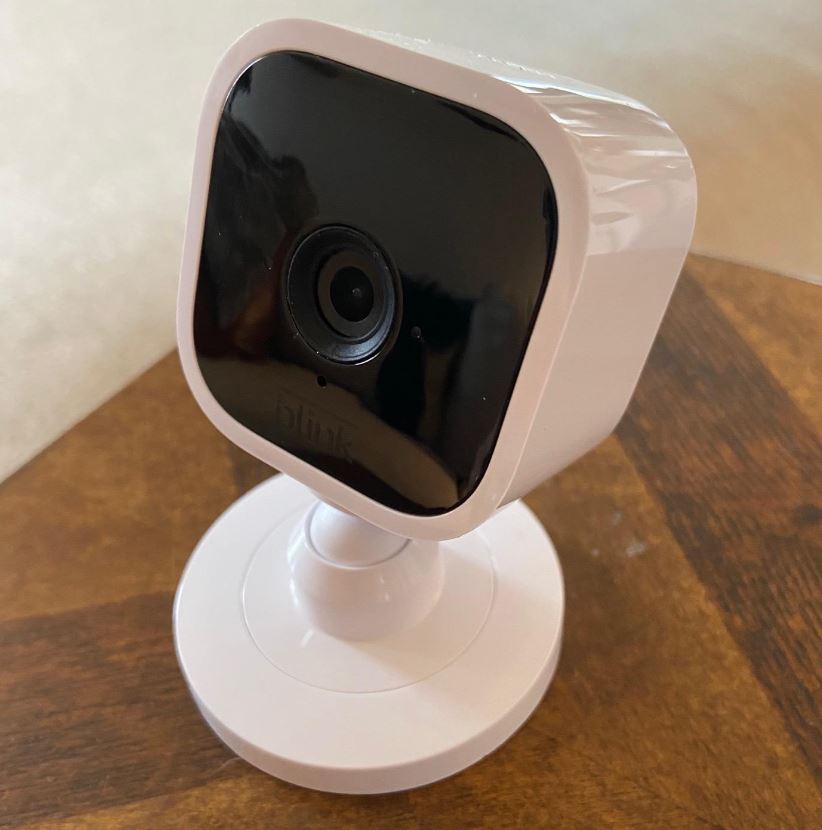
Sadly, though, to monitor the video stream from your Blink Mini, you have to pay for a subscription service. While it’s pretty inexpensive, this is an annoyance, especially considering you also have to buy the camera. On this note, though, the Blink mini is very inexpensive, costing under $30.
The Blink Mini also has 1080p HD video, so you won’t have any difficulties monitoring your printer. There’s also a spectacular night vision mode that you can use to watch your printer even without a light nearby. And the two-way audio on the camera will allow you to listen for any extruder issues on your printer, like the notorious clicking problem!
So, if you want a camera that’s easy to set up, has a relatively low upfront cost, and has great video quality, I highly recommend the Blink Mini.
What is a 3D Printer Camera?
A 3D printer camera is any video monitoring device that you can place near or on a 3D printer to watch it remotely.
3D printer cameras, while they can be specifically meant for 3D printing, are usually just general-purpose video cameras, like computer webcams, that have been set up and positioned specifically for recording a 3D printer. However, in recent years, there have been cameras that are specifically marketed for 3D printing, such as Creality’s tripod camera.
3D printer cameras have become increasingly popular over the past few years, especially after the boom of OctoPrint and other remote printer servers that support webcams. These server setups provide you with a remote-access website where you can stream the feed of a connected 3D printer camera.
How to Setup a 3D Printer Camera
Setting up a 3D printer camera isn’t too difficult an upgrade, but it does involve both digital and physical work.
Hardware
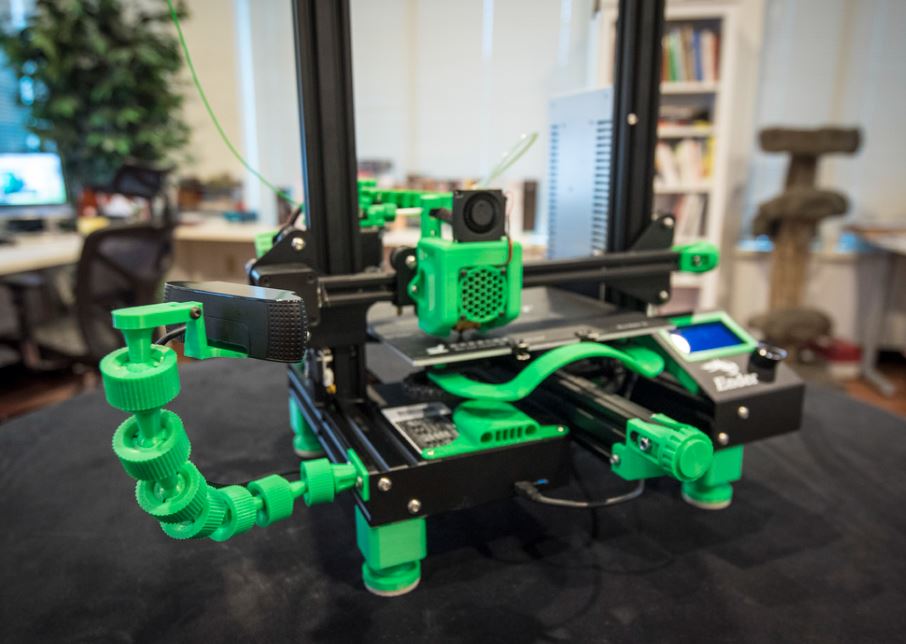
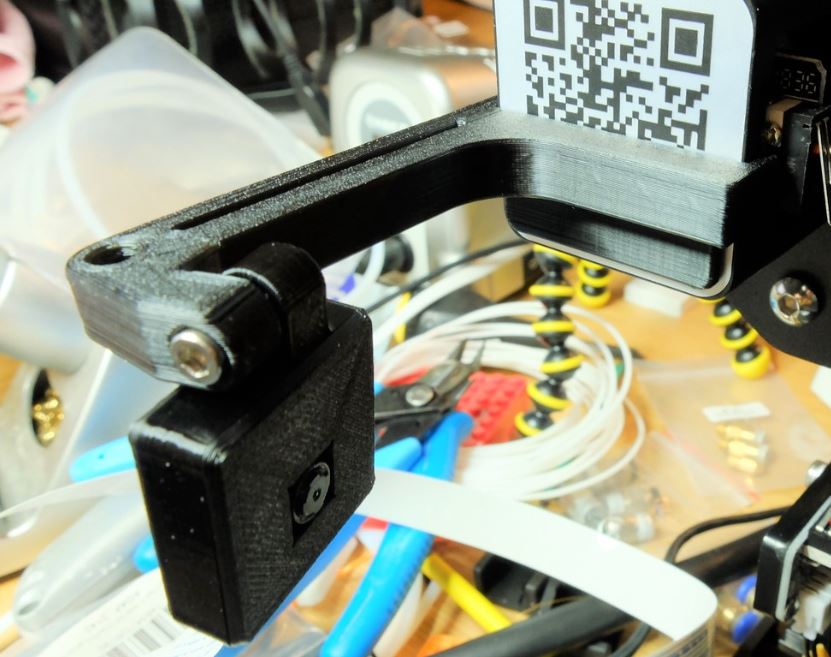
On the hardware and physical side of things, you have to find a way to mount the camera. I like to do this using a 3D printable camera mount as there are many options online that work with different cameras and different 3D printers.
If you’re using a Raspberry Pi camera on the Creality Ender 3, this mount works great!
But, if you can’t find a 3D printable mount that’s compatible with your camera and a 3D printer, you can either design one, modify an existing option, or DIY a mount without using 3D printed parts. Even just stacking a few books to put your camera on works! Just make sure that your mount positions the lens of the camera towards the 3D print bed, as this is where the parts will be printed.
And, if you’re wondering which position, orientation, and angle work best, it’s up to you and how you want to monitor your 3D printer. Personally, I like mounts that move with the 3D printer, but you might like a camera mount that has a fixed position. You can use your phone camera (or the actual camera you have) to test different viewing points.
Software
As for the digital side of the installation process, we have to figure out a way to make the camera feed accessible via the internet. That’s because a camera, alone, can’t connect to the internet where you’d be able to remotely stream the video feed.
Perhaps the most popular is using a remote printer control server, such as OctoPrint, Repetier Server, AstroPrint, or Klipper Mainsail. Adding a camera to one of these platforms is pretty easy, and there are many tutorials online. All you need is a computer, like a Raspberry Pi board, a power cable, a microSD card, and, of course, your camera.
The other option is using a standalone system, such as the Blink Monitoring app, if you have the Blink Mini. Sadly, standalone systems only work with proprietary hardware; for example, you can’t connect a Logitech webcam to a Blink camera network. But, if you do have a compatible camera, then setting it up under the standalone system is very easy, and instructions for this process can usually be found with your camera.