7 Best Ender 3 (V2/Pro) Enclosures in 2024

3D printer with enclosureWant to print ABS? Not so fast! To print temperature-sensitive materials like ABS, polycarbonate, or nylon, you’ll need an enclosure.

Even if you’re just printing PLA or PETG, which don’t require an enclosure, having one can improve the quality of prints.

But what is an enclosure?

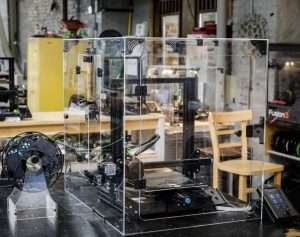
If you’ve never heard of the term, an enclosure is a structure that your 3D printer goes in… almost like a little house for your manufacturing machine. The enclosure isolates your 3D printer and keeps out unwanted contaminants like wind, dust, and cold air.

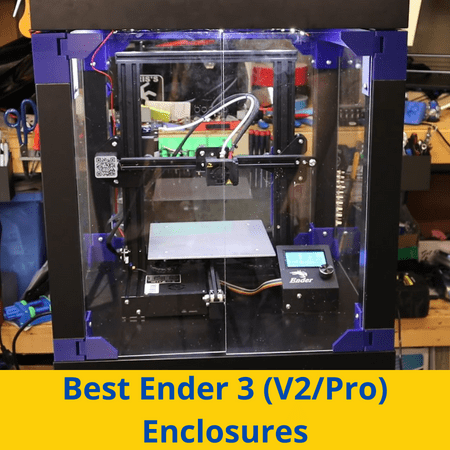
Unfortunately, an enclosure doesn’t come built-in on most printers, including the original Creality Ender 3, Ender 3 Pro, or Ender 3 V2. So, if you want to improve the print quality or use certain filament materials on the Ender 3, you’ll need to either build or buy an enclosure.

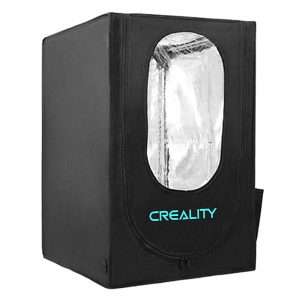
Creality’s Ender 3 enclosure is a pretty convenient option that’s relatively inexpensive and widely available. But, personally, I love a good DIY project, so I prefer custom building an enclosure and putting in all the features I want, from a temperature sensor to an external spool holder.

In the sections below, we’ve taken a look at the best enclosure options for the Ender 3 (Pro/V2), including both purchasable products and DIY projects!

Ender 3 (V2/Pro) Enclosures: To Buy

In the sections below, you’ll find the non-DIY enclosures for the Ender 3 that you can buy. These are all great options if you want an enclosure fast and don’t want to customize the structure or spend too much time on it.

Our first purchasable enclosure for the Ender 3 comes from the same company who makes the printer: Creality. The Creality Enclosure is objectively a pretty good deal. You get a well-insulated, perfectly-fitted cloth enclosure for under $75.

If you look at the inside of the enclosure, you’ll notice that the inside is silver. That’s because Creality used reflective aluminum film which is excellent at insulating. As for the outside of the box, Creality used flame-retardant cloth. So, in the extremely unlikely event of your Ender 3 catching on fire, it shouldn’t spread outside the enclosure.

The enclosure looks a little tall because it fits not just the 3D printer but also accounts for the overhead spool holder. This will keep your filament dry which will improve the quality of your prints, especially for hygroscopic materials like PETG.

But my personal favorite feature on this enclosure is the side pockets which come in handy for storing your tools, like the spatula or Allen keys. There are also a few zipper doors around the enclosure to allow for easy accessibility. And one has a partial window for visibility.

So if you want a super easy-to-set-up enclosure for your Ender 3, the Creality enclosure is an option to consider. It offers a good bang for your buck and it has its fair share of included features.

Pros

Cons

Wham Bam is a 3D printing company that makes accessories for your printers. One of their most popular products is the HotBox, an enclosure that fits the Ender 3 as well as many other budget printers. Now in its second version, the HotBox V2 has a lot of new features not seen in many other enclosures on the market.

The inside of the enclosure is made of Nylon 600D fabric with a metallic coating on one side and a fire-resistant coating on another. This makes for the perfect insulative and safe material for an enclosure.

But, the enclosure isn’t just a big tarp. Instead, the cloth is wrapped around some lightweight panels with zippers and other features. Because of this technique, the HotBox V2 can be folded down and stored away, which is great for transporting it or keeping it out of the away.

Some other features on the HotBox are the included lighting system which wraps around the enclosure to illuminate your Ender 3 so you can see it from the window panels on the sides. Like on the Creality enclosure, there are also a lot of pockets for storing things like tools.

I’d suggest the HotBox V2 for those who want to keep the cost of an enclosure low but want to speed the extra $50 over the Creality enclosure to get a higher-quality product. Moreover, the Wham Bam HotBox V2 is loaded with features, like lights and foldability, that make it worth the cost.

Pros

Cons

If you have a bit extra to spend, the 3D UpFitters enclosure is a great option for the Ender 3 that boasts total visibility. Moreover, the enclosure is completely made of acrylic panels, so you can see the printer from every angle. 

No more hiding you failed 3DBenchy!

The enclosure fits all versions of the Ender 3, including the Pro, V2, and even S1. But the spool holder needs to be moved to the side (or above) because the dimensions of the enclosure don’t allow for it.

Although the price of the 3D UpFitters enclosure is a bit high, the company has allowed for total customization of the enclosure. Moreover, you can add a variety of features to the enclosure like a temperature sensor, side-mounted spool holder, filament dry box, fire suppression system, and carbon air filter. This is my favorite part about this option because it gives you an ecosystem to work with.

The hinged door on the 3D UpFitters enclosure also makes it easy to access your prints!

So, if you don’t want to deal with compatibility or assembly/installation issues between different enclosure features, then I’d strongly recommend the 3D UpFitters enclosure for the Ender 3!

Pros

Cons

Ender 3 (V2/Pro) Enclosures: DIY

4. Wood

Ender 3 Wood Enclosure

A wood enclosure is my personal favorite type of DIY enclosure and I use this style for my best-performing Ender 3s. Wood enclosures, as the name indicates, consist of wooden panels. Wood isn’t known for being the best insulator (for keeping heat inside), but it does the job fine and also doesn’t let air draft through to the printer either.

As for building the enclosure, it shouldn’t be that difficult as wood is pretty easy to work with (e.g. can be cut easily). And you can usually find just the right size wood panels as well as everything else you need for the enclosure at a Home Depot, Lowes, or local hardware store.

While wood prices have been on the rise over the past few years, you should still be able to make your own Ender-3-fitting wooden enclosure in under $150. It all just depends on which features you include in the enclosure.

And, on this note, because wood is such an easy material to work with, you can easily DIY many features on your enclosure. For example, on one of my wooden enclosures, I purchased some cheap wood trim and used a nail gun to secure it to the side panels. This allowed me to use an acrylic panel for the front of the enclosure so that I can see how my prints are going without opening the box.

Many people also like to screw in hinges to the wooden side panels to make the inside of the enclosure more accessible. Some other features that you can add include a temperature sensor, heater, filament spool holder, and camera.

So if you’re looking to make your own DIY enclosure for your Ender 3 and want the most customizability, I’d say wood is your best bet. Although it’s a bit more expensive than some other DIY options, it’s easy to work with and there are even a handful of wooden enclosure build guides out there that you can follow for assistance.

Pros

Cons

Have an at-home gym? Well, the flooring of that room just became your new enclosure for your Ender 3!

No seriously!

Most foam exercise mats are the perfect size for making an enclosure for your Ender 3. And, because they’re interlocking (puzzle-like sides), assembly of this type of enclosure takes literally under a minute.

All you’ve got to do is place your Ender 3 on the bottom mat and connect the other five mats around it to form a cube enclosure.

But don’t worry if you don’t have them laying around (or not enough) because they sell for under $50 for a six-pack on Amazon and even less at a Costco.

And while the exercise mat cube enclosure isn’t the sexiest look for your printer and also restricts visibility of the machine (there’s none from outside), foam serves as a good insulator. In fact, I’ve had my best ABS prints in a foam enclosure.

However, I will have to note that you can’t really customize a foam mat. While it’s easy to cut these mats, they aren’t rigid, and attaching anything to them will cause them to sag.

But, if you really want to print in ABS or other sensitive materials and want a cheap way to get the job done, exercise mats are seriously a great option!

Pros

Cons

Across America, IKEA is the place to go for furnishing your home. But what if I told you that it’s also the spot for finding the sexiest, most visually appealing enclosure for your Ender 3?

The IKEA Lack table is the perfect piece of furniture for making an enclosure out of. The table’s top surface fits the Ender 3, almost perfectly. Maybe IKEA liked r/3DPrinting?

And, from there, all you need are a few acrylic panels and 3D printed parts to turn a regular-looking table into an enclosure for your Ender 3. But, the fun doesn’t stop there! If you get a second table, you can make the ultimate 3D printing setup, with your enclosed printer on the top table and a place to store your filament and other 3D printing essentials below.

There are a few different well-documented guides for turning your IKEA Lack table into an enclosure for your Ender 3, and they all vary slightly in the 3D printed and other parts they use. However, most of them feature four see-through panels that enclose the printer, a hinge door for accessing the machine, and a storage rack on the table below (or the surface above).

I’d say the IKEA Lack table is the enclosure for the DIY-ists out there because it does its job as an enclosure (e.g. keeps heat in), but is also a fun project and very customizable. Nonetheless, I still think this type of enclosure could work for those less DIY-y because of how many easy-to-follow guides there are out there.

Pros

Cons

7. Plastic Sheet (Most Reliable on a Budget)

plastic sheet 3

Our last enclosure is the funniest looking. A plastic sheet costs basically nothing and can come in many forms: a trash bag, camping tarp, photography screen, or even just baking sheets taped together.

While it’s not the best insulator, it gets the job done as long as there isn’t too much airflow (wind) in the room because the plastic isn’t sturdy enough to block a lot of air. Additionally, it’s also not customizable, like at all, because you can’t attach anything to it.

However, a plastic sheet doesn’t have to be all bad. And some people have made a more permanent version of a plastic sheet by using PVC pipes to make a sturdy structure to wrap the plastic sheet around. This looks a little better than just draping a tarp over your Ender 3 and will also ensure the tarp doesn’t hit any moving part on the printer.

But, however you do it, a plastic sheet enclosure shouldn’t be your first option. But, honestly, I’d still recommend it to anyone wanting to print ABS that doesn’t have the means of making or buying a more permanent enclosure at the moment.

Pros

Cons

Tips For DIY Enclosures:

Before we get into our list of the best DIY enclosures for the Ender 3 (Pro/V2), there are a few things worth mentioning about how to build and use these types of enclosures. I’ve provided a few tips in the mini sections below!

Tip #1: Let the Heat Out

Source: Youtube Chris Riley

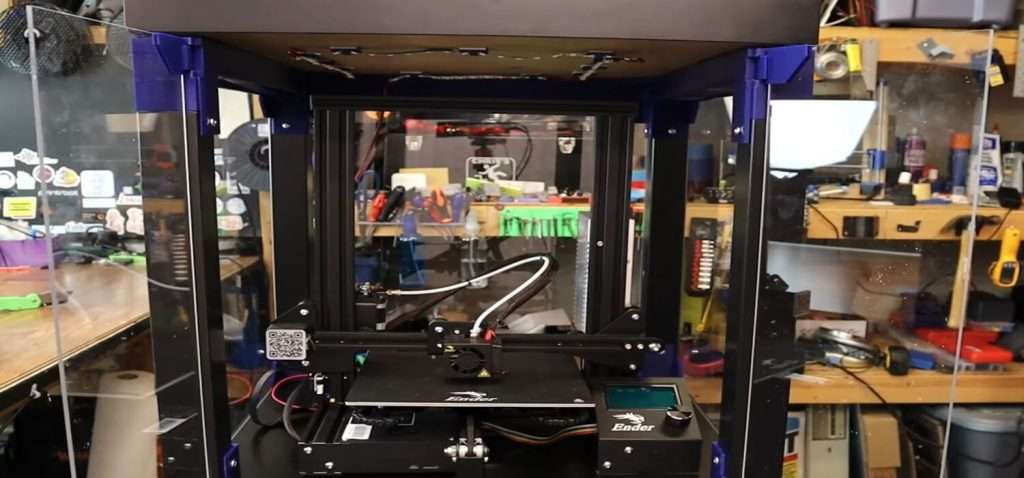
While the point of an enclosure is to keep the heat in, you also want a way to let the heat out. The best way to do this is to add an access hatch to your enclosure, such as a zipper or hinged door. 

This door not only allows you to take prints off your Ender 3’s print bed but also gives the hot air a place to come out when your machine is finished printing.

Tip #2: Protect Your Electronics

Source: Youtube Chris Riley

As you know by now, inside a 3D printer enclosure is pretty hot. This heat promotes higher-quality prints and the frame of your Ender 3 won’t be affected. However, the same can’t be said for the electronics onboard your trapped printer.

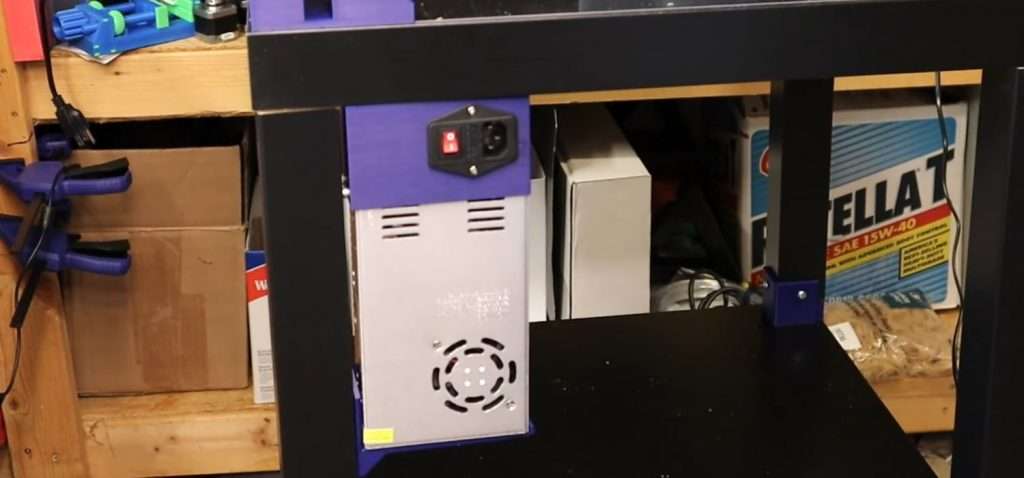
If too hot, the sensitive and important electronic components on your printer, such as the stepper motor drivers or processing chip, will have weaker performance. In turn, this will lead to worse prints and a higher likelihood of failure. The best way to combat this on DIY enclosures is to do your best to move the electronic components outside of the enclosure box.

Many users like to put their Ender 3’s power supply unit (PSU) and motherboard in an external box. While this isn’t exactly necessary, it will 100% help and lead to more consistent prints.

Tip #3: Plan It Out

Source: Youtube Chris Riley

The last tip I have for you about building a DIY enclosure is one that I can’t stress enough: PLAN IT OUT! 

On the first 3D printer enclosure I ever built, I didn’t account for the dimensions of the moving bed on the Ender 3, so every time a print finished, the enclosure basically self-destructed.

Now you might not be as forgetful as me, but a plan will still help you with the build process. I suggest designing your enclosure idea out in Fusion 360 or another platform, but just writing a few dimensions down on a sticky note is better than nothing.

What’s the Purpose of a 3D Printer Enclosure?

Before you drop anywhere from $25-200 on an enclosure for your Ender 3, you’re probably wondering what the enclosure actually does.

Temperature Control

The most important thing an enclosure does is trap heat around the printer to control the temperature. An enclosure keeps the heat produced by the hot end and heated bed around your printer.

This helps the layers of a model (especially when your printing ABS, nylon, or PC) bond to each other better. Furthermore, if you try to print one of these “enclosure required” materials (ABS, nylon, PC) without an enclosure, the layers of the model will likely separate or come out very ugly.

Traps Fumes

Enclosures also keep the fumes produced by your printer inside. This is mainly helpful when printing ABS because its fumes are very toxic, but it also applies for other filament materials. 

Another thing an enclosure helps with is noise, because the structure contains the audible vibrations made by your printer so you hear it less.

Keeps Contaminants Away

As we mentioned, enclosures also keep out unwanted factors and contaminants, like wind, cold air, and dust. All of these can negatively impact the printing process and can cause problems, so it’s better if they keep their distance from your printer.

Storage

Next, an enclosure gives you a space to store not just your 3D printer but also all of the relevant (and small) tools. So you don’t have to put all the wrenches, screwdrivers, extra nozzles, and whatnot in a separate area from your machine.

Visual Appeal

The last major purpose of an enclosure for a 3D printer is to make it look nice. Moreover, 3D printers, especially budget options like the Ender 3 (Pro/V2), look very overwhelming and almost too “techy”. An enclosure, when made right, will make your 3D printer look more at home so guests think you’re an innovative genius rather than a low-level nerd.

What are the Dimensions of the Enclosure?

Source: Youtube Ryan

The most important element of an enclosure is its size. Because a 3D printer has to go inside an enclosure, you have to make sure that the internal dimensions of the enclosure fit your printer, which, in this case, is the Ender 3.

The Ender 3, Ender 3 Pro, and Ender 3 V2 all have an approximate maximum footprint of 440 x 410 x 465 mm. But, don’t use these dimensions when planning out your enclosure. That’s because you’ll definitely want some extra space on every axis so you can more easily repair the printer and fit it inside the structure.

As such, I like to use 500 x 450 x 500+ mm as a basis for any enclosure I build. 

However, I change the dimensions depending on if I’m using a top-mounted, side-mounted, or totally separated filament spool holder. I’d suggest planning out taking some measurements around your Ender 3 and then adding some space based on how much space around the machine you want.

Conclusion

So, overall, an enclosure is a great upgrade to make to any 3D printer, especially one as already-versatile as the Creality Ender 3. And, while enclosures are absolutely necessary when printing certain materials, like ABS, PC, or nylon, don’t be scared to invest in one if you’re just printing with PLA or PETG. Moreover, you’ll still notice some benefits such as an overall improvement in print quality regardless of material.

Scroll to Top