

If you have a 3D printer, then there’s a 99.99% chance you know about Ultimaker Cura. It’s only the most popular 3D slicer for FDM 3D printers out there (and it’s free)!
Cura is home to literally hundreds and hundreds of different settings and options, making it perhaps the most versatile 3D printer slicer software. While most experienced 3D printing enthusiasts can read and understand these settings like basic English, they can be a bit confusing for those new to the hobby.
And, to be honest, the technical terms in Cura, such as “Infill Overlaps Percentage” and “Combing Mode” sounds a lot more intimidating than they actually are. But, nonetheless, knowing how to use these settings is very important if you want to achieve the highest-quality prints.
Today, I’ll be going over the most important settings in Cura in simple terms, explaining what each one does and how you can use it. In no time, you’ll be able to figure out what settings to change to improve your 3D prints!
Table of Contents
Why Use Cura?
But before we dive into the settings, you might be wondering why you should even use Cura. The simple answer: it’s the best and most versatile slicing platform around.
Furthermore, Cura has the most adjustable slicer settings than any other slicer software (including PrusaSlicer and Simplify3D). This means you have the most opportunities to fine-tune the print quality.
Additionally, Cura’s interface and layout make the platform usable for anyone, whether it’s their first day with a 3D printer or their thousandth. Moreover, beginners benefit from Cura’s default setting selection, which only covers the high-level, basic settings, like layer height and infill density. This makes slicing 3D prints a lot easier!
But, at the same time, 3D printing professionals can set Cura’s setting selection to “Expert” or “Show All” to have more setting options so they can make more specific adjustments to the print quality.
It’s also worth pointing out that Cura is open-source and has a large community following, so it’s always being developed and new features are added monthly. Plus, there’s a repository of plug-ins that expand what Cura is capable of. Check out our article about the best Cura plug-ins to learn more about this.
With that in mind, let’s get started!
Cura Settings for 3D Printing

There are hundreds of different adjustable slicer settings within Cura’s interface, and below, I’ll be explaining the most useful and practical ones. As there are so many settings, I’ve organized them into their respective sections in Cura, like “Quality” and “Infill”.
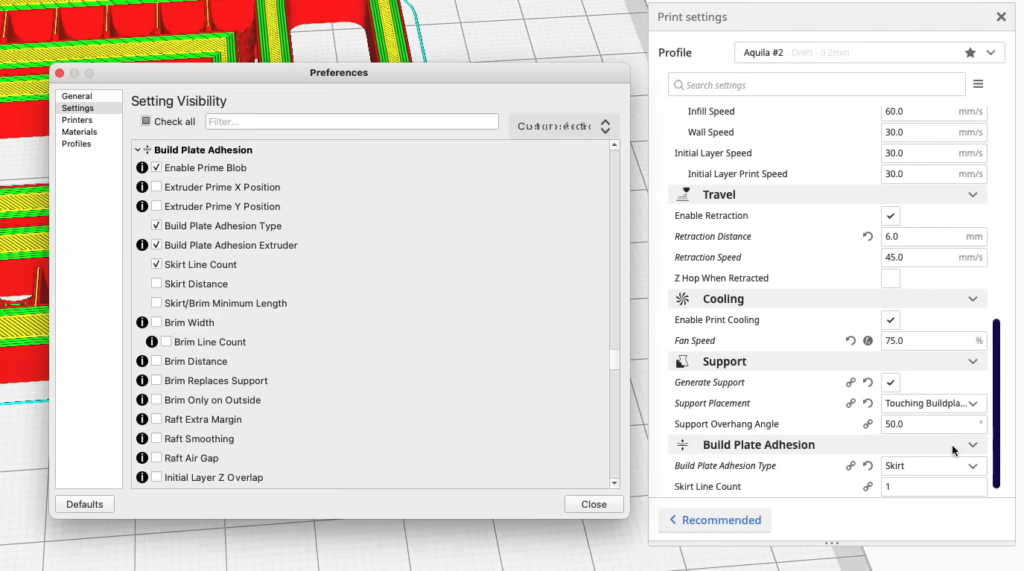
And, if you can’t see a setting, it’s probably because your Cura setting selection is not set to “All”. To fix this, click the settings menu in Cura and then click the three-dashed-bars icon in the top right. Finally, select “All” to show all of Cura’s available settings!
Now, let’s get to it!
Quality
Our first section of Cura settings is Quality. The heavy hitters in the Quality section include settings like layer height, line width, and more! These settings are usually the most impactful on the print quality and visual appearance of your 3D prints.
Layer Height
The first setting is layer height. Layer height controls the Z-axis distance of each layer of your print; in other words, it’s how much the nozzle moves up after each layer.
The layer height is usually considered the most relevant setting for what we call print quality, which is basically how good and detailed your 3D model comes out. The smaller the layer height, the more layers make up a 3D print, giving the machine more space to include detail and small features on the 3D model.
On the reverse side, a larger layer height yields larger layers and less detail on your 3D print. But, on the upside, a larger layer height provides more strength for your 3D prints, making it useful for printing functional models (e.g. mechanical gear).
The most common layer height for FDM 3D printers is 0.2 mm, and this provides a good mix between detail and strength on your 3D prints. Feel free to change this value, though, if you’re printing high-detail models or parts that require a lot of strength.
Initial Layer Height
The initial layer height setting controls the layer height ONLY for the first layer of your print job. This is a useful setting because too small or too large of a layer height may cause issues with the bed adhesion for the first layer of your print.
Moreover, if you’re using a very high or very low layer height but don’t want issues with first-layer bed adhesion, you can use an initial height of 0.2 mm, which usually works great regarding bed adhesion.
Line Width
The line width setting controls the width of each line (of melted filament) that the nozzle lays down. For example, if this value is set to 0.4 mm, a single nozzle pass will create a strand of plastic that’s 0.4-mm in width.
Make sure to keep this setting at Cura’s default value, which should be equivalent to the size of your nozzle. For example, if you have a Creality Ender 3, which (by default) uses a 0.4-mm nozzle, then the line width should be set to 0.4 mm.
Walls

The Walls section in Cura includes all of the relevant slicer settings for 3D printed walls (sometimes called “shells”). For reference, the walls on a 3D print are the completely-solid structures that separate the infill portion of your model from the outside of the part.
Wall Thickness
Perhaps the most important wall-related setting in Cura is the Wall Thickness. This setting, as it sounds, controls how thick the walls of your print are. The thicker the walls, the more durable and sturdy your 3D print is. Also, if you’re printing a model that you want to be waterproof, then use a high wall thickness value.
For standard, normal 3D prints, I like to use a wall thickness of 0.8 or 1.2 mm.
Wall Line Count
The Wall Line Count setting is directly related to the Wall Thickness setting we just went over. Moreover, this setting is set to the wall thickness divided by the line width setting. If you want a certain number of walls, then make sure to adjust this setting which will automatically change the wall thickness setting.
Top/Bottom
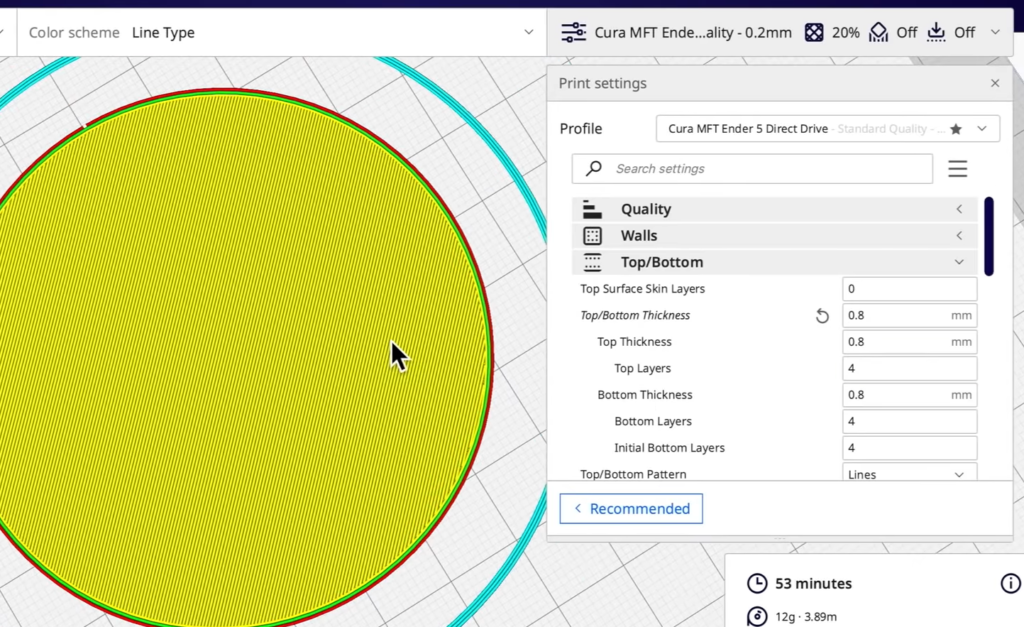
Next, the Top/Bottom section in Cura includes settings related to the top and bottom layers of your 3D print. The top and bottom layers of your print, just like the walls, are another part of the “shell” of your model. These sections of your print are completely solid and separate the infill portion of the model from the outside.
Top/Bottom Thickness
The Top/Bottom Thickness setting controls how thick the top and bottom sections of your 3D print are. The higher this value, the more filament will be used, the longer your print will take, but, also, the stronger and more durable your model will be!
I like to use a Top/Bottom Thickness of 0.8 or 1.2 mm, but feel free to increase or decrease this value depending on if you want strength or speed for your 3D print.
Top/Bottom Layers
Just like with the Wall Line Count setting, the Top/Bottom Layers setting is directly related to the Top/Bottom Thickness setting. Moreover, this value is automatically set to the Top/Bottom Thickness divided by the set line width. You can change this value if you want to set the wall thickness as a number of layers rather than a distance.
Enable Ironing
Ironing is a very special slicing feature that uses the heat from the nozzle to essentially iron (just like you would with clothes) the top layer of a 3D print. This smooths out the layer lines on the topmost layer of a 3D printed model to make it look better.
To activate ironing, you can turn on the “Enable Ironing” setting in Cura, and a list of ironing-specific slicer settings will appear. While I won’t dive into these settings, I do recommend turning on ironing if you’re printing a mid-large-size 3D model that you want to look super smooth, like a trophy.
Infill
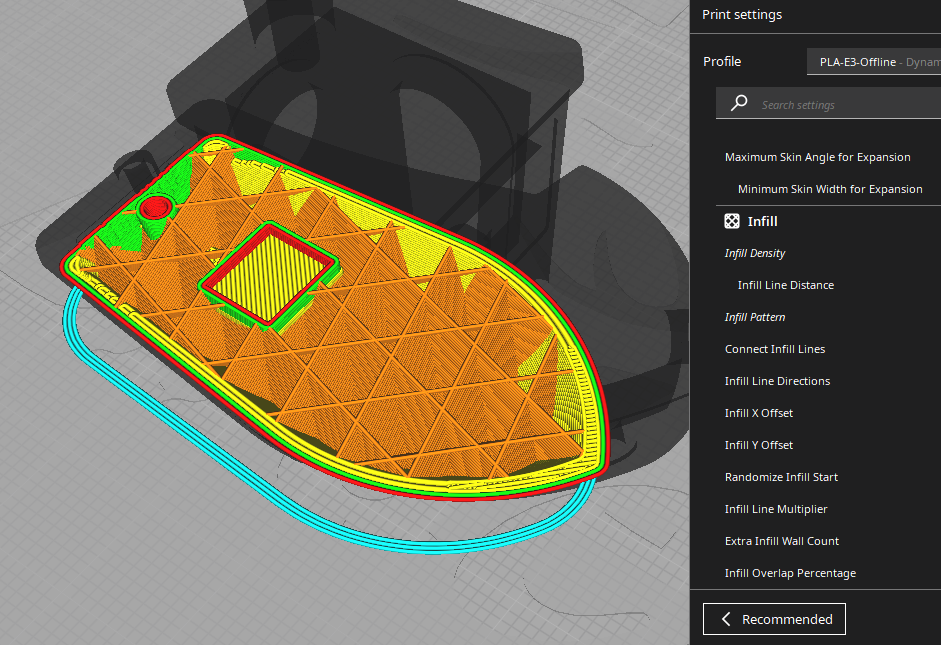
The next Cura settings section is Infill. If you didn’t already know, infill is specific to 3D printing and basically, no other manufacturing style allows you to control the internal density of a part. As such, the infill settings listed below, like Infill Density and Infill Pattern, are super important.
Infill Density
The Infill Density setting is a percentage value that controls the “full-ness” of the inside of your 3D print. An infill density of 100% means your part will be 100% solid, while a 0% infill density makes your 3D model hollow (with the walls and top/bottom layers still present).
Obviously, the higher this percentage, the more filament your print will consume, the heavier your 3D model will be, and the longer your print will take. But, it also makes your model more sturdy and durable!
For most prints, I suggest using a 20-30% infill density. And, if you’re printing a part that needs to be strong, consider going up to 50-80%.
Infill Pattern
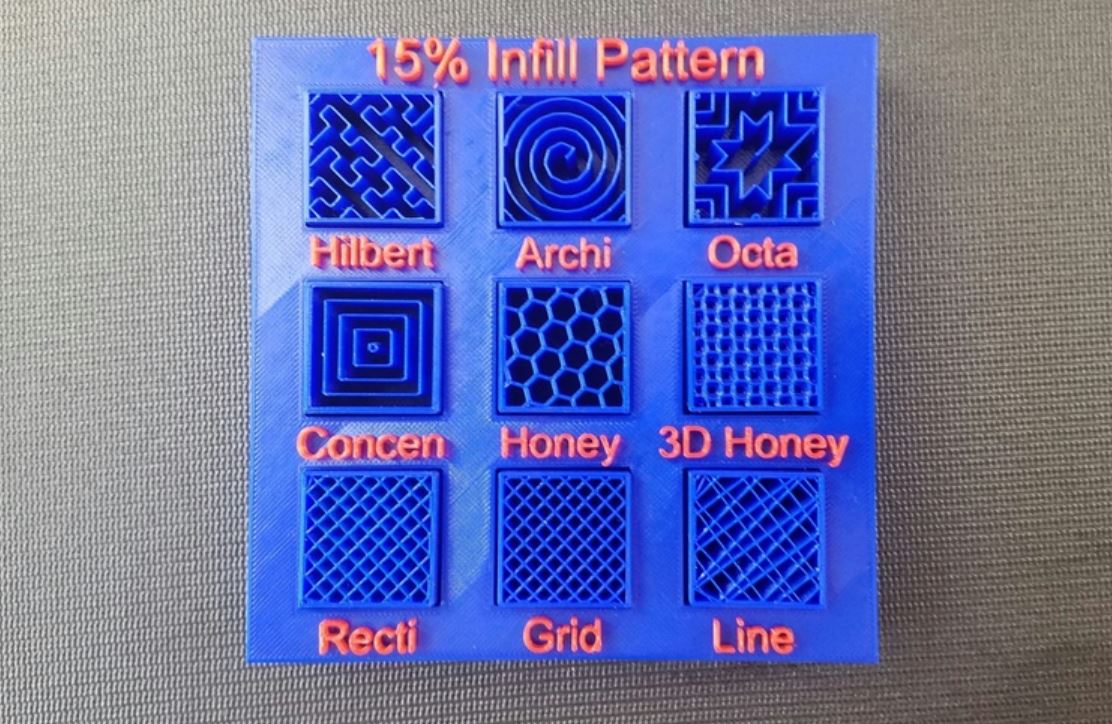
The infill pattern is the arrangement in which the infill material is laid out inside your 3D model. While you can’t see the infill pattern on a 3D print, it’s still an important slicer setting as it impacts the strength of your print, as well as its weight and print time.
I recommend the cubic infill pattern as it provides strength across all three axes (X, Y, Z), and doesn’t make your prints too long or too heavy. The grid, lines, and triangle patterns also are available in Cura and work well for any type of 3D model, whether it needs to be strong or contains a lot of detail.
Check out our related articles on the best Cura infill patterns and strongest infill patterns here to learn more.
Infill Overlap Percentage
The Infill Overlap Percentage controls how much the infill portion of your 3D print overlaps with the walls of your 3D print. In Cura, the default value for this setting is 30%, and I recommend leaving it at this so the infill is well-bonded to the shell of your model. This makes your part stronger!
Material
The Material section in Cura covers everything related to heat, including the nozzle and bed temperatures.
Printing Temperature
The Printing Temperature setting in Cura is the nozzle temperature, and it is one of the most important settings on any 3D slicer. That’s because the nozzle temp is directly correlated with the flow of filament.
Moreover, the higher the Printing Temperature is set, the hotter the nozzle gets, and the faster filament will be melted. As such, if you want to increase the print speed, make sure you also increase the printing temperature.
And, if you’re experiencing under-extrusion in your 3D prints, consider raising the Printing Temperature. The reverse is true for over-extrusion.
Printing Temperature Initial Layer
Sometimes you may want to use a higher Printing Temperature for the first layer, and the Printing Temperature Initial Layer setting allows you to do this. When I’m having bed adhesion issues, I like to make this setting about 5 °C higher than my normal Printing Temperature to ensure no under-extrusion occurs.
Build Plate Temperature
The Build Plate Temperature setting, also known as the bed temperature, controls how hot your printer’s heated bed gets. A heated bed is practically a necessity on a 3D printer as it helps a ton with achieving good first-layer bed adhesion and preventing issues like warping and elephant’s foot.
You should set the Build Plate Temperature to the value suggested by the manufacturer of your filament. And, if you’re having bed adhesion issues, try increasing the bed temp by 5 or 10 °C.
Build Plate Temperature Initial Layer
Just like with the Printing Temperature, you may want a different Build Plate Temperature for the first layer of your print. If so, use Cura’s Build Plate Temperature Initial Layer setting. When I’m printing in a cold room, I like to set this value to 10 °C above what my normal Build Plate Temperature is to ensure no warping occurs on my print.
Speed
Next, in this section, I’ll go over some of the most important settings related to the speed of your printer.
Print Speed
The Print Speed setting in Cura is a blanket setting that controls how fast filament is pushed out the nozzle. Obviously, the higher this value, the faster your 3D model will be printed.
And, as I mentioned, this setting is a blanket setting, meaning changing it will adjust a handful of sub-settings, each related to a specific print action. For example, changing the Print Speed from 60 mm/s to 30 mm/s will make the default Wall Speed go from 30 mm/s to 15 mm/s.
Also, it’s worth noting that you should accompany any increase (or decrease) in your Print Speed with a similar adjustment in the Printing Temperature setting.
Check out our more in-depth article on the best print speed settings for different types of filament here to learn more.
Initial Layer Speed
The Initial Layer Speed setting controls how fast filament is pushed (and the printhead moves) during the first layer of your print job. By default, the Initial Speed value is set much lower than the regular Print Speed setting, and I recommend keeping it this way.
Travel Speed
The Travel Speed controls how fast your machine’s printhead moves during non-extrusion moves, such as when it’s moving from one section of a print to another. A higher travel speed will yield faster prints (lower print times), but don’t go too crazy. A Travel Speed as high as 200 mm/s should work fine, but be careful of raising it past this as it could cause some printing issues.
Travel
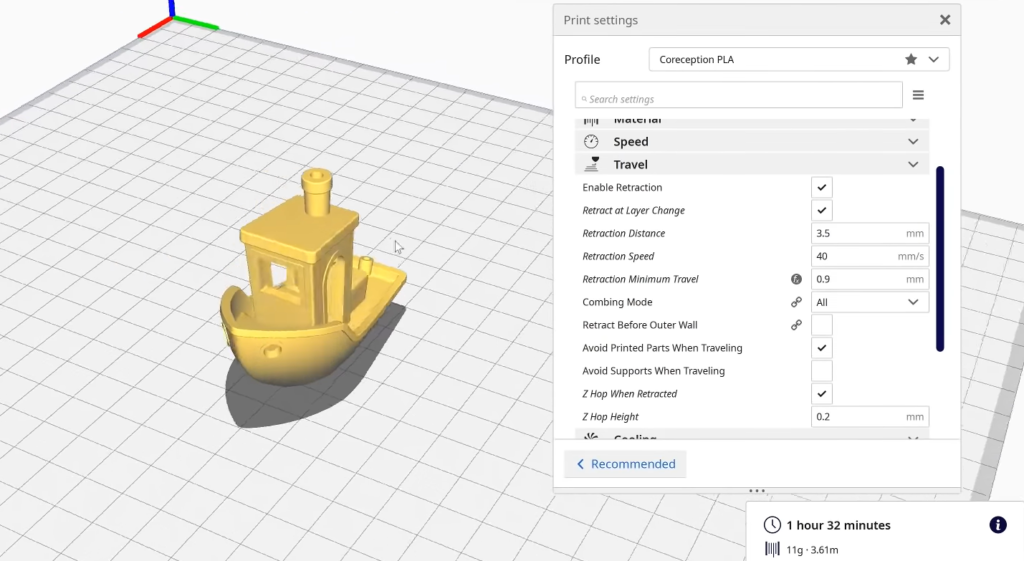
The Travel section in Cura contains a handful of useful settings related to retraction (when filament is pulled back from the hot end) and anti-stringing actions.
Enable Retraction
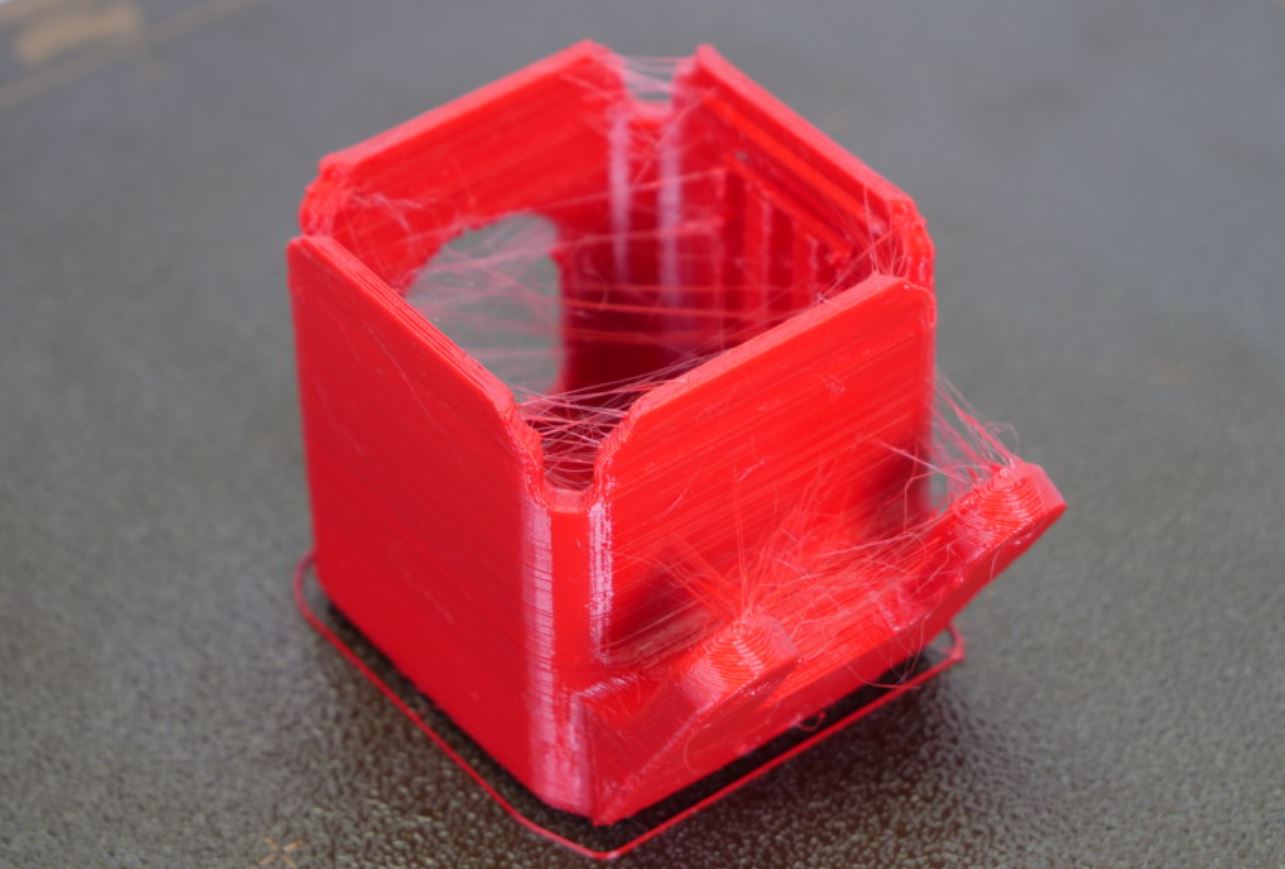
First in this section is the “Enable Retraction” setting. Retraction describes the process of the extruder pulling back filament from the hot end assembly to relieve pressure in the hot end and prevent stringing from occurring.
I suggest turning this setting on. Doing so will reveal a handful of retraction-related settings, some of which, I’ve gone over in the other sections.
Retract at Layer Change
The Retract at Layer Change setting is a boolean setting (can be turned on or off) that tells the printer to make a retraction move every time a layer is finished. This helps eliminate stringing, and I suggest turning this setting on.
Retraction Distance
The Retraction Distance is one of the most important settings related to retraction and it is the distance of filament that’s pulled back each time a retraction occurs. The higher this value, effectively, the more pressure will be relieved from the hot end, so increasing this setting is a good way to reduce stringing on prints. However, increasing the retraction distance too much can cause nozzle and hot end jams, so don’t increase it too much.
Retraction Speed
The retraction speed is another important setting related to refraction and it controls how fast the extruder pushes and pulls filament from the hot end during retraction moves. Just like the retraction distance, increasing the retraction speed can help reduce stringing on prints.
Make sure to check out our article on the best retraction speed and distance settings to learn more.
Combing Mode
The combing mode is a multi-option setting in Cura that controls how the printhead moves around the print space. There are a few different options for the combing mode, including “Off”, “All”, “Not In Skin”, “Within Infill”, and “Not On Outer Surface”.
I won’t go into how each combing mode works, but it’s worth noting that the “Not In Skin” and “Within Infill” options are most effective at reducing stringing on prints.
Avoid Printed Parts When Traveling
There’s not much to explain here; the name says it all! I suggest turning this setting on!
Avoid Supports When Traveling
Just like the previous setting, the Avoid Supports When Traveling works just like it sounds. Moreover, when this setting is turned, the printhead won’t go over the support structures when moving around the print space. This reduces the chances of the printhead accidentally knocking over a support structure.
I suggest leaving this setting turned on!
Z Hop When Retracted
The Z Hop When Retracted setting tells your printer to move the printhead up every time a retraction move occurs. It helps reduce stringing and the chances of the printhead hitting a section of the print.
I recommend turning tis setting turned on!
Cooling
Next, the Cooling setting section in Cura covers all the fan settings which impact how filament is cooled when it comes out of the nozzle. Cooling is very important to the 3D printing process, so make sure you know how to use these settings.
Enable Print Cooling
First off, the “Print Cooling” setting is just as it sounds: it turns on the part cooling fan on your machine’s printhead. You should turn it on most of the time as cooling is helpful for printing most filament materials (e.g. PLA, PETG).
However, when printing certain materials, like ABS or ASA, you might want to turn print cooling off as cooling can hurt prints made with these filament materials.
Fan Speed
If you enabled print cooling, you’ll have the ability to set the Fan Speed setting, which controls how fast the part cooling fan spins. The higher the Fan Speed, which is expressed as a percentage, the more cooling on your printer. As such, if you notice droopy sections of a print, consider increasing the Fan Speed.
Initial Fan Speed
The Initial Fan Speed setting in Cura controls the fan speed for the first layer. It’s common practice to leave this value at 0% as cooling the first layer can cause warping and other bed adhesion issues.
Regular Fan Speed at Height
Next, the Regular Fan Speed at Height sets the layer at which your printer switches from using the Initial Fan Speed to the regular Fan Speed percentage. I like to keep this setting at 3-5 layers, as this gives enough time for the first layer to properly adhere to the build plate.
Support
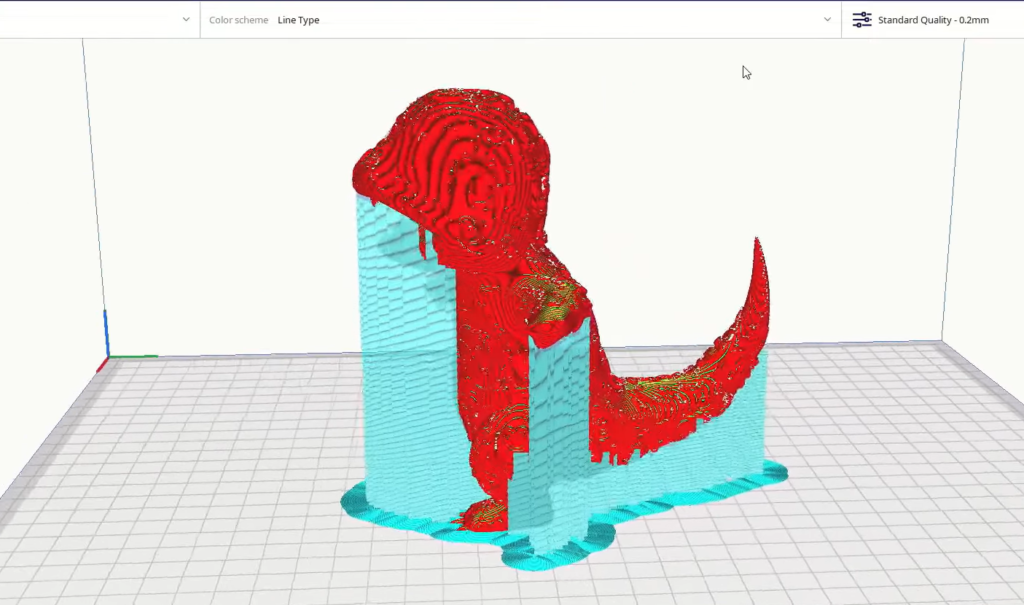
Next, the Supports section controls the settings related to support structures on 3D prints. For reference, supports on 3D prints are structures generated by your 3D slicer software that help your machine successfully print overhangs on models.
Generate Support
First, you’ll have to decide whether to use support structures or not on your 3D print. I recommend turning the “Generate Support” setting on only when you’re printing a model that has somewhat large overhangs that you don’t think your 3D printer can handle without help.
Support Structure Type
There are two different types of support structures you can choose from in Cura, including Normal and Tree supports. I’ve discussed each type below:
Normal
Normal supports in Cura are support structures that have regular geometries. They start right beneath the overhang on the model and end right below the overhang to make it easy for the printer to successfully lay down filament in the overhang.
Tree
On the other hand, Tree overhangs are a special, algorithmically-generated type of support structure that’s meant to reduce filament usage, and print time, and make the bottom surface of the overhang as smooth as possible. Using Tree supports, though, does increase the chance of a print failure as these structures are a bit more complicated than Normal supports.
Support Density
The Support Density is the infill density of the support structure. This setting is expressed as a percentage, and raising the value is a good way to ensure your supports are sturdy and don’t fall over. However, I recommend leaving this setting at the default 10-20%, as supports don’t need to be too strong to function properly.
Support Overhang Angle
The Support Overhang Angle is one of the most important support settings and it’s a threshold value for overhang angles on prints. So, if you’re printing a model that has an overhang that has a 40° angle, but your Support Overhang Angle is set to 50°, then no support structures will be generated for that overhang.
I suggest leaving this value at 45°, as this is a limit that most printers can handle.
Support Z Distance
The Support Z Distance setting controls how much space is placed between the final layer of the support structure and the first layer of the overhang area of the actual 3D model. A higher Z distance will make support structures easier to remove!
Build Plate Adhesion
Next, the Build Plate Adhesion section has all of the settings related to bed adhesion, like for skirts, brims, and rafts.
Build Plate Adhesion Type
The most important setting in this category is the Build Plate Adhesion Type, and there are three of them you can choose from. I’ve gone over each below:
Skirt
A Skirt is the least-intensive bed adhesion assistant, and it is simply a few single-layer outlines of your 3D model that aren’t connected to the base of the part. As such, a Skirt provides no help with bed adhesion. But it does get your hot end ready to go for the real print by priming the extruder!
Brim
A Brim is my personal favorite Build Plate Adhesion Type and it’s like a Skirt, but only more outlines it’s actually connected to the base of your 3D model, so it does help with bed adhesion.
Raft
Lastly, a Raft is basically a base surface, standing a few layers tall, that is printed first and serves as a base for printing your actual 3D model. It provides the most bed adhesion for your print and helps the most with eliminating warping and other bed adhesion issues.
Skirt/Brim Line Count
If you chose to go with a Skirt or a Brim, then you can set the Line Count, which is the number of nozzle passes (AKA outlines) that your printer makes for the skirt/brim. I like to use 4 for both skirts and brims!
Dual Extrusion
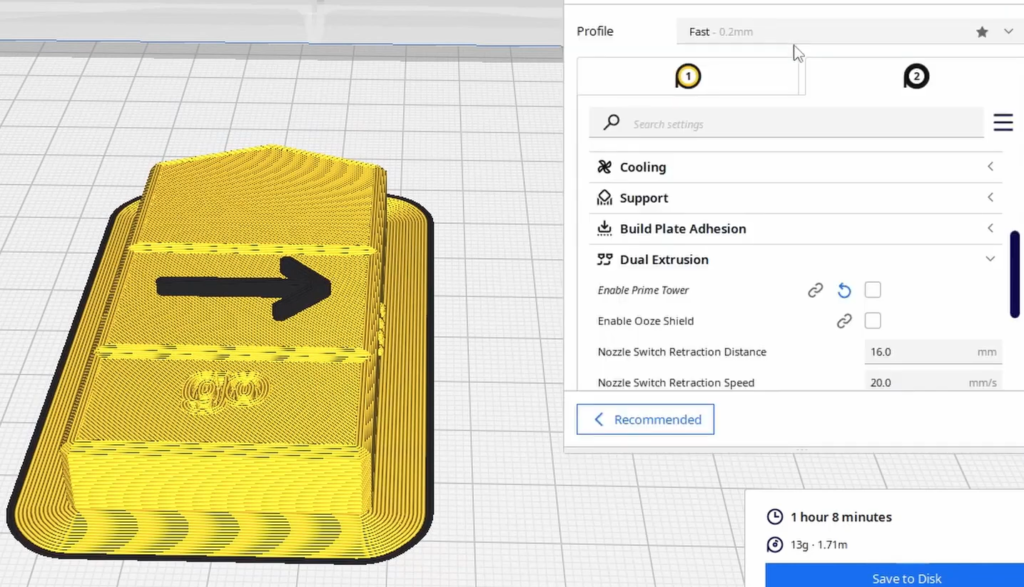
While most people use Cura with single-extruder 3D printers, like the Creality Ender 3, the slicer also has features to cater to dual-extruder 3D printers.
Moreover, there are a handful of settings related to dual extrusion in Cura, such as “Union Overlapping Volumes”, which merges internal sections of a 3D model so prints are less likely to fail. There are also settings like “Extensive Stitching”, “Remove All Holes”, and “Maximum Resolution”, which enable further control over your dual extruder printer. You won’t see these settings, though, unless you’ve configured your machine to have two extruders in Cura’s “Machine Settings” tab.
If I’m being honest, though, Ultimaker Cura probably isn’t the best slicer for dual-extruder printers, and other options, like Simplify3D and IdeaMaker, are better suited for these types of machines.
Special Modes
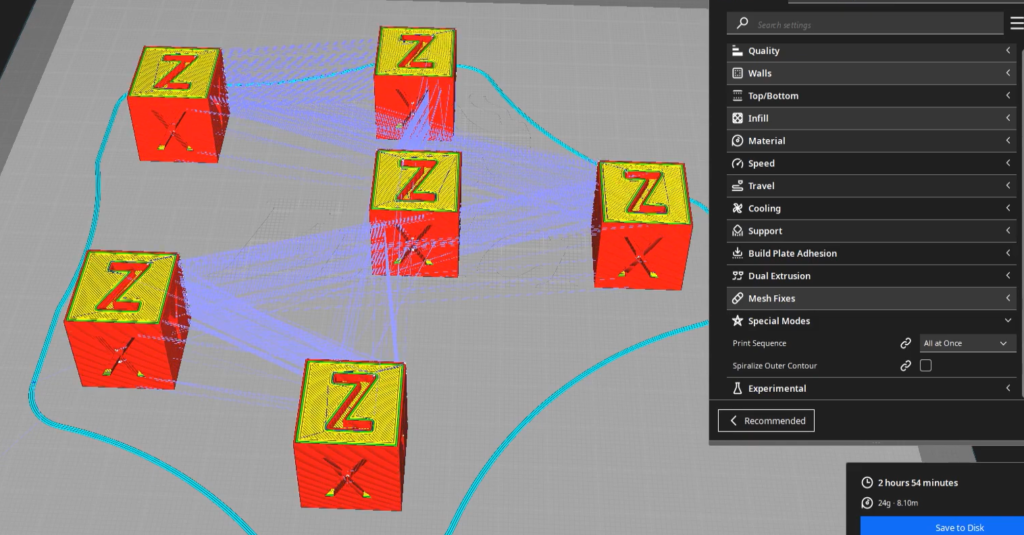
Special Modes is another section of useful slicer settings in Cura and, here, you’ll find many options (AKA “modes”) that enable very special and specific printing styles. I’ve gone over the most important special modes settings below:
Print Sequence
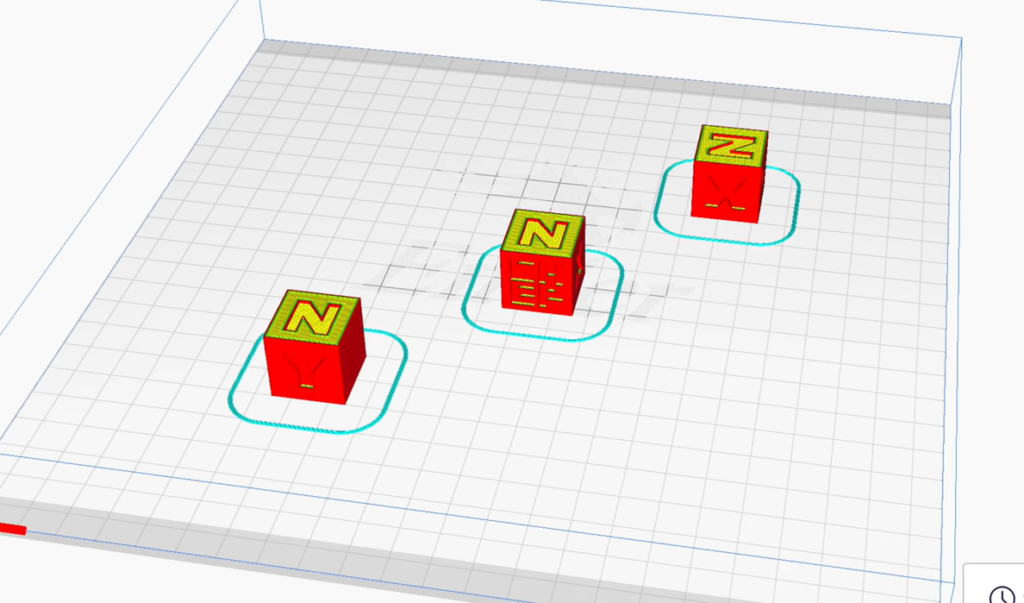
Print sequence controls the order in which models are printed. Due to FDM 3D printers’ layer-by-layer approach, the default option for this setting is “All At Once”. However, in special scenarios, you can switch this to “One At A Time” if you want to print your 3D models one after another.
As you might expect, printing models one at a time requires them to be spaced out a good bit. If you don’t space them out enough, Cura won’t be able to slice the model.
Surface Mode
Surface mode controls how Cura’s slicing engine treats the imported 3D models. The default option for this setting is “Normal”, which tells Cura to view your model like a regular volume and print every part of it, including enclosed areas.
However, you also have two other options for surface mode, including “Surface” and “Both”. The “Surface” mode, unlike the normal surface mode, tells Cura to treat your model like a non-volume surface, meaning your part will be printed with no infill or top/bottom layers. Finally, the “Both” option entails printing your part’s enclosed volumes regularly but treating the rest of the model as a mesh surface.
You shouldn’t need to change this setting at all unless you have a really niche print and want to try out the feature!
Spiralize Outer Contour
Next, the “Spiralize Outer Contour” feature in Cura is what most people call “vase mode”. Turning this setting on will tell Cura to print just the outer wall of your imported 3D model as well as a few bottom layers. This creates a vase-like version of your model.
Additionally, using the Spiralize Outer Contour setting will make your machine print the model with continuous extrusion. This yields a much higher-quality surface on your vase-like 3D model because continuous extrusion eliminates many printing issues like stringing.
You can check out our article all about Cura’s vase mode to learn more about this setting.
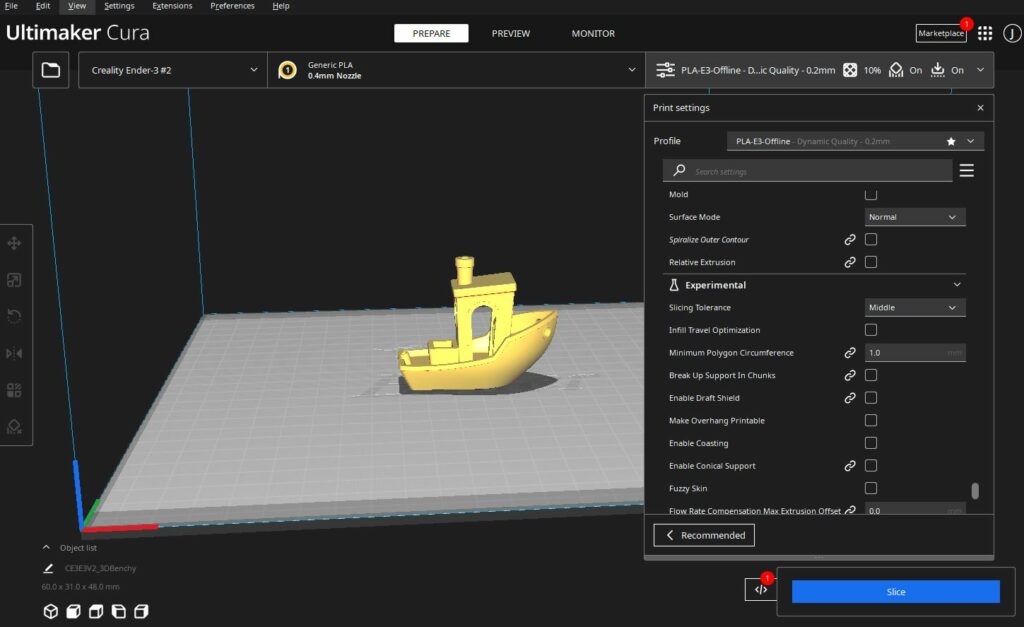
Experimental
Next, Cura’s Experimental section contains new, special-purpose settings that aren’t finished products yet. In other words, these settings are still in the works and might have a few bugs here and there, but offer next-gen printing abilities.
Make Overhang Printable
The make Overhang Printable option in Cura is a tool you can use to automatically modify the geometry of your imported 3D model so that the Minimum Support Overhang Angle isn’t met.
This, as the name of the setting says, makes the overhangs on your model printable (without supports). I suggest leaving it turned off unless you don’t mind a slight change in the shape of your 3D model.
Fuzzy Skin
The Fuzzy Skin option is a very fun setting in Cura that, when turned on, will adjust how Cura tells your machine to print your 3D model so that the outer-most layer is…fuzzy. It’s not a super useful or practical setting, but, in some situations, it proves useful.
Use Adaptive Layers
Finally, the Use Adaptive Layers option in Cura is a super practical setting that allows Cura to automatically change the layer height in some sections of your print when it makes the most sense. Moreover, when Adaptive Layers is turned on, Cura will use a larger layer height in the more basic sections of a print and a smaller layer height in the more heavily-detailed areas.
Tuning Settings
If you’ve familiarized yourself with the settings I discussed above, you might be wondering how to use them to your advantage. Well, if you want to employ your settings knowledge to improve the print quality, then you’ll have to be able to diagnose an issue, pick the right settings to change, and adjust them in the right amount and direction.
To help you out, I’ve provided a few examples of common print quality issues and some slicer setting adjustments you can use to solve them:
- Gaps in the layers of a print:
- Increase Printing Temperature
- Decrease Print Speed
- Lower Retraction Distance
- Zits and blobs on prints:
- Decrease Printing Temperature
- Increase Print Speed
- Increase Retraction Distance
- Increase Retraction Speed
- Printing a vase:
- Activate Spirzalize Outer Contour setting
- Warping on the first layer of prints:
- Use a Brim or Raft
- Increase Line Count (for a Brim)
- Support structures knocked over during print:
- Turn on Z Hop When Retracted
- Increase Support Density
- Use a Brim or Raft
- Droopy overhangs:
- Increase Fan Speed
- Decrease Printing Temperature
- Increase Support Overhang Angle
Conclusion
Overall, there are many different settings in Cura, and all have a purpose and control of a different aspect of how your 3D printer actually prints a 3D model. But learning each and every setting is almost impossible and, to be honest, not very practical.
There are, though, many Cura settings that you should definitely know if you want to be able to solve different print quality issues, whether it’s under-extrusion, stringing, zits, or something else! Make sure you’ve read through each of the settings I went over in the above sections as all can be used to improve your print quality!
Hope this helps!
Related Articles: