

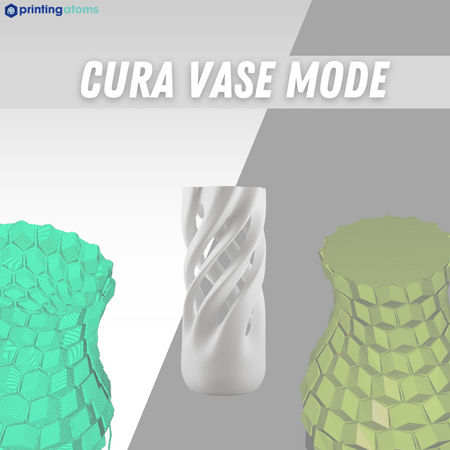
Vase mode is one of the coolest features in Cura and other 3D slicers, and it’s super useful if you like to print vases.
Vase mode is an innovative feature in 3D slicers, including Cura, that can turn any normal 3D model into a vase-like structure. Vase mode can be used to turn models that aren’t supposed to be vases into vases. However, many 3D printable vases also require vase mode to be used, so knowing about the feature is very important.
Today, I’ll be going over vase mode in Cura, discussing why you might want to use it and how to use it!
But before we get to that, it’s worth noting that vase mode isn’t actually a setting in Cura. Instead, vase mode is officially known as “Spiralize Outer Contour” in Cura. But because similar features in other slicers (e.g. PrusaSlicer) are called “vase mode”, that’s the name people use for the spiralize feature in Cura, and that’s what we’ll be calling it in this article.
Now, let’s get to it!
Table of Contents
What is Cura Vase Mode?
Cura vase mode, officially known as “Spiralize Outer Contour”, is a feature that turns solid 3D models in your 3D slicer program into hollowed-out, vase-like structures. In other words, vase mode, once activated, slices your model as if it were structured like a vase.
To use the feature, start by importing a full, solid 3D model that you want to print as a vase. Then, find and activate the “Spiralize Outer Contour” setting in Cura and click “Slice”. Finally, check the layer view mode in Cura to see the result of activating vase mode.
As you’ll see, your once-solid 3D model is now hollowed-out and is structured like a vase.
How Does Vase Mode Work?
Vase mode works in 3D slicers not by changing the actual shape of your imported 3D model but by slicing the part so that it’s 3D printed like a vase. Moreover, when vase mode is activated, the 3D slicer provides printing parameters that will make your solid 3D model printed with only one wall and a solid base but no internal filling or top layers, just like a vase.
In other words, when this slicing mode is activated, your printer lays down the first few layers of the 3D model. But then, with the base down, the nozzle starts to continuously print the outer-most perimeter of the model in a spiral-like manner.
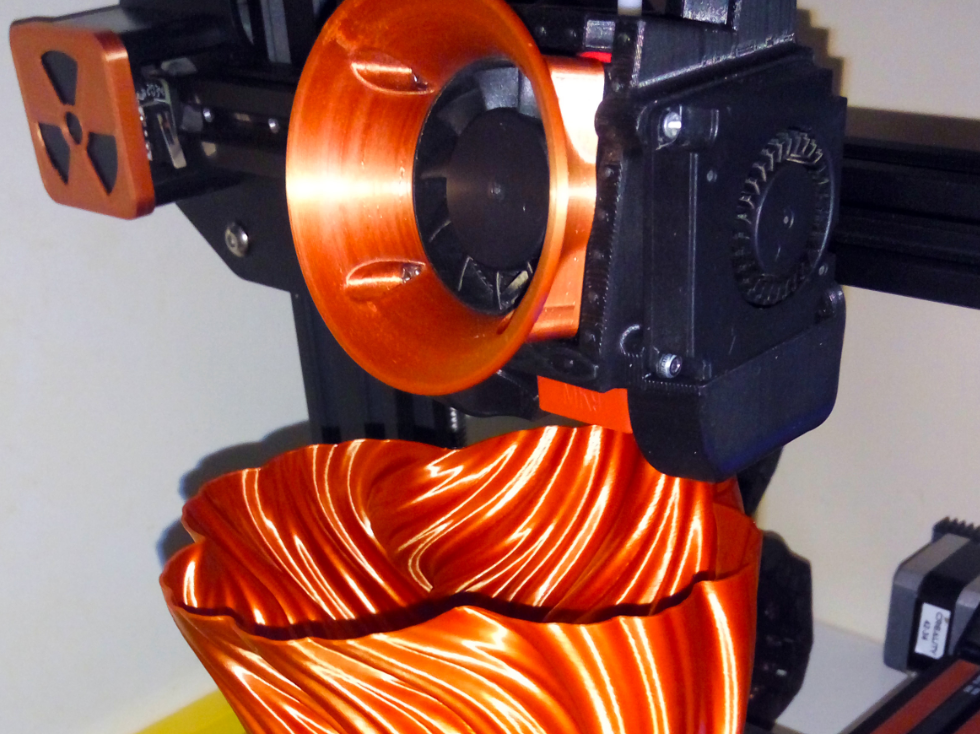
Because of this extrusion method, a majority of the vase-mode-activated model is printed in one continuous motion without any stops or retractions. The result is a very smooth vase-like model that doesn’t have a Z-seam.
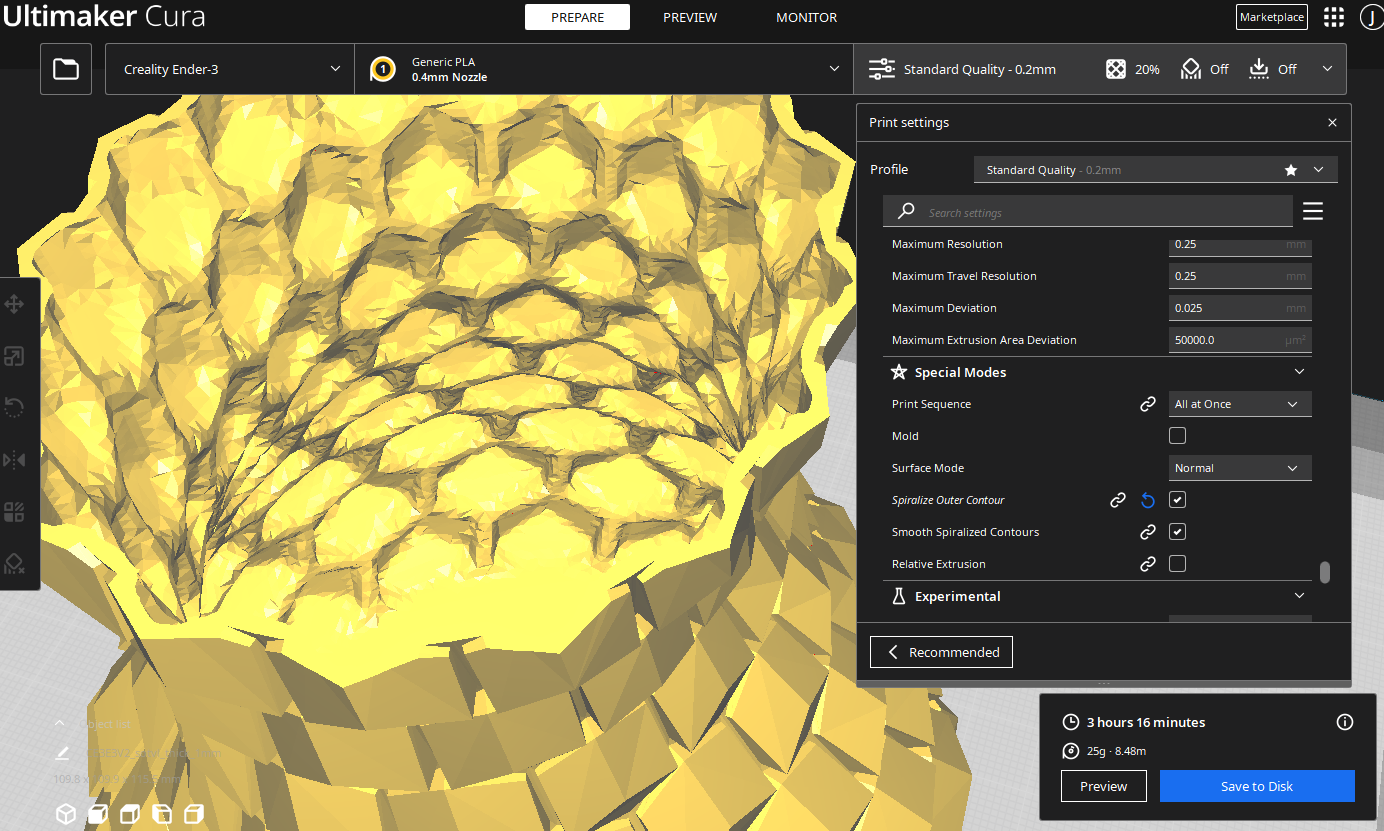
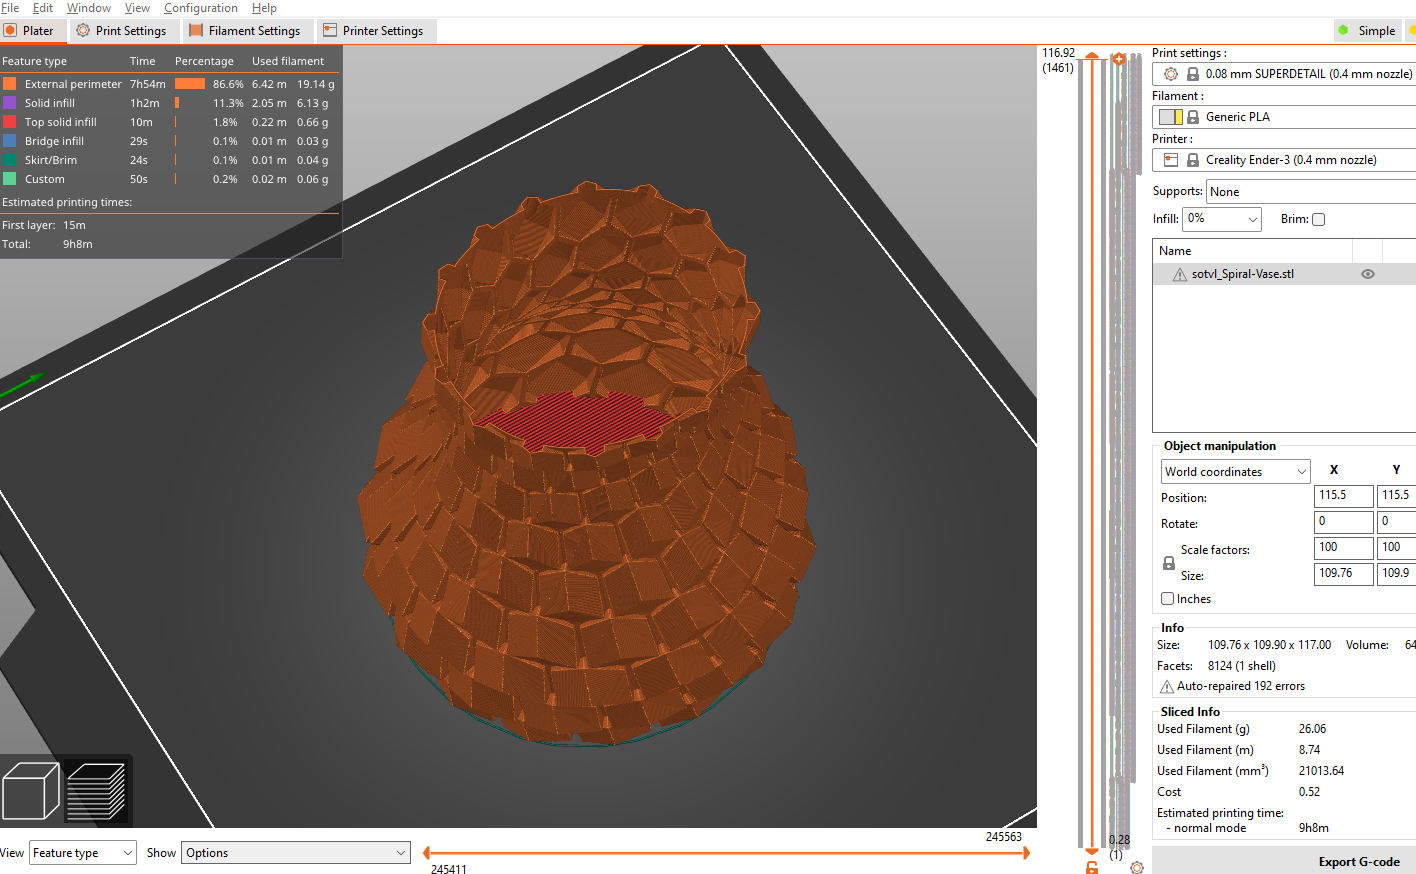
The best way to explain how vase mode works in Cura is with a visual example. Let’s say that I want to print this honeycomb vase, and I want to use vase mode, so I download the solid version of the model.
First, I would import the model into Cura, and the un-sliced 3D model would look something like this:
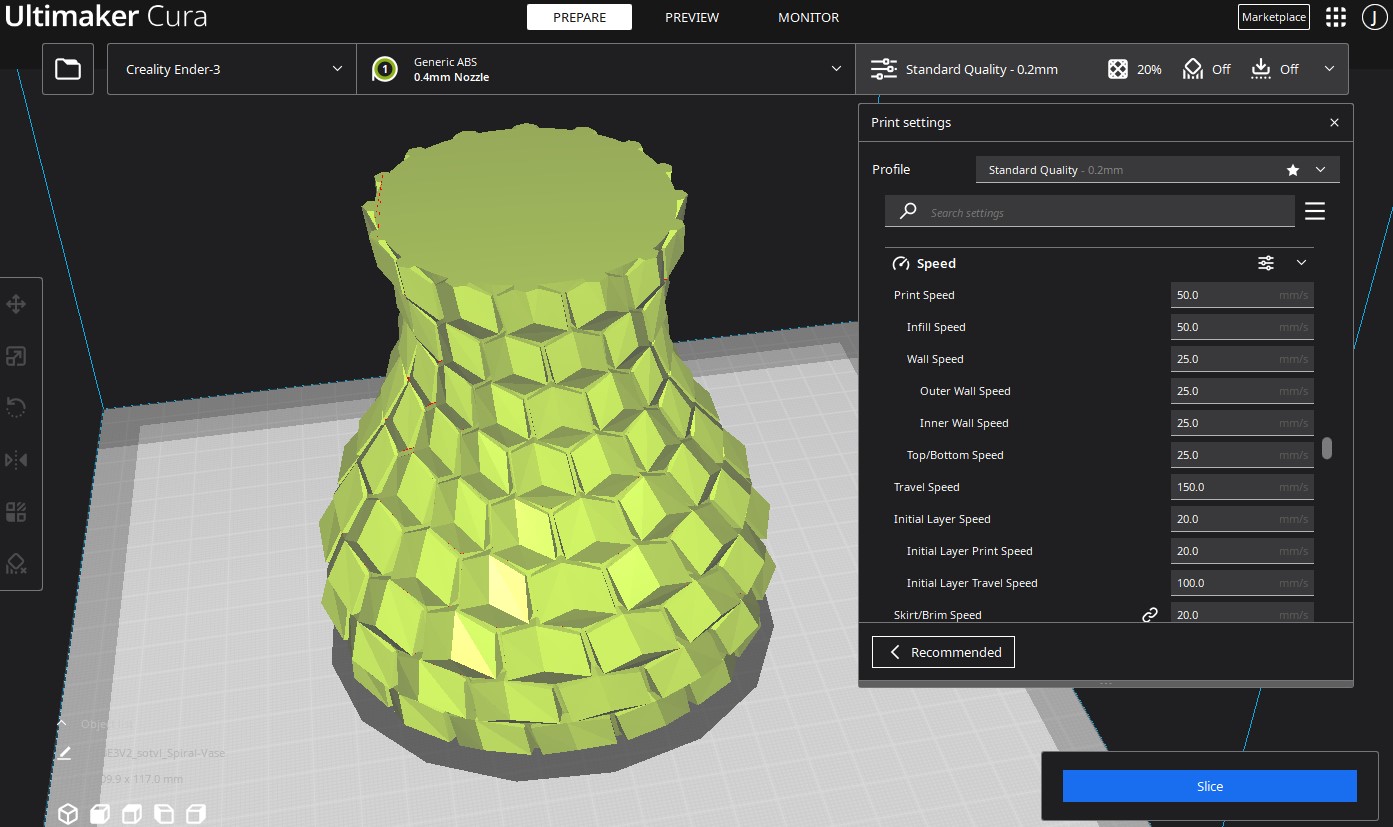
As you can see, the vase model is still 100% solid and doesn’t look anything like a vase structure.
To turn the model into a printable vase, I would find the “Spiralize Outer Contour” setting in the “Special Modes” section in Cura and turn it on. Also, I would make sure that the corresponding “Smooth Spiralized Contours” setting is also activated.
Next, I would slice the model and go into the layer view mode to see how the part would be printed. The G-code visual would look something like this:
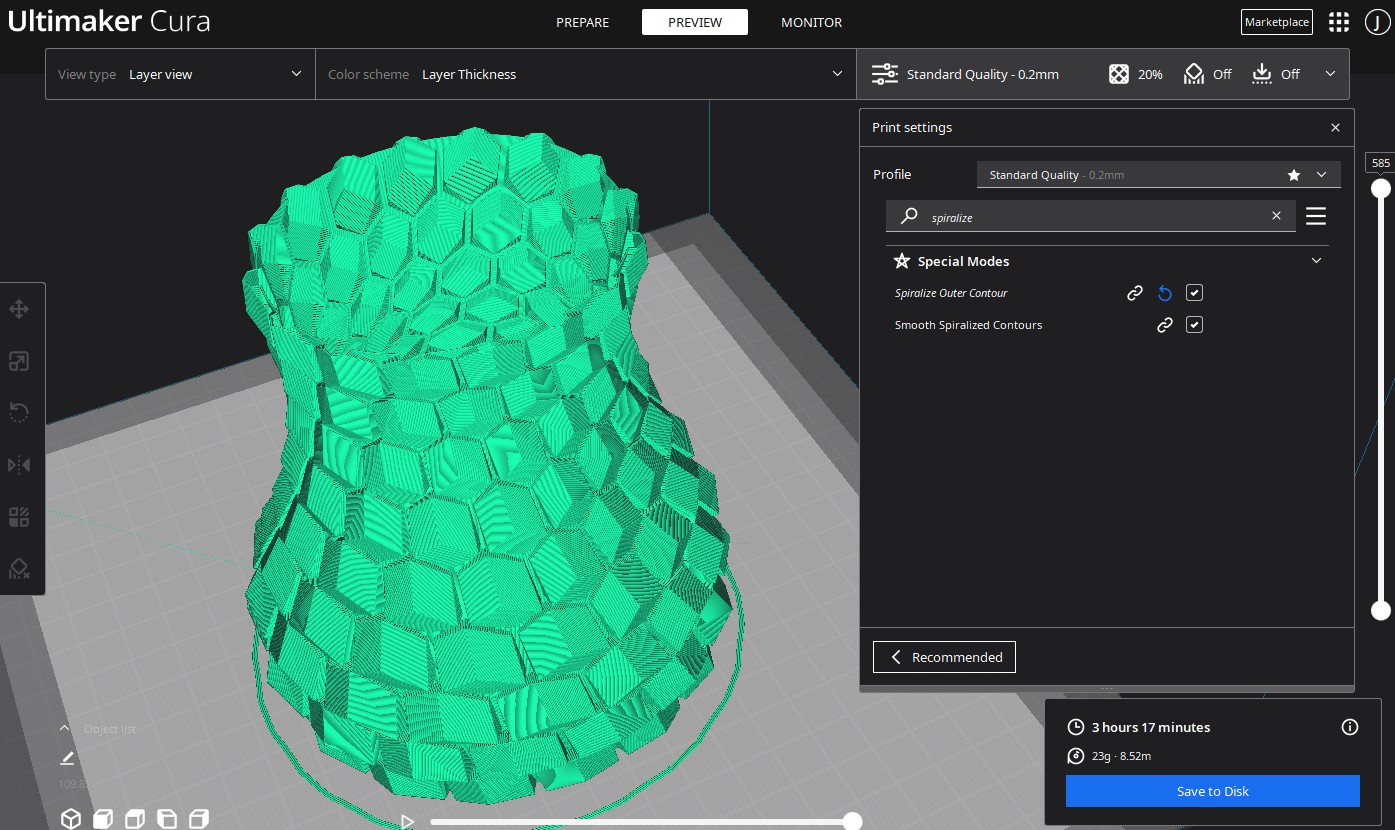
It might be a little difficult to see from this angle, but the model is only one wall thick and has no infill or top layers. It will make for the perfect vase 3D print. And, because of how vase mode prints a model with basically continuous extrusion, the print time is also much lower than if it were to be printed normally.
When to Use Vase Mode
You should use vase mode mainly when you are printing a vase, and the designer has provided a solid version of the model. That’s because it’s easier for slicers to generate a single-wall contour of the model when it’s completely full versus when it’s already designed as a vase.
However, you can still use vase mode with models that are already structured as a vase. For example, let’s say you have a model that is already hollowed out and has thin walls, like this one below:
If you slice it with the “Spiralize Outer Contour” setting activated, the model will still end up being printed like a normal vase mode part, with only one single wall.
But using Cura’s vase mode feature with solid models is still a safer bet because issues with the G-code, such as holes in the vase model, are less likely to occur.
But, besides vases, Cura’s spiralize feature isn’t particularly useful. That’s because not many models other than vases benefit from having only a single wall and a few bottom layers.
Cura Vase Mode Settings

In Cura, there are a few settings related to vase mode that you should adjust to ensure your vase prints are the best possible.
The first and most important setting is “Spiralize Outer Contour”. To enable vase mode, start by turning this setting on!
Once you activate the “Spiralize Outer Contour” setting, another setting will appear right below it, titled “Smooth Spiralized Contours”. This setting is responsible for the continuous extrusion path used for Cura’s vase mode, so make sure to leave it activated (it’s turned on by default).
These are the only two settings directly related to Cura’s vase mode. However, if you want the best vase 3D prints, then you should also consider adjusting the following settings:
Print Speed

The print speed controls how fast the printhead moves and lays down filament. With vase mode activated, you can get away with using higher-than-normal print speeds, like 60, 70, or even 80 mm/s, due to the consistent extrusion from vase mode. If you’re printing PLA or ABS, try using 70 mm/s and see how that works for you!
Nozzle Temperature
The nozzle temperature has a big effect on the flow of filament from the hot end, and the higher the temperature, the faster you can print. If you plan on increasing the print speed, as I recommended in the previous bullet point, make sure to also increase the nozzle temperature.
Layer Height
The layer height controls the spacing between each layer of your 3D print. I like to use a large layer height, such as 0.2 or 0.24 mm, when using vase mode to print models. That’s because a large layer height provides a lot of strength for prints at the detriment of detail. But, because vases don’t usually have a lot of 3D detail anyways, it works out perfectly.
Wall Line Width
The wall line width setting in Cura (and other settings) controls how wide each wall or nozzle pass is. This value should be set to the exact diameter of your nozzle, which is 0.4 mm for most of us. I recommend going into your slicer and just making sure that the wall width equals your nozzle diameter.
Bottom Layers
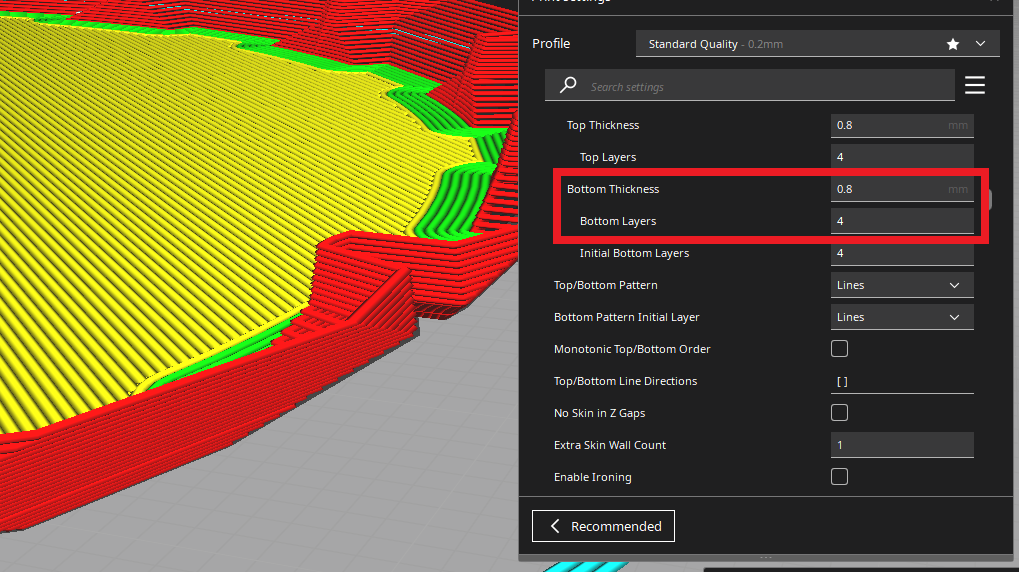
Finally, the bottom layers setting controls how many bottom layers are on your print. This setting is very important when using vase mode because the bottom layers are the only layers that are completely solid on prints. 4 layers for this setting work great, providing decent strength for your vase 3D print while still making it a quick print.
Best Prints for Vase Mode
If you’re wondering what models would look good using vase mode, I’ve provided a few terrific examples below. You can click on the link for each model and download a solid version of the vase that you can slice with vase mode activated.
- Honeycomb Vase
- Low Poly Vase (no solid version available)
- Spiral Vase
- Twisted Heart Vase
- Bloom Vase
Check out our related article the coolest 3D printed vase here to learn more.
Cura Vase Mode vs PrusaSlicer Vase Mode
As I mentioned before, Cura isn’t the only 3D slicer program with a vase mode feature. PrusaSlicer, another very popular 3D slicer program, has a similar feature, known as “Spiral Vase”.
But while the two slicer programs might use different names for what’s commonly known as “vase mode”, the Spiral Vase and Spiralize Outer Contour features are effectively the same.
The only noticeable difference between the two vase modes is that the one on PrusaSlicer uses more bottom layers for prints than Cura. But this can be changed by adjusting the number of bottom layers in the “Horizontal Shells” settings section in PrusaSlicer, so it’s not even a permanent difference.
As such, feel free to use either PrusaSlicer or Cura when printing with vase mode!
Conclusion
If you’re printing a vase, then you need to be using Cura vase mode!
Cura’s Spiralize Outer Contour setting, commonly coined as “vase mode”, slices 3D models in a way so they are printed just like a vase. Moreover, when you turn this setting on and slice your model, only a few base layers and an outer contour of the design will be printed.
Vase mode also makes your printer continuously extrude filament, rather than the typical stop-then-go method. This yields a much smoother and more visually appealing model, which is just what you need when printing vases! Additionally, vase mode significantly lowers the print time for parts!
To use vase mode in Cura, all you have to do is turn on the “Spiralize Outer Contour” setting. But, you can further optimize your print settings for printing a vase by increasing the print speed, setting the desired number of bottom layers, and more!
Enjoy!