

Noticing issues with your printer’s extrusion? Maybe you’re seeing gaps in the layers of your print? Or blobs and zits on the outside of your models?
Well, if slicer settings aren’t fixing your issue, the problem might lie in the extruder! Specifically, I’m talking about E-steps.
E-steps are a hardware setting (not found in the 3D slicer), that determines the number of steps (partial rotations) the extruder stepper motor moves to extrude a certain length of filament. E-steps are commonly overlooked but have a massive impact on the precision of your printer’s extrusion. As such, if the E-steps aren’t calibrated regularly, you might experience under or over-extrusion on your 3D prints.
So if you want to achieve high-quality prints again, then you should calibrate your 3D printer’s E-steps. Calibrating the E-steps on a 3D printer is a bit more difficult than something like setting the printing temperature or changing the filament. But, with the steps I’ve provided, the process should be a breeze and take no longer than 10 minutes.
Let’s get to it!
Table of Contents
What are E-Steps?
E-steps, also known as extruder steps, is a hardware setting related to the extruder motor on your 3D printer. The E-steps setting controls how many steps that the extruder motor should take to achieve extrusion of a certain length of filament.
For reference, the term “steps” refers to the partial rotations that a stepper motor can make. Moreover, stepper motors don’t rotate freely; instead, they use incremental steps. For example, most 3D printer stepper motors operate at 200 steps per full rotation. So, if you needed to move the motor one-half rotation, the motor would rotate by 100 steps.
It’s also worth mentioning that E-steps can typically be controlled through your printer’s LCD, but you can also view and change this setting by editing your 3D printer’s firmware or manually sending G-code commands through a G-code terminal. However, you cannot view or change the E-steps through your 3D slicer, so keep this in mind.
Finally, I just want to point out that the term “E-steps” is specific to the extruder motor. In fact, every stepper motor on your 3D printer has its own “steps” setting. For example, the X-steps setting controls how many steps your machine’s X-axis motor needs to rotate to move the printhead a certain distance along the X-axis.
Why Calibrate E-Steps?
One of the main reasons to calibrate your E-steps is to ensure that your printer is using the correct amount of filament for each layer. Furthermore, if the E-steps are not calibrated correctly, the extruder may use too much (over-extrude) or too little (under-extrude) filament.
Moreover, when your printer is under-extruding (E-steps are too low), your prints might have gaps in the layers. This not only hurts the visual quality of your model, but it will also make the part a lot weaker and more brittle than it should be.

On the flip side, if the E-steps are set too high, your printer will naturally over-extrude on 3D prints. This will result in zits, blobs, and other excess filament defects appearing on your model, which, of course, makes your model look worse.

Another reason to calibrate your machine’s E-steps is to improve your printer’s dimensional accuracy. Whether the E-steps are too high or too low, when the setting isn’t calibrated, your prints won’t be as dimensionally precise as they should be. This is especially harmful to functional 3D prints that need to fit around or inside another part.
So, unless you want ugly, rough, dimensionally-inaccurate 3D prints, make sure you calibrate your printer’s E-steps!
Tools & Materials Needed
You don’t need much to calibrate the E-steps on your 3D printer. I’ve gone over the supplies, both physical and digital, that you’ll need to have for this process in the sections below:
Computer with Slicer Software
First off, you’ll need a computer (e.g. laptop, PC) with 3D slicer software. I personally recommend using Ultimaker Cura as it’s free, compatible with a plethora of different 3D printers, and offers tons of adjustable settings. However, basically, any 3D slicer software will do, such as PrusaSlicer, Simplify3D, Slic3r, and IdeaMaker.
Also, if your 3D printer doesn’t have an LCD interface with a way for adjusting your machine’s E-steps, then you’ll also need a G-code terminal. G-code terminals allow you to manually send G-code commands (instructions) to your printer’s motherboard, and you can send specific commands for adjusting your machine’s E-steps, among other things. Some popular G-code terminals include Pronterface (AKA Printrun), MatterControl, and OctoPrint (it has a built-in G-code terminal).
Filament
Of course, to test and calibrate your printer’s E-steps, you’ll need filament. Make sure that the filament you’ll be using to calibrate your machine’s E-steps is the same one that you plan on printing with post-calibration. Also, make sure this filament ISN’T flexible; that means no NinjaFlex or other TPU or TPE materials.
Permanent Marker
Next, you’ll need a permanent marker. Make sure the marker is of a different color than your filament. I like to use a black Sharpie, but any sort of non-erasable marker should be fine.
Caliper

Lastly, and perhaps most importantly, you’ll need a caliper. If you’ve never heard of a caliper, it’s basically a tool that can take precise measurements.
I suggest using a digital caliper as I find they are better for the purpose of calibrating 3D printer E-steps, but if you prefer an analog one, that will do just fine. If you don’t have a caliper, though, below are a few great options that don’t cost too much and are very accurate and precise:
Also, I want to note that, if you’re like me and are always looking for a deal, don’t fall for a trap and get a janky plastic digital caliper, like this one. These plastic calipers are absolutely terrible and it’s way better to just spend the extra $10 and get a high-quality one.
Finally, for anyone thinking they will get away with using a tape measure, let me stop you right there. While tape measures are great for woodworking on general household carpentry, they won’t be useful for calibrating your 3D printer. That’s because modern 3D printers are simply way too precise and accurate, so you need a measuring device that’s equally so, and a generic tape measure just isn’t!
How to Calibrate the E-Steps on 3D Printers (8 Simple Steps)
Once you’ve got everything you need, it’s time to get started! I’ve gone over each step of the E-step calibration process in the sections below.
It’s important to note that this process is mostly universal between different printers, no matter their extruder configuration, hot end, or other hardware components.
1. Check Current E-Steps
First, we’ll need to check the current E-steps setting on your 3D printer. We’ll use this value in our calculations later.
To find your printer’s current E-steps value, first power on your 3D printer and make sure the LCD is working. On the LCD’s main menu interface, go to the tab titled “Control”, and then click “Motion”. Note that the names of the settings and menu buttons will vary printer-to-printer depending on what firmware the machine is running.
Here, you should see a setting named “E-steps/mm”. Record the current value, and don’t change it. That comes later!
Also, if your printer doesn’t have a functional LCD, don’t worry! You can find the current E-steps by sending the “M92” G-code command to your printer.
To do this, simply open up a G-code terminal software on your computer, connect your computer to your printer’s motherboard (via USB), and send the “M92” command. There should be a response, containing all of the step setting values for your printer’s motor. The one with the letter “E” is the current E-steps value.
2. Insert Filament into Extruder

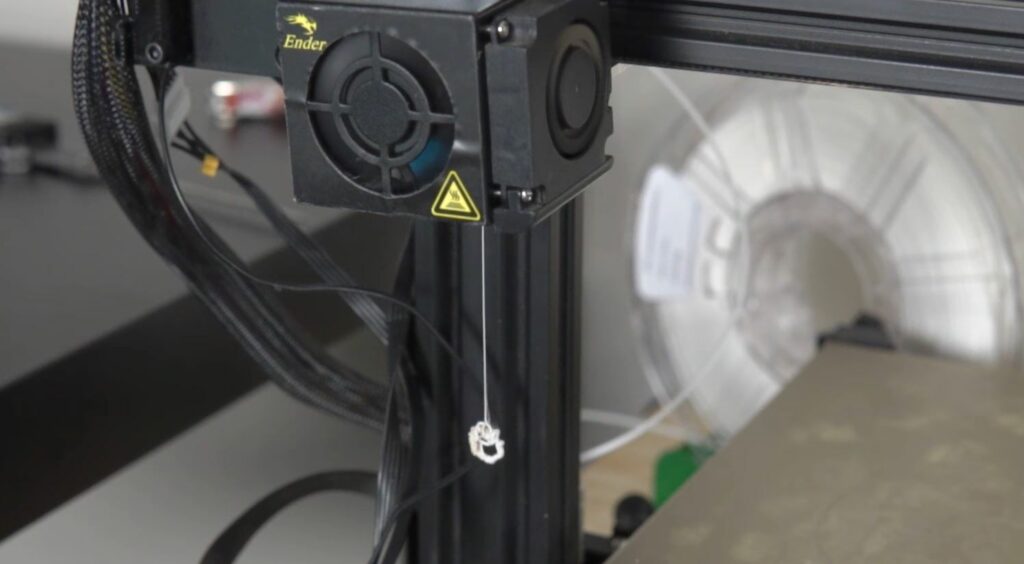
Next, make sure your filament is inserted into your printer’s extruder. Once loaded into the extruder, pull the extruder level and manually push the filament through until you see it coming out of the nozzle. Of course, to do this, you’ll need to heat up the nozzle to your normal printing temperature.
3. Measure and Mark Filament
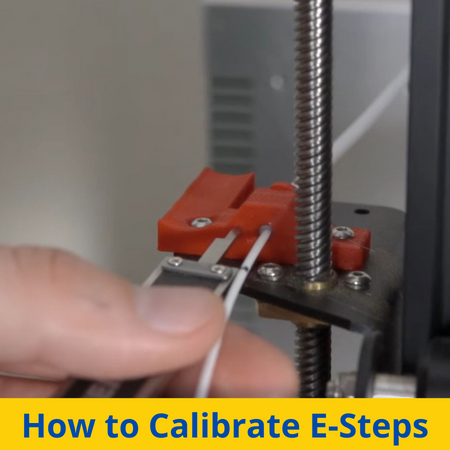
With your filament loaded into your printer, take out your caliper and Sharpie (or whatever permanent marker you’re using). With the caliper, measure a distance of 100 millimeters from the entrance point of the extruder and mark the point with your Sharpie.
I’ve provided an image of what I mean below:

(except don’t use a ruler; use a caliper)
And, if you have a Bowden-drive 3D printer (e.g. Ender 3 V2), make the marking 100 mm away from the entrance point of the Bowden, side-mounted extruder assembly.
4. Extrude Filament
Next, go to your printer’s LCD and navigate to the “Prepare” page. Then, click “Move Axis”, “Move 1 mm”, and then “Extruder”.
Now, rotate your printer’s LCD knob (or click the up arrow) to extrude exactly 100 mm of filament. The current number should be 0, but if it’s not, don’t worry; just increase it until it’s 100 mm more than it was before.

Once at 100 mm, go back to the LCD menu so you don’t accidentally move the knob more. Now, wait a minute or two until the extruder stops moving.
5. Measure Difference

After the extruder stops moving, look to see how much filament was extruded. To do this, find the Sharpie mark you made earlier and compare its position relative to the entrance point of the extruder.
Ideally, the marking should be lined exactly at the entrance point of the extruder assembly. But, if you’re reading this article, chances are, it’s not.
Furthermore, if there is a noticeable gap between the marking and the extruder, then this means your current E-steps value is too low. And, if you can’t see the marking on the filament, this means that it’s inside the extruder assembly and that your E-steps value is too high.
Using your caliper, measure the distance between the marking and the entrance of your extruder assembly. Obviously, this is a bit difficult if your printer over-extruded the 100 mm because you can’t really see the marking but just try your best.
Now, use this number to determine the actual length extruded. For example, if your printer under-extruded the 100 mm by 5 mm, then the actual length extruded would be 95 mm. And, if your printer over-extruded the amount by 3 mm, the actual filament extrusion would be 103 mm. Record this number.
6. Calculate New E-Steps
Next, we need to calculate your new E-steps value. To do this, we’re going to use the equation below:

For example, let’s say that my current E-steps value as 93.00, and my actual filament extrusion amount was 95 mm. Then, after doing the math, I would arrive at a new E-steps value of about 97.90 (rounded up). On this note, I suggest rounding the number up to two decimal places.
Record your new E-step value!
7. Change E-Steps Value
Now, it’s time to change the E-steps value. Just like we did in the first step, on your printer’s LCD, go to “Control”, then “Motion”, and find the “Esteps/mm” setting.
Click the E-steps setting on your printer’s LCD and set it to the new E-steps value we found in the previous step.

Once you’re done with that, save the new setting by clicking the “Store Memory” button on your printer’s LCD. This will save the value to the motherboard’s EEPROM (offline storage).
8. Test and Repeat
Now that we have set a new E-steps value, it’s time to test it!
You can do so by re-doing the original E-steps test we went over. You’ll know that you got it right if the Sharpie marking on your filament matches up with the entrance point of your printer’s extruder.
If you still see a gap or a difference, then repeat the steps we went over to re-calibrate the E-steps setting. It shouldn’t take too long, especially once you get the hang of it!
Finally, once you’ve got the perfect E-steps setting, load a test model into your 3D slicer, slice it, and print it! Now you shouldn’t see any over or under-extrusion on your print. And, if you do, at least now you know it’s not due to a miscalibrated extruder motor.
Bowden VS Direct Drive
One important thing to note is that E-steps will vary significantly (relatively) between printers with Bowden extruders and those with direct drive. And, if you’re wondering about the difference between these two extruder configurations, I’ve explained it here!
First up, a Bowden extruder configuration separates the extruder assembly (including the extruder motor and drive gears) from the printhead, specifically the hot end. Filament flows between these two assemblies through a PTFE tube, also known as a Bowden tube.
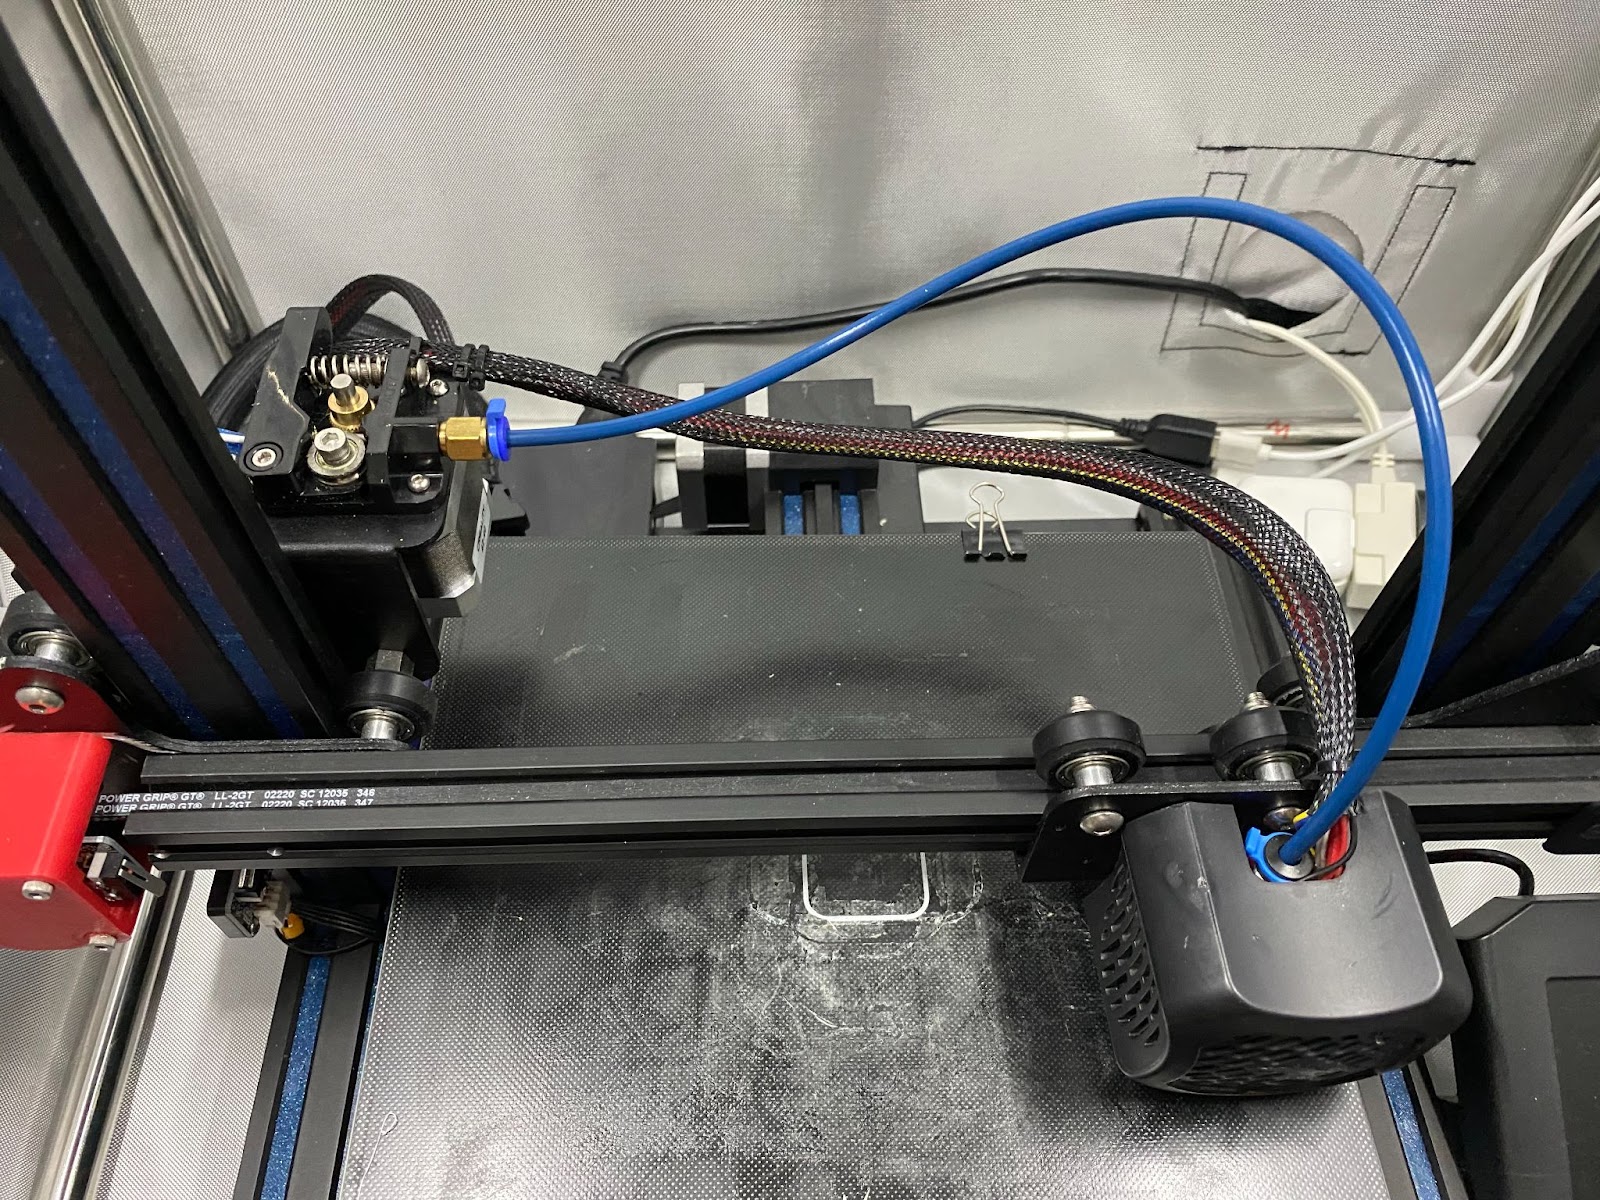
On the other hand, direct drive extruders have the extruder assembly placed directly over the hot end. This means the extruder is attached to the printhead, and, because there is only a very small gap between the extruder and hot end, a long PTFE tube isn’t required.
Bowden setups are common on older, budget 3D printers, like the Creality Ender 3 and Ender 3 V2, but direct drive printers are on the come-up. And, while both extrusion systems print similarly, it’s worth noting that Bowden-drive printers typically require a higher E-step value than direct-drive machines.
Check out our related article on the differences between bowden and direct drive extruders here to learn more.
Conclusion
While you won’t find E-steps in your 3D slicer, this setting is still extremely important to the performance of your 3D printer.
When the E-steps are too high, your 3D printer will over-extrude prints, leaving zits and blobs on the outer surface of the model. And, when the E-steps are too low, your prints will be under-extruded, making them very brittle and leaving gaps in the layers.
To ensure that neither of these possibilities happens, I strongly recommend that you regularly calibrate your 3D printer’s E-steps. Now, you don’t have to calibrate the E-steps every day, but doing so every few months doesn’t hurt.
And, don’t worry because calibrating your machine’s E-steps, while it seems complex, is actually pretty easy. All you have to do is mark off a certain length of your inserted filament, extrude that distance, and perform a small calculation. Then, just change the E-steps value, either through your printer’s LCD, a G-code terminal, or the motherboard’s firmware, and you’re good to go!