

Wouldn’t it just be terrific if you could send a model to your 3D printer and it comes out perfectly?
Yes, it would!
Too bad…
That’s just not how it is. Instead, you have to fiddle around with different printing parameters, known as slicer settings, which control how your model is printed. Every time you change a setting, the resulting model will also slightly change. The more settings you control, the more complex the tuning process becomes, but also the higher quality your models can be.
If you just use the default slicer settings, such as the one that Cura offers for the Ender 3 (Pro/V2), your prints will come out fine. But, if you want to take your models to the next level in terms of quality, you have to spend hours and hours tuning your settings.
Orrrrrr…you can copy the slicer settings of someone else who went through this very intensive process. Hint, hint, we already did it for you!
In this article, I’ll go over the best Cura settings for the original Ender 3, Ender 3 Pro, Ender 3 V2, and Ender 3 S1. for printing PLA filament. I can assure you that, if your printer is built right and your filament isn’t terrible, these settings will bring you amazing prints. I’ve personally spent years and many spools of filament fine tuning this profile so that you don’t have to.
Table of Contents
What is the Perfect Ender 3 PLA Profile?
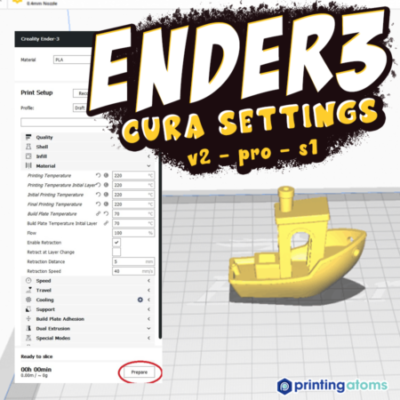
So let’s just get to the point: what is the perfect slicer profile for printing PLA on the Ender 3? In the bullet points below, we’ve debriefed the main settings so you can quickly copy them into your Ultimaker Cura slicer profile and start printing.
- Nozzle temperature: 205-210 °C
- Bed temperature: 60 °C
- Layer height: 0.2 mm
- Print speed: 55 mm/s
- Retraction: 5 mm @ 50 mm/s
- Infill density: 20-30%
- Infill pattern: Cubic
- Initial layer settings:
- Nozzle temperature: 210-215 °C
- Bed temperature: 65 °C
- Print speed: 20 mm/s
- Fan speed: 0%
- Adhesion assistant: Brim (4 walls)
So, if you don’t have time to read the explanations of why I have each setting at what value, take this and get started! I promise you’ll love it! But, for those a little more interested…or skeptical… read on as I explain how I landed on the values I did.
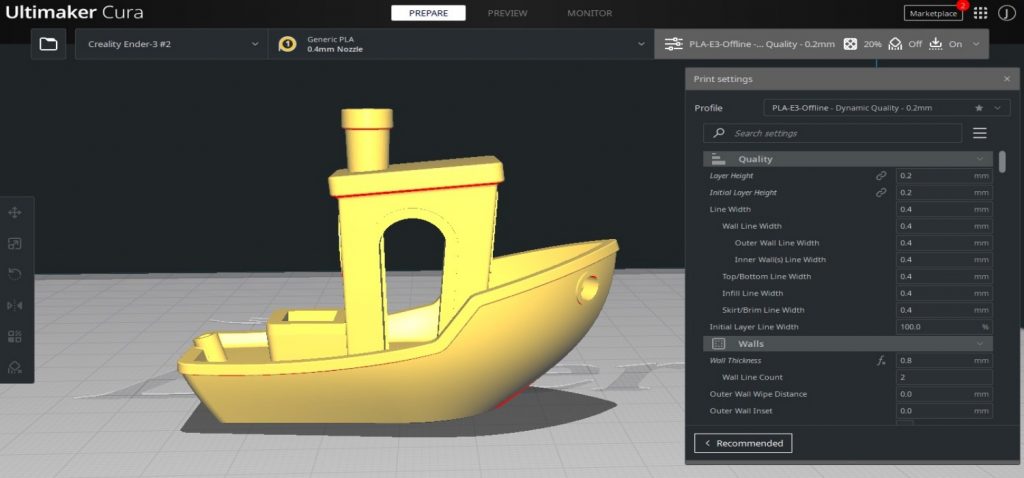
How to Set Up Cura for the Ender 3?
Before we get into the explanations, though, it helps to learn how to set up Cura for your 3D printer, which, in this case, is the Ender 3 (Pro/V2/S1). Luckily, Cura is open-source, meaning it is, to some degree, developed by the community. And, because the Ender 3 is so popular, there’s a pre-made slicer profile for the original Ender 3, Ender 3 Pro, Ender 3 V2, and Ender 3 S1.
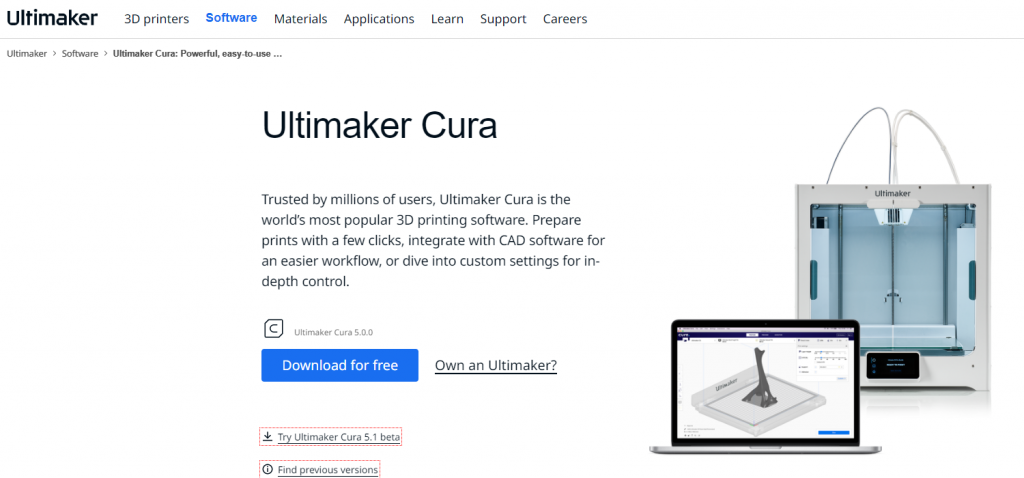
So, first you’ll want to install Ultimaker Cura (it’s free!) from the download page on Ultimaker’s website. Then, after skipping through the tutorial, click “Add Printer” and look for the “Creality” category.
Click the drop-down arrow next to “Creality” and find your version of the Ender 3. If, for some reason, your specific version isn’t there, just click another version of the Ender 3 because the slicer profiles for the original, Pro, and V2 are basically the same.
And that’s it!
Best Cura Settings for the Ender 3 (V2/Pro/S1)
Now for what we’ve all been waiting for (or at least me): the explanation of the settings I suggested in the earlier section. As I mentioned, these settings are meant for the Ender 3 (Pro/V2/S1) when printing regular PLA filament.
Slight modifications may need to be made for other printers or when using special blends of PLA filament like wood PLA.
In the following sections, I’ll go over each main setting and why I have it at the value I suggested. Enjoy!
Hot End Temperature
The first setting is the hot end temperature, which I also call the nozzle temperature. I consider this setting the single most important setting of any slicer profile because it directly impacts the extrusion of filament, which is how 3D printed parts are actually printed.
Too high of a hot end temperature will cause over-extrusion because the excess heat will push an excess filament out of the nozzle. This will leave your model with unwanted marks and blobs along the exterior surface. But you can’t go too low or else you’ll experience under-extrusion, where the layers of the print have gaps and aren’t what they’re supposed to be.
On the side of most PLA filament spools, you’ll find a suggested range between 180-220 °C. A 40 °C range of freedom is just way too much, so I’ve narrowed it down to just 5 °C.
205-210 °C works for every different brand of regular PLA filament I’ve ever used, providing enough heat to properly melt the filament and make parts strong, but not too much to where over-extrusion occurs. I recommend starting on the low end (205 °C) and increasing it if you see any signs of under-extrusion.
Bed Temperature
If you ever have any bed adhesion issues, the bed temperature is a great tool that you can use to fix them, which is why it’s such an important setting to get right.
Most manufacturers of PLA filament state that you can print parts without using a heated bed. While this is technically true, you can achieve much better prints and run into fewer problems if you use a heated bed.
Luckily, all versions of the Ender 3 come with a heated bed, so it’s no big deal.
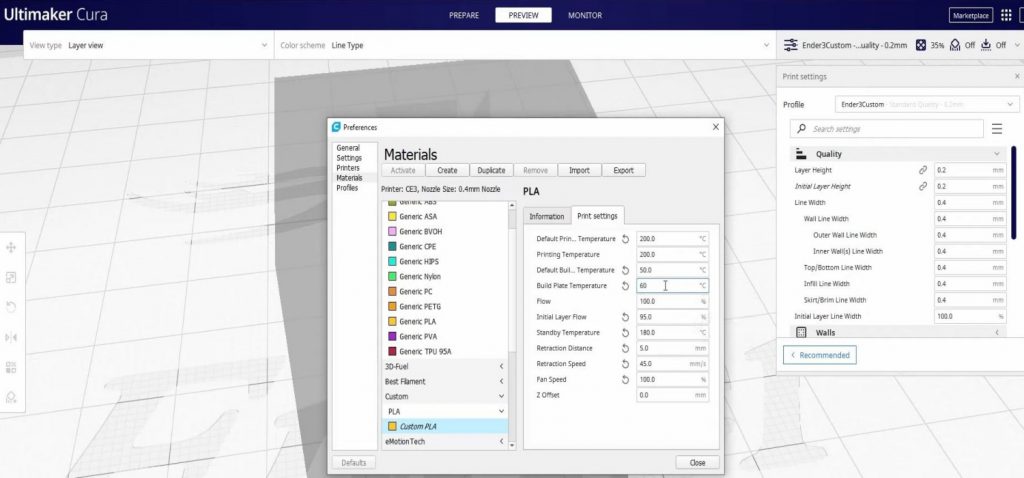
60 °C is my go-to setting for the bed temperature for whatever brand of PLA filament I’m using. I don’t even do a range because this setting works great basically every time.
However, if you notice some expansion on the bottom layer of your model (elephant’s foot), then try going down as low as 50 °C. But, on the flip side, I wouldn’t recommend going above 60 °C. That’s because, at this point, your bed adhesion issues are caused by poor bed leveling or an incorrect Z-offset value rather than a lack of heat on the print surface.
Layer Height
Layer height defines how much, along the Z axis, the nozzle moves up after each layer. The higher the layer height, the fewer layers in a model because each layer will be more separated and thicker. As such, larger layer heights will produce stronger models because the fewer layers mean there are fewer places for the model to break.
However, small layer heights are better for getting more detail in prints. That’s because the extra layers used on the model give the printer space to fit in smaller features on a 3D model. Sadly, a small layer height also means prints will take longer.
For general purpose printing on the Ender 3, I recommend using a layer height of 0.2 mm. This value provides a decent amount of strength while still achieving respectable detail on the print.
But, if you need a print to be extra strong, like for a camera mount, you should increase the layer height to 0.24 or 0.28 mm. And, if you’re printing miniatures where you want as much detail as possible, try using a 0.12 or 0.16 mm layer height.
That said, we recommend a resin 3D printer for printing miniatures.
Just note that you can’t use too high of a layer height without increasing the nozzle size. You can learn more about the relationship between nozzle size and layer height in our info article all about it!
Print Speed
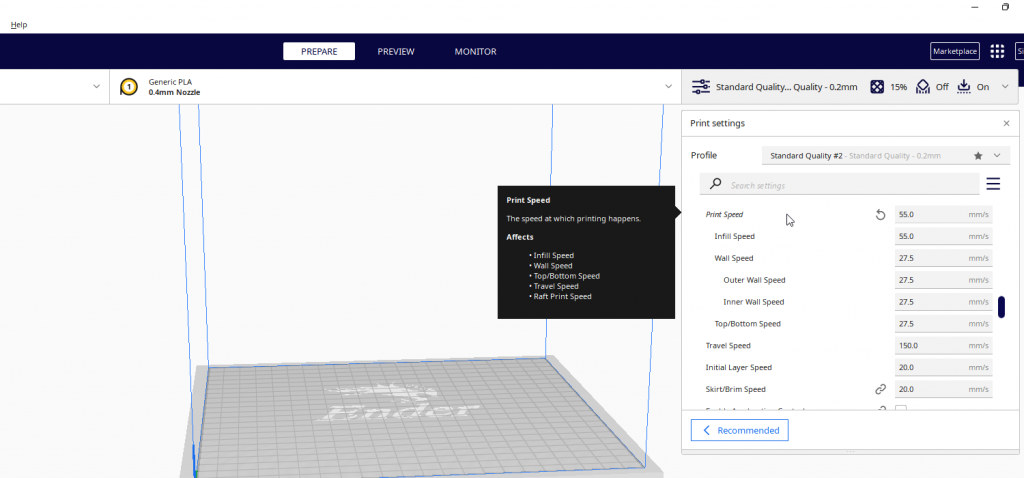
The faster you cook, drive, or do really anything else, usually, the worse you are at it. The same is true for your Ender 3 (and other 3D printers).
The higher the Ender 3 print speed, which is how fast the nozzle moves around the bed while printing, typically the worse the quality of the model. For printing PLA, I’ve found that 55 mm/s works great, giving you not-too-long print times while also yielding high-quality prints.
Note: The initial layer speed is 20 mm/s print speed.
Of course, 55 mm/s isn’t as fast or sexy as the 100+ mm/s speeds that more cutting-edge printers, like the Voron 2.4, can achieve. But, you have to remember that the Ender 3 (Pro/V2/S1) is a budget 3D printer, and the stock parts on the machine aren’t meant to run this fast without significant drops in print quality.
However, if you want to try to test your Ender 3 a little more, and up the print speed, just remember to also change the hot end temperature accordingly. Moreover, with every increase in print speed, you need to give the nozzle more heat so it can more quickly melt the filament.
Retraction
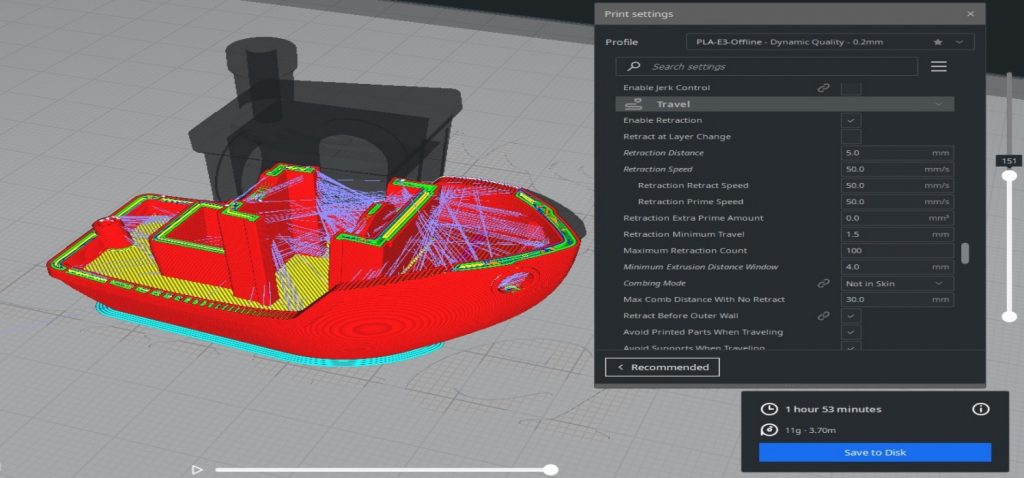
When filament is pushed through the hot end, pressure builds up, causing the melted filament to continue out the nozzle even when the extruder stops pushing.
Retraction is a setting that helps prevent this by reversing the extruder motor so a small amount of filament is pulled back. This results in a higher-quality exterior surface on prints because you won’t have over-extrusion or stringing.
The original Ender 3, Ender 3 Pro, and Ender 3 V2 are all Bowden-drive printers, meaning you have to use more intensive retraction settings compared to direct drive printers. I’ve found that a retraction distance of 5 mm with a retraction speed of 50 mm/s works perfectly. On this note, retraction for the Ender 3 S1 should be 1.0-2.0 mm at 40 mm/s (retraction speed). With these values, along with my suggested nozzle temperature and print speed, I haven’t had any stringing issues on any of my prints.
But, if you still have stringing, try lowering the nozzle temperature by 5 °C and increasing the retraction distance in increments of 0.2 mm until you hit 6 mm. That’s because, if the retraction distance gets too high, you’re a lot more likely to experience hot end jams.
If you also want to add auto bed leveling to your Ender 3, the first step is finding and buying the right sensor. My positive experiences with the BLTouch make this option my personal favorite. However, for an even easier installation experience, the CR Touch is the better way.
Infill Density
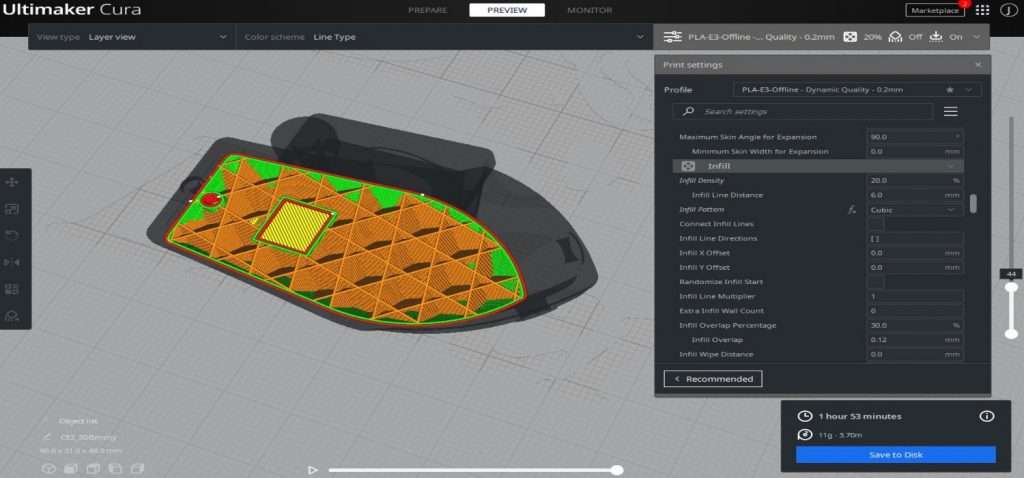
Infill is a feature on 3D prints that allows you to control how solid a part is, something you can’t do with traditional manufacturing processes.
So, if you want a stronger, heavier, and more solid part, you should increase the infill density. However, note that the higher this density value, the longer prints take and the more filament is used.
I’ve found that 20-30% is an effective infill density that provides a great mix between part strength and material usage. However, don’t be scared to go all the way up to 100% for the infill density if you’re printing a part that you want to be stronger or more solid. On the flip side, an infill density of 0% is also possible if you want a hollow model.
Infill Pattern

While the infill density is very important, don’t sleep on the infill pattern. The infill pattern defines the internal structure of the model and is how your printer achieves the set infill density.
There are a few different infill patterns offered by Cura, like triangles, grid, rectilinear, gyroid, and more. But the difference between these patterns isn’t just their names- they vary in how fast they’re printed, the level of strength they provide, and more. The ideal infill pattern is one that provides three-dimensional strength so parts aren’t brittle, doesn’t take too long to print, and, as a bonus, looks cool.
The cubic infill pattern meets these standards which is why I recommend this infill pattern for all types of prints, whether it needs to be strong or not. However, for the most visually appealing infill pattern, check out Cura’ gyroid option as it looks spectacular.
Initial Layer
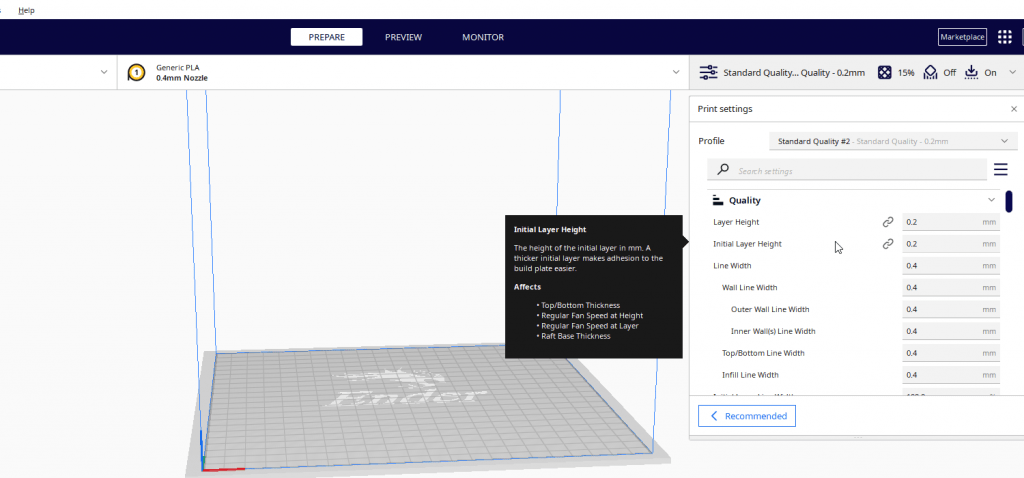
Finally, it’s important to talk about the settings that you should use for the initial layer. The first layer is undoubtedly the most important layer of a print. That’s because if it doesn’t come out right, your print job will likely fail as the following layers rest on the first one.
The overall strategy for the first layer settings is to be as conservative as possible and not push your printer’s limits. As such, I like to print my first layer with a 20 mm/s print speed for PLA so everything comes out nice.
Also for the first layer, I use a raised nozzle and bed temperature of 210-225 °C and 65 °C, respectively. This provides ample heat for strong print bed adhesion. I use a 0% fan speed so the cooling fan doesn’t mess up the filament coming out the nozzle.
Lastly, I use Cura’s brim feature which we go over in our article about rafts, brims, and skirts. This feature further improves the bed adhesion for the model.
How to Test Settings?
Now that you have my fine-tuned settings for printing PLA on the Ender 3, you might be dying to finally print some models and see the results. But I wouldn’t recommend trying out your new slicer profile on the first model that strikes your eye or a 24+ hour model that you actually want because there’s always a chance of failure whenever you change the settings.
Instead, it’s best to test any new print settings on a test model.
Test models are simple 3D designs that don’t consume too much filament or time, and are an easy way to see the effects of the new settings. You can inspect their features once printed and see what slight changes to the slicer settings you need to make.
A simple search query on Thingiverse of “test print” will give you thousands of models to choose from. A few of my favorites include the iconic 3DBenchy, XYZ calibration cube, and the intensive all-in-one test print.
Once you print the test model and verify that it looks good, then you can start printing whatever you want without worry!
Conclusion
Whether you just got your Ender 3 (Pro/V2/S1) or you’re trying to achieve the best print quality possible, using a fine-tuned slicer profile is a good idea. But don’t waste your time making teeny-tiny adjustments to each setting and testing all of them.
Instead, take advantage of the work we did for you and try out our fine-tuned slicer profile for printing PLA filament on the Ender 3.
I hope you get the best prints possible with this profile. However, if it’s not perfect the first time, don’t fret because most print quality defects can easily be solved. Just use the test prints and take advantage of the supportive 3D printing community online to help you!
Related Articles: