

Dual extrusion on 3D printers means using two filaments at once, allowing you to achieve multi-color prints or prints made of multiple materials.
Not only can this be a super useful capability for printing models where the visual appearance matters a lot, like cosplay items, but being able to make multi-material parts can come in handy for mechanical applications. For example, a half-TPU and half-PETG part would be both very rigid and strong, while also being flexible and impact resistant.
The Creality Ender 3 is one of the most popular and upgrade-able consumer-grade 3D printers out there. While the Ender 3 comes in a single-extruder configuration, you can upgrade it to add another extruder to enable these capabilities.
Want to learn how? Read on for a few different methods and guides as well as some other information!
Table of Contents
Is It Possible To Upgrade Ender 3 to a Dual Extruder?
So, is it possible to upgrade the Creality Ender 3 to a dual extruder 3D printer?
Yes!
The Creality Ender 3 is an open-source 3D printer, meaning the printer’s designs, firmware, and other specs are publicly available. This makes the Ender 3 super easy to upgrade and modify, leaving room for companies and individuals to create dual extruder upgrades for the Ender 3 that you can install yourself.
Why Upgrade to Dual Extruder?
Even though it’s possible, you might wonder why you should consider upgrading to a dual extruder on your Ender 3.
Well, most importantly, you’ll be able to create multi-color or multi-material models. This means you can skip the painting process, which can be pretty time-consuming, as prints will already be printed with your desired color scheme as long as you design the multi-color model correctly.
Having a second extruder also allows you to push off maintenance to your printer, providing more uptime for your printer. Moreover, if one extruder breaks on the machine, you can switch to the other one to continue printing without an issue.
Upgrading your Ender 3 into a dual extruder 3D printer will also save you money. Instead of buying a new dual extruder 3D printer, you can upgrade your existing Ender 3 and save half as much.
There are also many other more niche and personal reasons you may want to upgrade to dual extruders on your Ender 3, such as if you are trying to print a half-flexible,-half-rigid part and want to print both TPU and PETG at the same time.
Upgrade Options:
Now that you have some motivation to add a second extruder to your Ender 3, let’s get into the options. There are a handful of products and projects that you can use to add a second extruder, or dual extruder capabilities, to your Ender 3.
We’ll go over some of the best options in the sections below, discussing how each one works and some more information about them. Enjoy!
DIY Chimera Project
Our first Ender 3 dual extruder upgrade method is through the DIY Chimera project. This project relies on an E3D Chimera hot end to allow you to print multiple filaments at once. If you’ve never heard of the E3D Chimera, it’s a hot end with two entry and exit holes, developed by the popular hot end manufacturer, E3D.
Of course, on top of adding a second hot end with the E3D Chimera product, you’ll also need to purchase and set up another extruder to push filament through the other nozzle. You’ll need to do a lot of setups to get the Chimera and extruder to work, including 3D printing and adding a custom mount to attach the hot end to the printhead carriage. You’ll also have to switch to a larger motherboard that has more extruder, thermistor, and heater cartridge ports to support the new electronics for this upgrade.
Although installing this upgrade will certainly not be easy and will require a decent amount of hardware (hot end, 3D printed parts, screws, PTFE tubing, etc.), it gives you all of the capabilities of two extruders. Moreover, the E3D Chimera combined with a second extruder means you basically have two printers inside of one. As you might expect, this upgrade is pretty pricey, but many users think the cost is worth the advantages it brings.
Multi-Material Y Joiner
Our second method is a multi-material Y joiner and this option is very straightforward. As the name indicates, this method involves using a Y-shaped connector that goes above the Ender 3’s stock hot end. The Y-shape allows you to insert two filaments at once and you can switch which filament you’re using mid-print by getting the extruder to retract one of the materials and further push the other one.
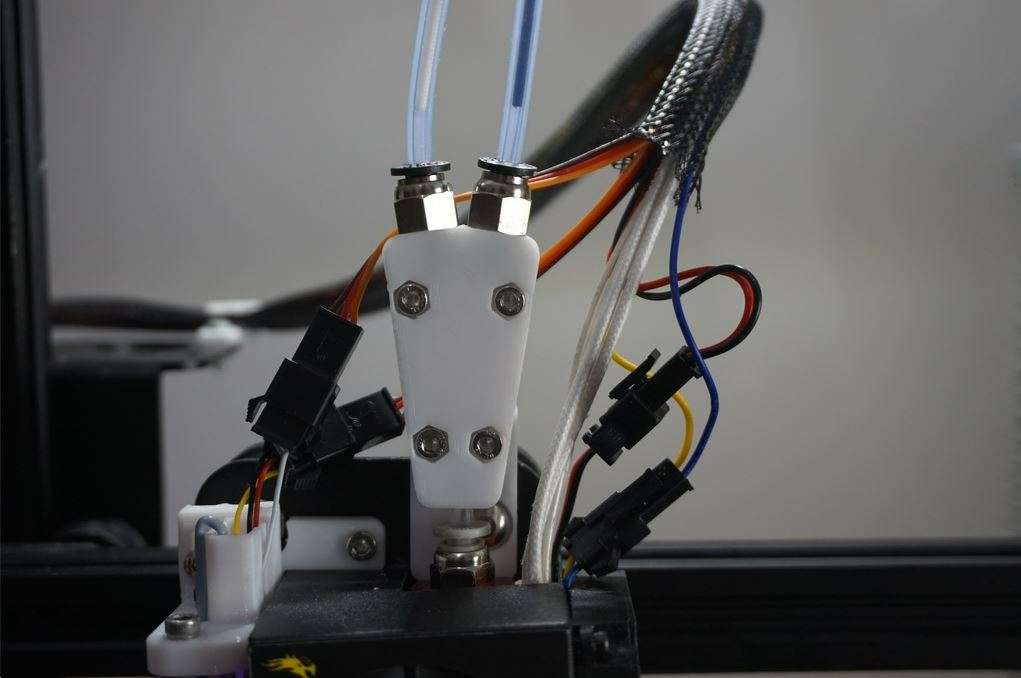
This project uses only a few components, including two sets of PTFE tubing, a 3D printed Y-shaped casing, and some screws and nuts. Once assembled, you can insert the device into your stock Ender 3’s hot end to be able to use two different filaments intermittently throughout a print.
Of course, to get your printer to utilize the Y-shaped mechanism to achieve multi-material prints, you’ll have to make some slicing changes so that what filament is being used changes at the right time in the right way. Nonetheless, the Y joiner method is perhaps the simplest and lowest-cost dual extruder option, though some extra steps are necessary to achieve dual extruder capabilities.
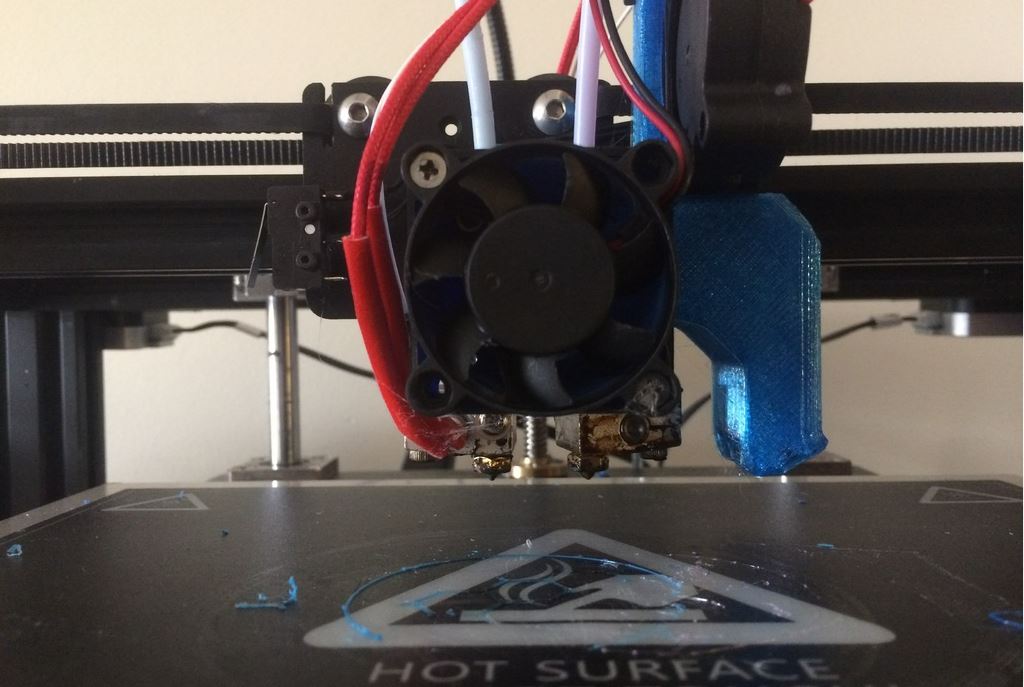
Cyclops Hot End
Our next method is the Cyclops hot end, yet another multi-extrusion brought to you by the extrusion experts at E3D. The E3D Cyclops is nothing like the E3D Chimera hot end, though, which had two input holes with two nozzles.
Instead, the E3D Cyclops has two input holes but only one nozzle. Dual extrusion is achieved on the E3D Cyclops by the printer only using one extruder at a time, so one filament is extruded at a time.
The downside to this method is that, if you’re using two different material filaments or using very abrasive materials, the constant injection and retraction of different filaments into the same nozzle is likely to degrade the nozzle very fast. To solve this, it’s best to use a wear-resistant nozzle like a hardened steel or ruby nozzle over a brass nozzle.
Still, we can’t forget to mention the benefit of this dual extrusion method: a smaller size printhead that supports dual extrusion printing. Obviously, filament changes mid-print will have some issues because one filament will have to be retracted and then the other filament will have to be pushed, but at least the E3D Cyclops is pretty inexpensive. Moreover, the hot end costs under $100 which is a great deal for a part that enables dual extrusion.
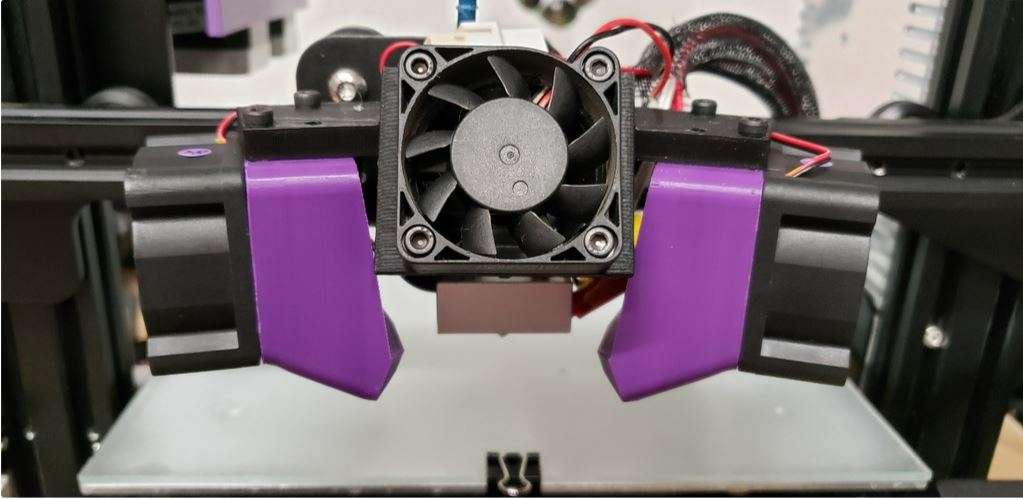
As to attaching the E3D Cyclops on an Ender 3, you can use designer zrxmopar’s Ender 3 Cyclops printhead that fits on the stock Ender 3 carriage. The new printhead features not one, but two large cooling fans with custom fan ducts that point towards the Cyclops’ single nozzle to ensure proper part cooling to yield high-quality prints.
There are a lot of technical flaws with the E3D Cyclops which probably lead to the hot end’s lack of popularity in the 3D printing community. However, we can’t forget that the hot end is less than $100 and can fit on the Ender 3 to make it a dual extruder printer, even if it will take some extra assembly work.
Manual Change Filaments
While it’s not exactly dual extrusion, manual filament changes in the middle of a print are a great way to achieve many of the benefits of dual extrusion without a significant cost.
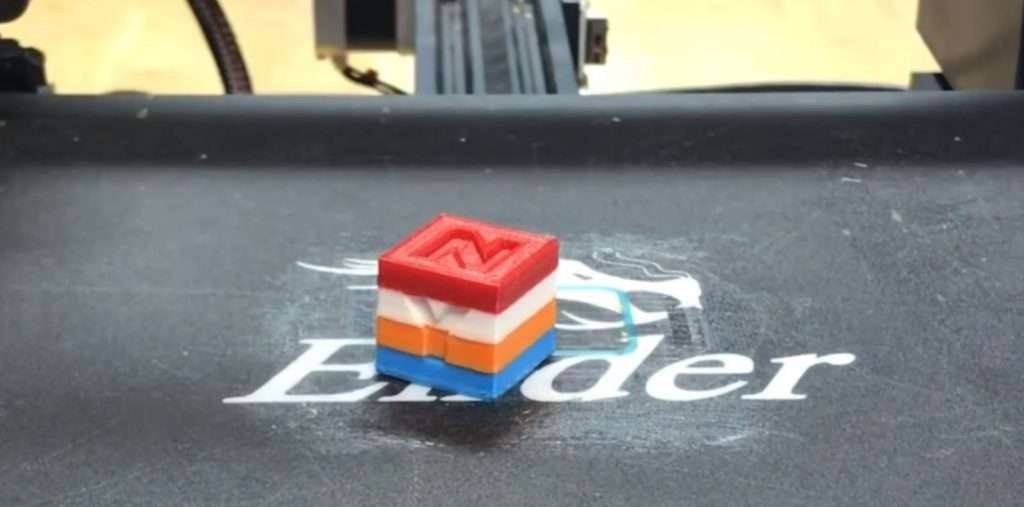
This method involves pausing a print in the middle of it, unloading your current filament, loading in a different one, and then resuming the print. The result is models with different layers printed in different filaments, and the best part is you didn’t spend any money to achieve it.
Of course, the downside of this method is that the only color or material changes occur by layer and not intermittently throughout layers. This prevents you from easily making very detailed and colorful 3D models because you would have to manually change the filament each time you wanted even a small area printed in a different layer.
On this note, while it’s a pretty simple process, mid-print filament swaps can take a few minutes each time and you have to be in front of your printer each time. Still, this method can be useful in some scenarios, and, as we mentioned, it costs nothing financially.
Mosaic Palette 3 and 3 Pro
Next, Mosaic Manufacturing is a company that develops multi-extrusion solutions for 3D printers and their flagship product is the popular Palette device. The Palette 3 is Mosaic’s latest iteration of their flagship device and it’s capable of allowing your Ender 3 to print with up to four filaments. The Palette 3 Pro is the even more advanced version of the Palette 3 and it goes a few steps further than the 3, allowing you to print with up to 8 different filaments.
The Palette 3 and 3 Pro work by having 4 or 8 input holes for the filament to go and cutting the different filaments and bonding them in a very precise manner.
Mosaic has developed a software ecosystem that allows you to use the Palette to make models of different colors in specific places. The software allows you to slice multi-color models in a special way that tells the Palette device when to cut and bond the filaments and which ones to use. This enables true multi-filament extrusion and allows you to use it in a controlled manner so prints aren’t just randomly colored.
The best part about the Palette 3 and 3 Pro is that the devices, although they run on proprietary slicing software, can attach to almost any 3D printer, including the Ender 3.
No special mounting is necessary for the Palette on the Ender 3 because it creates a custom-made strand of filament rather than adjusting which filaments are being used during the printing process. You will, however, have to detach the Ender 3’s stock extruder as the Palette device takes care of this already and will push your filament.
As you might expect with a device like this, the price tag is pretty high and it costs between $700-900, depending on if you get the 3 or 3 Pro. However, this price is well worth it if you’re looking for consistent quality in multi-color or multi-material prints. Additionally, this product might be for you if you don’t want to deal with a lot of hardware changes.
3D Chameleon
The last dual extruder upgrade for the Ender that we’ll talk about is the 3D Chameleon, an upgrade kit for consumer-grade 3D printers developed by the company 3DChameleon.
The 3D Chameleon is similar to the Y joiner upgrade we previously discussed, but it’s a complete kit, containing almost everything you need to be able to print multiple filaments with the same nozzle. Moreover, like the Y joiner, the kit uses multiple extruder motors but a split-off input hole for the hot end that allows for multiple filaments to go in.
However, while the Y joiner only allows for 2 filaments to be used, the basic 3D Chameleon allows for four. This is possible because the split-off hot end connector has basically 2 Y-shaped joiners stacked on top of each other to allow an additional two filaments to be used.
Of course, with this method, only one filament can be extruded at a time and a filament switch requires one extruder motor to pull the filament out and then another motor to push a different filament through. This can be a long process, meaning any filament that switches your program into a print through G-code will cause the print time to noticeably increase.
Overall, though, the 3D Chameleon is a great option for adding multi-filament extrusion to your Ender 3 and the only part needed for the upgrade that’s not included in the kit is a 3D printable mount. Additionally, there are a handful of easy-to-follow upgrade guides for adding this kit to the Ender 3 so assembly and installation should be pretty straightforward. Moreover, the kit costs a little less than $200, so it’s not too expensive compared to other upgrade options.
Advantages of a Dual Extruder Upgrade
Now that you know about the different dual extruders that you can build and install on your Ender 3, it’s worth reviewing the advantages and disadvantages of a dual extruder upgrade. In this section and the following one, we’ll do just that, first, going over the benefits and then the cons of the upgrade. It’s worth noting that the points we’ll make are general and are true for most dual extruder upgrades, but not necessarily everyone.
Now, let’s get started:
- Can print multi-color models without having to paint them afterward
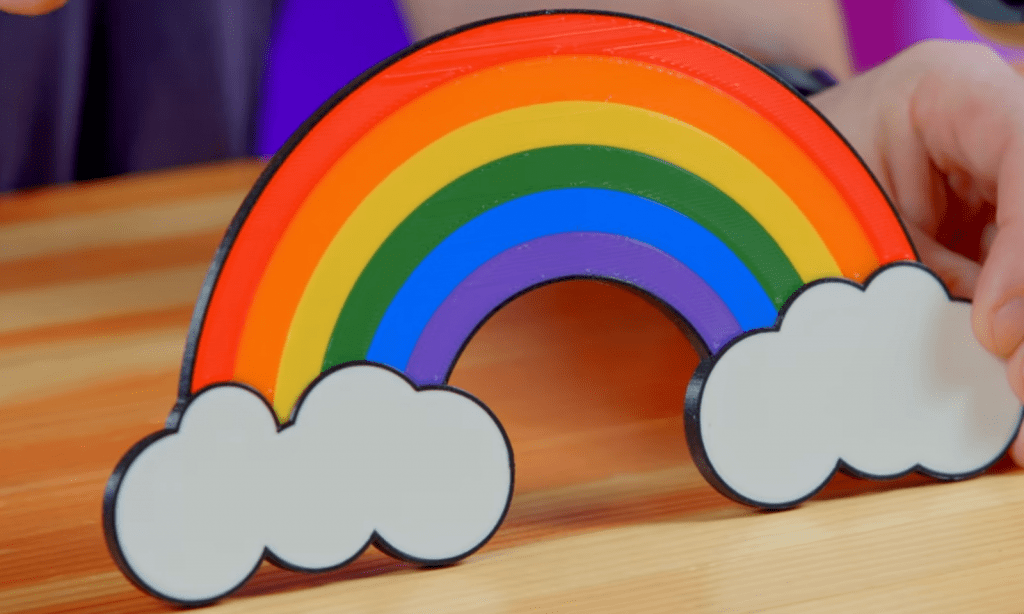
- Allows for truly, 3D multi-color prints and not simply color changes by entire layers
- Can make multi-material parts that have properties of the different materials that make them up
- Not always that expensive
- Many options
- Keeps your printer running because you can switch extruders and go into a single-extruder mode when one breaks
Disadvantages of a Dual Extruder Upgrade
While the advantages of making an upgrade are always what people look at first, it’s also necessary to take in the downsides of making an upgrade. A dual extruder upgrade to the Ender 3 may offer many benefits, but it’s also got a few disadvantages, which we’ve described below:
- Significantly increases the cost of the printer, relative to its initial cost
- Designing and slicing models meant for dual extrusion can be difficult and take a lot of time
- Multi-material models don’t always come out the way you want them to due to material compatibility issues
- Dual extruder upgrades are generally difficult to build and install
Are Dual Extruders Worth It?
With everything in mind, you may be wondering if making a dual extruder upgrade is worth it. The answer?
It depends.
While “it depends” can seem like the answer to a lot of questions, in this instance, it’s especially true because there are many factors to a dual extruder upgrade and how practical they are. You should consider how many times you’ll actually use both extruders.
You should also keep in mind that preparing a model for dual extrusion 3D printing can be an annoyingly long and difficult process.
However, if you really want to print multi-color models without having to paint them afterward, you want to print parts that are made up of an assortment of different materials for mechanical advantages, or if you really just want to max out your Ender 3, then making this type of upgrade is probably the right move.
No matter if you make the upgrade or not, though, we wish you the best of luck in all of your 3D printing endeavors and hope to be along the way!