
Firmware. You can’t see it! You can’t hear it!
But it’s super important.
What is it?
Firmware on a 3D printer is a digital program that runs on the motherboard and deciphers 3D print files (G-code) to tell the printer how to actually make the desired model. So you hand your printer a G-code file for a mug, and the firmware guides the motors, heaters, and other components so that they print the file exactly.
Firmware also decides the control interface on your printer’s LCD, which hardware works, and so much more. But, just like anything (or anybody, haha), the older it is, the worse it performs compared to new releases of firmware.
More up-to-date firmware programs have more features, more compatibility, and more everything!
So if you haven’t changed the firmware on your Creality Ender 3, whether it’s the Original, Pro, V2, or S1, you should consider doing so! Don’t know how?
We’ve explained the entire process, and your options for firmware, in the sections below!
Table of Contents
Why Is It Important to Update the Firmware?
If you were picking out a teammate for a competition, you’d look for the most capable person, right? Well, it’s very similar to 3D printers and firmware. You want to find the smartest, most up-to-date firmware possible for your printer so it can perform as best as possible.
New printing features, like linear advance, come out every day, and the newer your firmware is, the more of these features it will have. As such, you can expect higher-quality prints from newer firmware programs.
Additionally, more recent firmware programs will offer better control over your printer. Moreover, the firmware provides the graphical user interface, so newer releases of the program will bring you a better, more easy-to-use GUI with more control over your lil’ manufacturing machine.
Firmware also defines which hardware is compatible. As such, newer, more updated firmware packages will offer support for a wider range of hardware, making more upgrades to your Ender 3 possible.
Advantages and Disadvantages of Firmware Update
As I’ve made clear, updating your 3D printer’s firmware is a GOOD idea. It will yield better prints, give you more features that you can use, allow you to use a wider array of hardware, and more.
But it’s also got some downsides.
Most obviously, updating the firmware on a 3D printer can be an intensive process, especially for the Original and Pro versions of the Ender 3. If you’re not into DIY-ing and electronics, flashing the new firmware onto your printer’s motherboard may seem like a daunting process. But don’t worry, because we’ve explained it very well in the sections below.
Another potential disadvantage of updating your firmware is a loss of stability. Typically, the older the release of a firmware, the fewer bugs it has. But you can avoid bugs by choosing the newest “stable” release of the firmware, which is usually indicated on the download page for the program.
Besides that, though, updating the firmware only brings happiness. Moreover, newer firmware turns your Ender 3 into a higher-quality machine overall, with better print quality, faster speeds usually, expanded compatibility, and so much more!
Firmware Options
Now that you know updating your 3D printer’s firmware is so important, you’re probably wondering what your options are for your Ender 3. As it’s an open-source printer, there are a handful of great firmware options that work on the Ender 3, and we’ve discussed the best ones below.
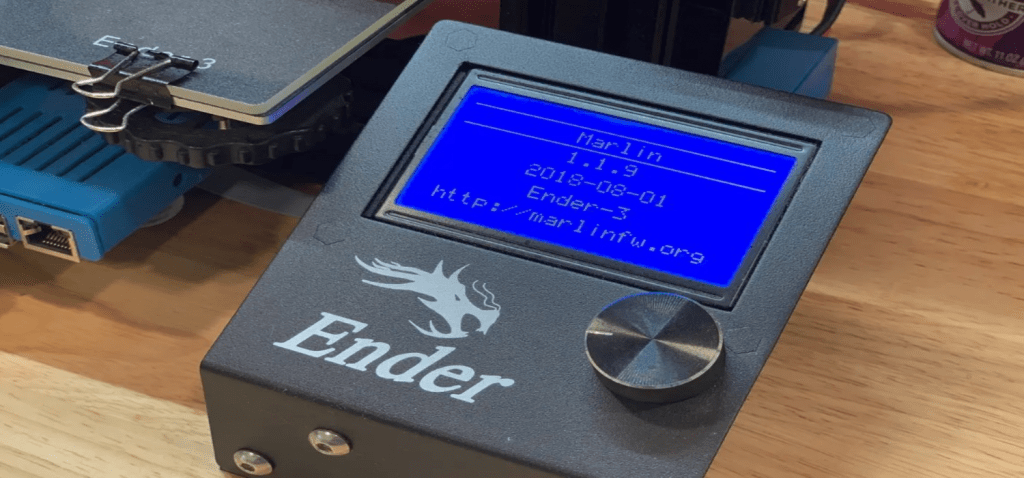
Marlin 1.1.9
First up, we have Marlin 1.1.9, and, no, we’re not talking about the fish.
If you haven’t heard of Marlin before, it’s the most popular firmware program for FDM 3D printers, like the Ender 3. All Marlin firmware is 100% open-source, meaning its source code is freely available on the respective GitHub page.
Marlin 1.1.9 is actually not the latest version of Marlin firmware but still deserves to be mentioned as it is the latest version that’s still compatible with the Original Ender 3 and Ender 3 Pro. Moreover, these versions of the Ender 3 have older 8-bit motherboards, and Marlin 1.1.9, unlike the later versions, can run on these low-computing-power boards.
Of course, Marlin 1.1.9 doesn’t have as many innovative features as the newer firmware makes, but it’s super reliable. I actually still run Marlin 1.1.9 on a few of my Original and Pro Ender 3s just because I know I’ll basically never run into an issue with the program.
Marlin 2.0

Marlin 2.0 is one of the latest versions of Marlin firmware and due to its many features, it only runs on 32-bit motherboards. This means you can only run Marlin 2.0 on the later versions of the Ender 3, including the Ender 3 V2 and S1, as they come with 32-bit boards.
As I mentioned, Marlin 2.0 is loaded with optional innovative printing features, like linear advance, which significantly improves the extrusion of your printer.
With Marlin 2.0, you also get a lot more hardware compatibility, so enabling new features like automatic bed leveling, a filament runout sensor, or even a new hot end is super easy. All you have to do is activate a few lines of code in the firmware, and your new hardware will be up and running!
While it technically isn’t supposed to run on weaker 8-bit boards, if you really want to, you can make it run on the Original Ender 3 and Ender 3 Pro. However, to do this, you’ll have to manually deactivate some of the features in the program to lower the computing requirements of the firmware.
TH3D Unified Firmware
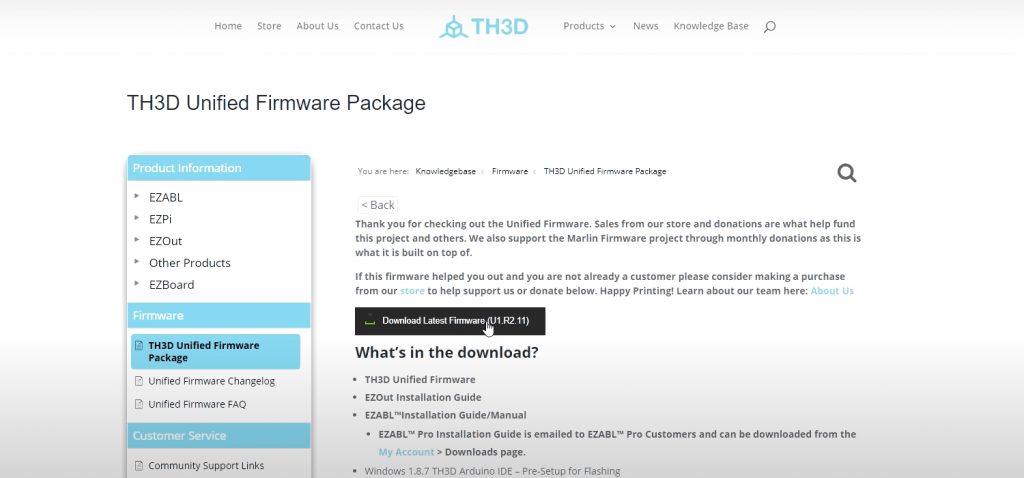
TH3D is a company that sells 3D printing parts, and they also have developed their own firmware, which works on some versions of the Ender 3. Known as TH3D Unified Firmware, this program combines the benefits of standard Marlin firmware with some extra features developed by the experts at TH3D.
Currently, TH3D Unified Firmware is on its second version, and it supports a lot of TH3D’s own hardware. For example, if you add the TH3D EZABL bed leveling sensor to your Ender 3, you can use this firmware program to make setting up the device super easy.
What’s great about TH3D firmware is that it’s super easy to identify which downloads you need as it’s clearly labeled on their website. It’s the perfect option for those who want an easy firmware installation process for their Ender 3 printers and who also use TH3D hardware on their printer.
Klipper
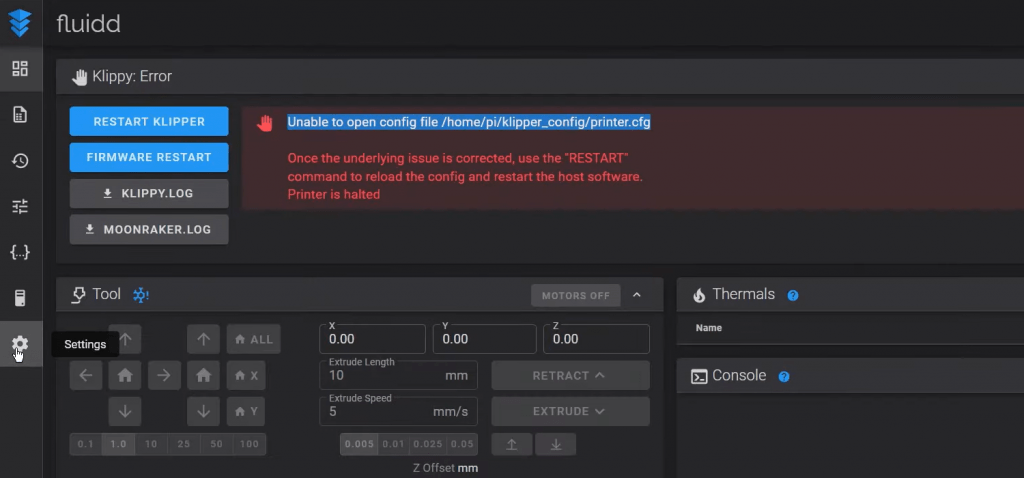
Lastly, Klipper is unlike the other firmware programs in this list.
The reason Klipper is so special is that the firmware comes with an operating system meant to run on an external computer, like a Raspberry Pi board. With this setup, the external computer handles all of the G-code computing backend work, while the motherboard solely focuses on controlling the different motors.
While Klipper is a more difficult firmware program to set up, its unique architecture allows for much faster printing. Additionally, the firmware is equipped with some of the latest features in 3D printing, like linear advance and improved motion processing, which result in high-quality prints.
There are also many remote control software programs, like Fluidd and Mainsail, that work with Klipper-running motherboards. With these programs, you can remotely start/stop prints, set temperatures, and so much more without any additional hardware because you are already using an external computer.
And, as another added bonus, Klipper works on both 8-bit and 32-bit motherboards, so you can set it up on all versions of the Ender 3!
How to Update the Firmware on the Ender 3
Once you’ve picked out the firmware option that you want, you have to actually install the program to the motherboard of your Ender 3. The specific firmware flashing process varies slightly between the different versions of the Ender 3, and we’ve gone over the different methods in the sections below:
Original and Pro
The Original and Pro versions of the Ender 3 were developed in the years prior to 32-bit boards becoming the industry standard. As such, they’re equipped with 8-bit motherboards, which don’t come with an integrated bootloader.
If you’re unfamiliar with the term, a bootloader is a computing program that allows you to load a new firmware program onto a motherboard. The 8-bit boards on the Original and Pro versions of the Ender 3 don’t have enough memory to add a bootloader, so an external device is needed to run the bootloader so you can flash the new firmware.
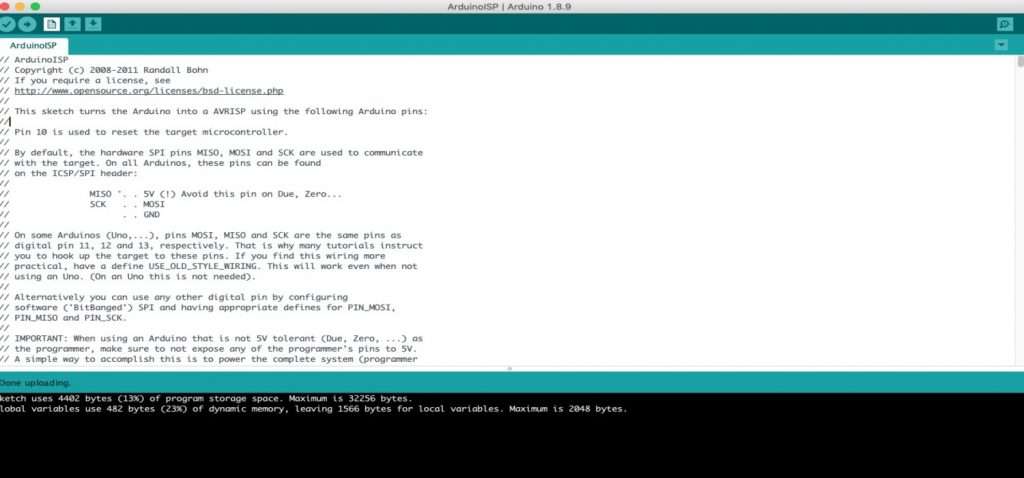
The device you can use is an Arduino board, and you have to first connect the board to the Ender 3’s motherboard through the USB port. Then, grab your laptop or PC, and fire up the Arduino IDE program. Open your desired firmware program (e.g. Marlin 1.1.9) into the program and make sure you’re in the “Arduino as ISP” mode with “Sanguino” as the board selection.
Then, use some Dupont jumper cables and set them up so that the 3×2 pins on the Arduino board match up to the 3×2 pins on the printer’s motherboard. Next, connect your computer to the Arduino board, and click “Burn Bootloader” in the “Tools” section in Arduino IDE.
Lastly, you have to verify the firmware package in Arduino IDE by clicking the checkmark icon on the interface. Then, just click the upload arrow icon, and the firmware will be flashed to your printer’s motherboard!
While the process is a lot, it’s 100% worth it to get a newer, more feature-full firmware package as it will vastly improve your printer’s performance!
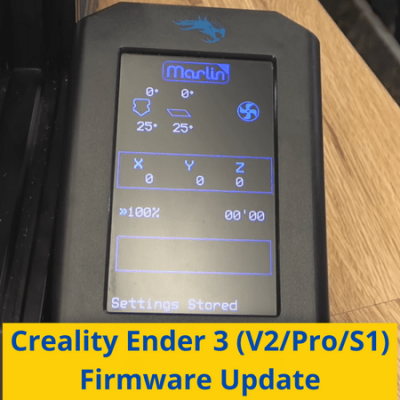
V2 and S1
As we said, installing new firmware on the Ender 3 V2 and Ender 3 S1 is much easier than on the Original and Pro versions. Moreover, these printers come with a 32-bit board which has an integrated bootloader feature. This means you won’t need to use an external board to flash the new firmware package to the motherboard.
We’ll get into the process below:
The first step is to remove the SD card from your printer’s motherboard and load it into a USB reader on your computer. Move all of the files you want to keep on the storage device to another location temporarily.
Next, download your desired firmware package in the BIN (.bin) file format. For those interested, this file format is pre-compiled and already contains all of the code you want. If you want to make any changes, download the source code of the firmware and edit it in an IDE software like VSCode.
Finally, shut off your printer, load the SD card into the motherboard slot, and turn the machine back on. The LCD screen on the printer should stay blank for a few seconds as the motherboard takes in and loads the new firmware package.
And that’s it! You see, it wasn’t hard at all! You can now put whatever you want on the SD card again and continue as normal.
Conclusion
Although you can’t see it, the firmware is, without a doubt, one of the most important elements of your 3D printer. Due to its super important role in the printing process, it can significantly affect the performance and usability of the machine. So do yourself a favor and just update to the newest version of your firmware for your Ender 3 if you haven’t done so in a while!
If you don’t know which firmware flavor or release to choose from, I personally recommend going with the latest “bug-fix” version of Marlin firmware. However, this version will be a bit old if you have the Original Ender 3 or Ender 3 Pro because their 8-bit motherboards can’t handle Marlin 2.0 or 2.1.
But, no matter which firmware you go with, make sure to follow the right firmware updating procedure. It’s a bit more difficult on the Original/Pro versions of the Ender 3, but still 100% possible and 1000% worth it!