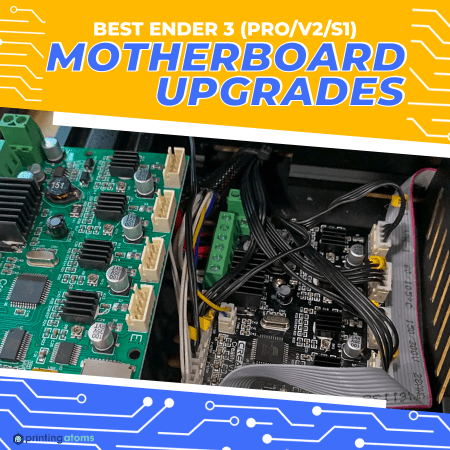
 The motherboard on your 3D printer is the brain behind the operations.
These microcontroller boards are what make the different motors, fans, heaters, and other hardware work together to create your 3D printed models.
Motherboards are pretty complex components, and they significantly affect the printing performance as well as the hardware compatibility of your 3D printer.
Sadly, most budget 3D printers, like the Ender 3 (Pro/V2/S1) come with pretty low-end motherboards that have weak processors and a limited number of ports.
As such, upgrading the motherboard on your Ender 3 is a great way to improve the performance and usability of your machine. It’s also one of the most popular upgrades for this printer!
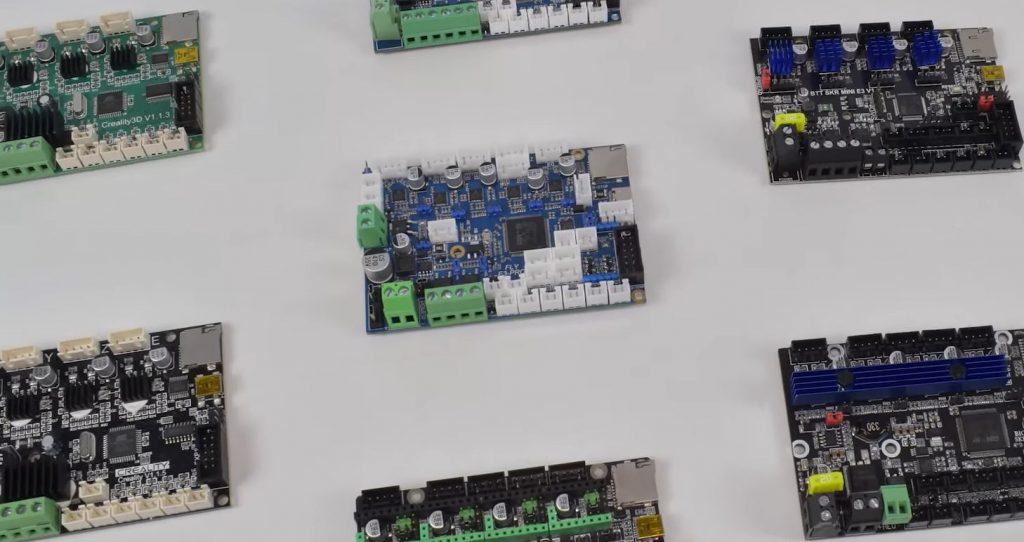
I’ve done countless hours of research and testing and have found the very best Ender 3 motherboard upgrade options.
The Creality V4.2.7 board is one of my favorite motherboard upgrades, offering silent printing and a relatively powerful processor. The BigTreeTech SKR Pro V1.2 is another terrific motherboard option for the Ender 3 that gives you more ports than you’ll ever need and a processor that can run circles around the stock Ender 3 motherboard.
For more of the best Ender 3 motherboard upgrades, keep reading!
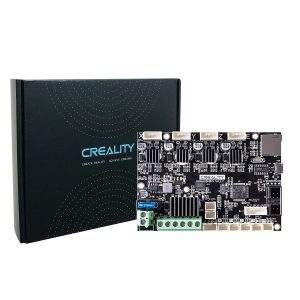

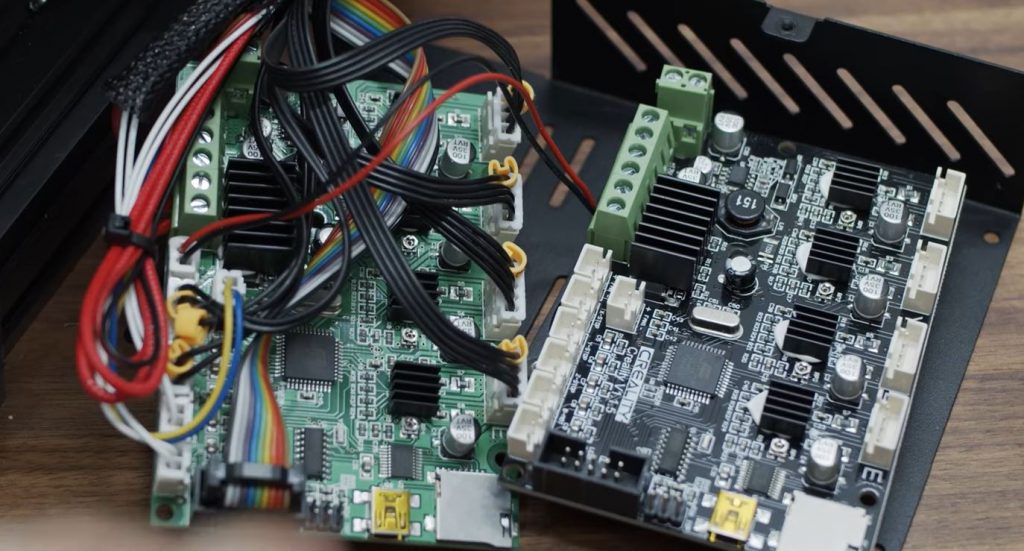
First, we have the Creality V4.2.7 board. I’ve personally used this one on 4 different printers, and I love it.
As it’s developed by the same company that made the Ender 3 (Pro/V2/S1), compatibility isn’t even a question. Moreover, the board is the same size as the stock motherboards on the different versions of the Ender 3, and it even has the same mounting holes. Additionally, the wire labeling is the same so moving all of the wires from the old board to the V4.2.7 is a breeze.
But besides the ease of installation, the Creality V4.2.7 board is overall a stellar motherboard.
The board is 32-bit with a decently fast processor chip, allowing you to run Marlin 2.0 firmware easily with any of its features activated. And printing lag, where the processor can’t interpret the G-code commands fast enough, won’t ever happen!
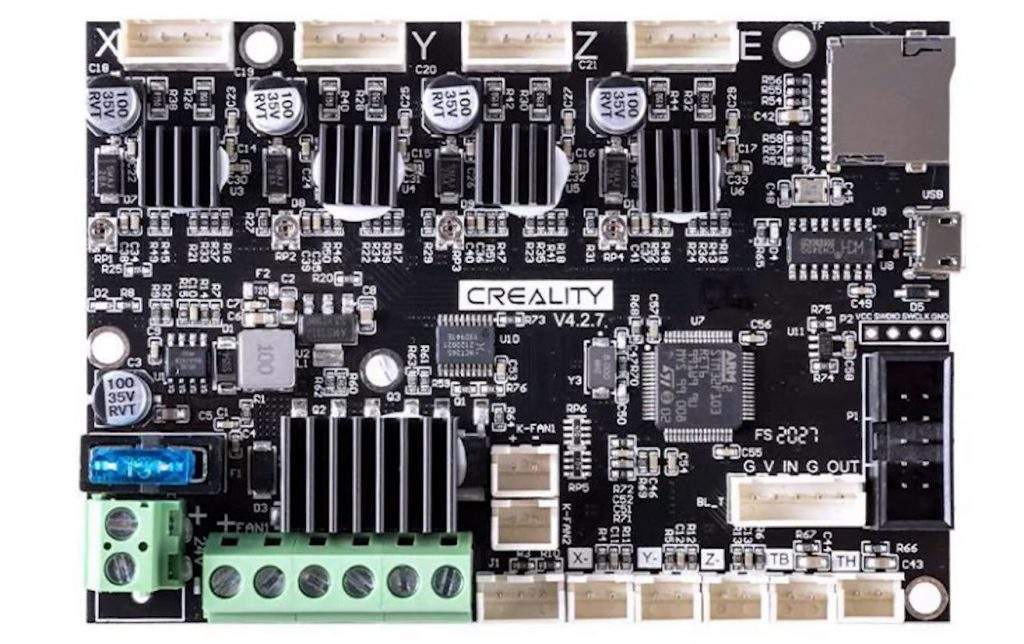
It’s also worth mentioning that Creality included a bootloader on the board for the MicroSD card. This means you can flash new firmware to the printer by simply loading the firmware file on the MicroSD card and inserting it into the board.
But what I love most about the V4.2.7 is the sound it makes: none! There’s a reason Creality calls the V4.2.7 board “the silent board”. With integrated TMC2225 drivers, the Ender 3’s stepper motors will make basically no noise and also be very precise.
The only problem I have with the V4.2.7 is that the firmware Creality provides for the board is poorly documented, and you never know how the wiring is configured. For example, if you have an automatic bed leveling sensor and are using Creality’s provided Marlin-based firmware, you’ll have to test two different wiring setups for the sensor.
But, overall, the Creality V4.2.7 is basically the perfect board upgrade for any Ender 3. It’s easy to install, powerful, versatile, and super silent!

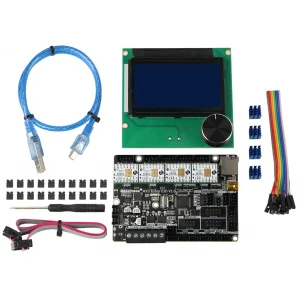
BigTreeTech, commonly abbreviated as BTT, is one of the biggest companies for 3D printer motherboards, with many different boards in their catalog. The BTT SKR Mini E3 V3.0 is one of the company’s flagship boards, specifically developed for the Ender 3.
Fitting the same dimensions as the stock motherboard on the Ender 3, installation should be a breeze. And, like the V4.2.7, the board has a pre-installed bootloader for easy firmware flashes.
The SKR Mini E3 V3.0 offers five motor ports, so upgrading your Ender 3 to a second Z-axis motor is possible. Alternatively, you could use the extra motor port as a second extruder.
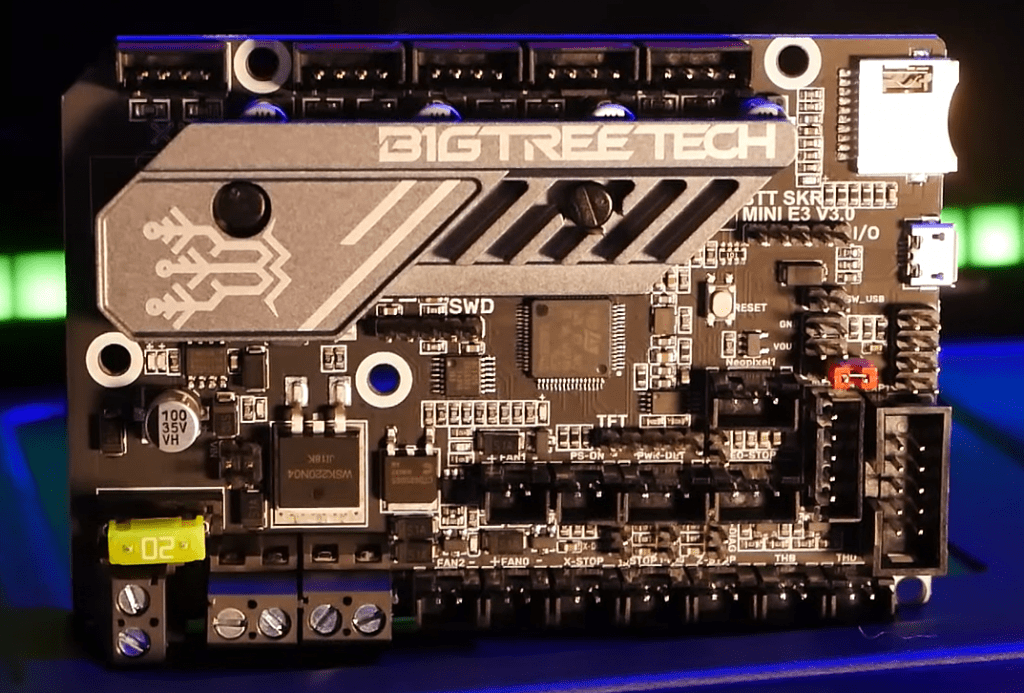
The board features integrated TMC2209 stepper motor drivers too. These provide super silent motor movement, reducing the sound of printing to under a whisper. Additionally, TC2209s are compatible with Marlin 2.0’s linear advance feature, so you can achieve more accurate prints.
The best part of the SKR Mini E3 V3.0, though, has got to be its insanely fast processing chip. The 32-bit processing chip has a name way too long for any normal person to understand, but I can tell you this: you won’t ever ever ever have a problem with this board being too slow or weak in terms of processing power. You can turn on every feature you want on Marlin 2.0, from linear advance to Wi-Fi chip, and this board can handle it easily!
Some other notable features on this board include ports for LED lights, a BLTouch ABL sensor, a filament runout sensor, and a plethora of fans.
I strongly suggest checking the BigTreeTech SKR Mini E3 V3.0 if you want a motherboard with enough speed to outrun Usain Bolt, an extra motor port, and slots for many sensors and fans.

The MKS Robin E3D is definitely not the most popular motherboard for the Ender 3, which is why you won’t find it in other articles about Ender 3 motherboards. But, from personal experience, I can tell you that this board is super versatile and is a good bang for your buck.
You might be wondering how the MKS Robin E3D can cost a fraction of the price of Creality and BTT boards while still offering many high-quality features. And the answer is the open-end stepper motor drivers. Moreover, unlike most motherboards, the E3D has ports for attachable stepper motor drivers (not integrated), meaning you can choose (and separately purchase) whatever drivers you want.
I honestly love this feature about the board because it means I can switch to better drivers as new ones come out over the years. Make sure to check out our related article on the best stepper motor drivers here!
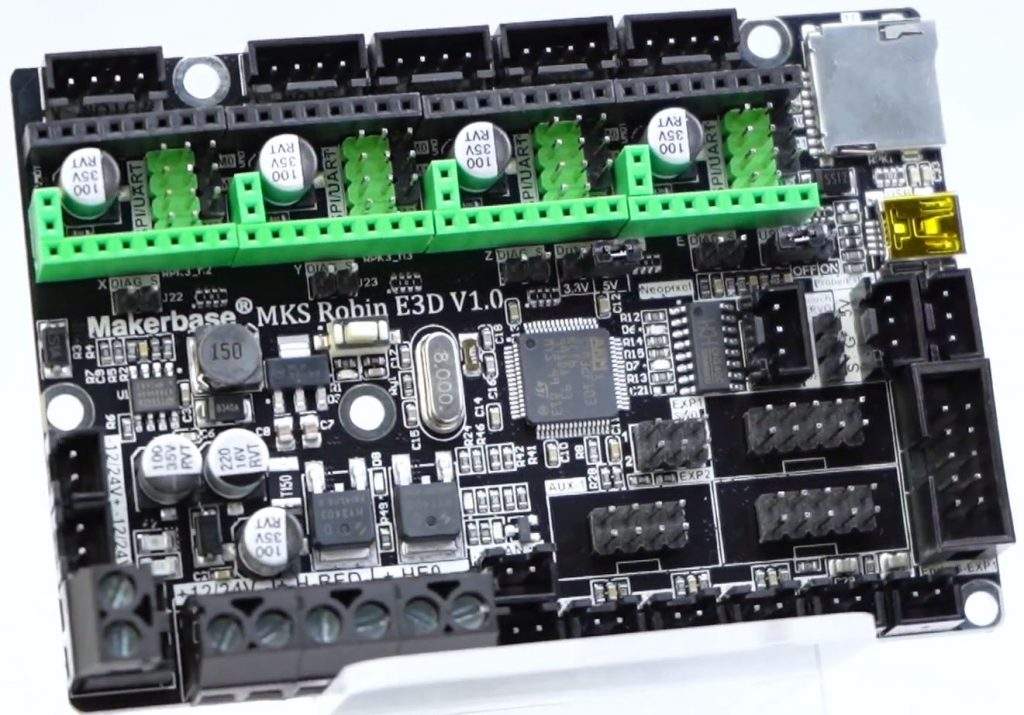
On top of the customizable drivers, the MKS Robin E3D also has five motor ports, allowing you to use two Z-axis motors if you want. Additionally, the board supports touchscreen displays, automatic bed leveling, and a filament runout sensor!
The downside of this motherboard, though, is that there’s limited community support, especially when compared to BTT and Creality motherboards which have much larger communities behind them.
So, if you’re okay buying stepper motor drivers separately and want a low-cost board that’s very customizable, definitely check out the MKS Robin E3D V1.0!

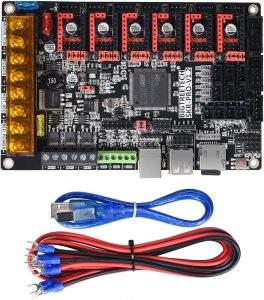
Another spectacular motherboard product from BigTreeTech is the SKR Pro V1.2, which is easily the most versatile board on this list.
Just like the MKS Robin E3D, the SKR Pro V1.2 has open-end stepper motor ports, supporting a variety of popular drivers, like TMC2208, TMC2209, TMC2225, and more!
And, on this note about stepper motors, there aren’t four, not five, not six, but SEVEN motor ports on this board. As such, you’ll be able to add a second Z-axis motor to your Ender 3 and even add a second or third extruder at the same time!
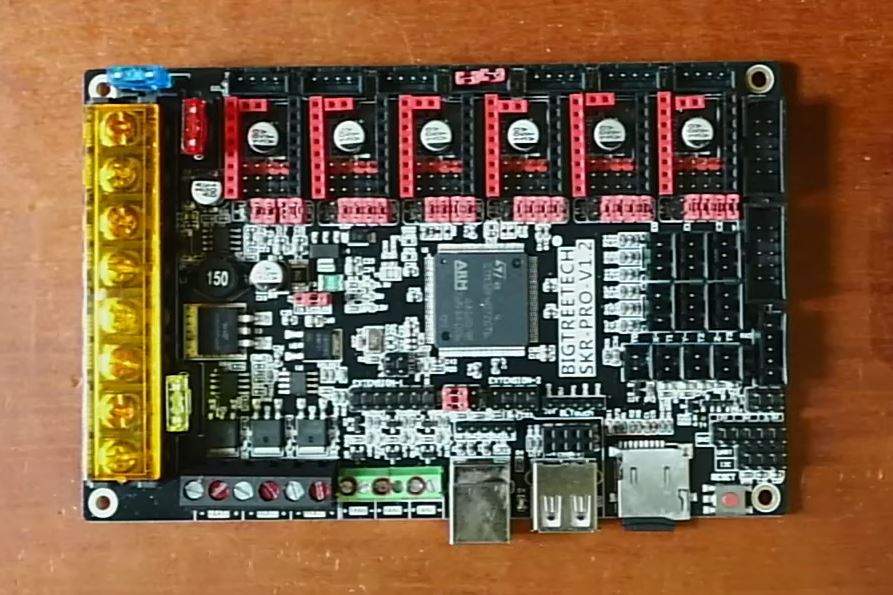
There are also a plethora of other useful ports on the SKR Pro V1.2 that really make it deserve “Pro” status. For instance, there are three ports for hot end heaters (and 1 for the bed), a total of four thermistor ports, six endstop ports, and two LCD pin sections. Unfortunately, though, you’re limited to just 3 fans, which seems a little low for the hardware the board supports.
And, while interface ports aren’t usually worth talking about for 3D printer motherboards, the BTT SKR Pro V1.2 has more than your typical board, offering a MicroSD card slot, Wi-Fi card module port, USB flash drive slot, and a Micro-USB slot. As such, there are many different ways you can control your printer.
So if you need a motherboard that can do it all or you’re planning to make a lot of intensive upgrades to your Ender 3 (Pro/V2/S1), then the BigTreeTech SKR Pro V1.2 is the one for you!

The last board we’ll cover is the TH3D EZBoard V2.0, a board developed specifically for Creality printers, such as the Ender 3 (Pro/V2/S1).
Fitting perfectly into the motherboard housing, the EZBoard V2.0 lives up to its name, being EZ to install. But, what I like most about the board is the ecosystem that TH3D, a popular manufacturer of 3D printer accessories, has made for the EZBoard.
Moreover, on top of selling the board itself, TH3D sells a few add-on modules for the board, such as the EZNeo Strips, which are controllable RGB light strips that can plug into the EZBoard V2.0. The EZBoard also can support TH3D’s EZABL Sensor, an automatic bed leveling sensor that can be mounted to the Ender 3’s printhead.
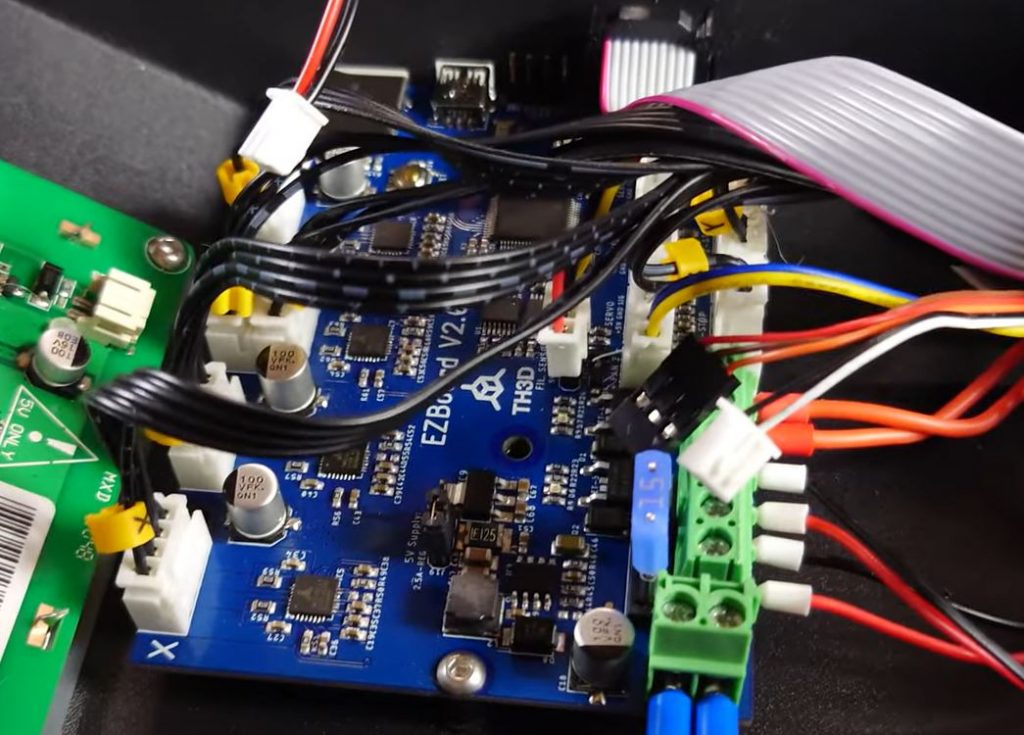
It’s also worth going over the ports on the EZBoard V2, which are honestly a bit lacking. Moreover, while there are five stepper motor ports (Hello, dual Z-axis motors!), there are only 2 fan ports, and the LCD pin board doesn’t support touchscreen displays.
But the EZBoard V2.0 makes up for it with its integrated TMC2209 stepper motor drivers, which provide both super low-noise printing as well as immaculate movement precision.
So if the installation process and compatible hardware are your main concerns, then I definitely suggest going with the TH3D EZBoard V2.0!
What is a 3D Printer Motherboard?
A 3D printer motherboard is a microcontroller board that serves as the “brain” of your 3D printer. It’s the place where all of the wires from the different motors, fans, sensors, and other hardware go to.
A motherboard is absolutely necessary for any 3D printer because it interprets the G-code commands for a print file and tells all the hardware what to do to create your 3D model. Without a motherboard, you would just have a bunch of hardware that can’t be controlled and a G-code file that makes no sense.
Motherboards are pretty complex, and they are made up of hardware ports (e.g. for motors, fans), interface ports (e.g. MicroSD card slot), and a processor. These elements of a 3D printer motherboard work cohesively to make your 3D printer run.
Additionally, it’s worth noting that all 3D printer motherboards run a firmware package, which is a digital program that outlines how the different motherboard components will work.
Considerations When Picking a Board
When picking the right motherboard for your Ender 3 (Pro/V2/S1), there are a few different factors that you should keep in mind. I’ve gone over the important ones below:
Processing Power
The processing power of any computer board is super important, especially for 3D printer motherboards, which have to process thousands of G-code commands for every print job. The best way to determine the processing power of a 3D printer motherboard is to look at the bit of the board.
Almost all 3D printer boards today are either 8-bit or 32-bit. While 8-bit boards used to be the norm for 3D printers, 32-bit boards are becoming the new industry standard. That’s because 32-bit boards can process G-code faster and have more memory, allowing you to run more feature-heavy firmware packages, like Marlin 2.0.
Ports
The number of ports available on a motherboard is also very important, as this tells you how much hardware you can use.
For example, a motherboard with 4 stepper motor ports will restrict you to using only one motor for each axis (X, Y, Z, extruder). Or, a board with only 2 thermistors limits you to using only one hot end and one heated bed.
Make sure you get a board that has all of the right ports for the hardware you’re using on your Ender 3, whether it be a bed leveling sensor, a second Z-axis motor, or something else!
Firmware Compatibility
Any 3D printer motherboard needs a compatible firmware program so that it knows how to function.
Sadly, not all motherboards can run just any firmware package. Most motherboards for the Ender 3 can run Marlin and Marlin-based programs, which are the most popular types of firmware, but if you want to use a different flavor of firmware (e.g. Klipper, Repetier), I suggest double-checking the compatibility.
Value
Lastly, you should look at the value of the motherboard. I like to think of the value of a product as the price per useful feature. Moreover, it’s important to consider the value of a product, so you don’t overpay for features that don’t matter.
Installing a New Motherboard
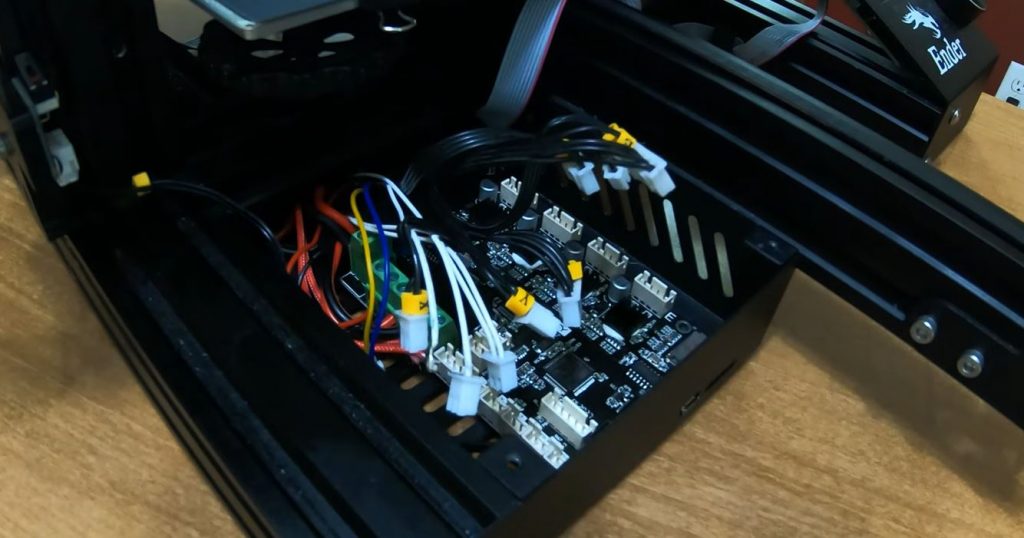
Installing a new motherboard might seem like a complicated job that only an electrical engineer can do, but it’s actually extremely simple. I’ve changed the motherboard on an Ender 3 countless times, and below, you can see my exact process:
- Turn off the Ender 3 by flipping the switch on the printer.
- Remove the printer’s plug from the power outlet to ensure no power is there.
- Unscrew the motherboard housing bolts using the right Allen Key.
- Move the motherboard housing shroud to the side. Make sure that you’re not pulling on the motherboard fan wires, as we don’t want these wires to snap.
- Take a picture of the current motherboard wiring. I like to use this photo for reference later.
- Unscrew the 3-4 small screws holding the motherboard down to the frame of the printer.
- Place your new motherboard right next to the current motherboard.
- Take a flathead screwdriver and unscrew the red and black power supply wires from the old motherboard.
- Screw the power supply wires into their respective ports on the new motherboard
- Repeat this process for every other port on the motherboard, going wire-by-wire and matching the port on the old motherboard to the one on the new board.
- Once all the wires are switched over, place the old motherboard to the side.
- Screw the new motherboard into the respective mounting holes in the printer’s motherboard housing.
- Make sure all of the cables are organized and in their correct ports.
- Screw in the motherboard housing.
- Plug in the printer and turn on the switch.
- Make sure everything is powered on properly. You might have to change the firmware for full compatibility, but you should be able to see that all of the hardware is powered properly.
And that’s it!
Also, if you turn on the printer and see any smoke coming from the motherboard, immediately turn off the printer and check your wiring and firmware.