

There are many different parts on a 3D printer, but few are as important as the nozzle. After all, it’s the last thing to touch the filament before it’s laid out and turned into the actual 3D model.
The better the nozzle, the more consistent and accurate the extrusion on your printer will be. Sadly, most budget 3D printers, such as the Creality Ender 3 (Pro/V2), come with pretty cheap nozzles in their stock form, resulting in users having to change the nozzle after only a few months of printing.
Luckily, the nozzle change process on the Ender 3 is a breeze.
All you’ve got to do is heat up the hot end, remove the fan shroud, and unscrew the old nozzle. Then, after you’ve picked out your replacement nozzle (I recommend a MicroSwiss A2 Hardened Steel nozzle), you just screw it in and get back to printing!
For a more in-depth guide for the Ender 3 nozzle replacement process, keep reading!
Table of Contents
Why Does the Nozzle Matter?
The nozzle is important on any 3D printer because it’s the part that gives the flowing filament its shape. Without a nozzle, the filament would just pour out of the hot end in an uncontrolled manner, resulting in a mess of a print.
A nozzle makes the printing process precise so that filament only comes out in strands of a certain diameter so that layers can be stacked to form your print.
When to Replace the Nozzle?
There’s no single time interval for replacing the nozzle that works for everyone because different nozzles degrade at different rates depending on what filament you’re printing and many other factors.
However, with that being said, most nozzles tend to start to degrade noticeably after 2-5 months of regular printing (at least once a week). As such, after a few months, I suggest looking at the nozzle and your prints and checking for any issues.
If there’s none, wait another month to do a check-up. And, if there are any (and I mean ANY) signs of degradation or poor extrusion caused by the nozzle, then you should replace the nozzle ASAP.
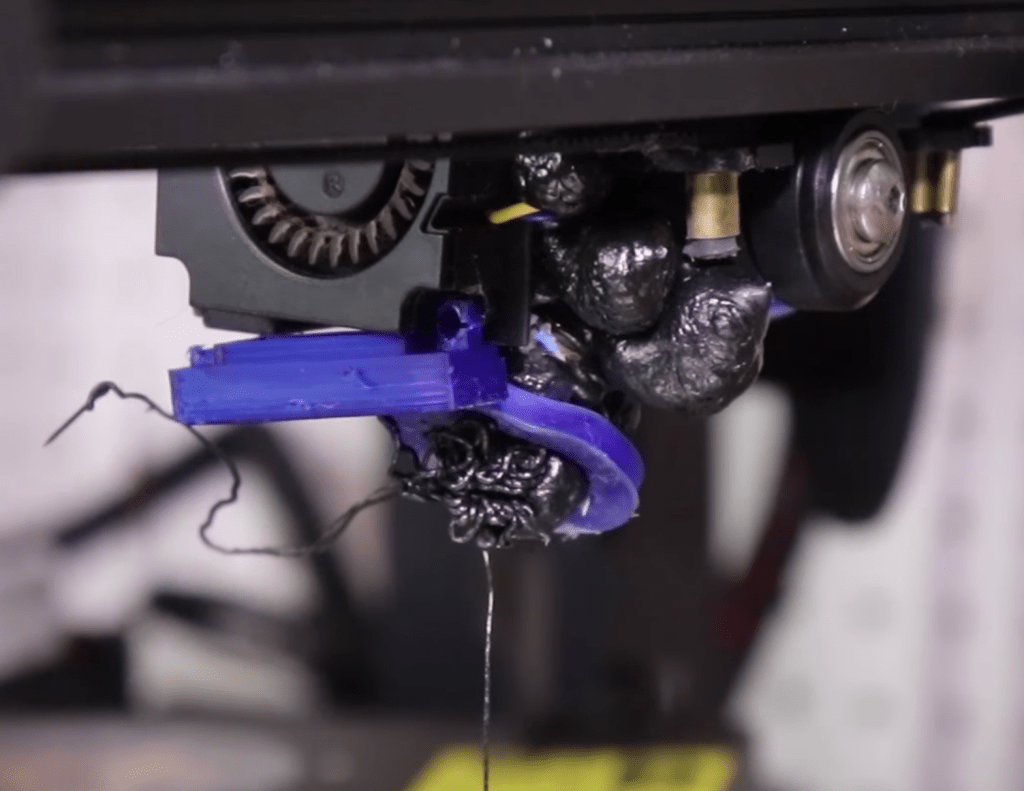
The longer you wait with a degraded or broken nozzle, the worse prints will get, and you might even end up with a hot-end clog.
Note: If you print every day, then you’ll mostly have to change the stock nozzles every 2-4 weeks.
Tools Needed:
Below are the tools you need for a nozzle swap on the Ender 3 (Pro/V2)
New Nozzle
Of course, if you want to change the nozzle on your 3D printer, you’ll need a new nozzle. While you could clean the old nozzle, which we’ll explain how to do later, it’s better to just change the nozzle entirely so you can start fresh.
Tweezers
We’ll have to heat up the nozzle before swapping it, so you’ll want some tweezers around, so you don’t have to burn your fingers off to hold the nozzle. Tweezers also help with the nozzle-cleaning process.

Spanner
A spanner is a wrench, and you’ll want a spanner that fits the nozzle so that you can properly unscrew it from the heater block without damaging it. The Creality Ender 3 comes with the right-sized spanner wrench, so you shouldn’t need to get your own.
Allen Keys
Lastly, you’ll need Allen keys, which are also included with the tool kit that comes with the Ender 3 (Pro/V2). The Allen keys are necessary for removing the fan shroud around your Ender 3’s heater block assembly.
How to Replace the Nozzle? 8 Simple Steps
Once you’ve got everything you need for the process, it’s time to replace the nozzle! I’ve gone over the exact steps for this process in the mini sections below!
1. Turn On the Ender 3
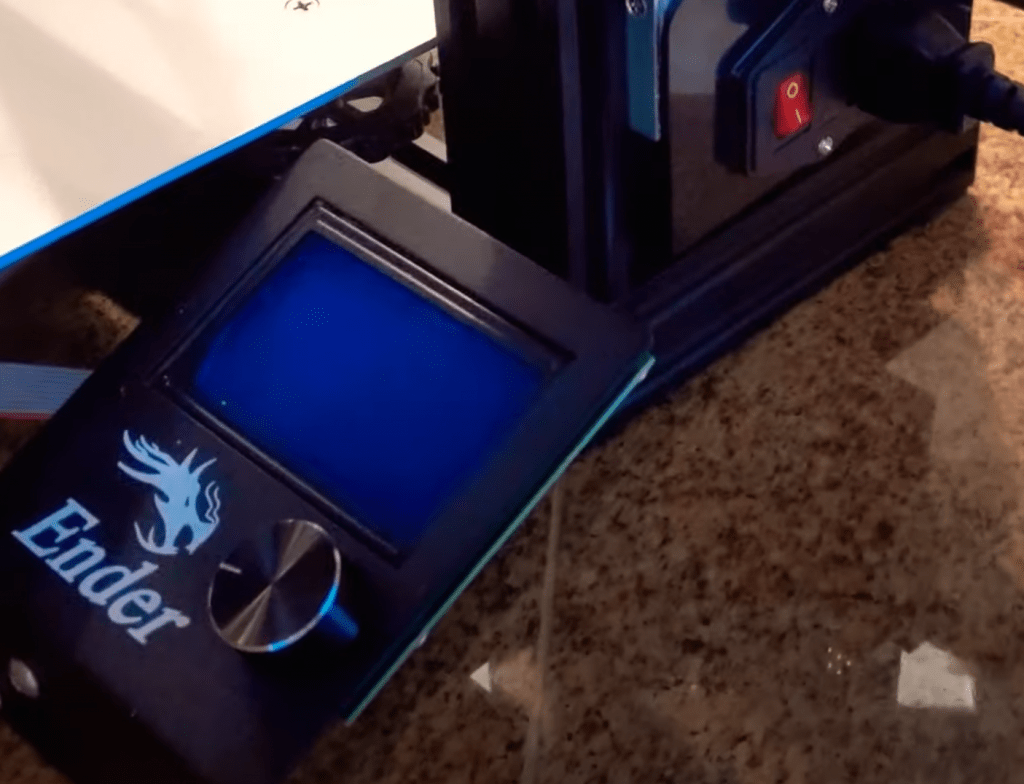
First, turn on your Ender 3. So, make sure it’s plugged into a power outlet, and then flip that switch on!
2. Disable the Stepper Motors
On Ender 3’s LCD interface, click “Prepare” and select the “Disable Steppers” button. This will turn off the motor limits on the printer, allowing you to freely move around the printhead so that the nozzle removal process is easier.

3. Heat Nozzle to 220 °C
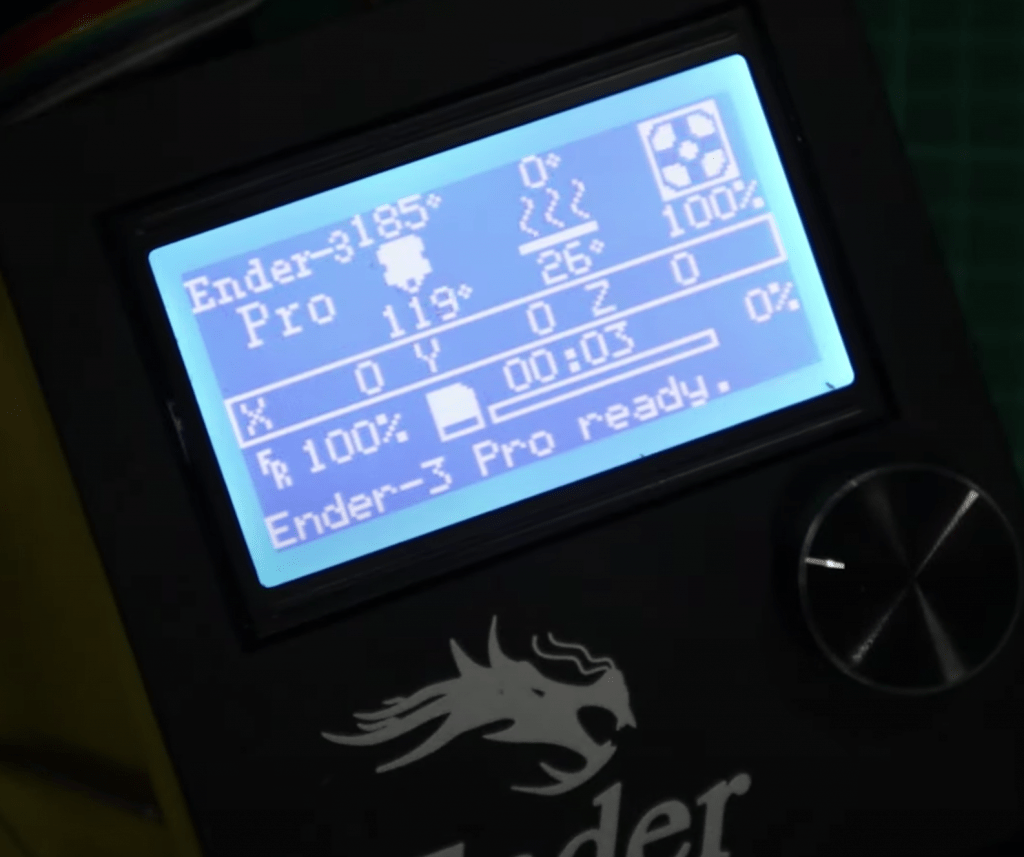
Next, if you’re printing PLA filament, heat up the heater block to 220 °C, as this temperature will melt the filament enough for you to remove it later and keep the nozzle hot enough to screw out of the hot end easily.
If you’re not using PLA, use a temperature that suits whatever filament material you’re using.
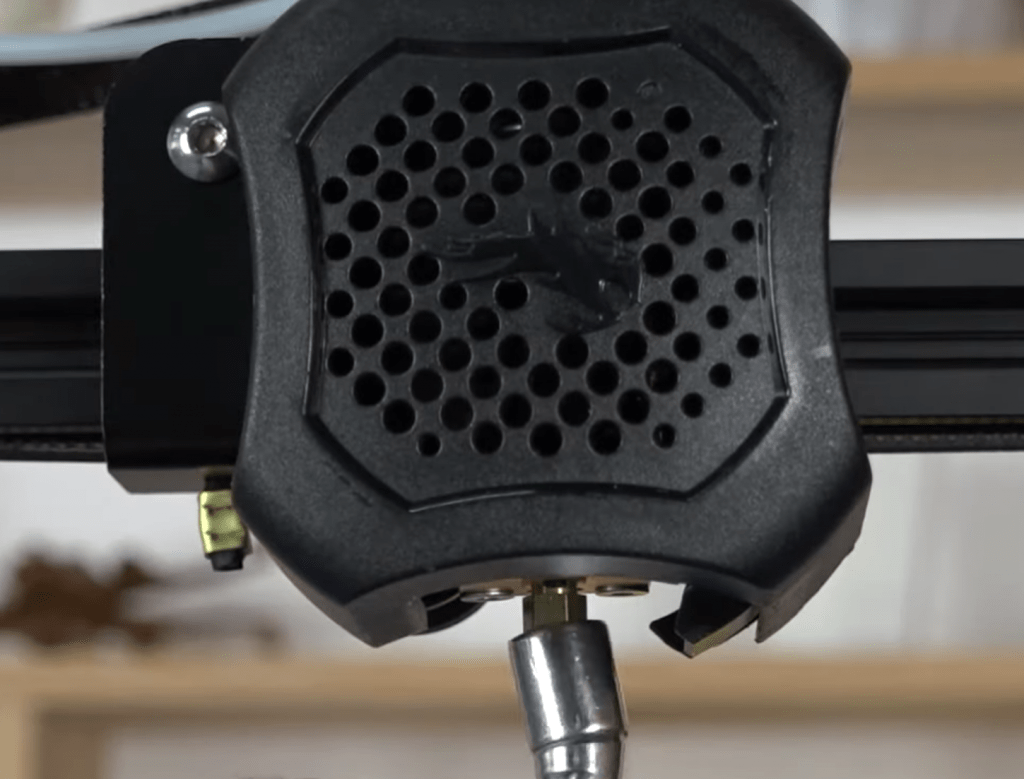
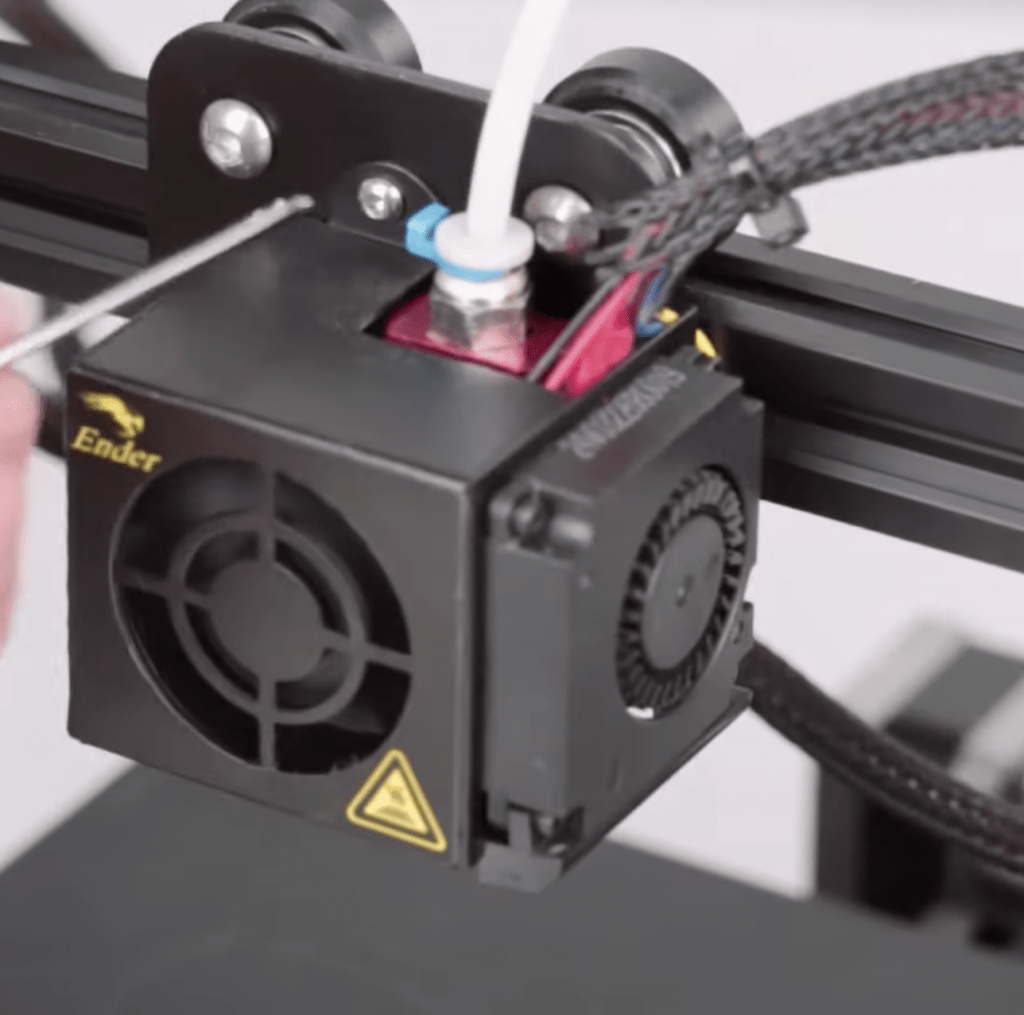
4. Move Fan Shroud to the Side
Next, we’ll have to remove the fan shroud as it gets in the way of the nozzle. To do this, get the right Allen key and unscrew the two (or one for the Ender 3 V2) fan shroud screws on the machine’s printhead.
Once it’s off, rest it on the X-axis aluminum extrusion, being careful that the fans aren’t hitting anything. Keep the screws somewhere close.

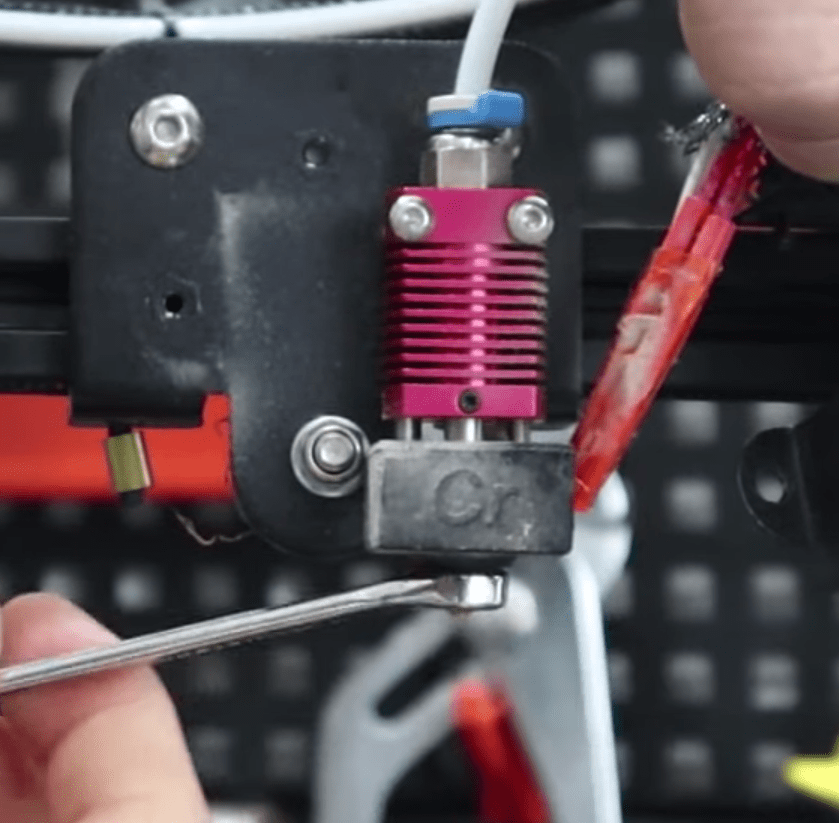
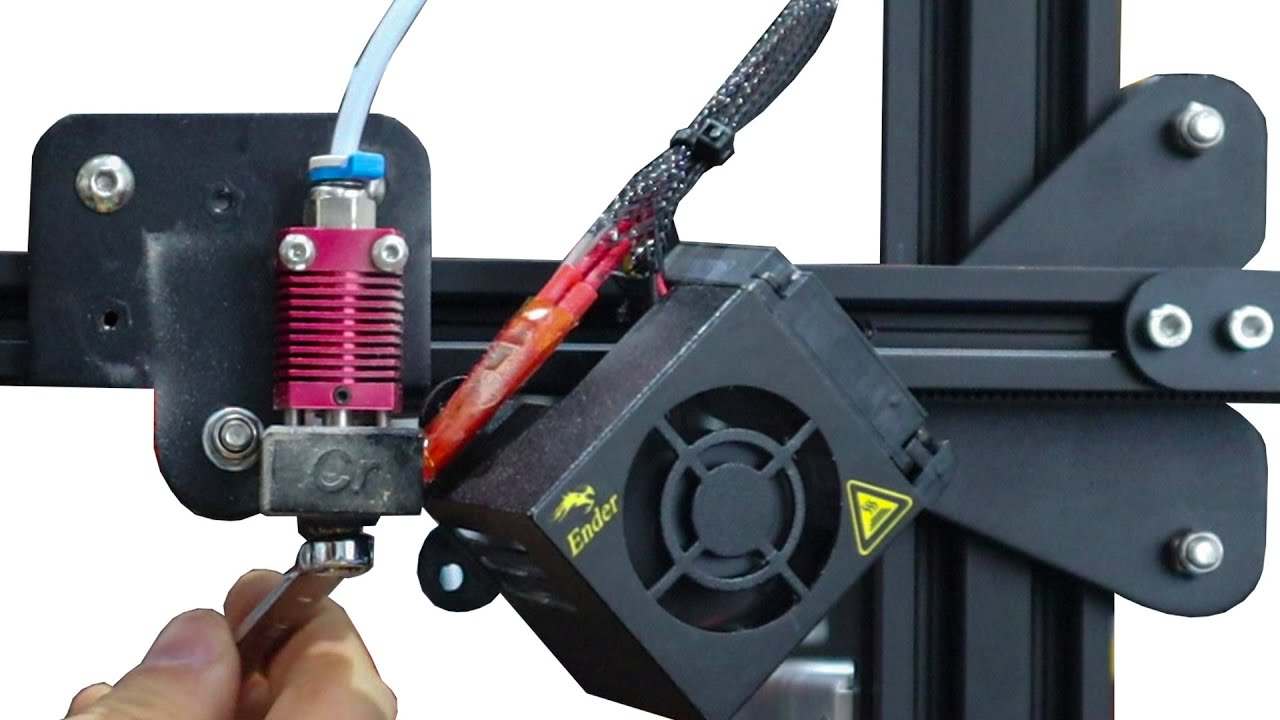
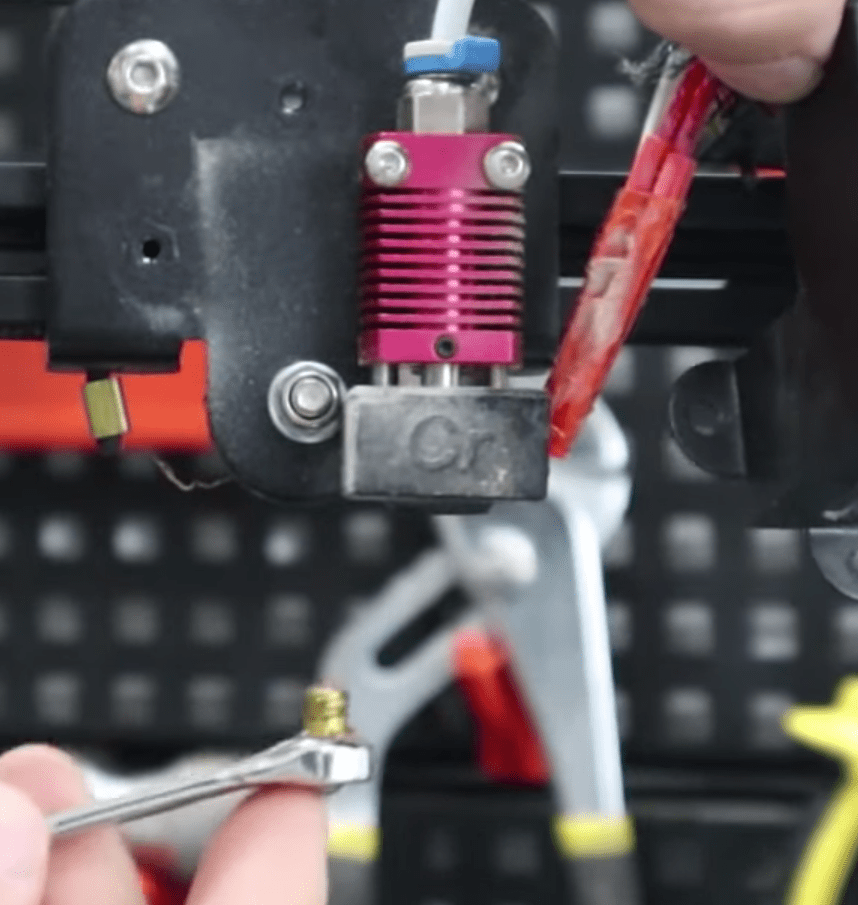
5. Unscrew Nozzle
Now, take the spanner wrench and hook it around the nozzle. With one hand on the wrench and the other holding the printhead steady, gently but firmly, rotate the wrench clockwise to loosen it off of the hot end assembly.
Go slowly and continue rotating the wrench until the nozzle falls off. I suggest keeping a towel beneath the nozzle so that the falling nozzle doesn’t damage your print bed.

6. Replace it with New Nozzle
Next, take your replacement nozzle of choice and hold in with two fingers. Now, being extremely careful not to accidentally touch the heater block, screw the nozzle just a little bit (a few rotations) into the hot end screw.
Once it’s locked in a little, use the spanner wrench to fully screw it into the hot end assembly. Make sure it’s tightly on there!
7. Screw Back the Fan Shroud
With the new nozzle installed, put the fan shroud back in place and use the Allen key from before to re-screw in the fan shroud screws.
8. Click Auto Home
Finally, click “Auto Home” on the Ender 3’s LCD to move the printhead (and nozzle) back to its home position.

That’s it!
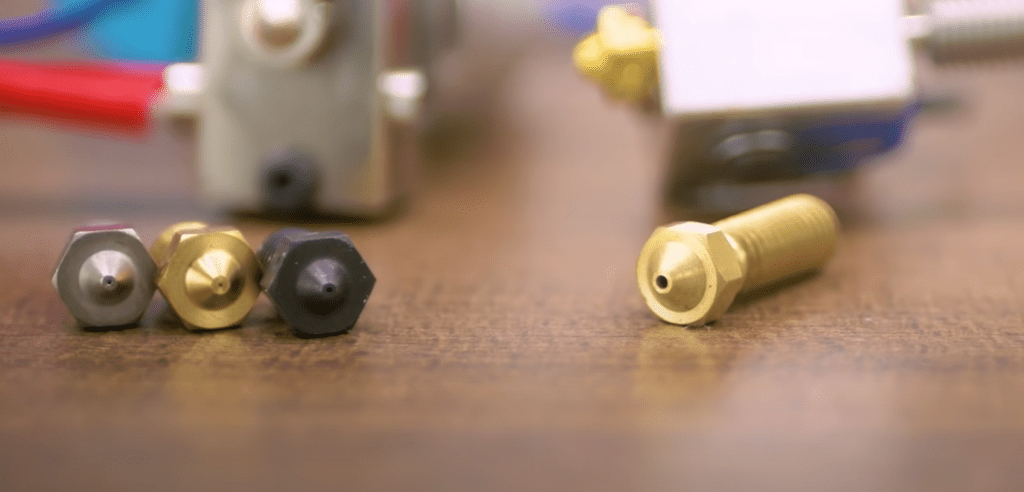
Best Nozzles Replacement for Ender 3
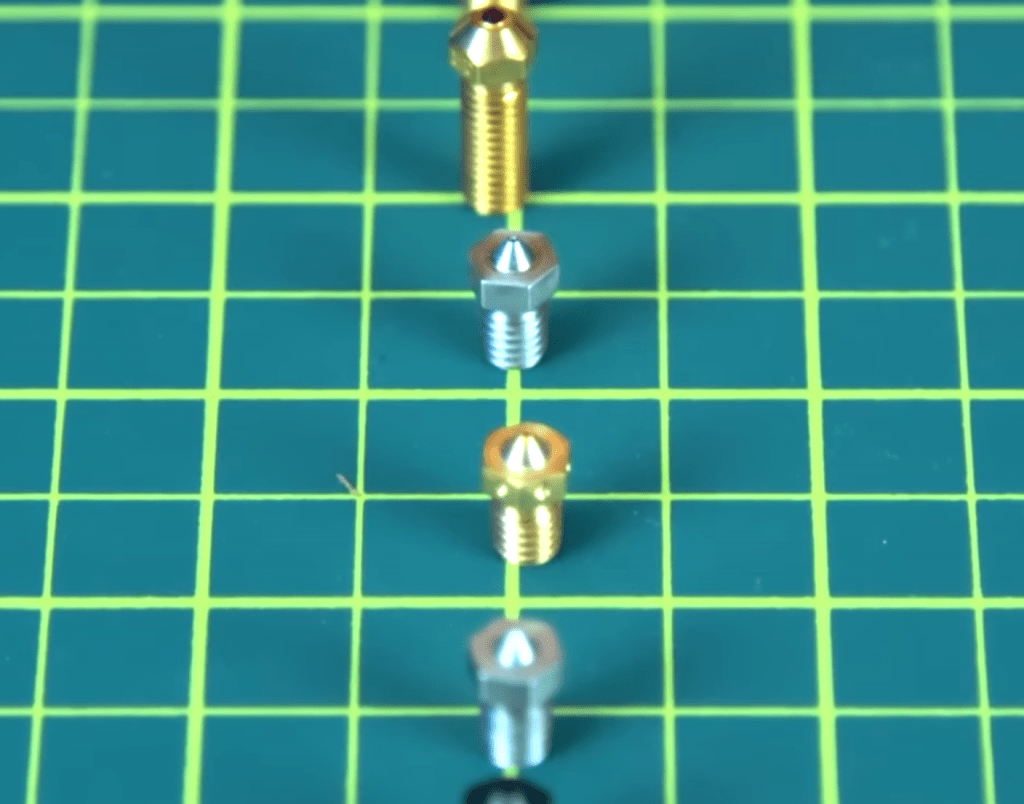
Now that you know how to replace the brass nozzle on your Ender 3 (Pro/V2), you might be interested in some compatible replacement options. Below, I’ve gone over my 5 favorite nozzles that work on the Ender 3 (Pro/V2).
Bondtech CHT Coated Brass Nozzle
The Bondtech CHT Coated Brass nozzle, like the Ender 3’s stock nozzle, is brass. However, the CHT is made of much higher-quality brass, and it’s coated in nickel to enhance the durability and abrasion-resistance of the nozzle. This means the nozzle will degrade a lot less quickly than a typical brass nozzle, and you can also expect better printing performance from this product.

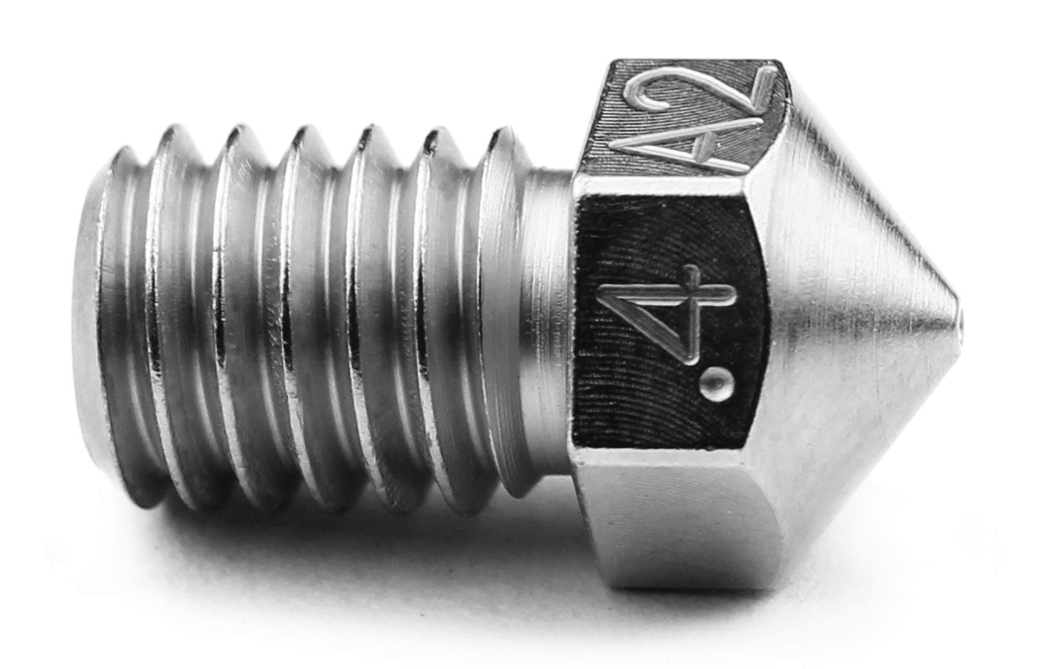
MicroSwiss A2 Hardened Steel Nozzle
Hardened steel is a very durable type of steel, and it makes for insanely strong and abrasion-resistant 3D printer nozzles. The MicroSwiss A2 Hardened Steel nozzle works on the Creality Ender 3, and it allows you to print any filament material you want, from PLA to polycarbonate, without much degradation over time.
Polisi3D Ruby Nozzle
The strongest replacement nozzle option I have for you is the Polisi3D ruby nozzle. While also much more expensive than the other options, it has a gemstone tip, which won’t degrade at all basically. It’s been said that one of these nozzles will last you a lifetime of printing without failure.

Generic MK8 Brass Nozzle
While not the fanciest on the block, generic brass nozzles are also replacement options for the Ender 3 (Pro/V2). Specifically, you should look for MK8 brass nozzles, as this indicates that the nozzles have an M6 thread size, making them compatible with the Ender 3.
But note that not just any ol’ brass nozzle from the search results on Amazon will do. To find a nozzle that won’t fail (degrade) after only a few prints, you should look for options that are made in higher-quality brass.
Of course, most of us aren’t material science experts, so judging the quality of a brass nozzle can be difficult. But you can check the reviews to see if other users have had good, long-lasting experiences with the brass nozzle you’re looking at.

Generic MK8 Steel Nozzle

My last nozzle recommendation is for a generic MK8 steel nozzle. It’s important to mention that steel nozzles come in two types: stainless steel and hardened steel.
Hardened steel is the stronger, more long-lasting grade of steel as it’s overall much tougher than stainless steel and exponentially tougher than brass. But stainless steel isn’t weak by any means and is still noticeably stronger and more capable than a brass nozzle. Additionally, stainless steel has great anti-stick properties, meaning a stainless steel nozzle will stay clean throughout a print (less stringing).
Check out our article to learn more about the differences between steel, brass, and ruby nozzles here.
How to Tell if a Nozzle is Compatible?
When it comes to seeing if a nozzle is compatible with your Ender 3 (Pro/V2), you need to check the thread size. As we’ve mentioned, the thread is the screw-on area on the nozzle, and it needs to properly fit the bottom-side hole on the hot end, or else the filament will leak, or the part won’t fit at all.
For the Ender 3, Ender 3 Pro, and Ender 3 V2, nozzles need to have an M6 thread. Nozzles with this thread size are also called MK8 nozzles.
Additionally, I suggest checking the customer reviews for any nozzle you’re considering purchasing for your Ender 3 (Pro/V2), just in case there’s something else that makes the nozzle incompatible.
When to Clean the Nozzle?
We already went over when to replace the nozzle, but you should also think about how long you should wait before cleaning the nozzle. Of course, there’s no one set time interval for when you need to clean your nozzle because all printers and nozzles are different and they will get dirty at different rates.
However, I suggest checking the nozzle and potentially cleaning it after every 5-10 prints as this is usually when gunk starts building up inside or around your nozzle. And if you’re starting a very long print (8+ hours), then I suggest cleaning the nozzle right beforehand so that your print job doesn’t fail just when it’s about to finish.
How to Clean the Nozzle?

Cleaning the nozzle on your 3D printer involves removing the unwanted gunk and contaminants on both the inside and outside of the part. There are a few ways you can clean the nozzle, but for the Ender 3, my personal favorite way is as follows:
I start by heating up the printer to 220 °C to get the nozzle warm, and then I pull the filament out of the hot end. Next, I take a small nozzle cleaning needle and insert it up the nozzle hole, pushing in and out to clear the exit hole.
Then, I unscrew the nozzle and quickly, while it’s still hot, use a pair of small tweezers to pull out any excess melted filament or gunk from inside the nozzle hole. After that, I use the pick to clean the outside of the part and rub it with a small alcohol wipe to remove any invisible chemicals (e.g. finger grease).
Then, just screw the nozzle back into the hot end, and re-insert your filament!
It should only take you around 5 minutes, so definitely take the time and effort to get it done so your nozzle doesn’t fail on your mid-print due to a clog.
Conclusion
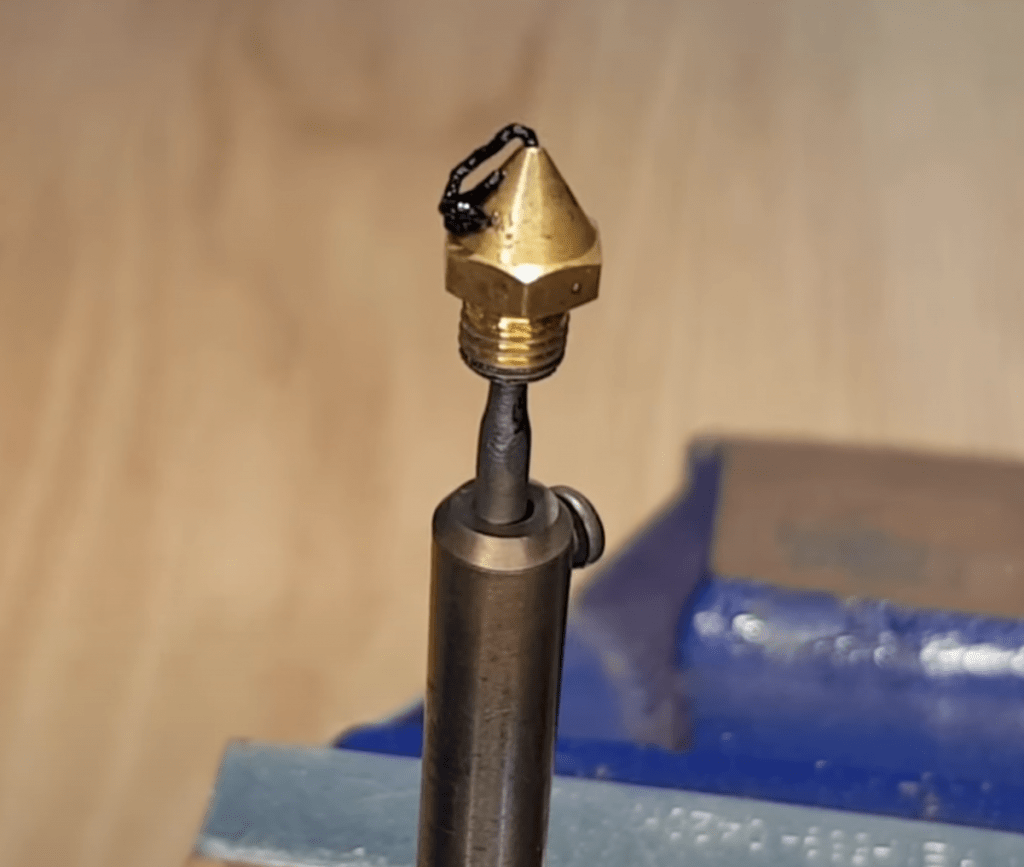
While your nozzle might not look damaged or degraded, if prints are coming out poorly, or not at all, on your Ender 3, the nozzle might be the culprit.
Luckily, changing the nozzle on the Ender 3 (Pro/V2) is light work.
All you’ve got to do is heat up the nozzle, pull out your filament, remove the fan shroud covering the hot end assembly, and unscrew that old nozzle. Then, just screw that new sucker back in and get right back to printing!
Related Articles: