
If you have an Ender 3 (Pro/V2), then you’re probably familiar with a whole set of different printing problems that can occur. One of the most annoying ones is stringing!
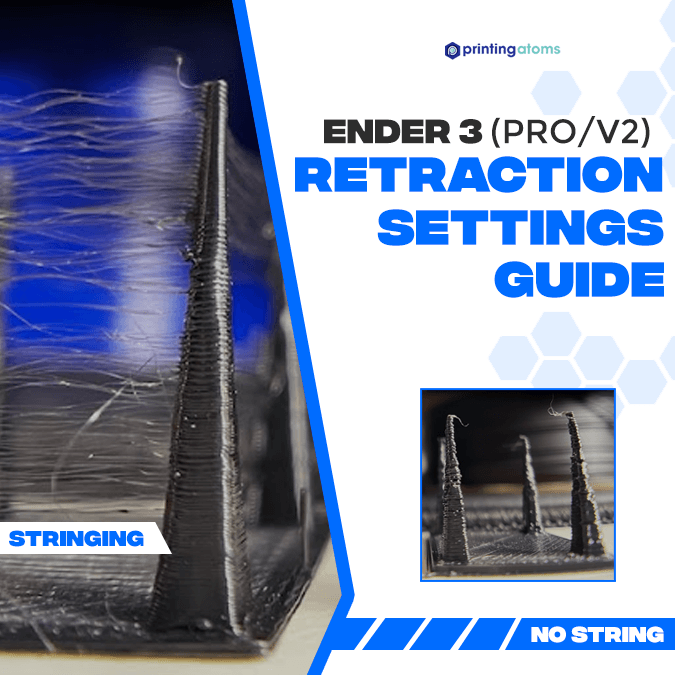
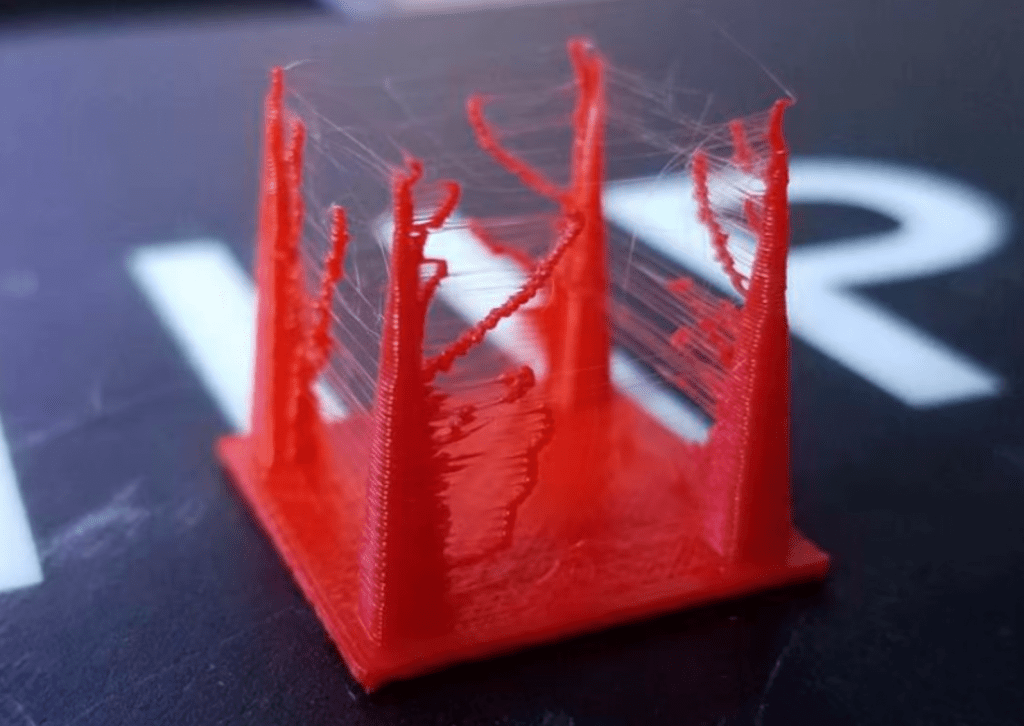
Stringing is when small wisps of excess filament attach to the exterior of your 3D print, ruining the look and dimensional accuracy of the model.
Luckily, you can stop stringing on your 3D printer through retraction, a printing feature that pulls filament back from the hot end to stop over-extrusion, such as stringing, from happening.
Getting your retraction settings right for your 3D printer can be a difficult task, so I’ve helped you
out and provided the best Ender 3 retraction settings.
In this article, you’ll find my recommendations for different retraction settings, each specific to the Ender 3 (Pro/V2/S1) and successfully tested by me.
Enjoy!
Table of Contents
What is Retraction?
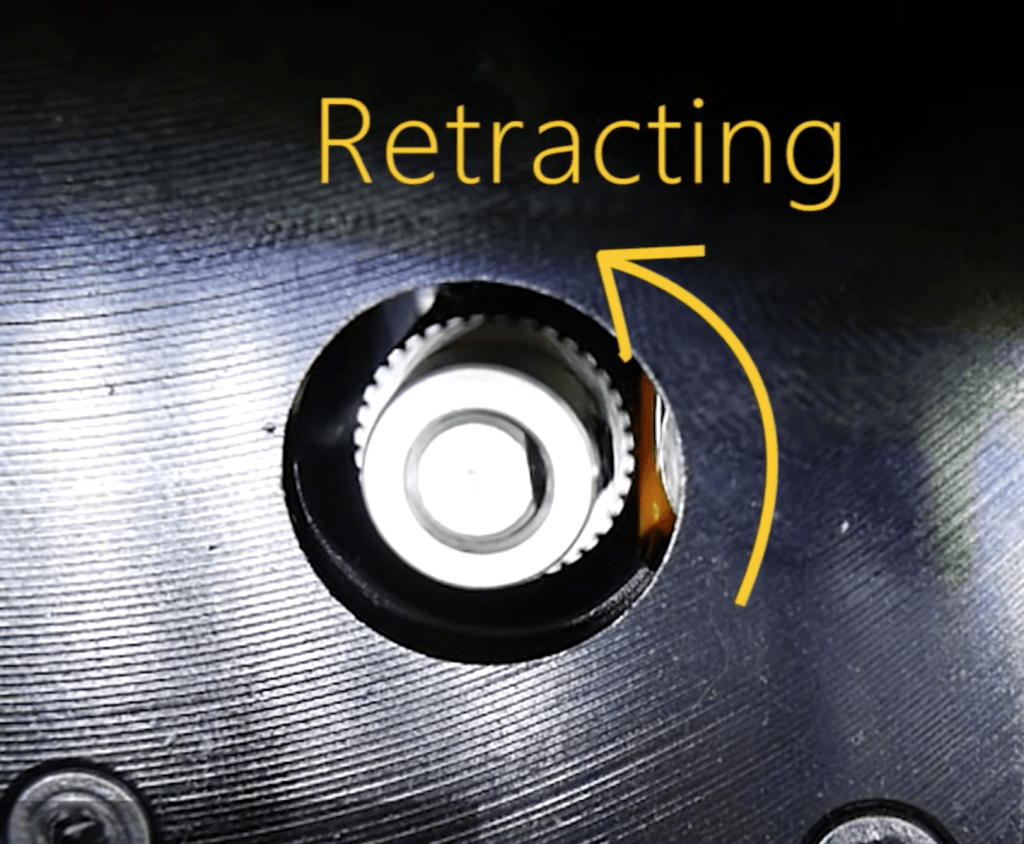
Retraction is a process in 3D printing where the extruder pulls filament back from the hot end to relieve the hot end of built-up pressure.
In other words, retraction is the process of the extruder sucking filament out of the hot end so that excess filament doesn’t come out of the nozzle and causes over-extrusion.
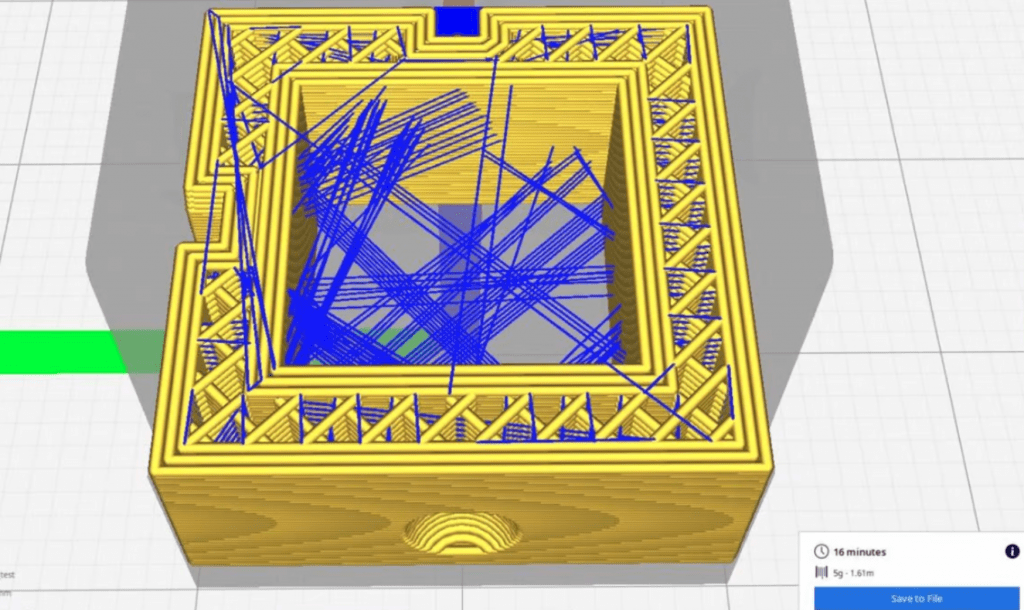
When a retraction move occurs depends on some slicer settings, but it usually happens before the printhead moves to the next layer or when the printhead is moving to a non-continuous part of a print job.
Retraction is controlled in the slicer through a few settings, such as Retraction Speed and Retraction Distance, and it has a big impact on how a print turns out.
Moreover, if the retraction settings are too weak, the pressure won’t go away, causing over-extrusion, usually in the form of stringing. On the other side of the spectrum, if the retraction settings are too strong, you could experience under-extrusion (e.g. gaps in your print) or hot end jams.
Check out our article on how to fix under-extrusion on your Ender 3.
What Is Stringing?
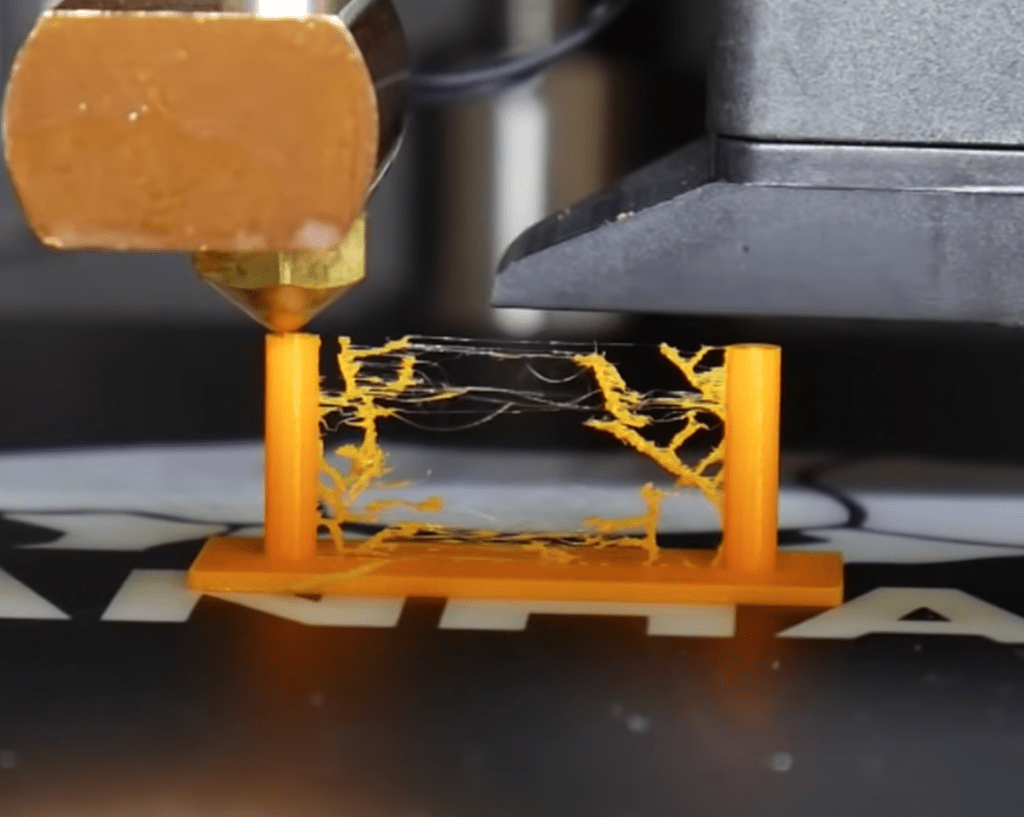
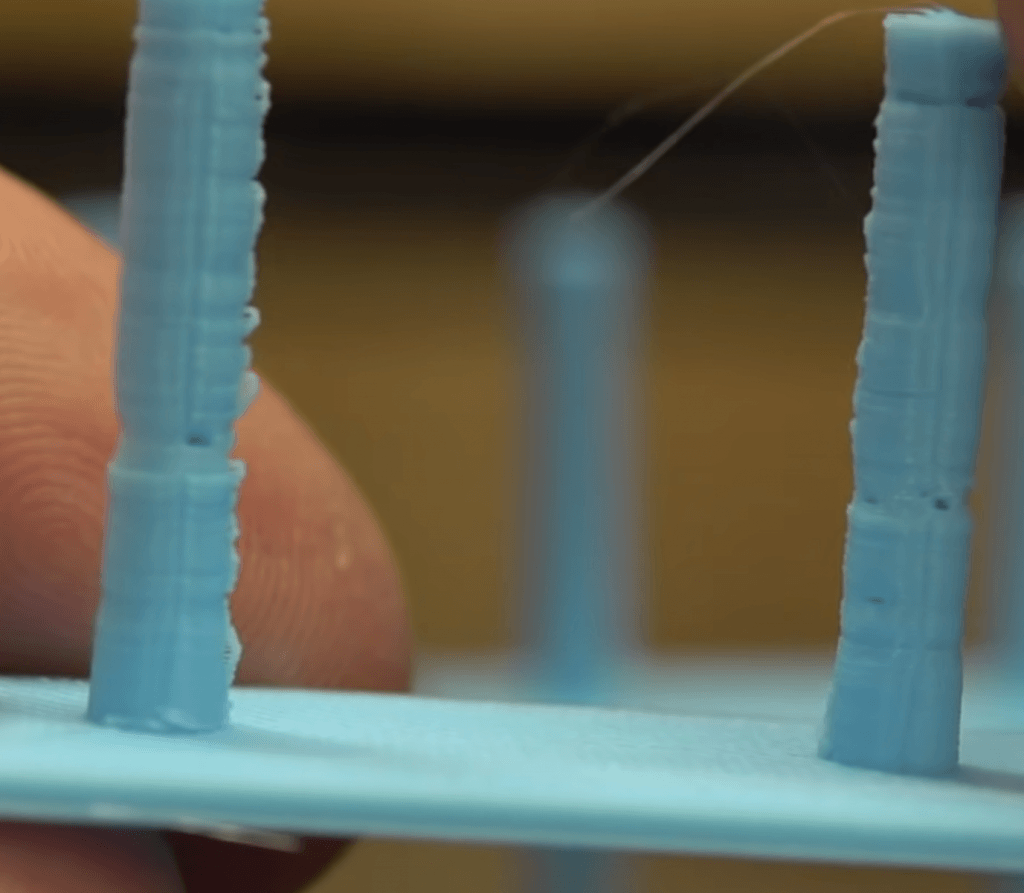
Stringing is a type of 3D printing issue that falls under the over-extrusion category. It occurs on a 3D print when excess filament comes out of the nozzle and forms small whisps or “strings” that stick to the exterior of a print.
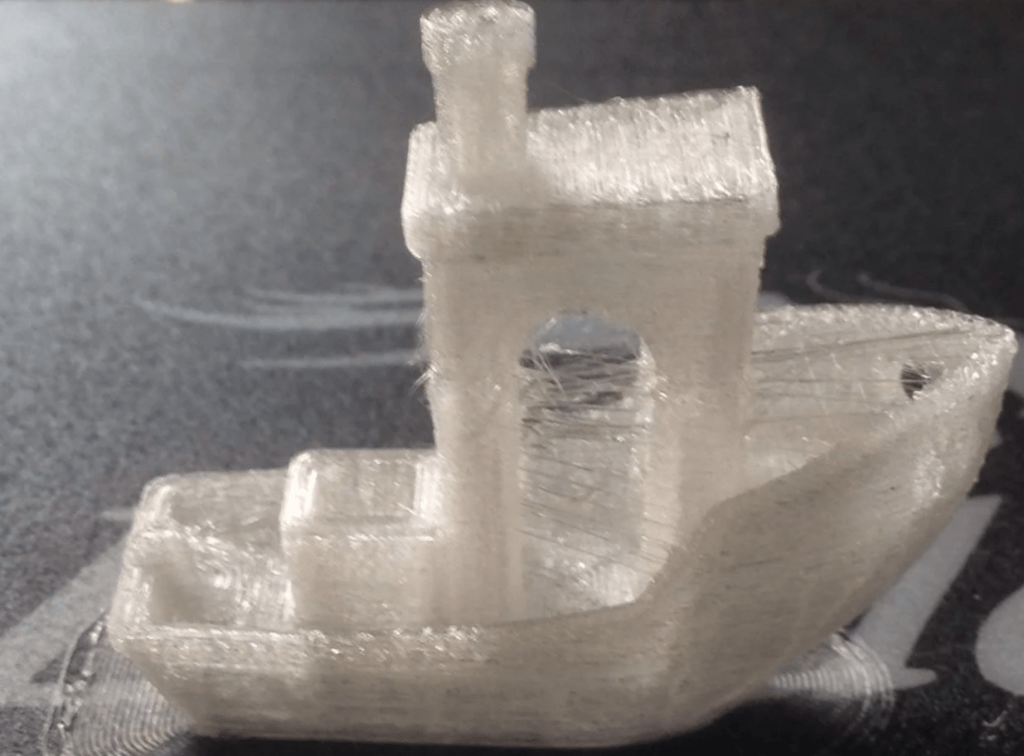
Stringing not just ruins the visual appearance of your 3D print but also negatively impacts its dimensional accuracy because too much plastic material is on the model.
What Causes Stringing?
Stringing, a type of over-extrusion can be caused by many different factors, but the most common one is poorly-calibrated slicer settings.
Specifically, I’m talking about incorrect retraction settings, whether it be the retraction distance, speed, extra prime amount, or another related setting. As we mentioned, when the retraction settings are too weak, stringing can occur on prints.
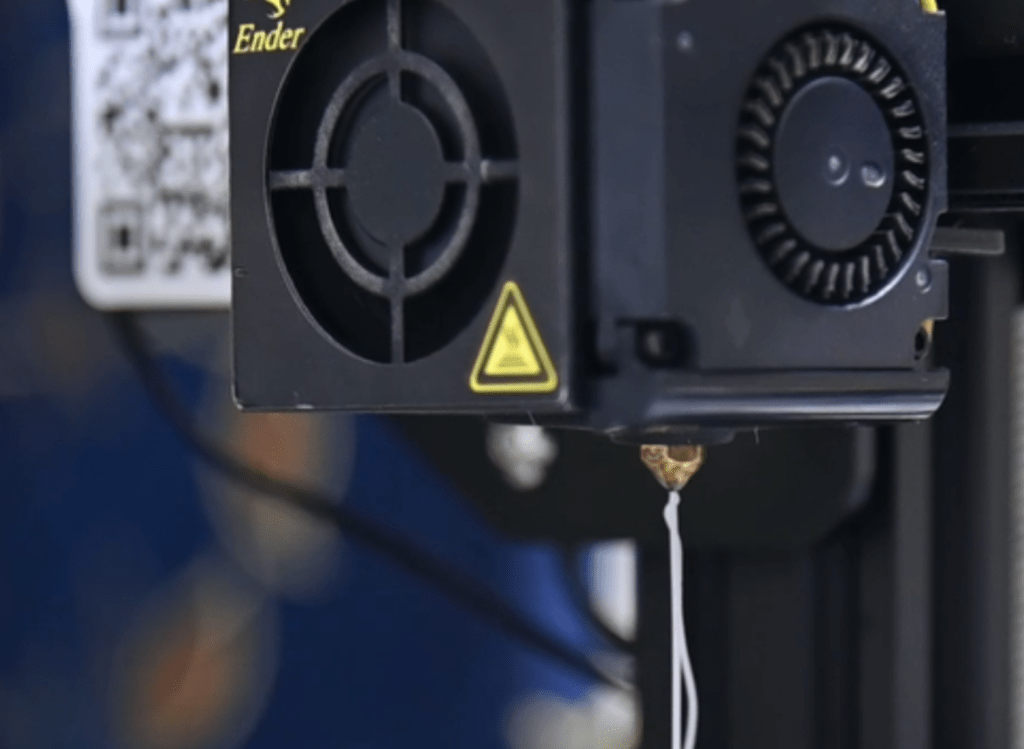
Another cause of stringing is too high of a nozzle (hot end) temperature. Moreover, the hot end temperature is directly correlated with filament flow, so the higher this temperature, the more filament will come out, causing over-extrusion (e.g. stringing) on prints.
If your nozzle is partially clogged or dirty on the outside, that can also cause stringing.
Finally, a weak extruder motor can lead to stringing. That’s because if the extruder isn’t strong enough to pull back the filament for a retraction, then stringing will occur.
Best Retraction Settings
Below, we’ve gone over the best retraction settings for an Ender 3 (Pro/V2). I’ve recommended a specific value for each of the retraction settings below. And while these values are specifically meant for the Original Ender 3, Ender 3 Pro, and Ender 3 V2, they will likely work on other printers too!
Enable Retraction
The first setting you should look at is the Enable Retraction feature, a boolean setting that tells the printer whether to use retraction moves at all or not. On Cura, it’s a checkbox, and I suggest checking it!
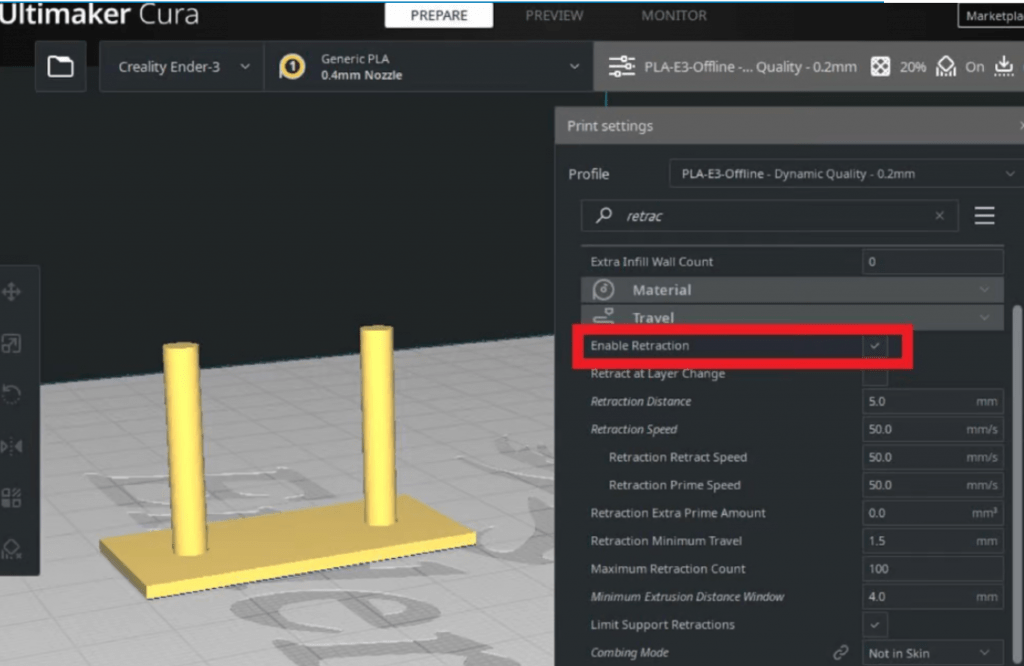
Once turned on, all of the other retraction settings will appear beneath the checkbox.
- Recommendation: Turn on
Retraction Distance
The retraction distance is considered the most important retraction slicer setting, and it controls the length of filament that is pulled back by the extruder for every retraction move.
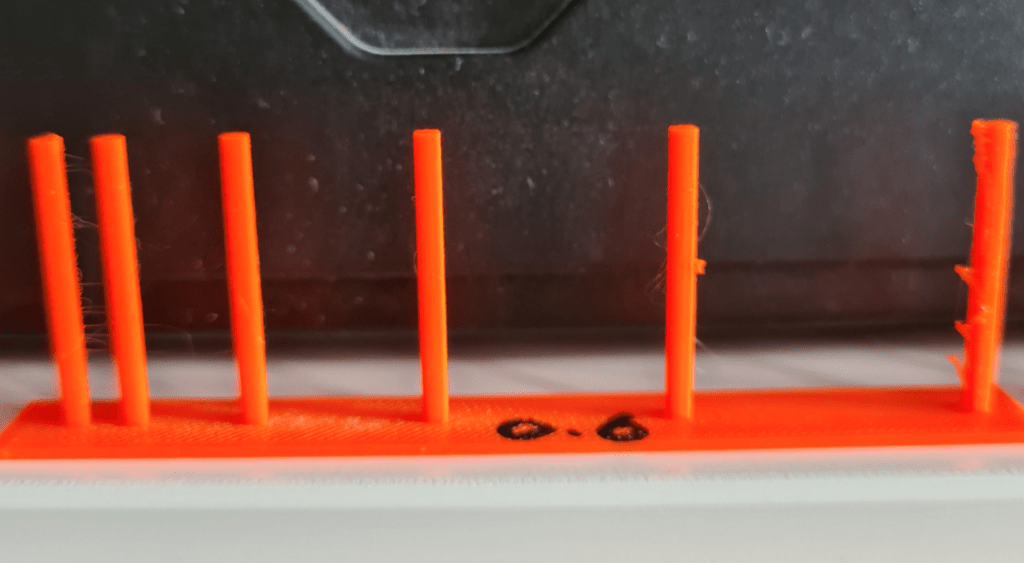
For the Ender 3 (Pro/V2), I’ve found that a retraction distance of 5.2 mm works great. Note that you should use a much lower value (1.0-2.5 mm) for this setting if you have a direct drive extruder configuration (e.g. Ender 3 S1).
While 5.2 mm works perfectly for my Ender 3s, every printer is different, so feel free to change it based on your print results. I suggest adjusting the value in increments of 0.2 mm, as this will prevent you from accidentally overshooting the correct retraction distance.
- Recommendation:
- Bowden drive (Original, Pro, V2): 5.2 mm
- Direct drive (S1): 2 mm
Retraction Speed
Retraction speed is the second most important retraction setting for 3D printers. As you probably guessed, this setting controls how fast a retraction happens, or, in more specific terms, the rate of speed for the extruder motor during a retraction.
The faster the extruder pulls the filament out of the hot end, the faster the hot end will depressurize. As such, a higher retraction retract speed means less retraction.
But don’t go too high for this setting. That’s because the Ender 3’s extruder motor isn’t optimized for high speeds, so using too high a retraction speed could tire out the motor, leading to other printing problems down the road like under-extrusion. Additionally, moving filament in and out of the hot end too fast can potentially cause a clog.
I like to set the retraction speed to the same value as my print speed, which is usually 45 (or 50) mm/s. Using the same speed means the motor won’t have to accelerate and decelerate as often, which reduces the chances of any motor problems.
But, if you like to print super fast, I don’t advise using a retraction speed equally as fast. Moreover, I wouldn’t set the retraction speed to anything over 55 mm/s as this could cause hot end clogs or motor overheating.
- Recommendation: 45 mm/s
Retraction Extra Prime Amount
The Retraction Extra Prime Amount is a setting in Cura that specifies how much additional filament should be pushed through the hot end to avoid under-extrusion.
Moreover, after the extruder retracts the filament from the hot end, it pushes the same amount back when the retraction move is over. But, often, the amount of filament pushed back into the nozzle isn’t enough, causing a small instance of under-extrusion at the end of every retraction move.
The Extra Prime Amount is the length of additional filament, in excess of the retraction length, that will be pushed by the extruder to ensure no gaps appear in the layers of your print.
The default value for this setting is 0, and I suggest keeping it this way. However, if you’ve noticed gaps in your Ender 3 prints due to retractions, then I recommend increasing the value to 0.064 mm. I arrived at this value by cubing the nozzle diameter (0.4 mm), which typically works very well for this setting.
- Recommendation: 0 mm (Or 0.064 mm if you have problems)
Minimum Extrusion Distance Window
The Minimum Extrusion Distance Window controls the space where the Maximum Retraction Count, a setting we’ll get to next, is enforced. In other words, the value of the Minimum Extrusion Distance Window is the minimum amount of filament extruded that must be met in order to perform the Maximum Retraction Count specified.
I suggest setting the Minimum Extrusion Distance Window to the same value as your Retraction Length, and Cura says the same!
- Recommendation: 5.2 mm (or whatever retraction distance you’re using)
Maximum Retraction Count
The Maximum Retraction Count is the highest number of retraction moves that your printer is allowed to make after extruding the Minimum Extrusion Distance Window.
For instance, let’s say the Maximum Retraction Count is 100 and the Minimum Extrusion Distance Window is 10 mm. That means for every 10 mm of extruded filament, 100 retractions are allowed to take place. Any suggested retractions after the 100th in the extrusion window won’t occur.
I suggest keeping the Maximum Retraction Count at Cura’s default of 100! For very small prints, though, you might want to increase this value to 200.
- Recommendation: 100
Limit Support Retractions
While Cura currently doesn’t offer it, the Limit Support Retractions is a boolean setting for some 3D slicers that tells the printer to avoid retraction moves while printing support structures as much as possible.
Turning this feature off will mean the printer will treat support structures the same as it treats the actual model, meaning more retraction moves will occur. As such, you’ll likely have less stringing on the support structures of your model, but, with this, an increased chance of a hot end clog (more retractions = higher chance of failure).
Because of this, I suggest turning this setting feature on because the support structures for a print will be thrown out anyways, and it’s better to stay safe than sorry!
- Recommendation: Turn on
Combing Mode
The Combing Mode is a setting that defines a set of rules the printer must follow when the nozzle is moving from one section of a print to another. Cura offers a few options for this setting, including “None”, “All”, “Not In Skin”, “Within Infill”, and “Not on Outer surface”. Each of these gives different restrictions to the path the printhead must follow when moving along a print.
I’ve found that the best combing mode for preventing stringing is “Within Infill”. This combing mode tells the printer to make travel moves above the infill section of a print. As such, any oozing or excess material flowing from the nozzle won’t end up on the exterior (visible) surface of your print.
- Recommendation: Set to “Within Infill”
Nozzle Temperature
Lastly, the nozzle temperature isn’t technically a retraction setting, but I like to consider it one sometimes because it can be used to combat stringing just as much as retraction settings can.
The nozzle temperature is directly correlated with filament flow, so using a high nozzle temp often leads to over-extrusion on 3D prints, such as the appearance of stringing. As such, if you’re dealing with stringing, I suggest lowering your current nozzle temperature by 5 °C.
And, if 5 °C doesn’t work, try going another 5 °C lower. But try not to lower your normal printing temperature by more than 15 °C as this can cause under-extrusion issues on top of stringing.
And, if you’re not sure what nozzle temperature to use in the first place, then you can check out the ranges for PLA, ABS, and PETG that I listed below
- Recommendation: Lower nozzle temperature by 5 °C
- Temperature ranges:
- PLA: 190-220 °C
- ABS: 240-260 °C
- PETG: 230-250 °C
Other Ways To Solve Stringing
While the retraction settings we went over in the previous sections are very useful, there are a few other ways you can prevent stringing on your 3D prints.
Clean Nozzle
Over time, the inside and outside of the nozzle will get dirty. This usually isn’t too big a deal, but it can actually cause stringing to occur, so cleaning the nozzle is a smart idea.
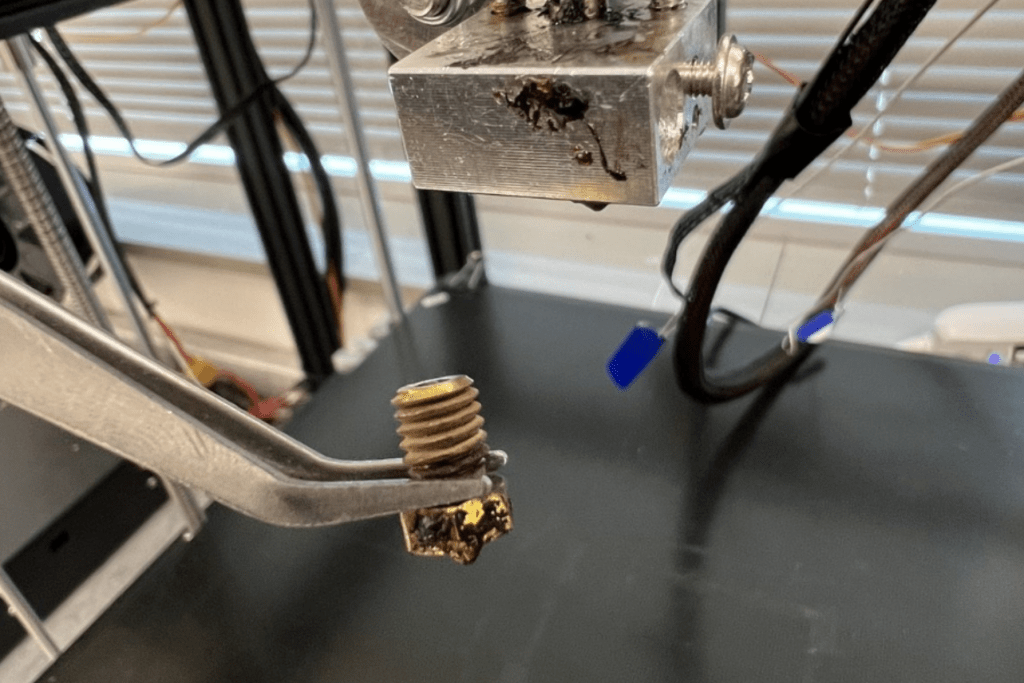
You can clean the outside of the nozzle by heating it up to your normal printing temperature and then going at it with a metal pick, scraping off any debris or guck from the outside surface of the part.
Cleaning the inside is a little more complicated, and the process starts by heating the nozzle up to your regular printing temperature and taking out the filament. Once the filament is pulled out, you should use a small metal needle and stick it up through the exit hole of the nozzle, pushing it up and down until it moves smoothly.
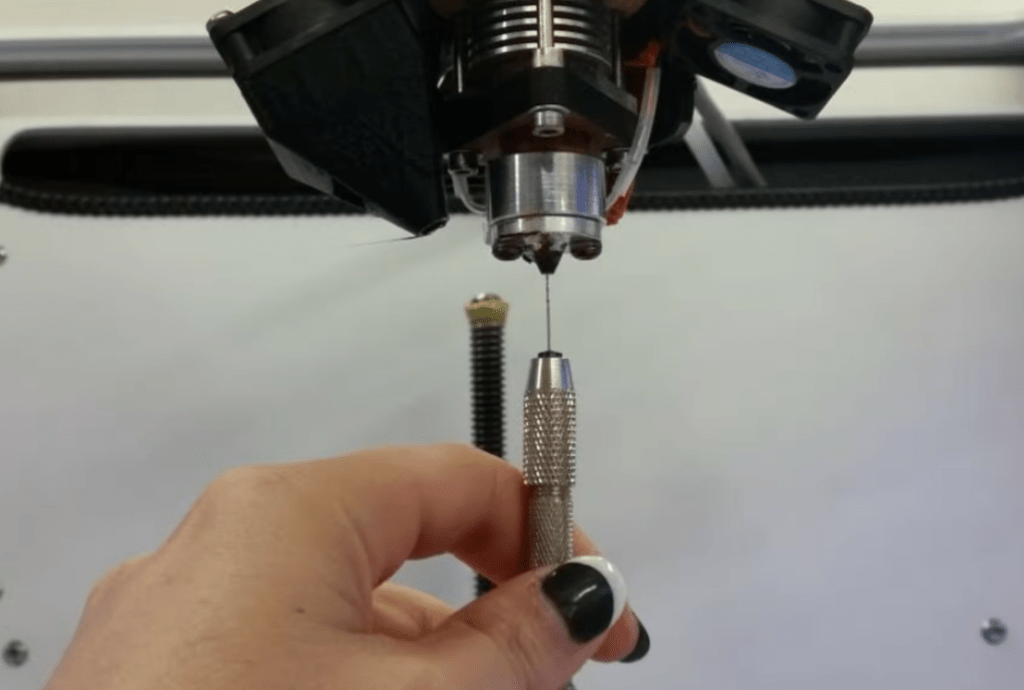
If this isn’t working, you might want to replace the nozzle because your clog might be too big to fix with a needle.
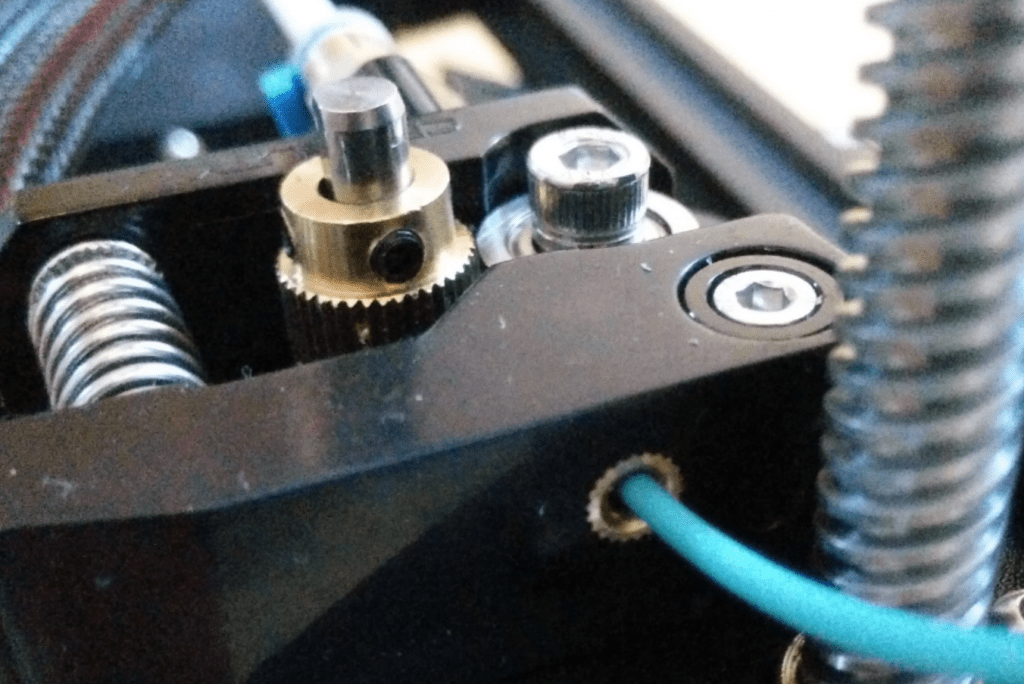
Clean Extruder
Just like a dirty nozzle can cause stringing, the same is true for a dirty extruder. After many prints, debris tends to build up around the drive gear of the extruder assembly.
This can make the extruder’s drive gear temporarily dull due to filament grinds filling the gaps between the gear blades. And, if the drive gear is dull, the extruder won’t have enough grip on the filament to push it with enough torque. As such, you should clean the extruder every few months.
To clean the extruder, just unscrew and remove the drive gear (or gears if your extruder is dual-drive) from the motor axle. Then, grab a toothpick or Exacto blade and carefully move it through the gaps between the gear blades. This should push any build-up debris out, sharpening the gear.
How to Know When the Retraction is Too High?
You’ll know if your retraction distance is set too high if your prints are coming out with small gaps in the layers or if the hot end clogs.
That’s because when the retraction distance is set too high, too much filament is pulled back, resulting in not enough filament coming out of the nozzle when the retraction is reversed.
If you’re scared of accidentally setting the retraction distance too high, I suggest starting with a small value and slowly increasing it until you’ve eliminated stringing on your prints. In other words, try setting your retraction distance to the minimum value that still gets rid of stringing on your prints.
Conclusion
Retraction is the easiest way you can stop stringing, as well as other forms of over-extrusion, on your 3D prints.
For the Ender 3 (Pro/V2), there are many different slicer settings you can use to fine-tune retractions to best prevent stringing.
After many hours of testing, I’ve found that the best Ender 3 retraction settings include a retraction distance of 5.2 mm and a retraction speed of 45 mm/s.
Some other tips for getting rid of stringing on your Ender 3 (Pro/V2) are to lower your nozzle temp a lil’ bit, set the Combing Mode to “Within Infill”, and clean the nozzle!
Hope this helps!
Related Articles: