

Every time you tell your printer to do something, whether it’s moving the printhead 10 mm or level the bed, there is at least one G-code command being sent, read, and executed. G-code commands are the digital building blocks of a 3D print, and, without them, your 3D printer wouldn’t be able to do literally anything other than exist.
There are hundreds of different G-code commands, each uniquely responsible. However, few G-code commands are as important as the G90 and G91 commands.
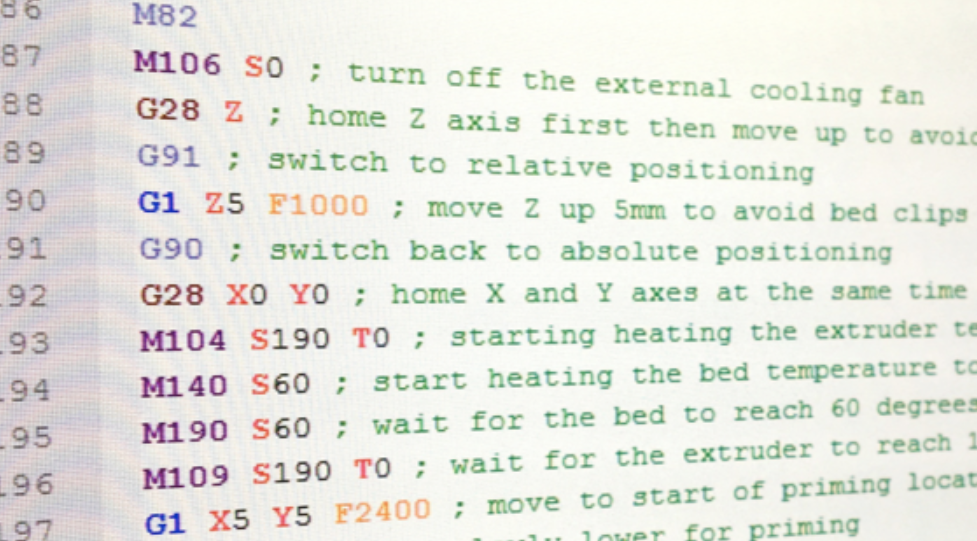
The G90 and G91 commands are two G-code commands that define the positioning mode of your 3D printer, CNC router, or similar machine. The G90 command specifies absolute positioning, where movements are set around absolute coordinates. On the other hand, the G91 command sets your printer into the incremental positioning mode, where all movements are incremental and relative to the current position of each axis.
While they might not sound all too important, the G90 and G91 commands are super helpful when manually moving the different axes of your 3D printer. In this article, we’ll take a deep dive into the G90 and G91 commands, going over what each does, how to use them, examples, and more! Enjoy!
Table of Contents
What is G-Code?
G-code is an instructional command language (officially known as RS274) used by the motherboard of 3D printers, CNC routers, and similar axis-based machines.
Contrary to what you might think, your 3D printer can’t actually interpret a 3D model; it can only interpret G-code commands. To turn a 3D model file (e.g. STL file) into a G-code file (print file), you use a 3D slicer software, like Cura or PrusaSlicer.

These 3D slicer programs generate a script of G-code commands based on given machine parameters, which can be read and executed by your machine to (hopefully) create your desired 3D part.
It’s worth noting that there are hundreds of different commands in the modern G-code language, which each perform specific actions and have their own parameters. Some commands, like G0 and G1, handle basic axis movement, while others, like G90 and G91, deal with the printer’s positioning mode.
What is the G90 Command?
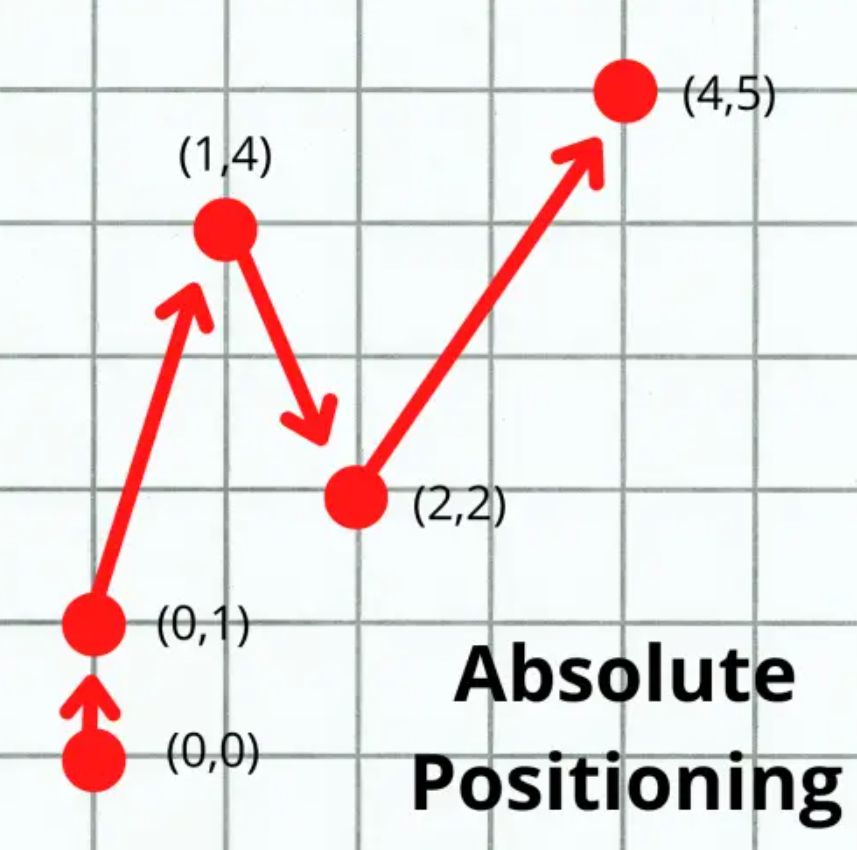
The G90 command is a G-code command that tells your machine to use the absolute positioning mode. If you’ve forgotten what this is since 6th-grade algebra, absolute positioning is basically when the coordinate system operates around a fixed origin point. As such, a set of coordinates will always point to the same place.

The simplest way I can explain this positioning mode is by making an analogy to a chessboard. The positions of the pieces on the chess board aren’t fixed (they all can move), but the coordinates of the actual board positions never change. E4 will always be E4, no matter where the King is placed.
In the absolute position mode, sending the same movement command, like “G0 X15 Y20 Z30”, will always bring the printer to the same axis position, assuming the origin position has not been changed by another command.
When to Use G90?

As you probably know at this point, the G90 command is useful when you want to enter into the absolute positioning mode.
You may want to enter into absolute mode when calibrating the axis limits for the printhead and print bed. Moreover, if your printer has an X-axis range from 0 to 220, you can send the “G90” command followed by a “G0 X220” movement command to check that the digital X220 position is lined up with the physical X-axis endstop.
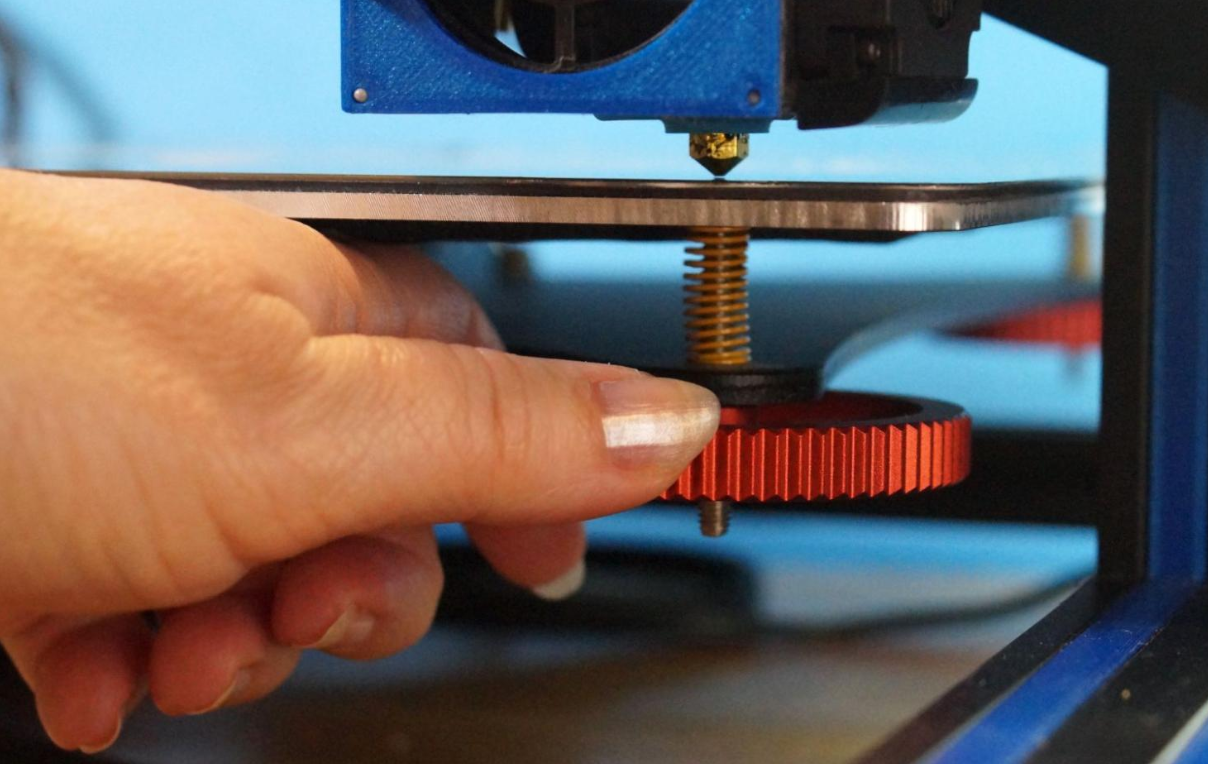
The G90 command can also be used when writing a custom bed leveling script, as absolute positioning is generally better in the context of bed leveling for 3D printers.
One thing to note, though, is that the G90 command is a bit difficult to use when you plan on extruding filament. That’s because, in the absolute movement mode, you have to keep track of all previous extruder movement to be precise in how much filament you extrude in a given instance.
How to Use the G90 Command?
Using the G90 G-code command is super simple, as the command has literally zero parameters that you have to specify. All you have to do is send “G90” through a G-code terminal. That’s it!
What is the G91 Command?
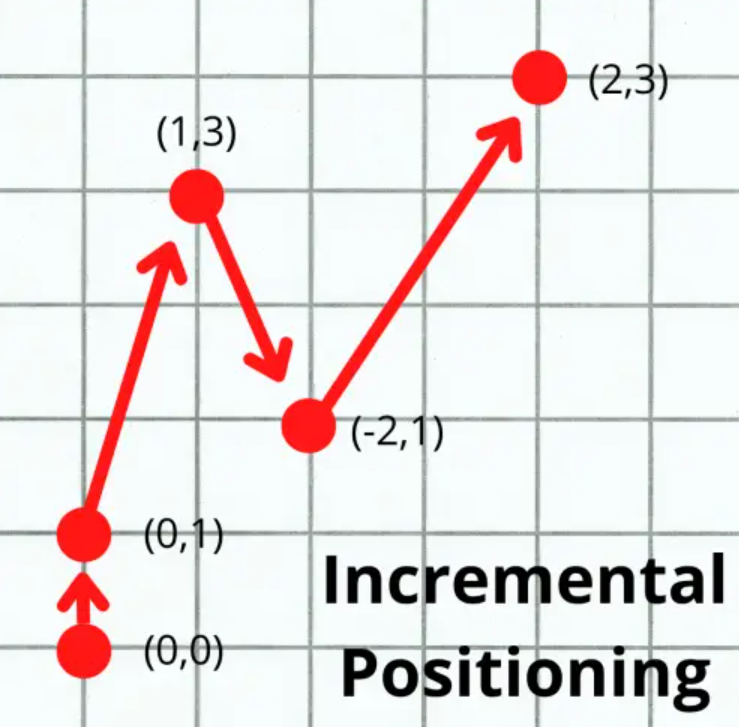
The G91 command is basically the opposite of the G90 command, specifying the incremental positioning mode rather than the absolute mode. With incremental positioning, also known as relative positioning, the printer’s coordinate system, and origin shifts with each movement.
Going back to my chess board analogy, imagine your King piece is placed near the center of the board, like E4. With incremental positioning, you could tell the King to move one unit up, and, no matter where the King is on the board, it will move one unit up.
Moreover, with incremental positioning, movements are made relative to the current position of an axis rather than the origin of that axis. So, if you sent the “G0 X10” command, your 3D printer would move the X-axis gantry 10 units forward no matter where it is (unless it hits a limit switch). And, in incremental mode, if you send the same movement command twice, the specified axes will move two times (unless a limit switch is triggered).
When to Use G91?
You should use the G91 G-code command whenever you want to use incremental positioning for the movement of your printer’s axes.
One of the most common instances, when this might happen, is when you’re fine-tuning the position of your print head. Furthermore, if you notice that your print head is slightly off from where you want it to be (center or corner of the print bed), you can use the G91 command to move it in small increments relative to its current position until it’s in the correct position. Just make sure you send the G92 command to set that new position as the origin point.
It’s worth noting that while the G91 command can be useful in certain situations, it’s important to be careful when using it, as it can lead to unexpected movements if not used correctly. It’s always a good idea to test any new commands on a small, simple print before using them on a larger or more complex project.
How to Use the G91 Command?
Just like with the G90 command, the G91 command has no parameters. As such, to use the command, all you have to do is send “G91” through a G-code terminal. Doing so will set in the incremental positioning mode for all axes, including X, Y, Z, and E (extruder).
How to Send G-Code Commands?
Whether you’re sending a G90, G91, or a different G-code command, you’ll need a way of communicating that command to your printer’s motherboard. There are two common methods for manually sending G-code commands, which I’ve briefly gone over in the sub-sections below:
1. 3D Printer Server

Firstly, you can use a 3D printer server, like an OctoPrint or Klipper server. These servers come with online platforms where you can monitor and control many aspects of your 3D printer, and even send G-code commands through their built-in G-code terminal.
Moreover, to send a command, start by connecting your 3D printer server to your printer’s motherboard (via USB). Then, open the remote access site for the server, find the G-code terminal on the platform, and send your commands.
2. USB Connection

The other super simple way to manually send G-code commands to your 3D printer is with a direct USB connection. This method entails using a USB cable to connect your printer’s motherboard to your laptop, PC, or another computer.

Once connected, you can download and use standalone G-code terminal software, like Printrun (AKA Pronterface) to manually send commands to the printer. Just make sure you specify the correct COM port on the software, or else you won’t be able to send commands.
Difference Between G90 and G91 G-Code
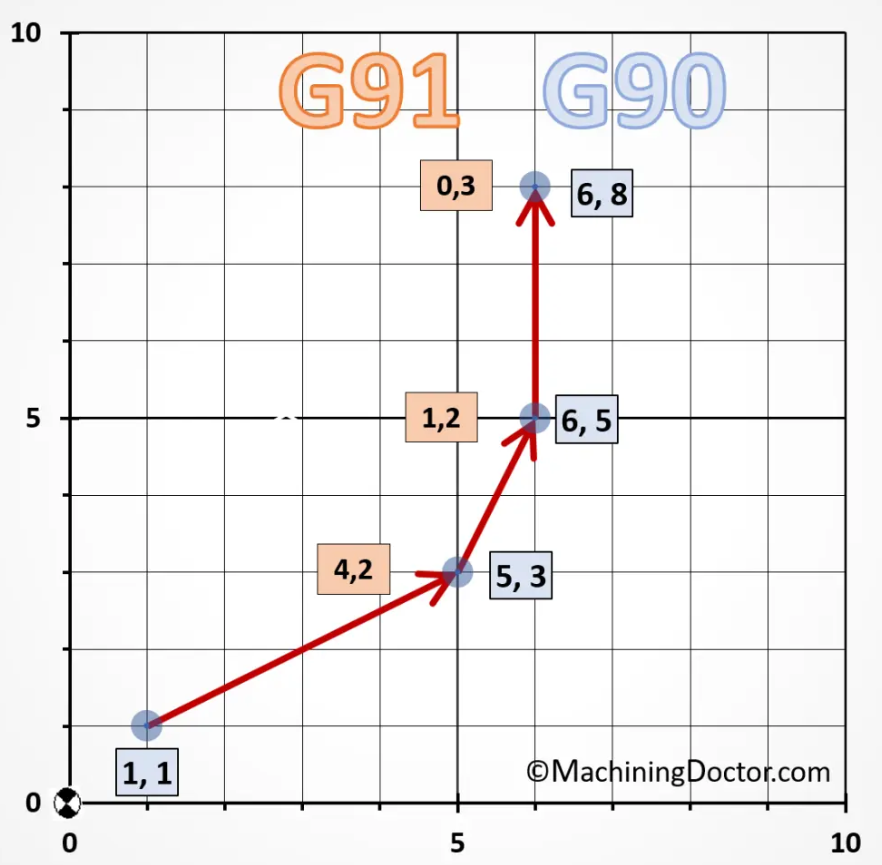
So what’s the difference between the G90 and G91 commands? Well, they each specify different positioning modes.
First up, the G90 command specifies the absolute distance mode or absolute positioning. In this mode, movements should be made using absolute coordinates. For example, if you want to move the printhead to the X50 position and it’s currently at the X30 position, you would send a command like “G0 X50” rather than “G0 X20”.
On the other hand, the G91 command specifies the incremental mode for your printer and its axes. In this mode, movements should be made using relative coordinates. For instance, if the print bed is positioned at Y20, and you want to move it to the absolute Y30 position, you would send a command like “G0 Y10”, and the bed would move +10 units from its current position.
Conclusion
When it comes to moving a component on your 3D printer, whether it’s the printhead, print bed, or extruder, knowing how the part will move is important. You should make sure you know whether your printer is set in absolute or incremental positioning mode before making sending any movement commands. The same movement command, like “G1 X10”, will move the printhead differently depending on the positioning mode of the printer.
The best way to ensure you know how your 3D printer will move is to know the G90 and G91 commands.
The G90 G-code common specifies the absolute positioning mode, where the coordinate system and origin are fixed. In this mode, sending the same command will result in the printer moving to the same spot every time.
On the other hand, the G91 G-code command will set your machine in incremental positioning mode. In this mode, all movements are incremental and are based on the printer’s current position rather than a fixed origin point.
And using either the G90 or G91 command is super easy as both of them have no parameters. Just type the three characters of the command into a G-code terminal and send it!