

One of the biggest problems people have with 3D printers today is that they’re too slow.
That’s because, typically, the faster you 3D print, the worse the print quality of the model.
But what if I told you that’s not always true? In fact, there are a few changes you can make to your 3D printer, including settings and hardware, that can lower print times while not degrading the quality of your prints. And, in some cases, these changes can actually improve the quality of your prints!
The most obvious way you can speed up your 3D printer is by increasing the printing speed and also increasing the nozzle temperature with it. Additionally, increasing the layer height, lowering the infill density, using a fast infill pattern, and limiting the use of supports also help a ton!
Read on to learn more about how you can speed up your 3D printer with our specific recommendations below.
Table of Contents
- Why Speed Up Your 3D Printer?
- How to Speed Up 3D Printing: 11 Methods
- 1. Increase Print Speed
- 2. Increase Other Speed Settings
- 3. Increase Layer Height
- 4. Decrease Infill Density
- 5. Use a Faster Infill Pattern
- 6. Increase Travel Speed
- 7. Don’t Use a Brim or Raft
- 8. Lower Wall Thickness
- 9. Reduce Top and Bottom Layers
- 10. Reduce the Amount of Supports
- 11. Printing Small 3D Models At The Same Time
- Physical Changes to Speed Up 3D Printing: 3 Methods
- Downsides of Faster 3D Prints
- Does Travel Speed Affect the Print Quality?
- Conclusion
Why Speed Up Your 3D Printer?
You should speed up your 3D printer because, well, you won’t have to wait as long for prints to finish.
Another reason you might want to speed up your 3D printer is if you’re having issues with heat creep or hot end clogs. Moreover, speeding up your 3D printer can actually solve these issues because the filament will flow out of the hot end faster, giving it less time to clog the hot end assembly.
How to Speed Up 3D Printing: 11 Methods
There are many ways you can speed up 3D printing in a safe way so that you preserve or improve the print quality. In the sections below, I’ve gone over my favorite and most effective methods!
1. Increase Print Speed
The first and perhaps most obvious way you can increase the printing speed of your machine is by increasing the actual print speed setting in your 3D slicer.
Just about every 3D slicer software, including Cura, PrusaSlicer, and Simplify3D, have a print speed setting. Depending on what filament material you’re printing, this speed value is usually set in the range of 40-60 mm/s. And, if you’re printing PLA, I suggest trying 60 mm/s, as this is pretty fast!
If you’re already using 60 mm/s, you can go up to 65, 70, or even 80 mm/s. And, when you change the printing speed setting over 60 mmm/s, I advise you to do so in increments of 5 mm/s to ensure no problems arise regarding print quality.
With this increase in printing velocity, I also suggest a 5 °C increase to your hot end. And, if you’ve increased the temp and speed and are seeing under-extrusion issues, increase the nozzle temp by another 5 °C.
On a related note, check out our article on the best print speed settings for PLA, ABS, & more to learn more and our reviews of the fastest 3D printer read here.
2. Increase Other Speed Settings
Besides the main print speed setting, there are also a handful of other speed settings, including the infill speed, wall speed, top/bottom speed, and initial layer speed, which each control the print speed during their respective print functions. These other speed settings are usually automatically set as a fraction of the main speed setting, but you can raise them to increase the overall printing speed of your machine.
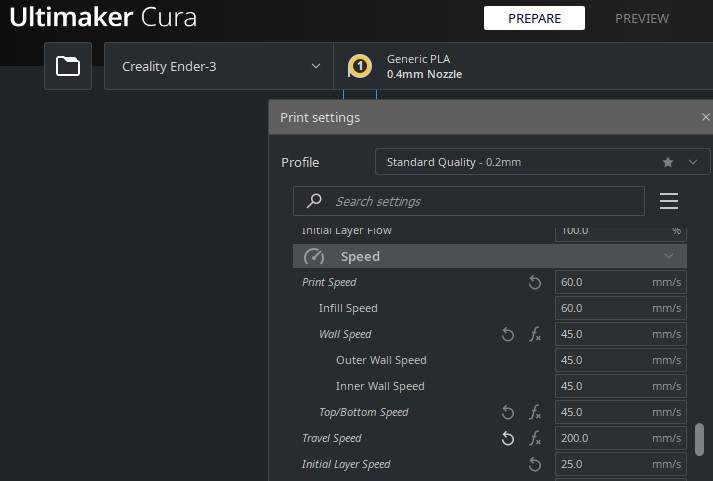
For example, Cura sets the wall speed to ½ of the main printing speed setting, but I like to use a wall speed slightly higher. As such, I’ve set the main print speed setting to 60 mm/s but changed the wall speed to 45 mm/s.
If you want fast prints, I’ve provided my recommendations for a few popular speed settings below:
- Infill Speed: 60 mm/s
- Wall Speed: 45 mm/s
- Top/Bottom Speed: 45 mm/s
- First Layer Speed: 25 mm/s
3. Increase Layer Height
The layer height is easily the most impactful setting related to how long prints take. The lower the layer height, the more layers a model will have. And the more layers in a model, the more times the nozzle has to go around, making the printing time exponentially higher.
On the flip side of things, if you use a larger layer height, there will be fewer layers on a model, significantly decreasing the time for a print to finish. It’s worth noting that a larger layer height leads to stronger prints but also less detail for models.
If you want to reduce print time, I suggest using a layer height 0.04 mm greater than the one you’re currently using. For most users, this means going to 0.24 mm from 0.2 mm, which is the industry standard for layer heights as it provides a good amount of strength and detail.
It’s best to set the layer height as a multiple of 0.04 mm. That’s because of the way NEMA-17 stepper motors, the motors found in most consumer-grade 3D printers, are built. So, if you need to adjust the layer height, make sure to do so in increments of 0.04 mm.
4. Decrease Infill Density
The infill density is another slicer setting, and it controls how full your 3D model is. Moreover, an infill density of 100% will mean your 3D print will be completely solid, while a density of 0% means your model will be empty other than the shell layers (e.g. walls). Decreasing the infill density is a great way to lower the print time on your 3D print!
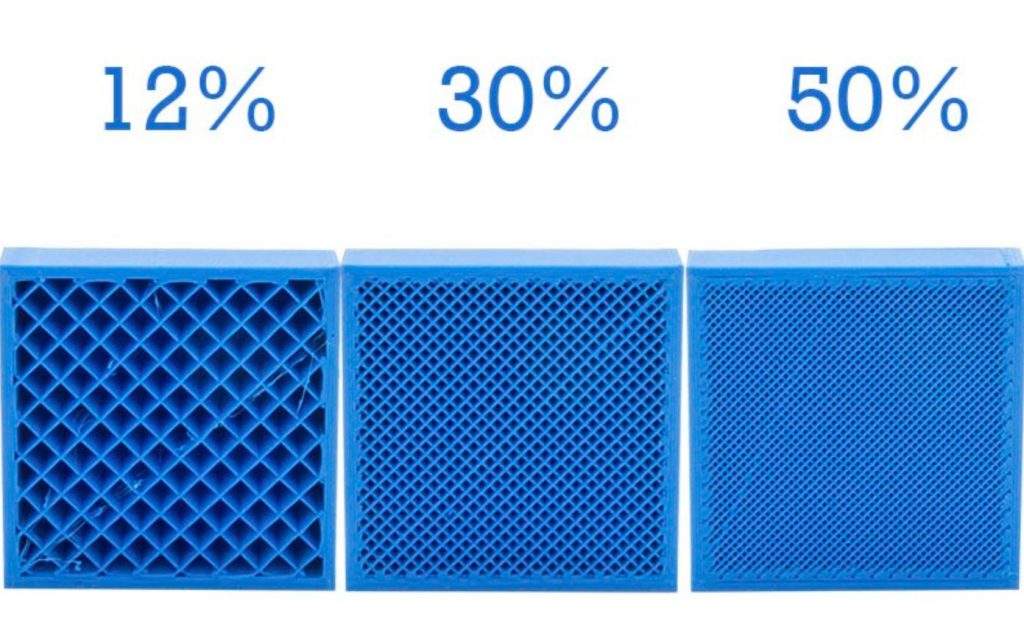
As infill density impacts strength, I don’t suggest dropping it to 0%. Instead, I suggest going with 10% or 15% as these will lower your printing time a good bit, especially if you were using a high density such as 50%. And 10-15% will also still make your model decently strong.
5. Use a Faster Infill Pattern
The infill pattern is the structure or shape of the infill inside a 3D print and surprisingly, it also has an effect on how long a print takes.
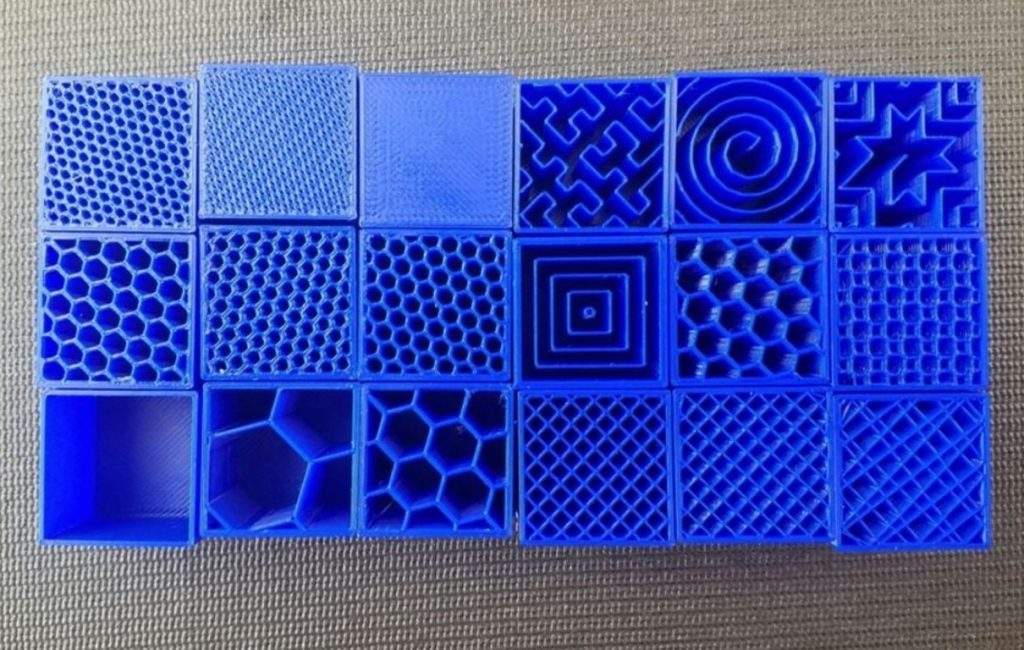
Moreover, certain infill patterns print faster than others, just as some are stronger than others. The fastest infill patterns are the “Lines” and “Rectilinear” patterns, as they’re both very simple shapes that the nozzle can trace very fast.
And don’t worry too much about strength because by choosing these “faster” patterns over a different one, you won’t be sacrificing more than 5-10% of the model’s strength.
6. Increase Travel Speed
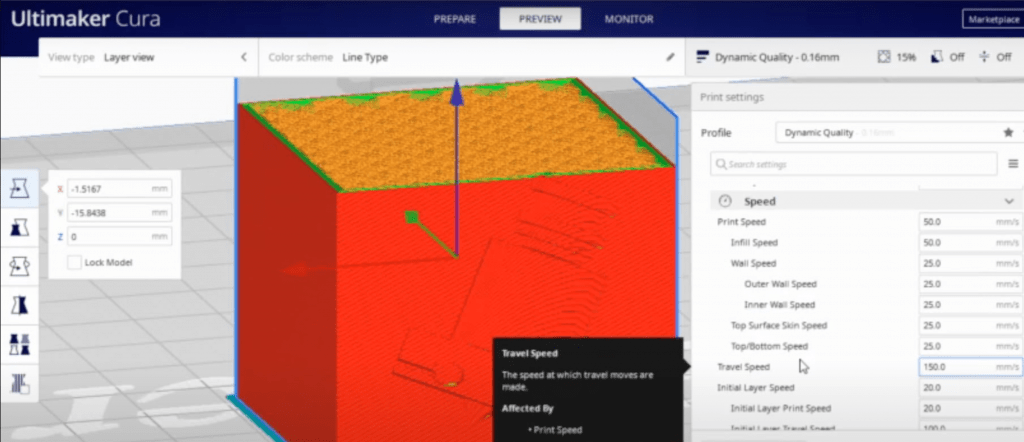
The travel speed is a slicer setting that tells your machine how fast to move the nozzle during non-extrusion moves. For example, your printhead is traveling when it’s moving from one segment of a print job to another without pushing filament through the hot end. Increasing this setting is another good way you can cut down on printing time.
In general, there aren’t any effects on print quality associated with increasing the travel speed, so it’s basically a no-loss change you can make. I suggest increasing this value to about 220 mm/s. If you want to speed up your printer, even more, you can try increasing it more, in increments of 10 mm/s (to be safe).
But I don’t advise setting it higher than around 280 mm/s. That’s because speeds this high could cause the motors to overheat, leading to printing defects or complete failures.
7. Don’t Use a Brim or Raft
A brim and raft are two ways many people like to ensure proper bed adhesion for prints. And while these two features can be super helpful, they add to the printing time. As such, you can deactivate a brim/raft to cut down on print length by at least a few minutes.
If you’re currently using a raft, though, and are still worried about first-layer adhesion for your prints, you can always just switch to a brim. And, if you’re using a brim, you can try using some glue or another print bed adhesive to ensure proper adhesion.
8. Lower Wall Thickness
The wall thickness in your slicer controls the width of the shell layers of your prints. Lowering the wall thickness is a pretty easy way to lower printing time, though this will make your 3D print a bit weaker.

Most slicers, like Cura, use a defect wall thickness of 1.2 mm (3 walls for most printers). But cutting this value to 0.8 mm will lower the print time by a good bit of minutes while not hurting the part strength too much. If you want to further cut down on time and aren’t worried about print strength, you can go down to 0.4 mm!
9. Reduce Top and Bottom Layers
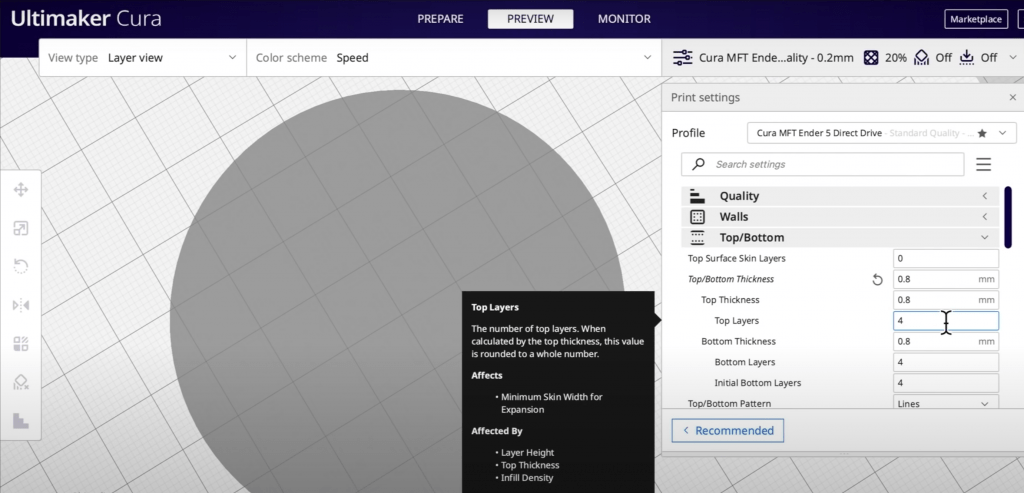
Similar to the wall thickness, the “top and bottom layers” is another setting that controls the shell of a model. But the top and bottom layers setting controls the distance from the infill to the outside layer of a print vertically, rather than horizontally like with wall thickness.
The top and bottom layer thickness is usually set at 1.2 mm, but I suggest going to 0.8 mm if you want to lower the printing time. Of course, this will make your model less solid and a bit weaker. But not by much!
10. Reduce the Amount of Supports
Supports are the features generated by the 3D slicer software that assist your machine in printing overhangs on a 3D model. Naturally, the more supports generated, the longer a 3D print. As such, it’s important that you reduce the amount, or the volume, of support material on your 3D model.

The best way to do this is to reorient your 3D model in order to minimize the size and height of overhangs on your inserted 3D model. In Cura, there’s actually a plug-in (Auto-Orientation) that you can download, and it will automatically orient your model to reduce support material and lower printing time!
Also, if you’re familiar with CAD software, you can try editing the structure of the 3D model to eliminate overhangs or at least make them more easily printable (e.g. smaller angle).
11. Printing Small 3D Models At The Same Time
My last suggestion is to print small 3D models at the same time. This obviously doesn’t lower the print time of an individual print, but it knocks out your print jobs faster, so you don’t have to spend as much time preparing your 3D printer and removing models from the build plate.
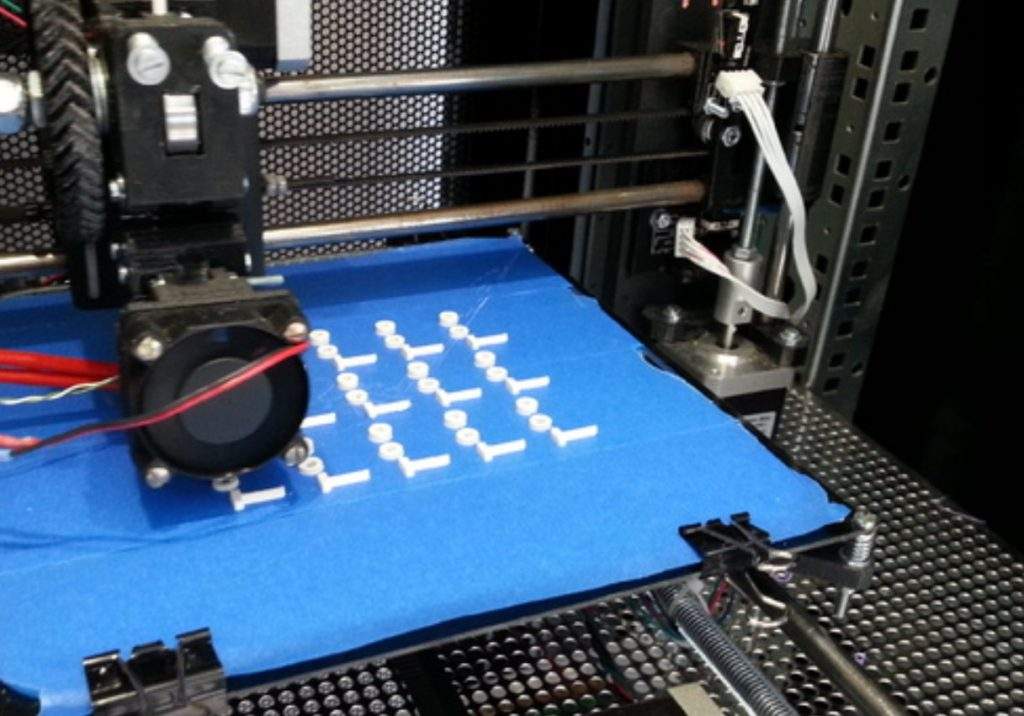
Printing small models at the same time only works if your print bed is level, though, so make sure you spend the time to properly level your bed. You can check out our article about how to do this on the Ender 3 (Pro/V2).
Once you’ve got the bed leveled, just load the same 3D models into your 3D slicer and move them around to make sure they fit.
Physical Changes to Speed Up 3D Printing: 3 Methods
Besides changes to your slicer settings, there are also a handful of physical changes that you can make to your printer to enable it to print faster. I’ve gone over the most effective physical modifications below:
1. Use Linear Rails
The first physical change you can make is to use linear rails, which is a motion system that involves using rigid metal rails on the gantries of a 3D printer. The moving parts of the 3D printer, including the printhead and print bed, are attached to carriages that have many small ball bearings onboard.
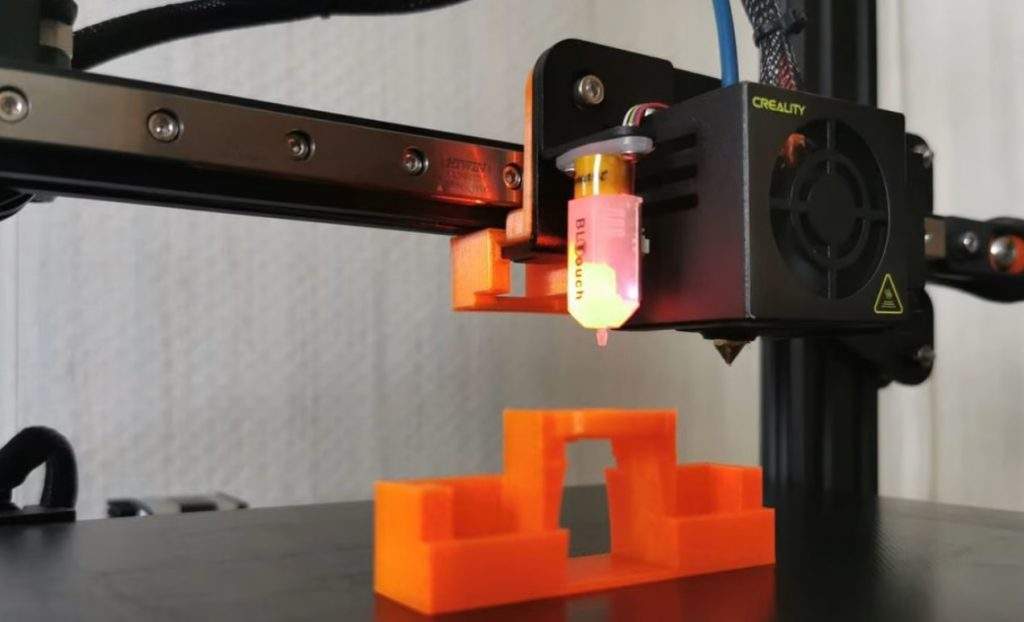
The ball-bearing carriages run super smoothly along the tracks, reducing vibrations from movement compared to other motion systems, like aluminum extrusions and conduit rails, which are on most printers.
And if the parts can move smoother, then you’ll be able to print faster because the risk of vibrations ruining your print quality isn’t as high.
2. Grease Bearing
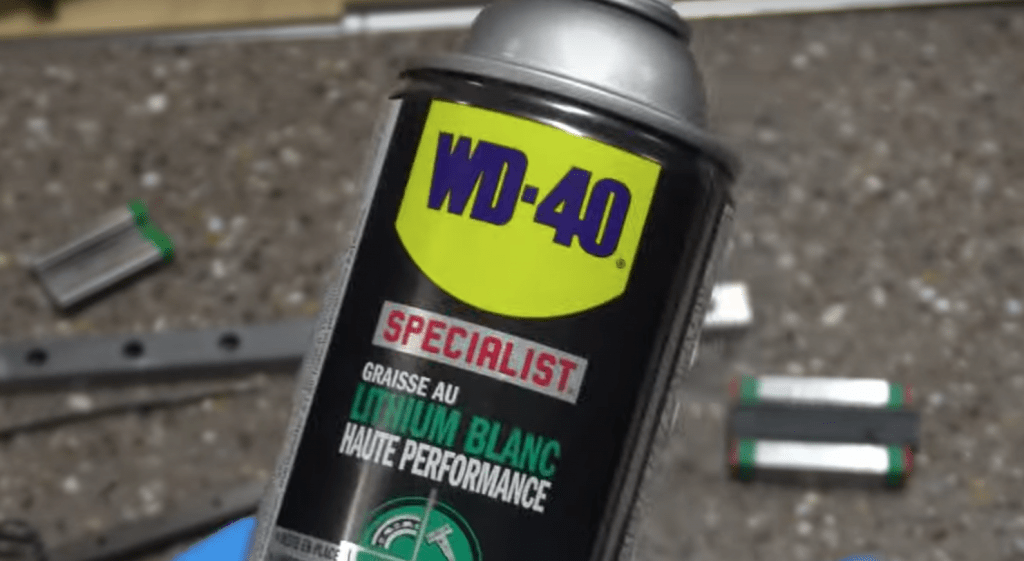
Most printers, like the Creality Ender 3, use bearing rollers to move the different components on the machine, like the printhead and print bed. Over time, and after a lot of printing, these bearings don’t roll as smoothly, meaning you might have to lower the printing speed in order to keep the same print quality as before.
You can grease these bearings to make them roll smoother, allowing you to use faster print speeds.
To grease them, start by cleaning off the current bearings, which you can do with some paper towels lightly soaked in a cleaning solvent like isopropyl alcohol or acetone. Then, get an adequate lubricant substance, like WD-40, and apply a light coating to the bearings. Make sure to try to spray all sides of the bearings.
After that, your 3D printer’s movements should be a lot smoother, meaning you can get away with using higher print speeds.
3. Use Wider Nozzle
The last physical change you can make is to use a wider nozzle diameter. Most 3D printers are equipped with a 0.4-mm nozzle. This diameter provides decent strength for parts, but you can switch to a wider nozzle, such as a 0.6 or 0.8-mm nozzle, to cut down on print time.
A wider nozzle diameter means layers will come out thicker, requiring a fewer number of layers to fulfill the wall thickness. Additionally, a wider nozzle can handle larger layer heights. Moreover, a 0.4-mm nozzle works best with 0.16-0.24-mm layer heights, but switching to a 0.8-mm nozzle means you can use a 0.5 or 0.6-mm layer height.
You can check out the example chart below to see how much the nozzle diameter and layer height can affect the print time of a model.
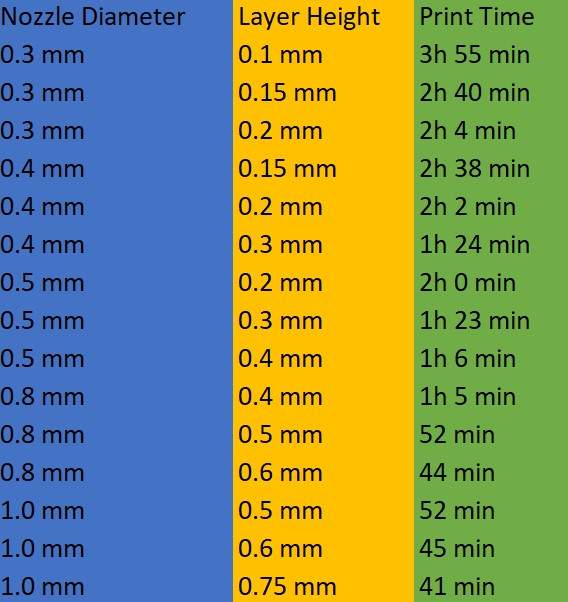
Read more on the relationship between nozzle size and layer height here.
Downsides of Faster 3D Prints
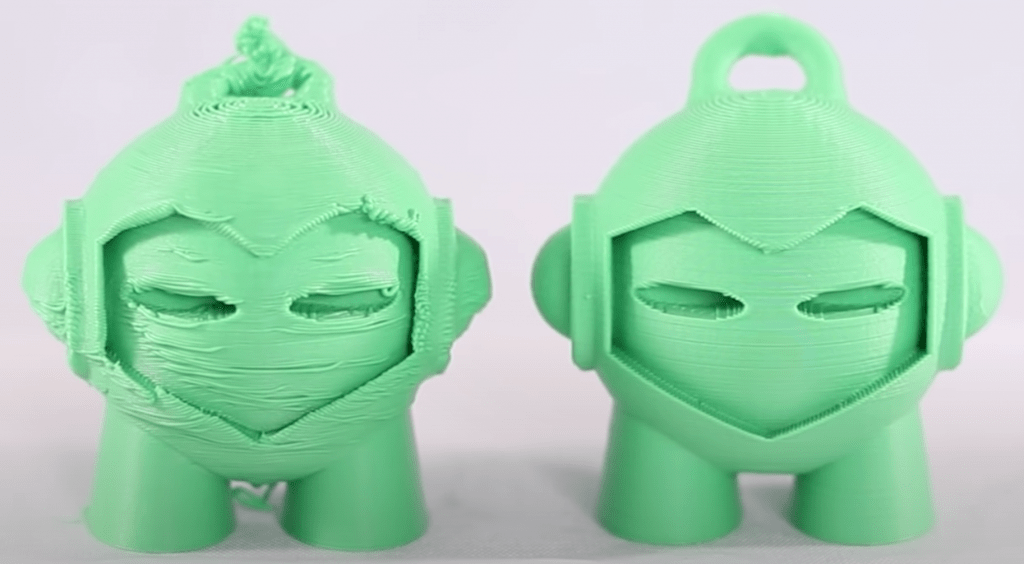
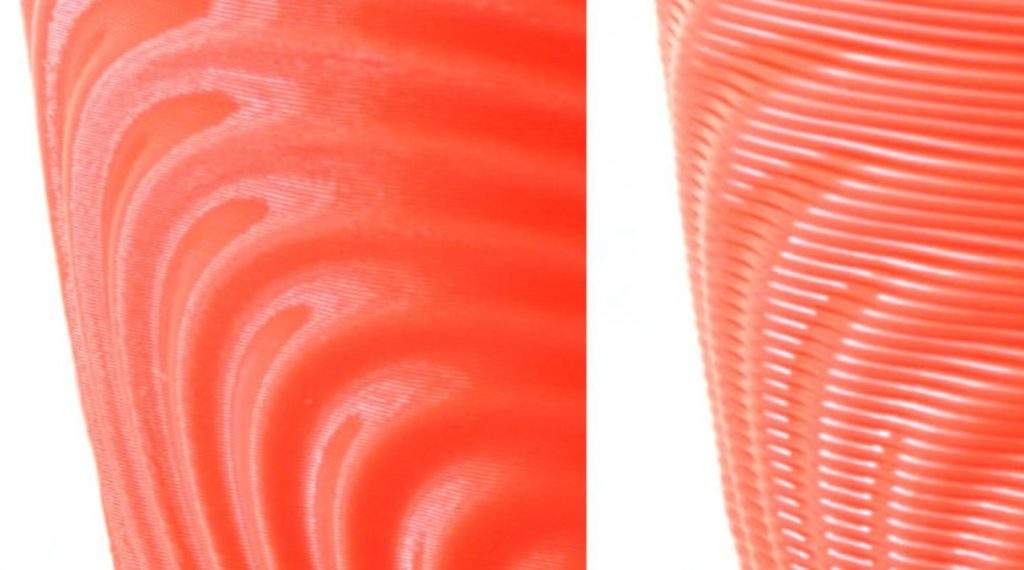
The main downside of printing faster is that the quality of your prints might go down. That’s because faster printing speeds mean less time for each layer of your print to form and settle (cool) properly.
But, if you follow my suggestions in each of the sections above, the quality of your prints should be preserved or even improved. That’s because I’ve made sure to suggest changes, such as increasing the temperature, that will counteract the effects of increasing the print speed or similar changes.
Does Travel Speed Affect the Print Quality?
Not really!
While the print speed can have major effects on the quality of prints, especially if you don’t make additional changes (e.g. increasing nozzle temp), the travel speed doesn’t really affect print quality.
That’s because the travel speed is only the velocity of the printhead during non-extrusion (non-printing) moves. As such, it won’t really impact how the layers of a 3D print turn out.
So feel free to increase this setting a bit. But make sure to be mindful of the stress it puts on your printer’s stepper motors, as too fast a travel speed could cause them to overheat and start having issues (e.g. lagging).
Conclusion
Print time is easily one of people’s biggest critiques about 3D printers. And even though consumer 3D printers are lightyears faster today than just a few years ago, it’s still a valid point. On a typical FDM 3D printer, using stock settings, a small cube print could take an hour.
But you can cut down the print time by making a few changes to your 3D slicer settings as well as to the hardware on your printer.
The most effective way to lower print time is to increase the layer height to 0.24 mm! Increasing the print speed also helps, and speed values of 60, 65, or even 70 mm/s can work on most printers.
I also suggest using the “Lines” infill pattern, with a low infill density of around 10-15%. Some other tips include increasing the travel speed, not using a brim/raft, and lowering the wall thickness!
Hope this helps!