

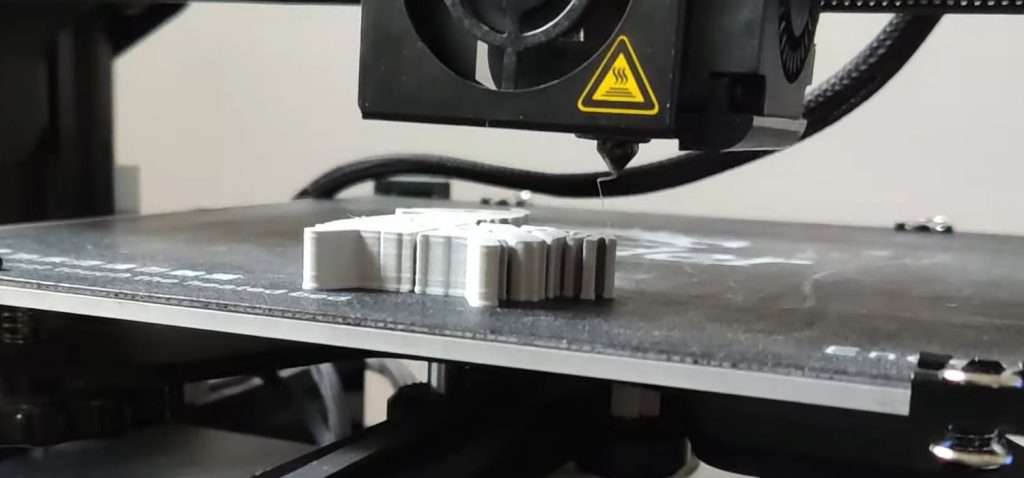
After many hours of anticipation and waiting, you go downstairs and look at your printer. Your 3D printed model is finally complete! Now all you have to do is remove it from the print bed…
What’s that? It’s not coming off? Welp…better start over.
Just kidding! Prints not coming off of the build plate is a common issue that’s very annoying, but it’s also super easy to fix.
The first thing you should do is try to push it from the bed with your hands. And, if that doesn’t work, whip out your 3D printing spatula and give that tool a whirl. And if that doesn’t work within the first minute or two of prying, stop it, because you don’t want to accidentally break your build plate.
Then, read the sections below to see more of the best ways to remove stuck 3D prints from your print bed!
Table of Contents
- When Can You Remove the Print from the 3D Printer Bed?
- 9 Methods on How to Remove 3D Print from the Bed:
- How to Remove a 3D Printed Raft?
- How to Remove a 3D Printed Brim?
- Best Options for Removing Prints on PLA, ABS and PETG
- How to Prevent 3D Prints from Sticking to Print Bed Too Much?
- How to Clean a Magnetic Build Plate?
- Conclusion
When Can You Remove the Print from the 3D Printer Bed?
Before we get into the different methods of removing prints from your print bed, let’s first talk about when it’s appropriate to do so. Obviously, you only want to remove your prints from the bed after they’re done printing.
But that’s not all.
On top of waiting until the print job finishes, you should also wait another 10 minutes as you want the printed model, the hot end, and the heated bed to cool down a bit. Letting the ambient air around your model cooldown will make it much easier to remove the model.
If you just go ham at your print the second it finishes, the print removal process will be much more challenging. That’s because the heat strengthens the bond between the first layer of the print and the printing surface.
9 Methods on How to Remove 3D Print from the Bed:
Now that you know some background info about removing prints from the bed, let’s get into the methods. As we mentioned, there are a few different ways to take a 3D printed model off of your print surface. We’ve listed some of the best and most popular methods and explained each one in the sections below.
1. Wait for the Print Bed to Cool Down
Our first method has to go back to the question “when should you remove prints?”, and is waiting for the print bed to cool down. As we explained, the heat of the print bed basically acts as an adhesive of sorts to the first layer (and the entire model) of your prints.
Waiting a few minutes after the print has finished to even attempt to remove your print from the bed is always a good idea. With this method, make sure to also remove any enclosure lid you have too (if your 3D printer is enclosed). This will let the hot air surrounding the print release faster.
And if you really just can’t wait a minute, using a fan can help cool down the print bed and ambient air around the print faster by pushing the hot air away. Another way to expedite the process is by placing one or two ice cubes on the print bed, but note that this will make a mess.
2. Use Your Hands
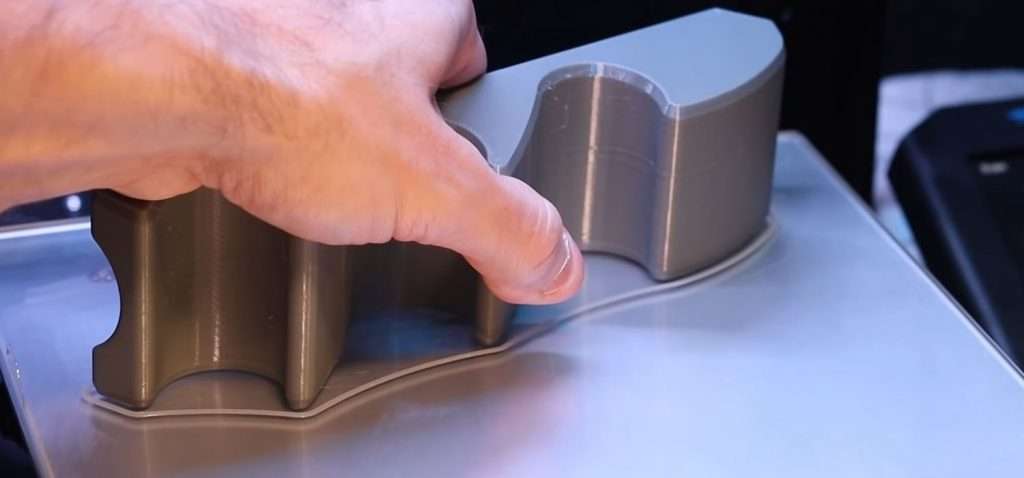
Next, we have the most obvious process for removing prints, which is by hand. If you just wait a few minutes until your print has finished, usually a good ‘ol push-a-roo will do the trick and your model will pop right off.
However, don’t just start pushing your model to a pulp. Try only applying force to your 3D prints in the most structurally sound areas as this will reduce the risk of your model breaking.
But, if you have a print that is very tall, gently pushing from the top will utilize some torque to help remove the print from the bed. The best example of this is if you printed a model of the Eiffel tower. Pushing from the four separate bases could break the model, so you should instead utilize torque to your advantage and push from the top to release the model.
It’s important to mention that if your model isn’t off the print bed after a few minutes of pushing in smart places, try another method. It’s better to spend a few extra minutes to safely remove your model than be lazy and accidentally break the model because you didn’t want to look for your spatula.
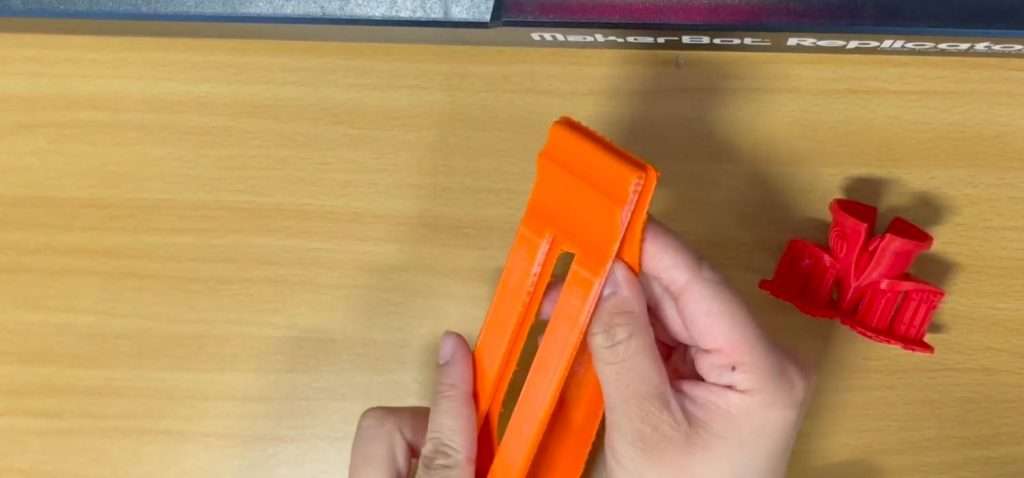
3. Use a Flat Blade/Scraping Tool
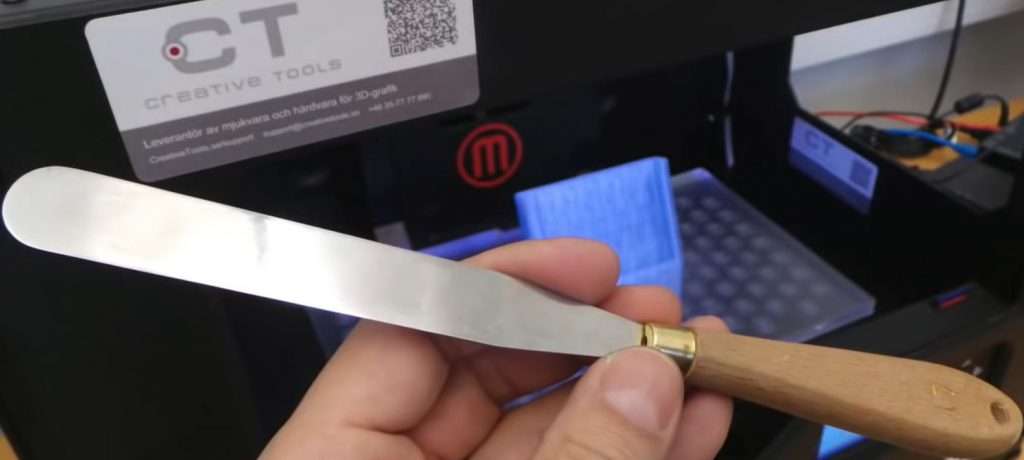
And, on that note about spatulas, we have our next method: using a flat blade or scraping tool, both of which I like to call spatulas. These tools usually come with your 3D printer and look like a paint scraper or a straight-ended and sharp spatula.
These tools are solely meant for removing prints and their sharp edge is meant to split the bond between the first layer of a print and the top surface of the build plate. As you might guess, to use it, simply angle it at around a 45-degree angle and push.
Some tips while using your 3D printing spatula are to try to not push in the same place the entire time. More often than not, there’s a spot on the outer wall of your print that’s more loose off the print bed than the other spots, and this is the best place to put the spatula under. That’s because, once under one area of the print, you can raise the angle of the tool to lift off more of the print.
Also, when you push on the spatula do some in small bursts, like pounding a hammer on the handle. Don’t put your entire weight into it while you’re pushing, because this could:
- break the model, or..
- cause you to pop off the print and run into something
4. Dental Floss
Dental floss is another easy way to remove prints and it’s super convenient because you probably don’t use it anyways (maybe that’s just me). This method is kind of similar to how you would cut the clay with a wire. All you have to do is align the floss on the print bed and push it into the first layer.
It’s most important that the floss line is flush with the print bed and first layer as you wouldn’t want to accidentally damage the print itself. With this method, putting your weight into it is a little more ok than with the spatula method.
However, you should also try to move the floss back and forth to wiggle your way under the first layer to pop off the model.
5. Enable a Raft
Next, enabling a raft isn’t really a method to remove your model from your print bed, but rather a precautionary measure you can take to prevent over-adhesion in the future.
If you’re unfamiliar with what it is, a raft is an optional feature on the slicer that generates a mini base model. The model is printed underneath your desired print so that your print never actually touches the print bed.
This can actually help for both poor bed adhesion and over-adhesion, but it uses a lot of extra filament and you’ll end up throwing out the raft base anyways. Additionally, you still have to remove the raft from the print before you start the next one, so it’s not too helpful.
A brim is a less intensive version of a raft that adds surface area to your model to help it stick to the build plate, but your model still touches the print bed. It too can help with over-adhesion to the bed because it’s easier to get under the brim, and thus get under the model to remove it.
We’ll talk more about rafts and brims, and how you can remove them in later sections.
6. Placing the Build Plate to a Cool Area/Freezer
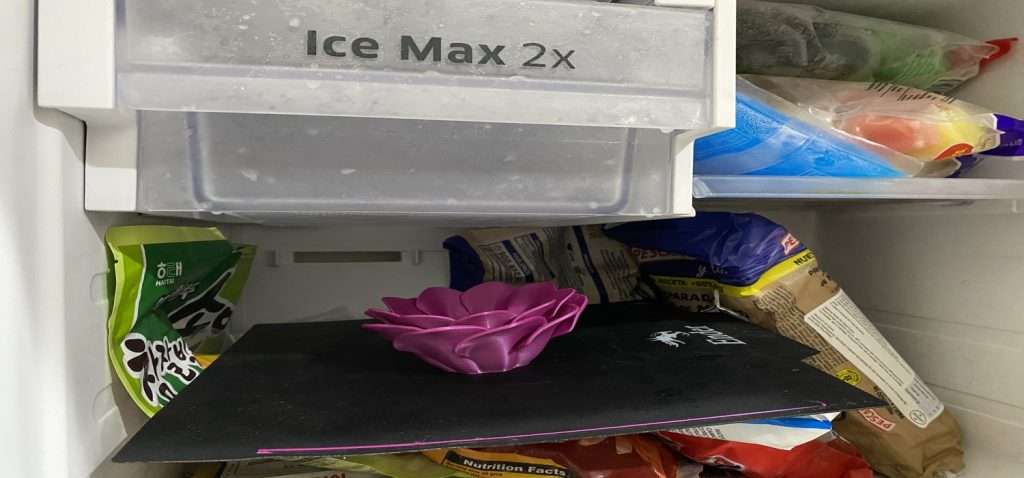
Just as heat will strengthen the bond between the first layer of a 3D print and the print bed, cold temperatures will significantly weaken it. So, if waiting for the print bed to cool down on its own isn’t doing the trick, you can take the cooling process up a notch by sticking the build plate in the freezer.
When in the freezer or another cold area, the bed will slightly contract in area, forcing the 3D printed model to pop off with ease. This method is especially convenient if you have a metal or glass print bed. That’s because, the more conductive the bed material is, the faster the bed will contract under cold temperatures, and the sooner you’ll have your 3D print in your hands.
Of course, you shouldn’t bring your entire printer, so first remove the bed bindings from the printer so that you can take off the build plate. Then, put the two stuck-together pieces in your freezer or another cold area (e.g. refrigerator).
There’s no exact amount of time you need to leave it there, so check back every five minutes to see if the print will pop off. Don’t leave the print bed in the cold temperatures too long because some could more permanently deform or, even worse, break.
7. Put Your Build Plate Under Running Water
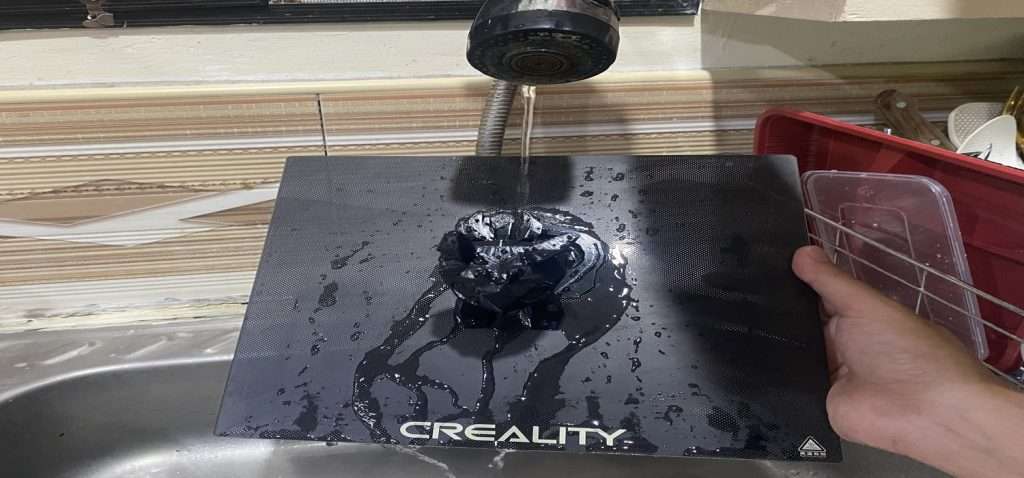
Yet another solution related to cooling down the print bed is to put your build plate under running water. The water will help to cool down the print bed so that it contracts from its heated state, making the print pop off due to the slight change in surface area.
This method is super simple, and, just like with the last one, you should start by removing the bed from the printer. Then, find a sink or faucet, and turn it on so that it only dispenses cool water.
Once the water is just a bit cold (test with your fingers), place the build plate so that the running water hits the top of it. This will allow the cool water to touch the most amount of surface area on the bed.
Then, leave the bed with the water running down for just about five minutes, and then try removing the print. If it still won’t budge, try using method #2 or 3 (the flat blade or floss) with the water running as well.
However, if it’s still not working, putting the bed in the freezer for 5-10 minutes might be a better option because you don’t want to waste too much water.
8. Use A Solvent
A solvent is a special type of chemical that can make certain materials dissolve or soften. For 3D printable plastics, popular solvents include acetone, isopropyl alcohol (IPA), ethyl alcohol, and proprietary mixtures like XTC3D.
While solvents are mainly used for post-processing 3D prints, like bonding different 3D printed parts or layer smoothing, they can also be used for removing prints. That’s because the plastic model softens when exposed to the liquid solvent, which weakens its bond to the build plate, making the print easier to remove with some force from your hands or a spatula.
We don’t suggest using a solvent as your first method of removing a stuck print from the bed as it’s a bit more intensive a process than the other methods we’ve described. Additionally, solvents might damage your build plate, especially if it’s made of plastic material, like polypropylene.
However, if you’ve tried some of the other methods without any luck, it’s worth a shot to use a solvent.
First off, you’ll have to pick the right solvent for your print, and this depends on the material of the filament you used. For PLA, some IPA or XTC3D should work, but we suggest acetone for most other materials like ABS because it’s kind of a universal solvent (works on many plastic materials).
Then, remove your print bed from your printer and put it in a sink to minimize any mess. Next, lightly pour some of your solvent liquid on the print bed and use a small brush to move the liquid so it’s mainly around the first layer.
After a few minutes of letting the solvent do its work, the first layer bond to the bed should be weak enough for you to push the print off. If it still won’t budge, though, try using a sharp blade or some floss as this will help.
9. Replace Build Plate
Our last solution is to replace the build plate entirely. We only suggest this as a last resort as changing the build plate will set you back somewhere between $20-50. However, it might be necessary if over-adhesion on the bed is a recurring issue and none of the other solutions are working.
Moreover, it might be worth it to buy a better build plate where you won’t run into over-adhesion with every print rather than using your current one and then putting in a lot of work to pop off each print. But that decision is up to you and is a question of how much you’re willing to pay for convenience.
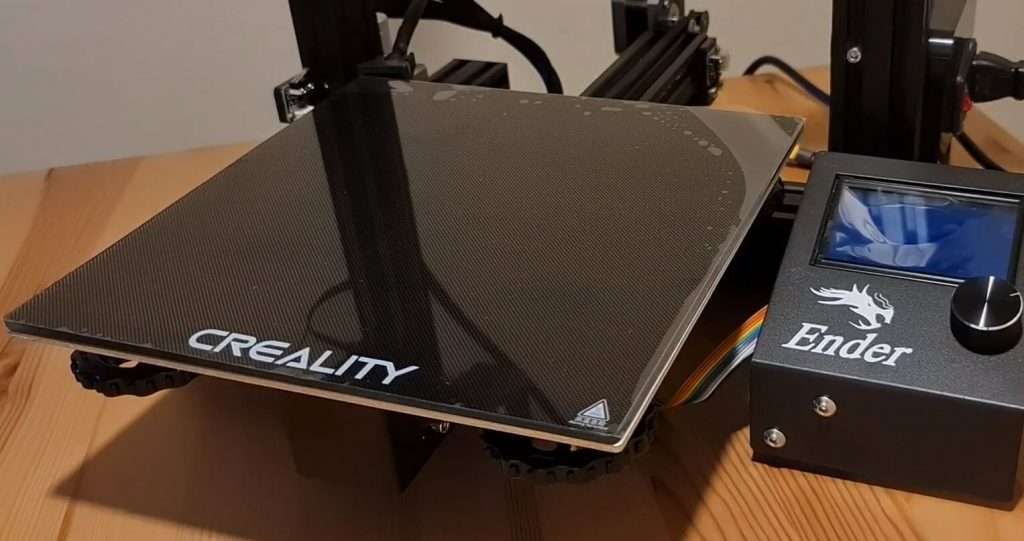
If you do decide to buy a build plate, though, make sure to look at the reviews of the product to check that over-adhesion isn’t a big problem. If you can’t decide what type of bed to get, I suggest using a tempered glass one, such as one from Creality. That’s because I’ve always been able to get prints off of glass beds by cooling them down and this material of bed is also pretty inexpensive.
How to Remove a 3D Printed Raft?
Now that we’ve covered the different ways you can remove 3D prints from the bed, let’s get into some other relevant information, such as how you can remove a 3D print raft.
As we mentioned, a raft is a slicer-generated feature that creates a mini base print beneath your 3D model. This way, your print won’t have any warping or adhesion issues because it will form a bond with the raft and not the build plate.
But even if you can get the print off of the raft, you still have to remove the raft from the bed. You can use all of the same methods we suggested to get the bed off. However, it’s probably easiest to use just blunt force from your hands or a flat blade. And you don’t have to be gentle with it like you would normally because you’re probably going to end up throwing out the raft either.
How to Remove a 3D Printed Brim?
Similarly, you also can use all of the methods we listed to remove the brim.
However, a brim is only one layer tall and is a lot easier to remove from the bed than a raft because you can basically peel it off. But, if this doesn’t work, again, I’d suggest just using your hands or a flat blade because you’re likely going to throw out the brim anyways.
Best Options for Removing Prints on PLA, ABS and PETG
So, with all of the methods we listed, you might be asking “which way should I take off my prints?”.
Surprisingly, the answer might depend on what print material you’re using.
For prints made out of PLA filament, I think the hands and flat blade methods work great and solve the issue 90% of the time. And, if that doesn’t work, using some floss or running water on the print bed will almost always do the trick. You also should use a lower bed temperature in the slicer to prevent over-adhesion from occurring in the future.
However, I don’t suggest putting your bed and stuck 3D print in the freezer or another cold area. That’s because PLA prints are known to deform easily due to temperature changes.
ABS is a much less sensitive print material, so, really any method will work. Still, I’d suggest using your hands, a flat blade, floss, or running water first as these methods are pretty easy and work a lot of the time. But, if that doesn’t work, just stick the bed and print in the freezer for a bit or maybe use some acetone as ABS is very soluble to this chemical.
As for PETG, start with the more convenient methods, like your hands, a flat blade, floss, or water. Then, try the freezer method, but skip the solvent solution as PETG is resistant to most chemicals, including regular plastic solvents.
How to Prevent 3D Prints from Sticking to Print Bed Too Much?
Once you remove your prints from the bed, it’s always a good idea to take some precautions so that the problem doesn’t happen again. The easiest way to do this is to lower your bed temperature in your slicer as this temperature directly correlates with the strength of the first layer adhesion.
Some other precautions include using less (or none) adhesive aids on the bed as well as using a slightly faster first-layer print speed. You might also want to reduce your printing temperature a little bit, but note that this could also make your prints weaker.
Whatever preemptive solutions you use, just make sure that you don’t over adjust as this will lead to poor bed adhesion, which is just as annoying as prints being stuck. If this does happen, though, you can find some solutions to improve your bed adhesion in our article all about it.
How to Clean a Magnetic Build Plate?
And, for those of you wondering how to clean a magnetic build plate, it’s super easy! While magnetic build plates come in a few forms, such as stiff and flexible, they’re usually all made of PEI or metal, which are both easily-cleanable materials.
All you have to do is wet a microfiber cloth with water and wipe the bed down. Using a scraping tool to remove excess grime and adhesive substances from the bed also helps. Once you’ve got rid of any unwanted substances from the bed, you just need to dry it with another cloth.
It’s important that you use a reusable cloth as paper towels might rip up on the bed when wet, which will add even more debris to the bed. Also, make sure not to use a solvent, like acetone, if you have a PEI bed. That’s because the PEI coating could degrade if exposed to a regular plastic solvent.
Conclusion
While everyone wants a solid bond between the first layer of prints and the build plate, there’s a thin line between good bed adhesion and over-adhesion. The latter will have you tugging on your prints, trying to yank them off the bed. But, pushing prints as hard as you can with your hands to separate them isn’t the only, nor the smartest, way to remove 3D prints from the bed.
Instead, after some gentle pushing of the print doesn’t work, try using a flat blade or some floss to get under the first layer of prints to remove them. Then, run some cool water on the bed and try again.
Related Articles: