
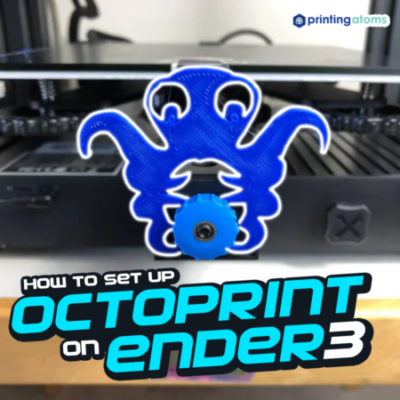

There are hundreds of different upgrades you can make to a Creality Ender 3, but I’d say none are as useful as OctoPrint.
Seriously!
Even adding an automatic bed leveling sensor or installing a direct drive extruder on my Ender 3 hasn’t improved my printing experience as much as an OctoPrint server has.
If you’ve never heard of OctoPrint, it’s a remote printer control server. When connected to the motherboard on your 3D printer, like the Ender 3, you can do everything you’d normally be able to do in person (plus more). Moreover, you can start/stop prints, perform a bed leveling sequence, set temperatures, and even look at the print bed (with a camera).
So if you want to make your printing experience with your Ender 3 (original, Pro, V2, S1) a million times easier, trust me… OctoPrint is the best way to do it! In the sections below, we’ve gone over some of the other benefits of OctoPrint and a guide to setting up an OctoPrint server for your Ender 3!
Enjoy!
Table of Contents
Advantages of OctoPrint
Usually, an upgrade for a 3D printer offers a few advantages over your unupgraded printer. However, OctoPrint is so useful that the advantages it brings to the table are just so plentiful that it’d be impossible to go over each one. Still, in this section, we’ve discussed the main benefits of Octoprint in the paragraphs below.
The most important advantage of OctoPrint that entails the other ones is that it allows you to remotely control your printer. No longer will you have to make the hike down the stairs to your closet with your 3D printer in it to start/stop prints.
Additionally, OctoPrint’s support for a webcam stream on the OctoPi online interface means you can monitor your print status without actually being there.
But my personal favorite advantage of OctoPrint is the plug-ins freely available on the OctoPrint repository. These community-developed add-ons make things like BLTouch control, firmware updates, and special time-lapses possible on the existing OctoPrint platform. We’ll go over more about plug-ins in a later section and even review a few popular options!
While there are many other advantages of OctoPrint, it all depends on you, the user, and what you need!
What You Need to Set Up OctoPrint:
On this note about “what you need”, let’s talk about what items you actually need to set up your own OctoPrint server.
Despite being such a useful upgrade for a 3D printer, not too many parts are needed. And, it’s not that expensive, with a typical OctoPi set up for the Ender 3 costing under $65.
I’ve gone over the main parts involved in the mini sections below.
Raspberry Pi
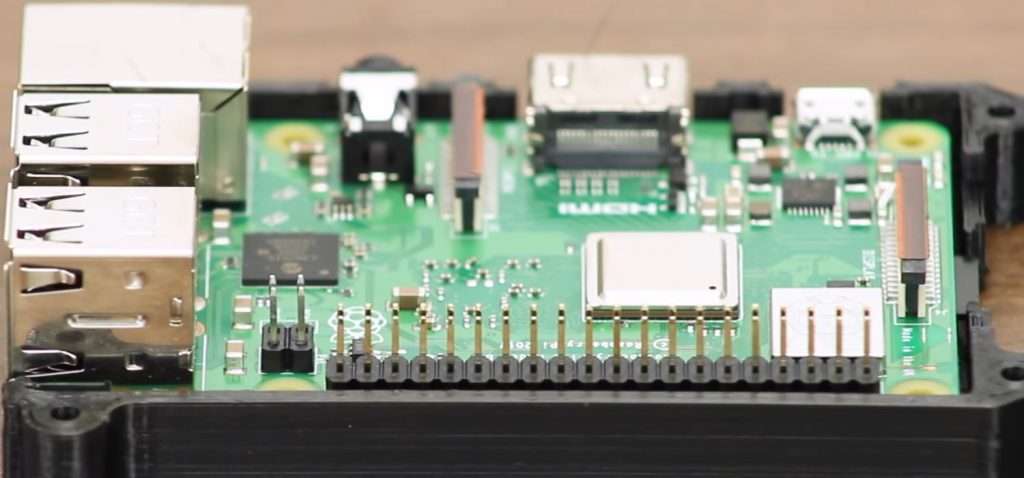
The first thing you need for an OctoPrint server for your Ender 3 is a Raspberry Pi board, such as a Raspberry Pi 3B+ or 4B.
Technically, any decently-modern computer can host an OctoPrint server… even a smartphone or fridge. But, in order for a computer to host the OctoPrint platform, it needs to run a supportive and proprietary operating system (OS).
Raspberry Pi boards are the most popular computer for OctoPrint because there’s already an OS built for running OctoPrint on these boards, known as OctoPi. OctoPi can run on basically any Raspberry Pi computer board.
However, it’s suggested to use a regular-size Pi board like a series 3 or 4 rather than a Pico or Zero. It’s not that these more miniature boards can’t handle OctoPi, it’s just that their interface ports are more limited.
Raspberry Pi Power Supply
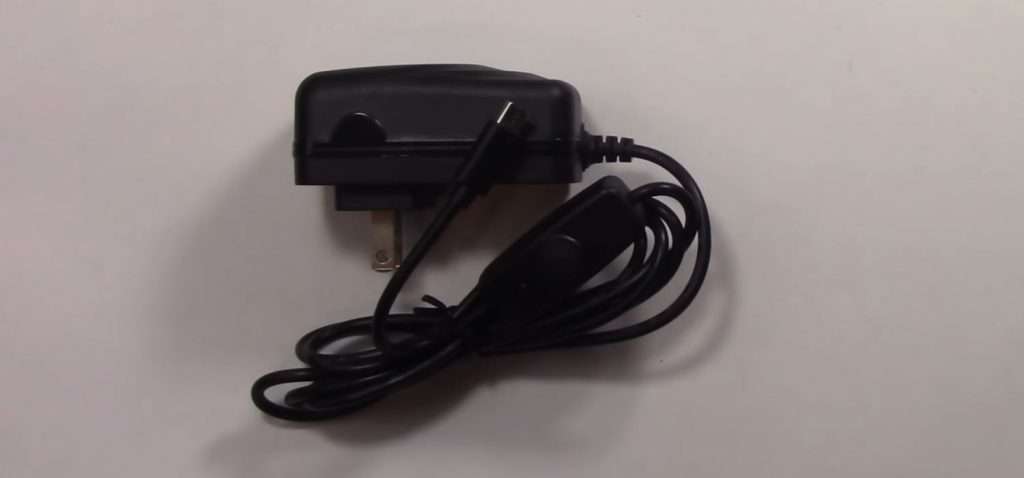
Although Raspberry Pi boards have a generic Micro-USB or USB Type-C power port, not just any wall adapter will sufficiently power the board. If you don’t use a wall adapter (“brick”) that provides (at least) 5V @ 2.5 amps, then you’ll run into insufficient power errors on the board which will prevent the installation of new programs or hinders performance.
Micro SD Card

Next, you’ll need a micro SD card to set up your OctoPrint server. The storage card goes in the Micro SD card slot on the belly of your Pi board. Make sure to get one with at least 16 GB of storage.
Micro SD Card Reader
A USB Micro SD card reader is also necessary for the installation process. You’ll use it to flash the OctoPi operating system to the Pi board.
USB Cable
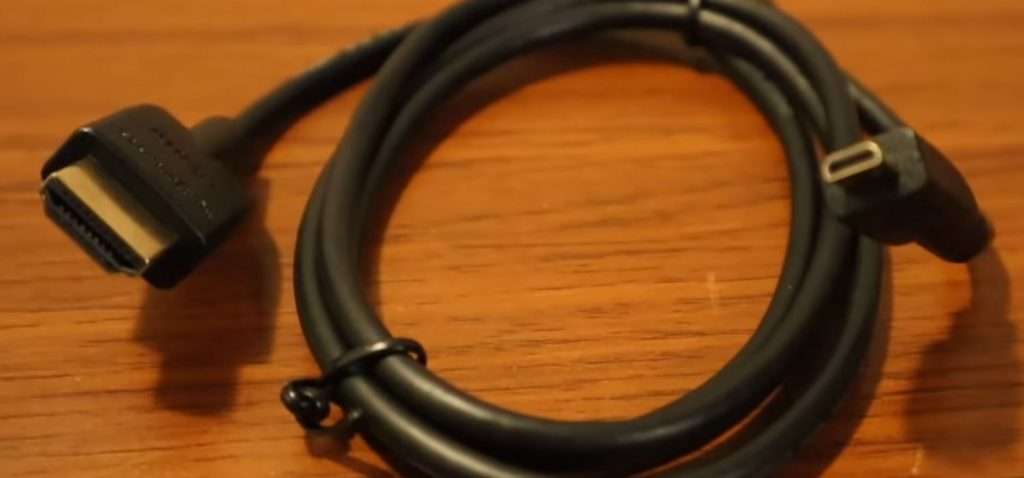
Unfortunately, the OctoPrint host computer doesn’t connect to your 3D printer wirelessly. Instead, you need to tether the Pi board to the interface port on your printer’s motherboard with a USB cable.
The motherboard on the Original Ender 3, Ender 3 Pro, and Ender 3 V2 all use Micro USB ports, so a USB Type-A to Micro USB cable should work. If you’ve got the Ender 3 S1, the board has a USB Type-C port.
Also, when choosing a USB cable or taking one from your “electronics drawer”, make sure to choose one with data transfer capabilities. Typically, the USB cables included with cheap electronics only offer power and ground, and not signal, which is necessary for this purpose.
Raspberry Pi Camera
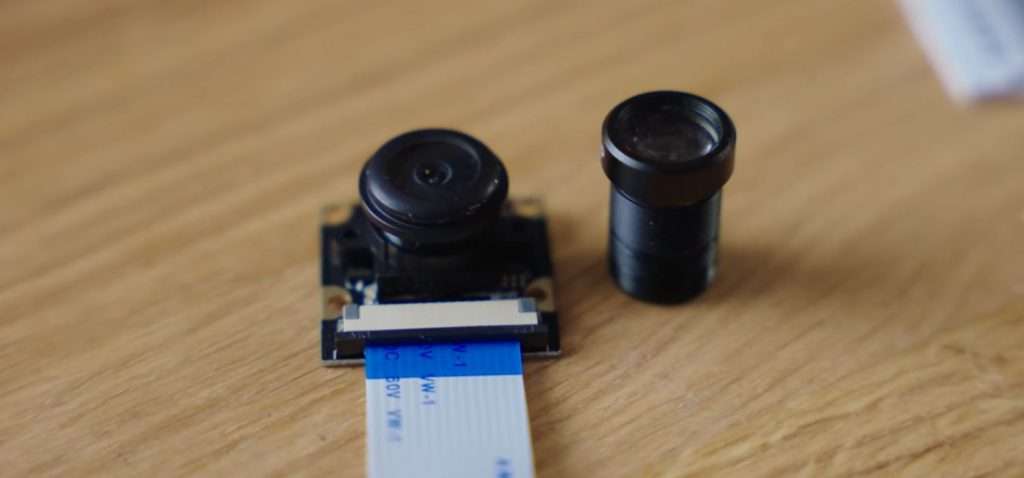
A Raspberry Pi camera technically isn’t a necessary component of your OctoPrint set up, but it’s definitely one you should get. To me, monitoring my printer remotely is half the reason I use OctoPrint to begin with.
The official Raspberry Pi camera, which connects to your Pi board through a ribbon cable, works great. But, if you’re frugal like me, it’s also okay to just buy one of the fake Raspberry Pi camera modules as they usually work (check the reviews). A USB webcam, like those from Logitech, also works!
Computer
You’ll also need a usable computer to make some of the configurations for your OctoPrint server. On the computer, you’ll need to download the following programs:
- A web browser: Chrome is my personal favorite but any should work.
- Raspberry Pi Imager: An imaging program is one that allows you to flash a new firmware to a storage device. Raspberry Pi Imager is just a special imaging program that has OctoPi ready to go which is why I recommend it for this process.
- Text editor: A text editor is a program that can open and read configuration files, like those in the OctoPi package. I like to use Notepad++ or Microsoft VSCode but any should work.
3D Printed OctoPrint Parts:
In addition to the electronics used for the OctoPrint server and installation process, there are also some 3D printed parts involved. While these pieces aren’t necessary, they make your set up look a lot cleaner and safer.
Camera Mount
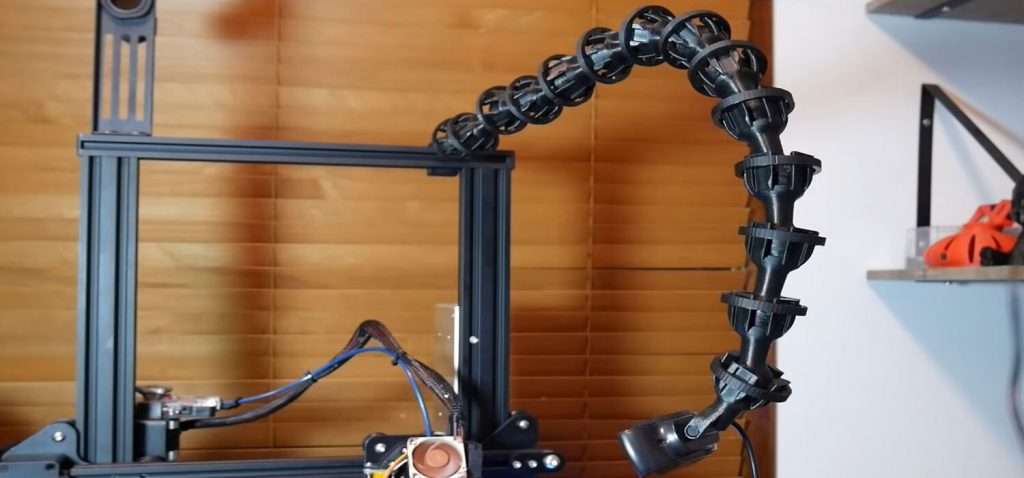
The first one, of two, is a camera mount. It’s more than likely that the Pi camera module or webcam you buy doesn’t come with a mount for the Ender 3’s frame.
But don’t worry because there are many 3D printable camera mounts for the Ender 3, covering many different cameras.
A simple query of “Ender 3 camera mount” on Thingiverse or Printables will bring up thousands of freely downloadable options. Just make sure that you choose a mount that positions your camera in a perspective that you’re comfortable viewing your printer from remotely.
Personally, I like the adjustable ball-joint mounts that go on the front left of the Ender 3’s frame, but there are many other options too!
Raspberry Pi Enclosure
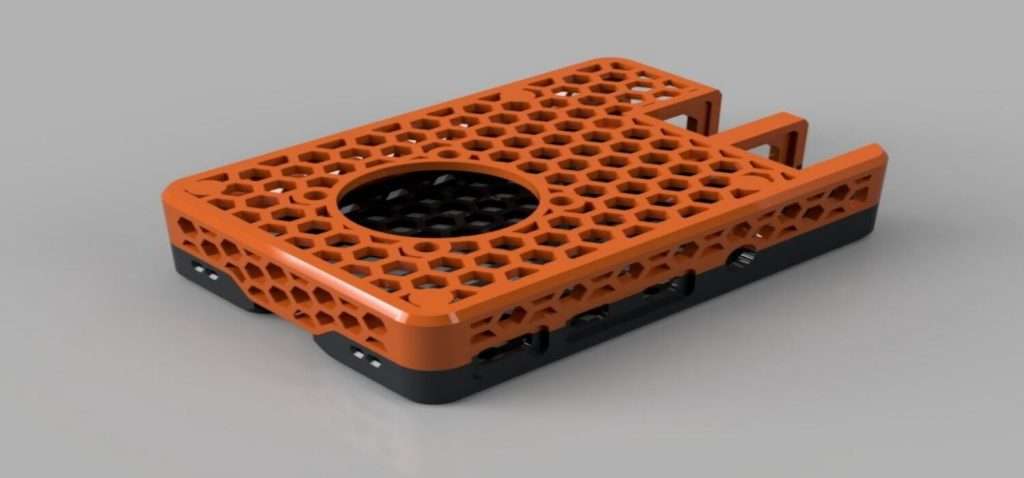
An enclosure for your Pi board also comes in handy. It makes your OctoPrint server set up look a lot cleaner because the IO pins aren’t all exposed and out in the open. Of course, this also is helpful for safety reasons too.
And if you go the extra mile and pick out a cool case design and print it in a visually appealing filament, it can really spice up your printer’s look. Like with camera mounts, there are many free downloadable options out there and it only takes a simple search to find them!
Just make sure the case you’re printing fits the exact board you have and leaves room for the power and camera ports.
Setting Up OctoPrint:
Once you have everything ready, it’s time to set up an OctoPrint server for your Ender 3 (Pro/V2/S1). We’ve gone over the main steps in the sections below:
Set Up OctoPi
The first step is to set up OctoPi, the operating system that needs to run on your Pi board in order for it to act as an OctoPrint host. OctoPi is free to download but, because we’re using Raspberry Pi Imager, we don’t even need to make the download ourselves.
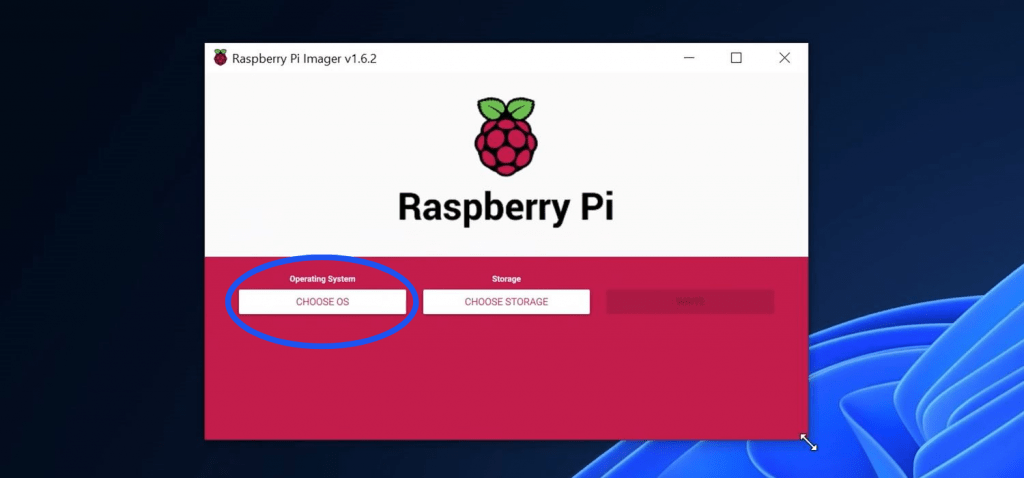
Moreover, the first thing you need to do is boot up your (usable) computer and open the Raspberry Pi Imager program. Then insert the Micro SD card (the one meant for your Pi board) into the USB reader on your computer.
Click the “Choose OS” button and scroll down to the “Other specific-purpose OS” category. Select “OctoPi” from the list of options and choose the stable option.
That’s all you need to do to ready OctoPi for the flashing process. But don’t do that just yet because we still need to set up the WiFi settings.
Set Up Network Settings
In order for your OctoPrint server to work and for you to be able to access it remotely, it needs to be connected to the internet. Unless you have an ethernet port nearby, you’ll need to use WiFi. Your Pi board won’t just automatically connect to your WiFi network, though, and it needs to be properly set up in the OctoPi configuration files.
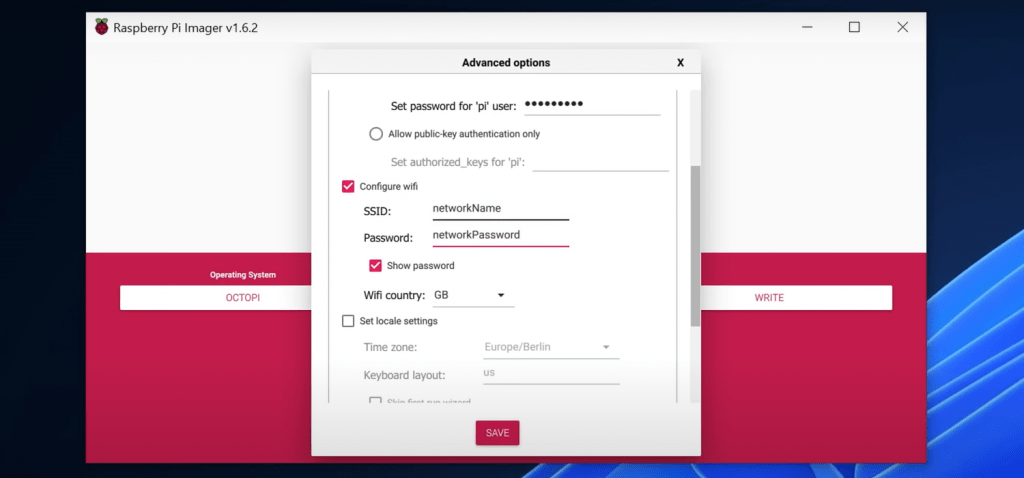
One way you can do this is by flashing the firmware to the Micro SD card and editing the files later. However, a much more convenient way to do this is using the built-in configuration tool in the Raspberry Pi Imager program.
To use this tool, simply use the Ctrl+Shift+X key combination in Raspberry Pi Imager with OctoPi selected for the OS. This will bring up the advanced configuration options. Scroll down to the “Configure wifi” option and then enable it. Next, enter in the SSID and password for the WiFi network and insert the right country (e.g. “US”) for the network.
Finishing the Server
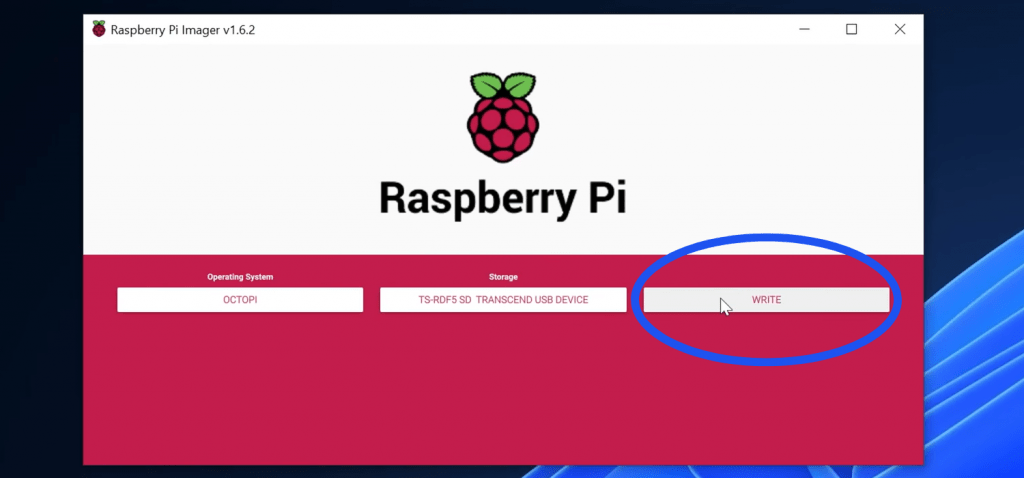
Once you’ve finished the network configuration, click “Save” at the bottom. Then click “Choose Storage” in Raspberry Pi Imager and select your inserted Micro SD card. Finally, click “Write”; this will begin the OS writing process, which should take a few minutes.
After you get the confirmation screen, eject the storage device and insert it into the port on your Pi board (with it powered off). Then, using a proper power supply, turn your Pi board on and wait as it loads up.
You can access the OctoPi online interface by going to the following URL: http://octopi.local. However, if this doesn’t work, open your WiFi control interface (varies by router) and search for the recently connected IP addresses. Then type in and go to the right IP address… make sure to bookmark the URL too for future use!
Finally, the last step is to plug the USB cable into the port on your Pi board and the other end into the motherboard of your Ender 3. Then, open up that remote interface and click the “Connect” button in the top left corner of the site.
Using OctoPrint
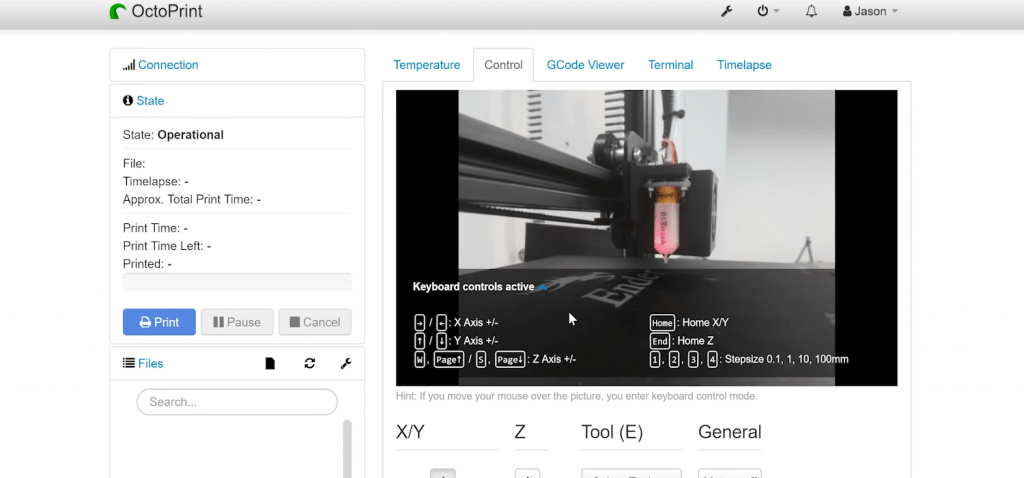
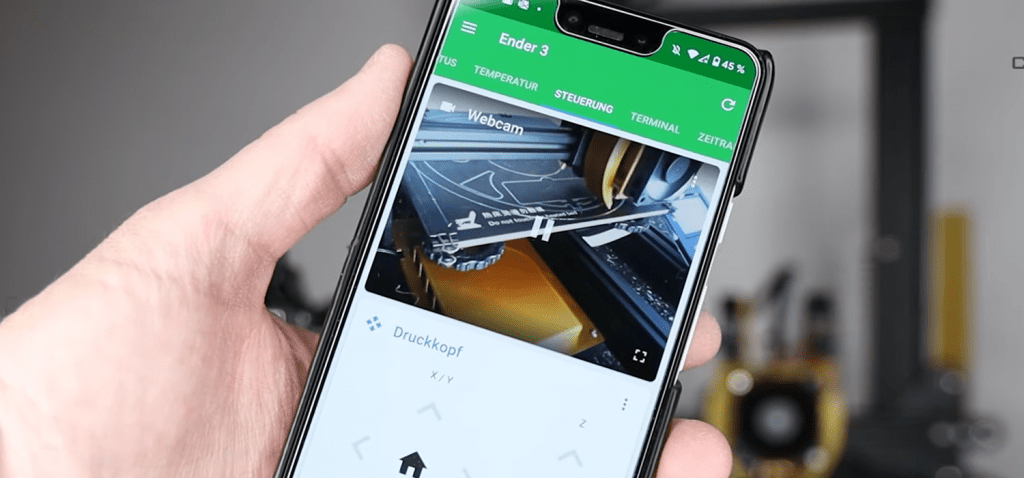
Now that you’ve successfully set up your OctoPrint server, it’s time to use it and take advantage of the many features it offers. First off, take a little tour around the interface, looking at the Control, Temperature, G-code, and other sections of the site.
The Temperature section is the first one we’ll go over and it contains all of the controls relating to the hot end and heated bed on your Ender 3. I like to heat up the components before starting a print and I also go into this section to make sure the temperature graphs look stable.
The control interface is where you can view your connected camera. On this note, if you haven’t set up your camera, now is the time to do so, and it’s as easy as plugging in the USB or ribbon cable on your camera module. Also on the Control section are the X/Y/Z axis movement and fan controls.
I like to use the GCode viewer section to perform very niche actions, like PID tuning the hot end, which requires sending special G-code commands. The Timelapse section, as the name suggests, is good for setting up your timelapse settings for your camera.
Install Plugins
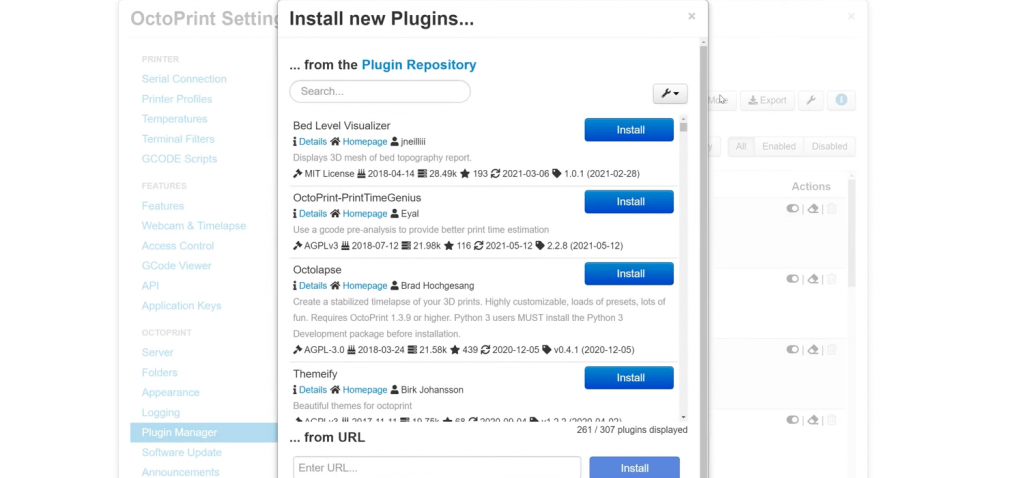
As we mentioned, plug-ins really help make OctoPrint the most helpful and versatile upgrade for a 3D printer. There are many different plug-ins, all of which help with different aspects of your printer. You can find and free download many of these plug-ins from OctoPrint’s online plug-in repository.
Below, I’ve gone over a few of my favorite plug-ins for using OctoPrint on the Ender 3:
BLTouch
The BLTouch plug-in adds a few tools to the Control section of OctoPrint’s online interface. These extra buttons let you activate, probe, and otherwise control the BLTouch sensor on your printer. They should also work for the CR-Touch device if you have the Ender 3 S1 or have installed one on your Ender 3 (Pro/V2).
OctoLapse
If you’ve been on Reddit or social media and seen epic time-lapses of 3D printers where the printhead remains in the same place throughout, it’s likely an OctoLapse. The OctoLapse plug-in allows you to make these special time-lapses. It adds a few configuration settings in the Timelapse section that let you control the waiting times and other OctoLapse-related controls.
Firmware Updater
Updating the firmware, especially on some of the older versions of the Ender 3, can be very difficult. With the Firmware Updater plug-in, you can easily upload new firmware packages to your 3D printer from your OctoPrint server. It’s a convenient way to get the better features in newer firmware programs, like Marlin 2.0, and it should work on your Ender 3!
Bed Visualizer
Leveling the bed is a super annoying process. But what if you were able to see a precise 3D graph of your bed’s topography to see which areas are giving your prints issues?
This is possible with the bed visualizer plug-in on OctoPrint, as long as you have an automatic bed leveling sensor (e.g. BLTouch) installed. It uses the mesh measurement data provided by the sensor and compiles them into a visual mesh that you can see and use to fix your printer’s bed leveling manually.
Conclusion
If you’re looking to expand the functionality of your Ender 3, an OctoPrint server is a great way to do so. While the upgrade is a little more intensive than just a simple 3D print, it allows you to do everything from remotely monitoring your printer to starting new prints. And the many plug-ins that can be added to your OctoPrint set up make the device even more versatile, enabling things like bed levelness visualizations and more.