
 Have you ever wanted to take a really cool time-lapse of your 3D printer? Well, a regular, old video time-lapse isn’t the best way. Instead, you should use Octolapse!
Octolapse is a special program that allows you to make time-lapses specifically meant for 3D printers. These time-lapses, known as Octolapses, are much more visually appealing and way cleaner than a regular time-lapse of a 3D printer when it’s making a part.
In the past, achieving a high-quality Octolapse has been very difficult due to challenges with installation, compatibility issues with the program, confusing camera settings, and the like.
However, today, I’ll simplify the whole process and go over what I’ve tested to be the best OctoPrint time-lapse settings. You’ll be making the coolest, most viral 3D printer time-lapses in no time!
Table of Contents
What is OctoPrint?
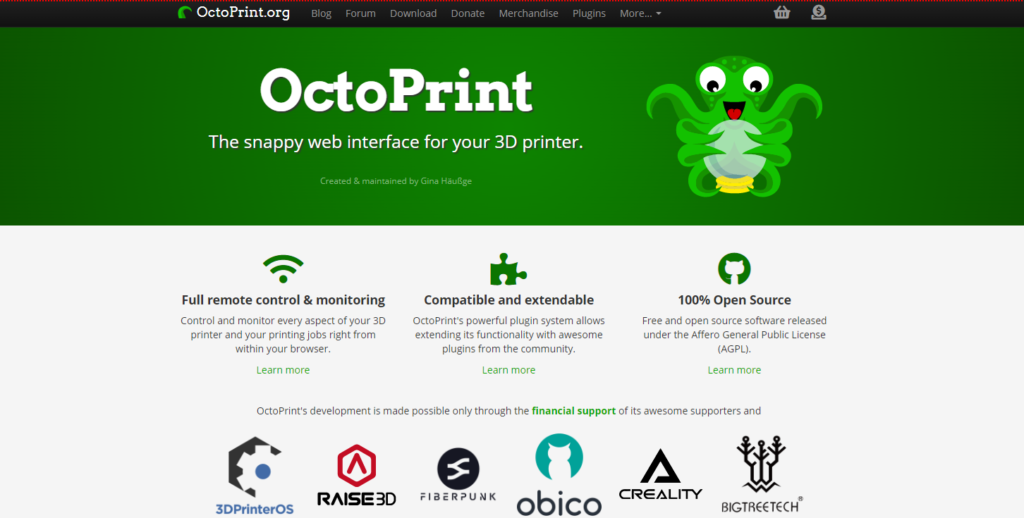
Before we dive into Octolapse and the relevant settings, it’s important to first go over OctoPrint, as you can’t use Octolapse without OctoPrint.
OctoPrint is an open-source project for making a 3D printer server, and it’s one of the most popular upgrades for a 3D printer. An OctoPrint server runs off of a computer, such as a Raspberry Pi board, and it connects to your 3D printer via USB. Once set up, you can access the server’s online interface to control many aspects of your printer, such as ongoing print jobs, temperatures, and more.
You can expand the functionality of OctoPrint through third-party plug-ins, available on the OctoPrint plug-in repository. Plug-ins, such as Octolapse, are community-developed programs that can be added to your OctoPrint server and provide additional features to the OctoPrint platform.
Check out our article on our favorite OctoPrint Plug-Ins if you want to learn more!
Now that you get the gist of OctoPrint let’s get into Octolapse!
What is Octolapse?
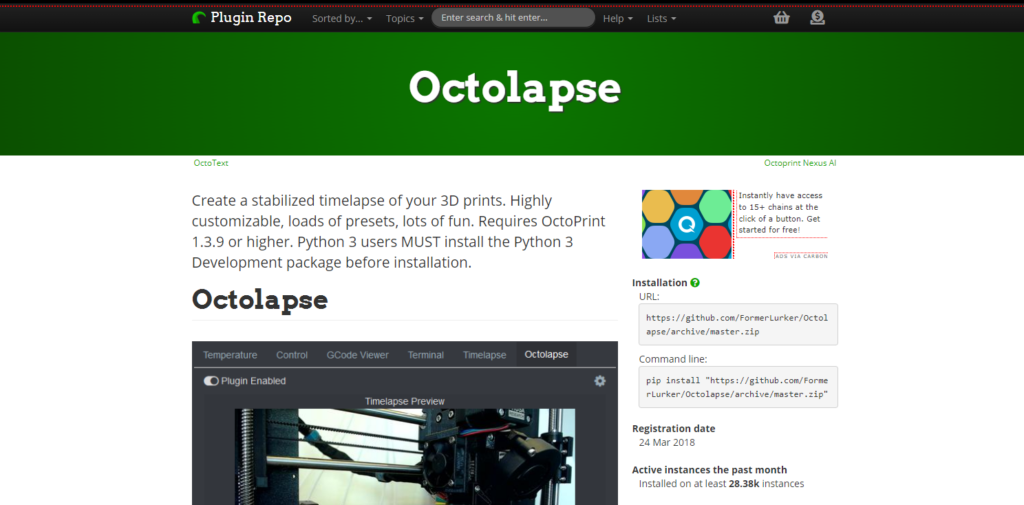
Octolapse is an OctoPrint plug-in that works with a connected camera to create special time-lapses of your 3D printer.
Time-lapses created using Octolapse are called Octolapses (confusing, right?), and they’re specifically meant for capturing the 3D printing process and nothing else. As such, Octolapses are visually cleaner and much more fluid than a normal video time-lapse. I’ll go over the difference between the two in a later section!
Octolapse, like all OctoPrint plug-ins, is an open-source project, and you can find all of the files, releases, and other elements of the program on the Octolapse GitHub page. While the creator of the program has ceased development (for now), Octolapse has come a long way from its beginning. Now, there are many adjustable settings, configuration options, and other features that you can use for the Octolapse plug-in.
How Does Octolapse Work?
Octolapse works by taking snapshots (photos) of your 3D printer every time a trigger command is given. These trigger commands are placed throughout the G-code file of a print job by the Octolapse plug-in. Then, when OctoPrint reads the trigger commands during the printing process, it will tell the connected camera to take a photo.
After the print is finished, these photos are arranged in consecutive order and blended to create the resulting Octolapse time-lapse video. Typically, hundreds or thousands of snapshots go into an Octolapse, but it depends on the size of the model as well as the camera trigger.
On this note, Octolapse gives you a handful of options for the camera trigger. The default trigger is at every layer, meaning a snapshot of your printer is taken at each layer of the print job. However, other options include standard time intervals, the height of the print, and more.
Additionally, Octolapse controls the positioning of the printhead for each camera snapshot. Moreover, the printhead (nozzle) is moved to a certain point on the X/Y plane for each photo to make the resulting time-lapse smoother and more stable. You can control the specific positioning of the printhead through the Octolapse settings.
Octolapse VS Normal Time-Lapse
The difference between an Octolapse and a normal time-lapse of a 3D printer is very noticeable. An Octolapse is a lot more smooth, stable, and fluid than a normal video time-lapse.
The first main reason Octolapses are superior to regular video time-lapses is because of the snapshot trigger. Moreover, a normal video time-lapse takes snapshots at a standard time interval (e.g. every 5 seconds), while Octolapse takes photos based on the progress of the print job. As such, Octolapses have better-planned photos than a normal video time-lapse.
The other reason Octolapses are better is that they control the printhead’s positioning. A normal video time-lapse is independent of your 3D printer, and the printhead will be at a different position for each snapshot of the time-lapse. This results in a much noisier, less stable time-lapse than an Octolapse, which keeps the printhead in the same spot for each photo.
Overall, I strongly recommend making an Octolapse to show off your 3D printer rather than a regular video time-lapse.
What You Need for Octolapse
To make an Octolapse, you’ll need a few things, which I’ve gone over below:
1. OctoPrint Server
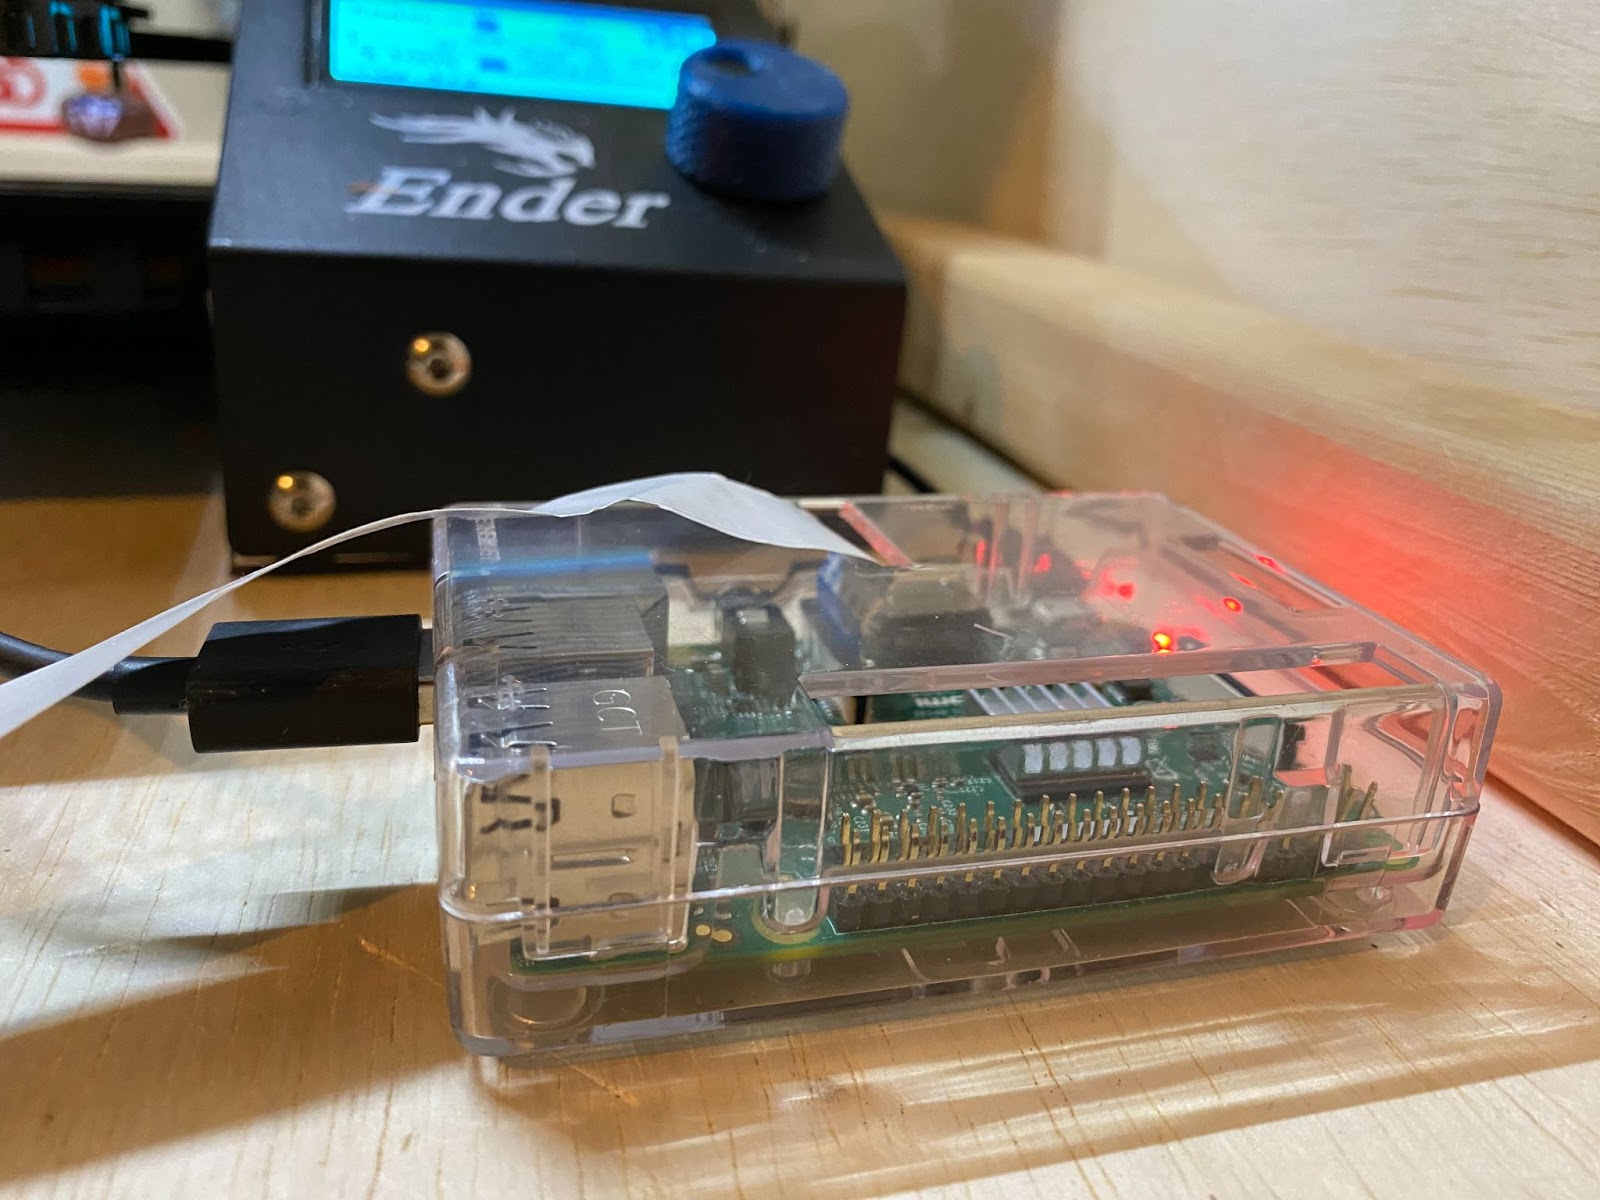
First, you’ll need an OctoPrint server. You can easily set up your own OctoPrint server using a Raspberry Pi board (e.g. Raspberry Pi 3B+), an adequate power supply, and a microSD card. You’ll also want a USB cable that’s compatible with the motherboard on your 3D printer; for example, if you have a Creality Ender 3 V2, make sure you have a Micro-USB cable.
You can check out our guide to setting up an OctoPrint server with a Pi board to learn more!
2. Camera

The only other piece of hardware you’ll need is a compatible camera. This could be a Raspberry Pi Camera Module or a USB webcam, such as a Logitech C920x HD. Both options work great and are equally as easy to use.
3. Camera Mount
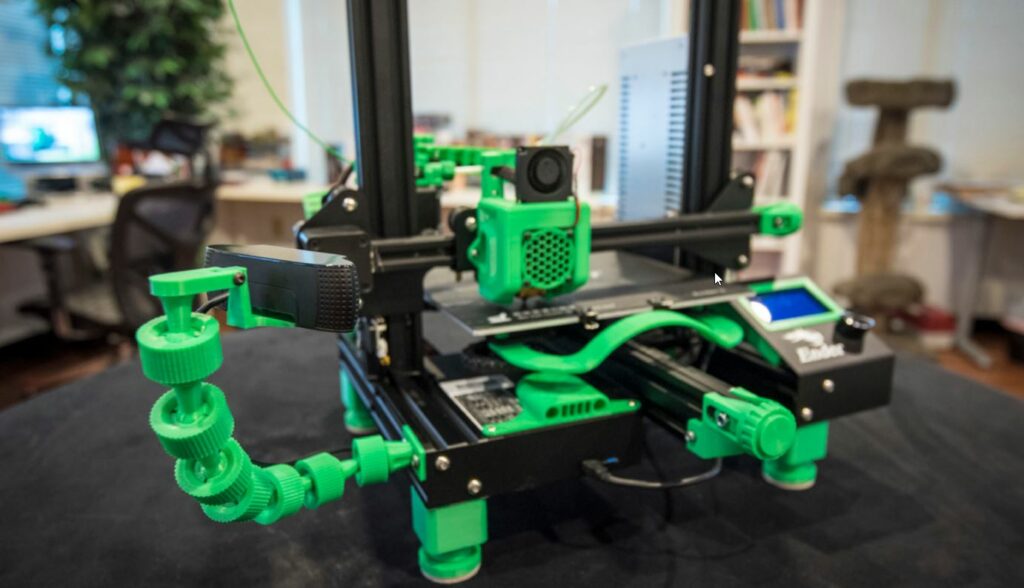
Next, while it’s not required, you’ll definitely want a camera mount. I’ve found that it’s best to 3D print a camera mount as there are many options available on Thingiverse and other repositories. Make sure to use a mount that’s compatible with your camera as well as your 3D printer if it mounts to the frame of the machine.
How to Set Up Octolapse
Setting up Octolapse is very easy, and I’ve split the process into three steps below:
Step 1: Download Octolapse Plug-In
First, you’ll need to download the Octolapse plug-in to your OctoPrint server. To do this, start by going to the online interface for your OctoPrint server. You can do this by entering the IP address of your OctoPrint host computer into the URL of your web browser.
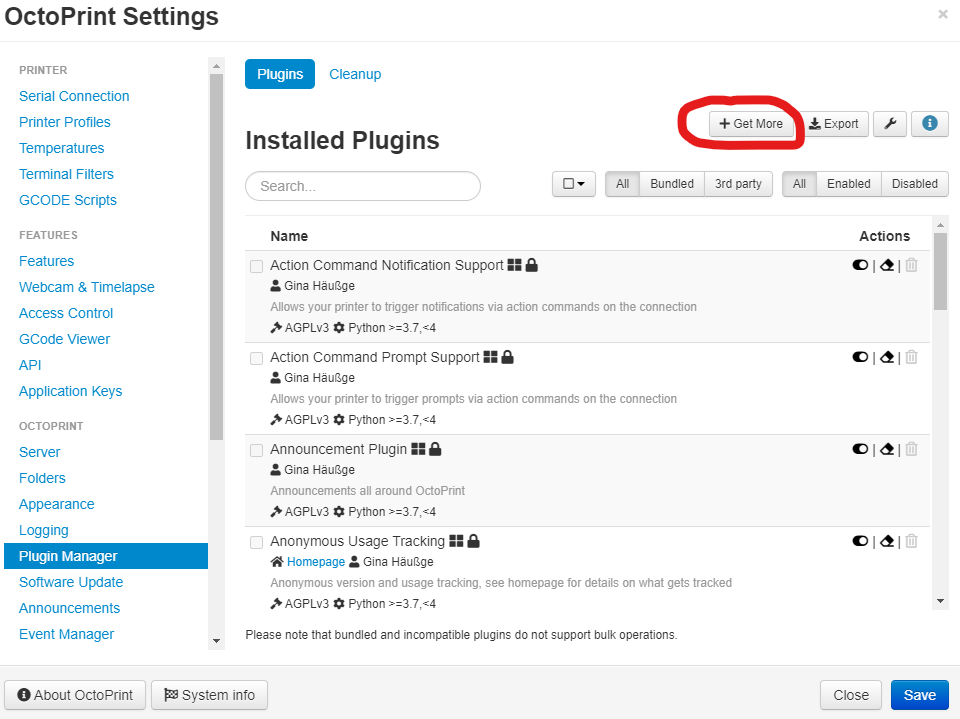
Then, click the wrench icon in the top right of the interface and find the “Plugin Manager” section. Here, click the “Get More” button in the top right of the menu and search for “Octolapse”.
Click “Install”, and wait for your OctoPrint server to install the Octolapse plug-in. You’ll need to restart your server (and reload the interface) for the changes to take effect.
Step 2: Setup Printer Profile
Next, we’ll need to set up a printer profile for your Octolapse plug-in. Octolapse needs to know some basic info about your machine so it can configure itself properly and create the best time-lapses.
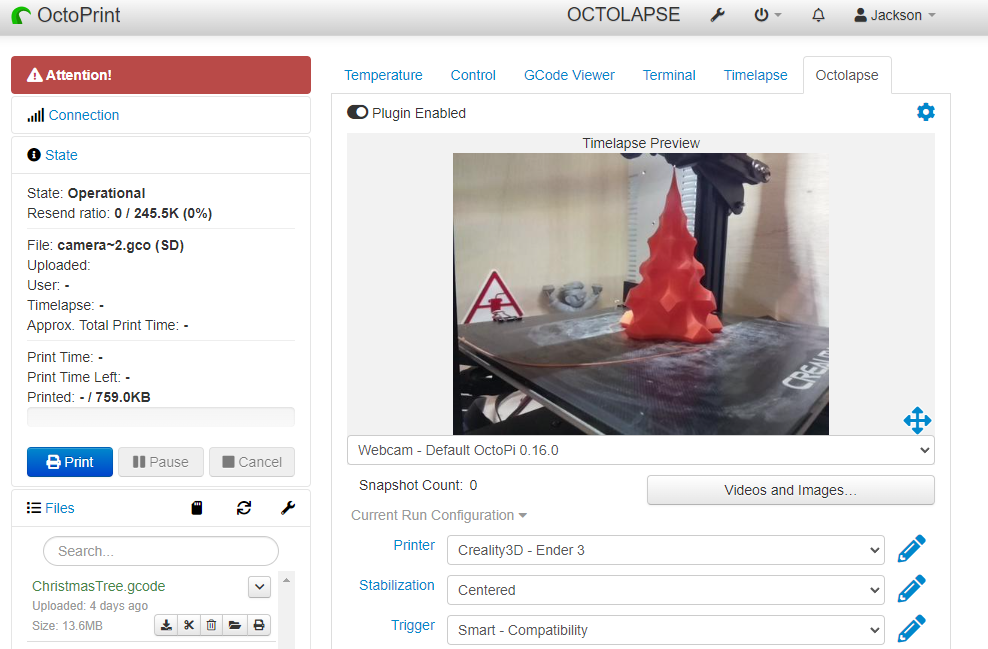
To set up a printer profile, start by going to the Octolapse tab of the OctoPrint online interface, which should be on the far right, right next to the “Timelapse” tab. Then, look for “Printer” and click the “+” icon.
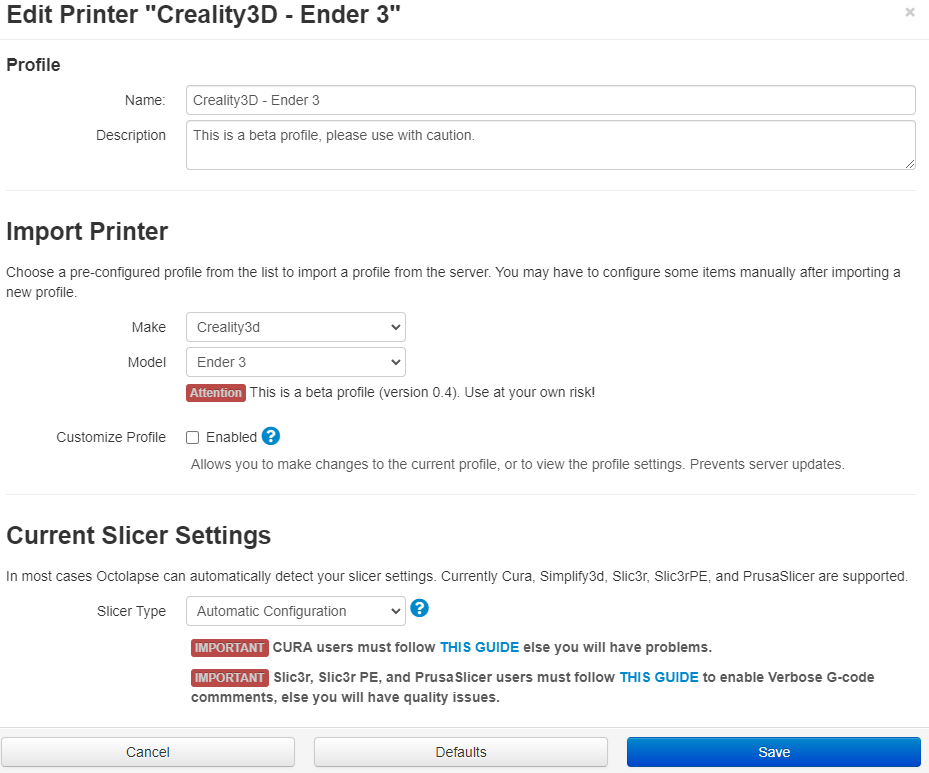
In the pop-up section, fill in the basic information about your 3D printer. If you’re using a popular machine, such as Creality Ender 3, you can fill in the make and model of your printer, and Octolapse will insert the pre-programmed settings for your machine.
For the “Slicer Type” section, select “Automatic Configuration”.
Finally, click “Save”!
Step 3: Configure Cura
Octolapse needs some basic information from your 3D slicer to operate correctly. For PrusaSlicer, Slic3r, and most other 3D slicer programs, you don’t need to do anything. But, if you’re using Cura (like I am), then you’ll need to configure the start G-code section for Octolapse.
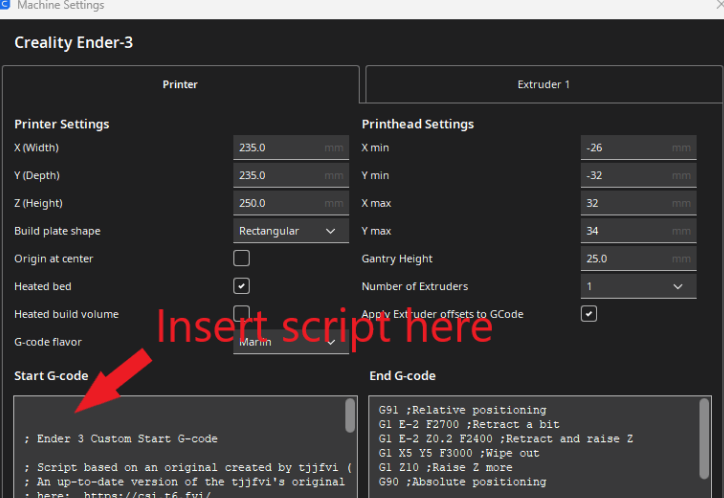
To do this, open Cura, click the “Settings” option, and select “Manage Printers…”. Then, choose the 3D printer you’re using, and click “Machine Settings”.
In the “Start G-code” section, go to the first line and click enter a few times to give some extra space. Then, copy-paste all of the lines in this script to the first line of the start G-code script. Make sure not to delete any of the original lines in the start G-code box.
You can check out the official GitHub page for Octolapse regarding slicer configuration if you’re having problems.
Step 4: Connect Camera
Next, we’ll need to connect your camera to your OctoPrint server. Your camera should already be connected to your OctoPrint server, so go into the Octolapse settings and make sure you see it selected for the “Cameras” setting.
If it’s not, try restarting your OctoPrint server after unplugging the camera and plugging it back in.
And that’s it! You now have set up Octolapse!
To use the plug-in to make Octolapses, load your G-code files and start the prints through the OctoPrint online interface. Starting a print locally, through the printer’s microSD card, won’t work!
Best Octolapse Settings
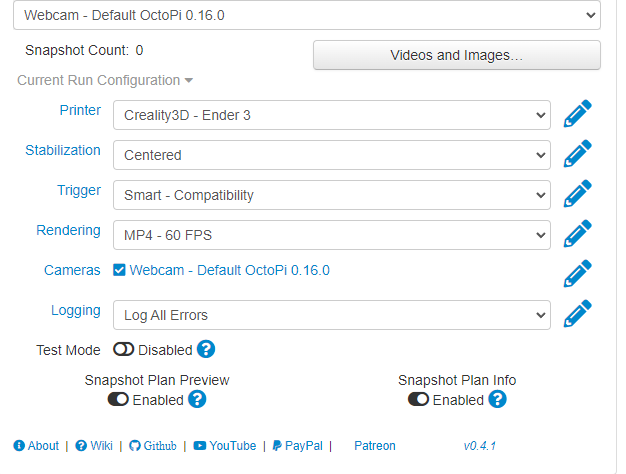
I’ve played around with Octolapse for tens of hours, and after a lot of testing, I’ve made a list of the best Octolapse settings! Here are them below:
- Stabilization: Centered
- Trigger: Smart – Compatibility
- Rendering: MP4 – 60 FPS
- Logging: Log All Errors
- Snapshot Plan Preview: Enabled
- Snapshot Plan Info: Enabled
However, feel free to deviate from this profile if you think it will better your time-lapse.
Also, you might want to make adjustments based on your personal tastes. For example, you can change the “Stabilization” setting, which controls the printhead placement, to “Back Left” if you want the printhead out of the way during the Octolapse video. However, do note that if you do this, the print time will be longer as the printhead is moving further away from its native position for each snapshot.
Another change you might want to make is with the “Trigger” setting. The default “Smart – Compatibility” option tells the camera to take a snapshot about at every layer, but changing this setting to “Classic – Every 0.5mm” will trigger photos every time the print increases in height 0.5 mm. Or, you could change the setting to “Smart – High Quality” if you want to make sure that the Octolapse doesn’t degrade the quality of your print.
Other Tips for Making Octolapses
Besides the main settings, there are some other important things to go into making a high-quality Octolapse. I’ve gone over them in the bullet points below:
- Lighting: Lighting is extremely important for any photo, video, time-lapse, or Octolapse. Make sure that your print bed is well-lit and that there aren’t a lot of shadows from the camera’s POV. I like to use a ring light behind the camera to do this.
- Camera Quality: The actual camera you use is also, obviously, very important for the quality of your Octolapse. Any camera will do, whether it’s a Raspberry Pi Camera Module V2 or a 4K Logitech Brio webcam. However, know that better cameras (higher megapixels) will usually yield crispier, more HD Octolapses.
- Positioning: Where you position your camera also matters. I think the best place to position your camera is from the side, with the camera a good bit over the print bed. This will make it easier to observe the infill of a print during the Octolapse.
Conclusion
If you want to really show off your 3D printer and what it can do, don’t make a regular video time-lapse of your machine. Make an Octolapse!
Octolapses are meant for 3D printers and work with an OctoPrint server and a connected camera. Compared to a normal time-lapse of a 3D printer, Octolapses are way more fluid, cleaner, and, overall, just better!
Installing Octolapse to your OctoPrint setup is also very easy. You just have to add the plug-in to your server, make a profile for your printer, configure your slicer, and adjust a few settings. It shouldn’t take more than an hour!
The best Octolapse settings for your printer might vary on what you want to see in the time-lapse, but using the Smart Compatibility trigger with the Centered printhead positioning (Stabilization) works great!
In no time, you’ll be making epic Octolapses like this: