
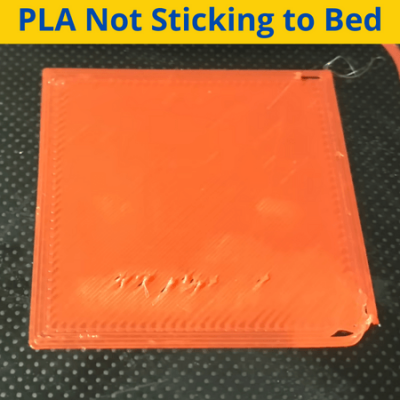

Ever start a print and come back to see a stringy mess of detached plastic? Let me save you the trouble of finding out the cause of the problem… it was likely your bed adhesion.
Bed adhesion is how well the melted plastic pushed out of the hot end sticks to the print surface (build plate). The ideal level of bed adhesion is when all your prints stick well to the print bed but can still be easily removed once the print job is done.
Too little bed adhesion will cause prints to constantly fail because the first layer won’t stick to the bed. On the other hand, though, too much bed adhesion will make it impossible to remove prints without breaking your build plate.
You can achieve better bed adhesion in a few ways, like raising your bed temperature, using glue, changing or cleaning your nozzle, and adding a brim or raft. However, there are many other ways you can further improve bed adhesion, which we’ll be talking about in the sections below!
Specifically, we’ll be taking a look at improving bed adhesion with PLA, the most popular filament material.
Enjoy!
Causes of Poor Adhesion for PLA
Before we get into the solutions for poor bed adhesion, it’s just as important to go over the causes as they will help us determine the solutions.
First off, let’s talk about how poor bed adhesion causes prints to fail.
On a 3D printer, each layer should be fixed to the layer beneath it or the build plate in the case of the first layer. If the layer isn’t securely fastened to the layer or print surface below, your printer will end up trying to print the next layer in thin air. Of course, this isn’t possible, so, without a point to stick to, the layer will fail and end up looking like a stringy mess.
Moreover, the reason layers don’t properly stick to the ones beneath it or the build plate is due to a lack of grip, essentially. Sometimes we also refer to this as the layer-to-layer adhesion or… bed adhesion.
With that out of the way, let’s get into the actual causes of the poor bed adhesion.
1. Bed is Not Leveled Properly
Our first cause is the most likely culprit for any print fail and is when the bed is not level. An unlevel bed means that the build plate is slightly tilted. As such, the distance from the print bed to the nozzle will be too high in some areas and too low in others.
In the areas where the bed is too high and is too close to the nozzle, the PLA plastic extruded from the nozzle won’t have enough space to stick to the build plate properly. As such, that first layer will have a smaller-than-desired layer height. The following layers in that area will fail because they won’t stick to the first layer as it’s too low to the bed.
On the other side of the spectrum, in the areas where the bed is too low and is too far away from the nozzle, the first layer will have too much space. The layer will basically be “falling” from the nozzle and it won’t end up in the right X/Y position. Furthermore, this means the layer won’t properly stick to the bed, and the following layers in that area of the bed also won’t stick to that first layer either.
So, if the bed isn’t level, if the print doesn’t fail right then and there, it definitely will within the next few layers.
It’s also worth noting that there are a few other causes of poor bed adhesion that are specific forms of an unlevel bed, such as warping, which we’ll talk about later.
2. Bed is Not Clean
If the bed has grease, grime, or other substances, this can also result in poor bed adhesion. That’s because these substances will act as a medium layer, separating the build plate surface from the bottom of the filament. This makes the first layer very susceptible to accidentally moving throughout the print, shifting the entire print, and causing the following layers to fail.
3. Bed and Printing Temperatures are Low
Bed temperature directly affects bed adhesion, as more heat encourages more adhesion. So, too low of a bed temperature is almost guaranteed to cause poor bed adhesion and maybe even a failed print.
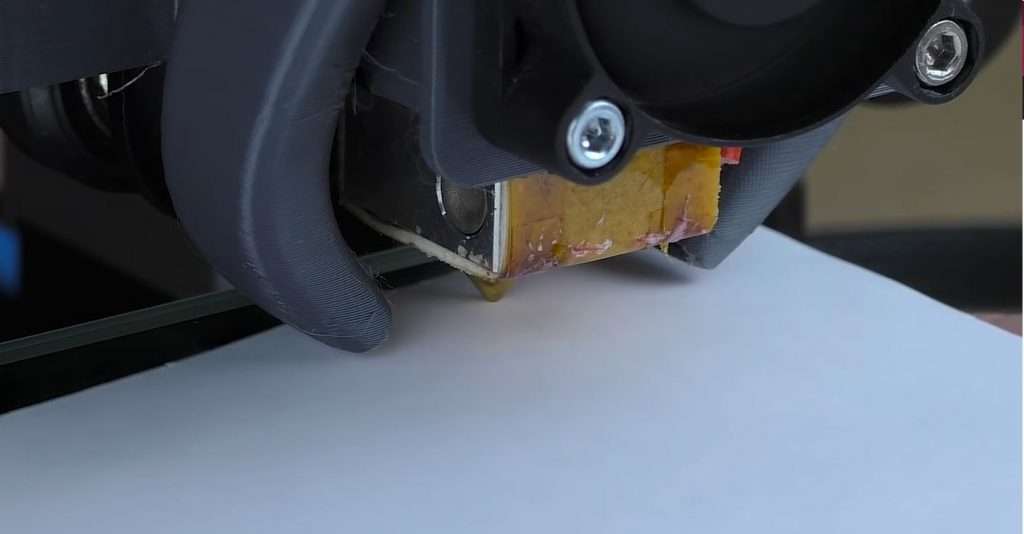
While less impactful than the bed temperature, the nozzle temperature also can affect bed adhesion. If the filament isn’t hot enough, it won’t be liquid enough to flow out of the nozzle and properly stick to the printing surface.
4. Printing Too Fast
Doing anything too fast can cause issues, and the same is true for 3D printing. If your first layer print speed is too fast, the filament won’t be extruded slow enough to form a proper stick to the build plate.
5. Wrong Z-Offset
The Z-offset goes hand-in-hand with the bed levelness and controls the offset distance along the Z-axis (vertical axis) where the nozzle is. So, if you have a perfectly level bed, but too high of a Z-offset, then the nozzle will always be too high above the bed.
The same is true in the other direction.
Furthermore, too low of a Z-offset also causes poor bed adhesion because the first layer of PLA plastic won’t have enough space to properly stick to the bed. This commonly causes clogged nozzles as the filament has nowhere to go.
6. Warped Bed
Our last cause is a warped bed. This means that your build plate has permanently defected with a spot on it that’s too low or too high.
As we previously mentioned, warped beds can be considered a form of an unlevel bed. That’s because the warped area that’s too high or too low is just a less-fixable form of a regular unlevel bed, and both can cause poor bed adhesion.
How To Get Good Bed Adhesion
Now that you know what causes the first layer of your PLA prints to not properly adhere to the build plate, let’s talk about how you can fix the issue. In the sections below, we’ve gone over a couple of easy solutions for poor bed adhesion!
1. Level the Print Bed
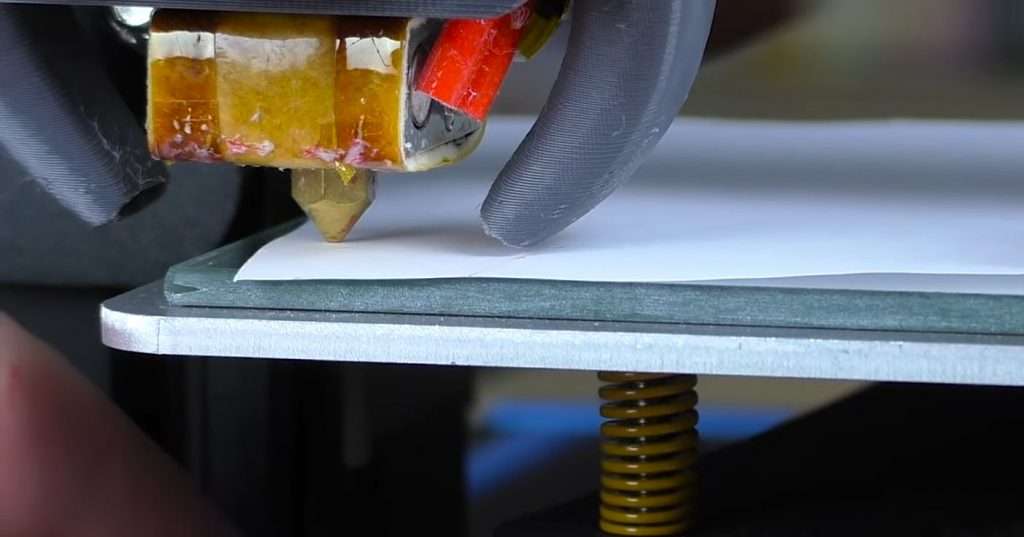
Just as an unlevel bed is the most common cause of poor bed adhesion, leveling the print bed is the most surefire way to solve the issue. Leveling the bed involves making sure that the build plate is completely even and that the distance between the nozzle and the top of the print bed remains the same across the entire area.
If you’ve never leveled your print bed, it’s super easy! All you have to do is use a piece of paper and set it in between your nozzle’s home position and your build plate. Then, rotate the leveling knobs around your build plate so that the paper can barely move.
Alternatively, if you have a printer with an automatic bed leveling sensor, like a BLTouch device, then the process is even easier. Moreover, with one of these ABL sensors, you can simply click a button on your machine’s LCD interface and the printer will level the bed on its own.
And, if you’re not sure you leveled your bed right, don’t be afraid to redo the process. It can take some getting used to, but once you get the hang of leveling the bed, it becomes second nature.
For a more visual sign, you can also look at the first layer of your print and rub your finger gently across the print lines. If the printed lines move, then you need to bring the bed closer to the nozzle.
2. Adjust the Z-Offset
Adjusting the Z-offset is another easy way to fix poor bed adhesion. As we mentioned, even if you have a perfectly level bed, if your Z-offset isn’t set properly, the nozzle will still not be the right distance above the print bed, leading to poor bed adhesion for prints.

Changing the Z-offset is super easy because it’s just a game of tuning! If your first layer isn’t sticking down, then you need to lower the Z-offset. On the flip side, if you’re getting poor bed adhesion due to the first layer being too close to the print bed, then you’ll need to increase the Z-offset.
You can adjust the Z-offset on your printer’s LCD or in your slicer (e.g. Cura). When adjusting the value, try doing so in small increments of around 0.05 mm. Feel free to use higher or lower increments, though, if your Z-offset is wayyyyy off.
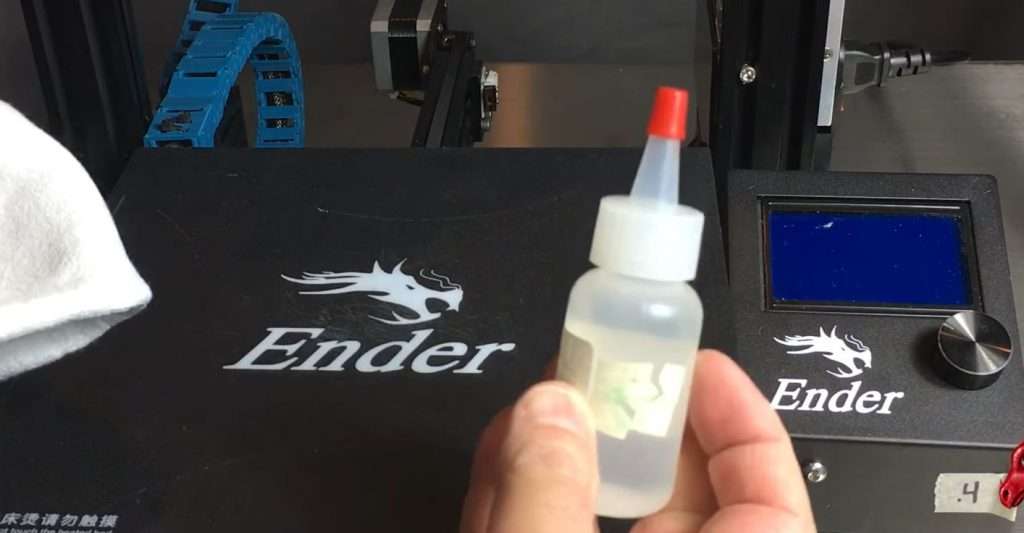
3. Use A Bed Adhesive
Next is a pretty obvious solution which is to use a bed adhesive, like glue or hairspray.
These adhesive substances should be applied to the top surface of your build plate. Once set down, they will improve the bond between the bottom of the first layer of your print and the print bed, so your PLA prints will better stick.

As we said, glue and hairspray are popular adhesive options. However, these are mainly used for convenience purposes as they can be found in most people’s homes.
For an even stronger adhesive that is sure to eliminate the problem of PLA not sticking to bed, you can use a proprietary substance like Magigoo or products by AirWolf 3D.
4. Clean the Print Bed
Although we just talked about applying an extra substance to the surface of the build plate, not just any substance will help. In fact, there are many substances and chemicals probably on your printer’s build plate right now that are actually hurting the bed adhesion, such as grease and grime from your fingers. Cleaning the print bed is a great way to improve bed adhesion and requires very little effort.
While a cloth lightly soaked in water will do the trick, using acetone or a plastic solvent is an even more effective cleaning method. That’s because these chemicals specialize in removing and evaporating unwanted chemicals from surfaces.
No matter what cleaning substance you use, make sure that it won’t degrade your print bed. For example, you shouldn’t use acetone if you’re using a polypropylene build plate because this bed material is thermoplastic and could partially dissolve if exposed to acetone.
Additionally, don’t forget to dry your print bed afterward. Any remaining moisture on the print bed could degrade the melted plastic laid down on the bed. A dry microfiber cloth or just a dry table cloth works great for this, but try not to use a paper towel because it can leave paper remnants on the bed.
Check out our article on how to clean your 3D printer bed for more in-depth information.
5. Adjust Slicer Settings
Slicer settings also can impact your machine’s bed adhesion. Specifically, I’m talking about the bed temperature setting, which directly correlates with PLA bed adhesion. Moreover, the higher the heated bed temperature, the stronger the bond between the first layer of plastic and the top of the build plate.
Most people use 60 °C for the heated bed temperature when printing PLA. But, if that’s not working, try increasing in increments of 5 °C until you reach 70 °C. That’s because, at the 70 °C point, it’s clear that the bed temperature isn’t the reason for your bed adhesion issues.
The bed temperature isn’t the only slicer setting that can impact bed adhesion, though. In fact, the nozzle temperature also plays a role and if your PLA isn’t melted enough when it comes out of the nozzle, it might not stick well to the print bed.
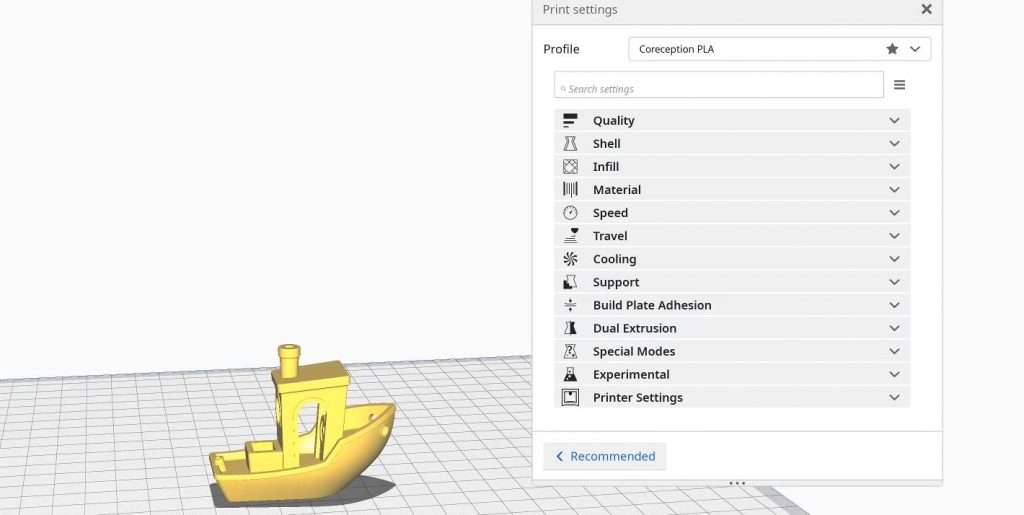
200 °C is usually a good temperature for PLA but increase in increments of 5 °C until you get to 225 °C. This might bring some other issues, like stringing and over-extrusion, but you can solve these later…we’re just focusing on the adhesion now.
The print speed is another impactful setting, and too high of speeds for PLA will almost always cause bed adhesion issues. It’s an easy fix, though: lower your first layer print speed as well as the other print speed settings. For PLA, 20 mm/s works great for the first layer speed, and 55 mm/s for the other speed settings (e.g. infill speed).
Lastly, the adhesion assistant settings, like a brim or a raft, in the slicer are also great ways to improve the bed adhesion. Both a brim and a raft improve bed adhesion for PLA prints. I personally suggest the brim as it still provides excellent bed adhesion for prints, but consumes a lot less filament and time compared to a raft.
6. Dry the Filament
Drying filament is perhaps the most underrated way to solve bed adhesion problems, as well as print quality issues (e.g. prints too brittle). This method involves putting your filament spool in a dryer of some sort, that will heat up the plastic to remove any moisture.
The reason this helps is that, when moisture is in the air around your filament, it can be absorbed by the plastic. If this happens, when the plastic is melted in the hot end, the water will turn into steam and cause bubbles in the flow of the filament. These bubbles make it difficult for the first layer to stick to the print bed.
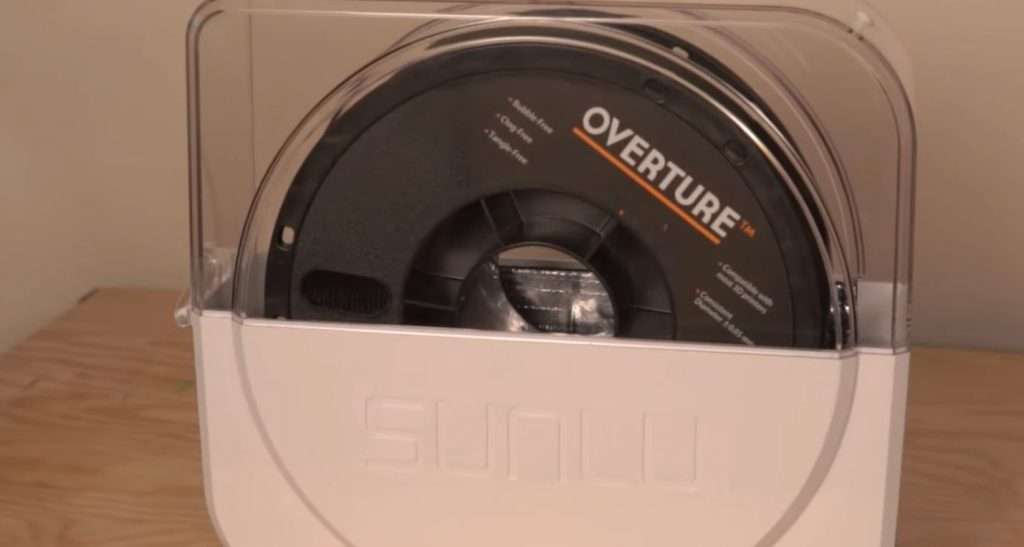
To make your filament the most dry, you can purchase a filament dryer online, such as those from Sunlu, eSun, or Creality.
However, a more practical and convenient way to dry your filament is to put it in your kitchen oven and set the temperature as low as possible. You only need to leave the spool in for a few hours and then it’s good to go, with almost all of the moisture removed.
7. Change the Print Bed
Our last method is changing your print bed and is a final resort if none of the other methods work. That’s because a print bed can cost anywhere from $20-50, which is more expensive than any of the other solutions we described. As such, I advise you to not drop the cash for a new print bed until you know it’s necessary.
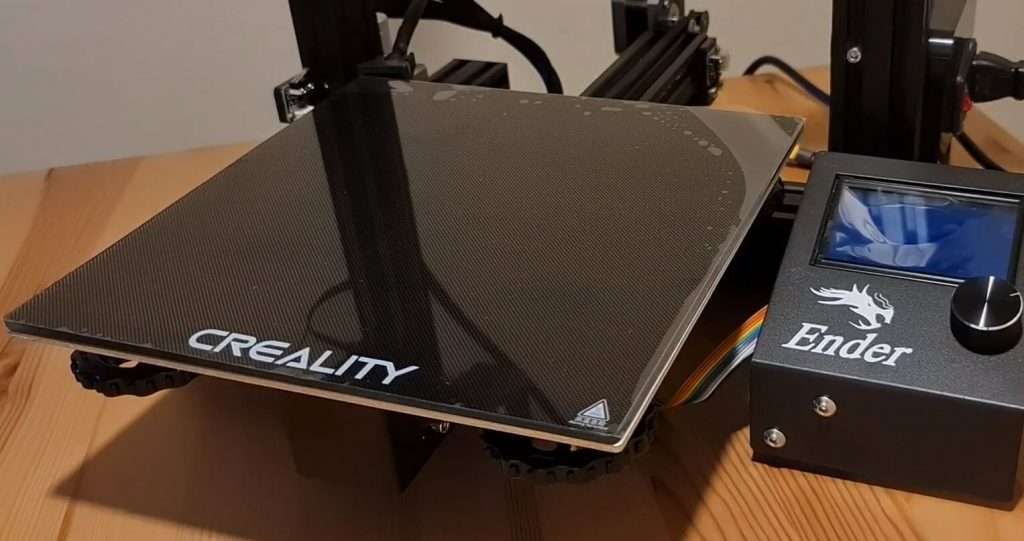
And, on that note, in some situations, replacing the print bed might be necessary. For example, if your bed is permanently warped in a way that proper bed leveling can’t solve, then changing the bed might be the only way to get rid of your bed adhesion problems.
All you have to do for this method is purchase a replacement bed that is the same dimensions as your current one. And, then remove the holding clips and switch them out!
Conclusion
Poor bed adhesion for PLA prints is one of the most popular problems that 3D printing enthusiasts run into. And, while many different factors can cause the issue, there are just as many (if not more) solutions that you can use, from leveling the bed, drying your filament, and setting the right temperatures. Don’t be scared to use multiple methods at once as this can expedite the fixing process.
And, if you’re wondering what methods to start with, here are my go-to methods:
- I start by leveling my bed and then checking that my Z-offset is right.
- Then I clean my bed with a half-dry-half-damp cloth and apply a thin layer of glue on top of it.
- And, if that doesn’t work, I use the other solutions I listed, like changing my slicer settings, drying my filament, and more.
Related Articles: