
Bed leveling is easily the most important step to do before printing. If you have an unlevel bed, your prints will almost definitely fail, usually at the first layer.
Bed leveling, whether automatic or manual, will ensure that the first layer comes out perfectly, sticking to the print bed so that the following layers can be laid down.
The Original Creality Ender 3, as well as the V2 and Pro versions, all feature manual leveling systems. You can level the print bed on these machines by homing the nozzle and adjusting the four leveling knobs until the nozzle is an equal distance above the build plate across the bed’s area.
Want to learn more about bed leveling and a more in-depth explanation of the process for the Ender 3 (V2/Pro)? Read on!
Table of Contents
What is Bed Leveling?
Bed leveling is a process for 3D printers that involves adjusting the position of the print bed so that it’s level with the nozzle. In other words, you move the print bed up and down at different points until the distance between the nozzle and the top print surface is the same across the entire area of the bed.
You can either level the bed manually or automatically. Most budget 3D printers, such as the Creality Ender 3, have manual bed leveling systems because they’re simpler to build and less expensive.
Automatic bed leveling, on the other hand, levels the bed by using a digital mesh of the bed which the printer interprets and uses as it prints models to keep the nozzle-to-bed distance the same. If you want to add an automatic bed leveling sensor to your Ender 3, you can check out our article all about this process!
And, with that, let’s keep moving!
Why Do You Need to Level the Bed?
Leveling the bed is necessary to get high-quality 3D prints because it determines the success of the first layer of the print, which affects how well all of the subsequent layers come down.
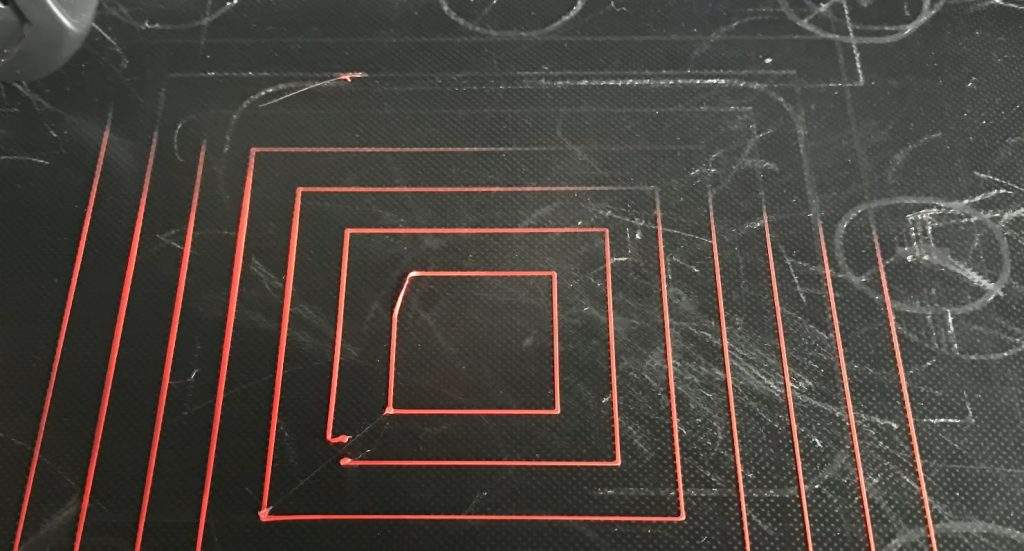
If the bed is tilted, for example, then the printer will try to print the first layer flat on a non-flat surface, resulting in some areas of the layer being higher up than others. This will result in your first layer looking something like this:

Because the first layer will come out flawed on your tilted, or otherwise unlevel bed- all of the following layers will also come out poorly because each one builds off of the previous layer.
So, unless you want constant print failures or overall low-quality 3D prints, then you should level your print bed.
How Often to Level the Bed?
You should try to level your print bed every 3-5 prints.
That’s because once you level your bed, it’s only a matter of time (and a number of prints) before it becomes unlevel. A bed can become unlevel for a few reasons, which we’ll get into in the next section!
Reasons Why 3D Printer Bed is Not Level
A 3D printed bed can be unlevel for a few reasons, but the main one is movement due to vibrations.
Moreover, when your 3D print bed is leveled, it’s not 100% rigid. As such, vibrations, such as those caused by your printer moving different components, will shake the bed ever so slightly. And while each vibration’s impact is negligible, over time, after a lot of vibrations, the bed will be unlevel again.
Another way the bed can become unlevel is when you try to push prints off of the surface. When you stick a spatula or scraper tool to the bed or even push the attached print with your hand, this slightly unlevel the bed. After a few print removals, the bed might be unlevel enough to be noticeable in the first layers of prints.
Of course, there are other potential reasons a 3D printed bed can get unlevel, but they’re too specific and vary person-to-person.
How To See If Your Bed Needs To Be Leveled?
You can see if your print bed is unlevel by checking if the nozzle is either too high or too low. We’ve gone over both possibilities below:
Nozzle is Too High
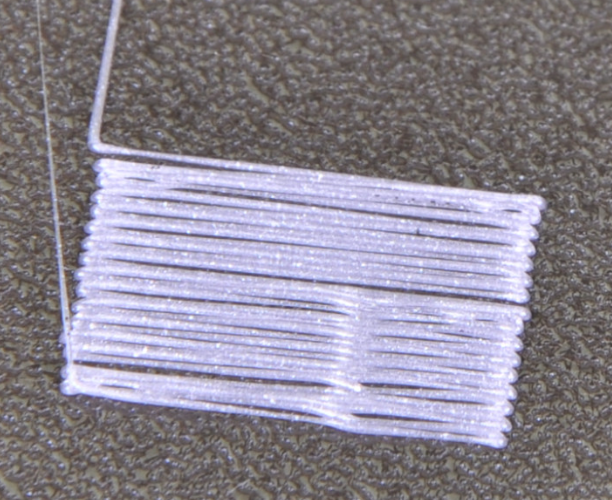
If the nozzle is too high, then the first layer will look too loose off the bed. This means there isn’t a good seal between the melted filament and the surface of the build plate. I’ve provided a visual example below:
Nozzle is Too Low
On the other hand, if the nozzle is too low to the print bed, then the first layer will look almost engraved into the surface of the build plate. Or, the layer lines might look like they’re fading.
Just like a nozzle that’s too high, a nozzle that’s too low can also cause print failures and other issues. But, even worse, a nozzle that’s too low could even cause permanent damage to your build plate, so be careful.
For reference, I’ve provided a visual example of when the nozzle is too low below:

And here’s a quick cheat-sheet you can use:

How to Level the Bed (Step-By-Step)
Leveling the print bed on your Ender 3, Ender 3 Pro, or Ender 3 V2 is no big deal, and, in the sections below, I’ve broken down the entire process into three easy steps!
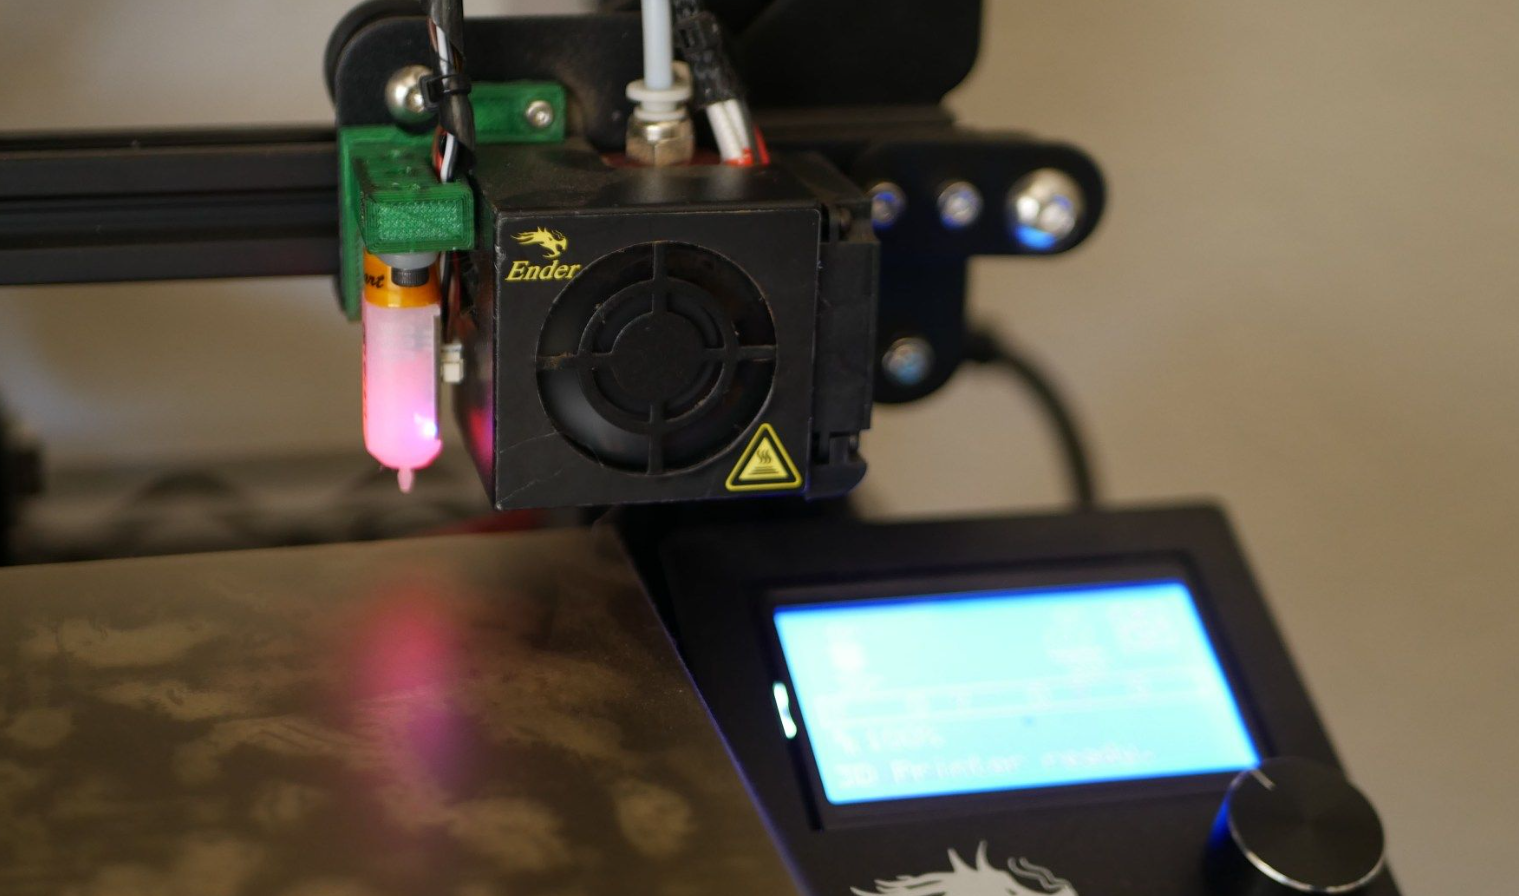
1. Home The Printer
The first step in the manual leveling process is homing the printer. Specifically, we’ll want to auto home the Z-axis of your printer because this is the axis that controls the height of the nozzle relative to the build plate.

Once all of the axes are homed, which you can do on the Ender 3’s LCD, you’ll want to disable the motor locks so you can move the nozzle left and right as well as back and forth. To do this, go on the Ender 3’s LCD interface and click the “Disable Steppers” button.

Make sure that you can move the nozzle left and right and back and forth. But DO NOT move the nozzle up or down! Doing so will require you to re-home the Z-axis before moving on.
2. Rotate Leveling Screw
The second step of the leveling process is to rotate the leveling screws.
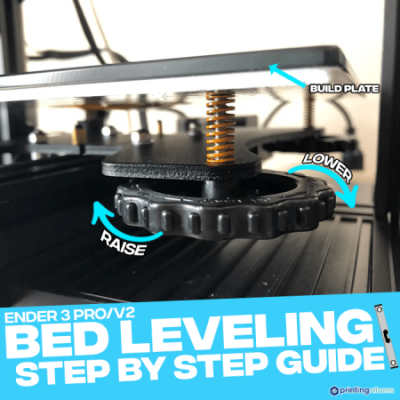
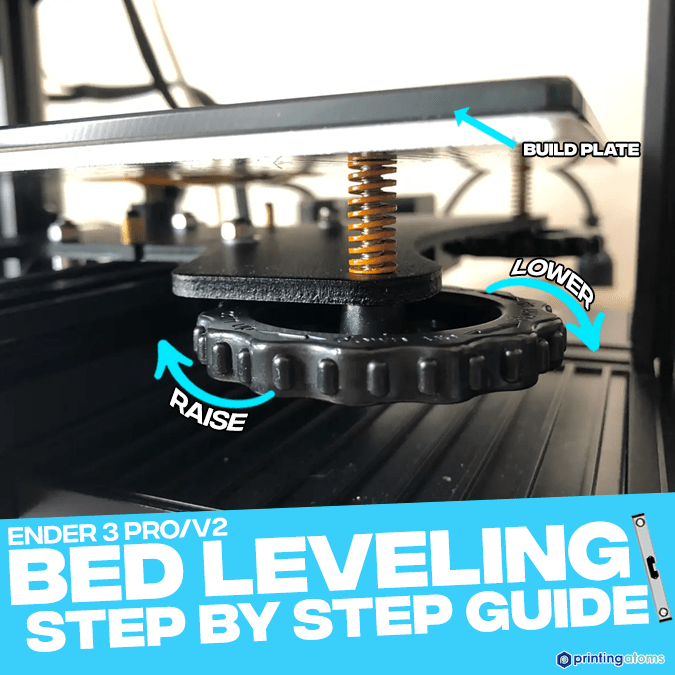
If you’re unfamiliar with the term, the leveling screws are those four large, rotatable, nuts (screws) underneath the print surface on the Ender 3 (V2/Pro). These nuts control the position (height) of the build plate.
Tightening a screw or rotating it clockwise (to the right) will pull the bed down in this area, expanding the distance between the nozzle and the build plate. And vice versa!
For the manual bed leveling process, it’s best to level each corner of your Ender 3’s print bed. Let’s start with the front-left corner! First, move the printhead assembly slightly right and back so that the nozzle is centered around the front-left leveling nut.

Once you’ve positioned the printhead, keeping the Z-axis height the same, grab a piece of paper or a sticky note. Slide the paper in between the print bed and the nozzle and see if you have room for the paper to wiggle.

Now adjust the leveling nut, turning right to expand the space or left to lessen the gap until the paper can move, but you can feel resistance. This move-with-resistance point is the perfect height for the nozzle to be above the bed.
3. Move Nozzle Around
Next, we’ll move the nozzle around to the other corners of the build plate and repeat the process!
I like to level the bed in a counter-clockwise motion, so after the first point is leveled (as we went over), move the printhead assembly so that nozzle is centered around the front-right leveling nut. Now repeat the process described in the previous step, adjusting the knob until the paper can wiggle with resistance.
Next, move to the back-right point, repeat, and then move to the back-left point, and finish it off.
You’re now so close to being done!
4. Repeat!
The last step of the bed leveling process is to repeat the three previous steps. This is essential for achieving a good bed level because each leveling knob slightly affects the position of the nozzle in the other three quadrants. As such, to accurately level your bed, you’ll need to re-level each point.
I like to go through the leveling process a total of three times. I’ve found this provides a good mix between time usage and bed level accuracy.
But, if you think you got it right on the first or second try, feel free to stop there. And, on the other side of the spectrum, if you need a few more go-arounds, that works too!
Tips & Tricks
Now that you know how to level the bed on your Ender 3, you may be interested in some tips and tricks for the process. I’ve provided some helpful tips in the bullet points below:
- Print Test Models: You may find it difficult to test how level your bed is after you’re done with the leveling process. A good way to quickly and accurately determine the levelness of your Ender 3’s bed is by printing a test model meant for showing the bed levelness, such as this one from Thingiverse.

- Use a New Piece of Paper: I often find that when I use the same sticky note (or piece of paper) throughout the leveling process, I don’t get the same accuracy as when I use new pieces of paper. This is likely because any heat from the nozzle could deform the paper. Of course, you don’t need to change the piece of paper for every leveling point, but getting a new piece for each leveling go-around isn’t a bad idea.
- Heat the Print Bed: Heat can expand metal and glass, such as the build plate materials on the Ender 3 (V2/Pro), so it makes sense to level the bed with the heat turned on. I suggest setting the bed temperature to the same temperature you typically use, as this will yield the most accurate and practical leveling results.
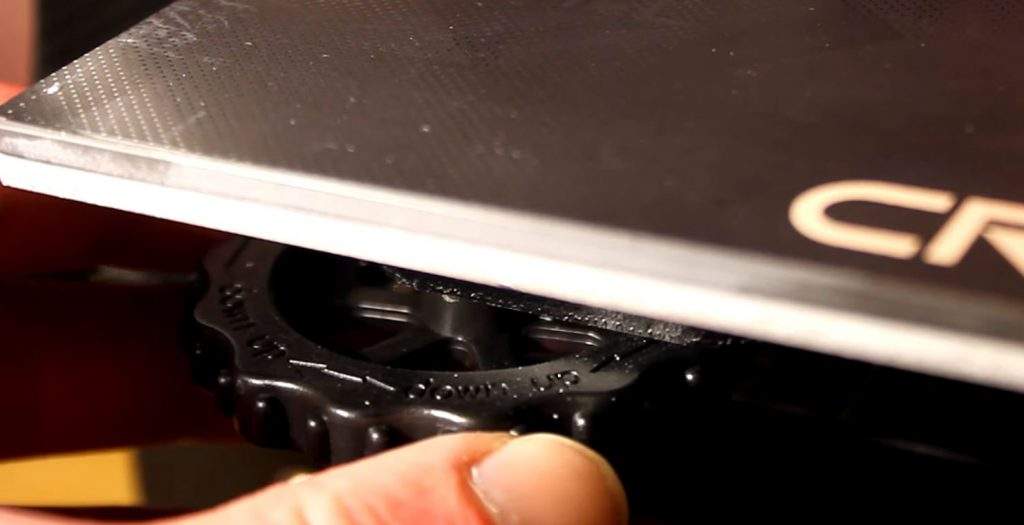
- Get Stronger Leveling Springs: You’ll notice that above the leveling knuts are a few springs. These springs make the bed levelness actually adjustable, but they also are responsible for “holding” the levelness of a bed. Because Creality cheaped out on the springs for the Ender 3 (V2/Pro), it’s a good idea to purchase stronger replacement leveling springs. From my own experience, I can tell you that using stronger springs will extend the life of each bed level, so you won’t have to level the bed as often. And they only cost a few bucks on Amazon.

- Use Auto Bed Leveling: While not related to the manual leveling process, I strongly suggest getting an automatic bed leveling (ABL) sensor for your Ender 3 (Pro/V2). These sensors not only eliminate the manual labor of the leveling process but also provide much more accurate bed levels because sensors work a lot better than paper and hands. There are many ABL sensors compatible with the Ender 3, such as the BLTouch, CR Touch, EZABL Pro, and more!
- Adjust the Z Offset: My final tip is to properly set the Z offset for your Ender 3. The Z offset controls the digital offset distance between the nozzle and print bed, and even if you have a perfectly level bed, if the Z offset is too high, your nozzle will be too far from the bed. You can set the Z offset either through your Ender 3’s LCD interface, your 3D slicer, or manual G-code commands.
Conclusion
Overall, the bed leveling process is extremely important for achieving successful and high-quality 3D prints.
Luckily, for the Creality Ender 3 (V2/Pro), the manual bed leveling process isn’t hard at all!
Just start by homing all of the axes on your printer, disabling the stepper motor locks, adjusting each knob with a piece of paper between the nozzle and bed, and repeat!