

If you want to be a pro with 3D printing, understanding infill is step #1!
Well, maybe not step 1 (turning on your printer), but it’s definitely up there for being one of the most fundamental parts of 3D printing to know.
Infill describes the inside section of a 3D print, or basically what lies in between the walls and ceiling of a 3D printed part. While you can’t see the infill section of a 3D print, it has significant affects on a model’s strength, print time, and weight. As such, it’s critical that you understand what it is and the relevant print settings, mainly infill density and infill pattern.
In the following sections, I’ll explain everything you need to know about infill, what each infill setting does, and the best infill settings for different types of 3D prints! Enjoy!
Table of Contents
What is Infill in 3D Printing?
Infill is a term coined by the 3D printing industry that simply means in-ternal fill-ing, hence the word’s spelling.
The best way to understand infill is to think about a 3D print as being made up of four different sections: the top layers, bottom layers, wall, and infill. The first three (top, bottom, walls) make up the perimeter, or the “shell” of a 3D print, and are outward-facing . The infill, on the other hand, describes what’s inside these barriers.
Infill is super important for 3D printing because no other manufacturing method (e.g. injection molding) can create infill. Moreover, 3D printing allows for customizable and variable densities; not just solid and empty.
Because it’s inside the shell, you can’t actually see infill on a 3D print. But, believe me, it’s there, and it’s very important! Infill has significant effects on a part’s print time, weight, and, of course, strength.
If you want to use infill to control these three major elements of a 3D print, you’ll have to understand and adjust two major slicer settings: infill density and infill pattern. Each of these print settings significantly controls how the infill section of a model is printed, and I’ve gone over each in the following two sections!
Infill Density
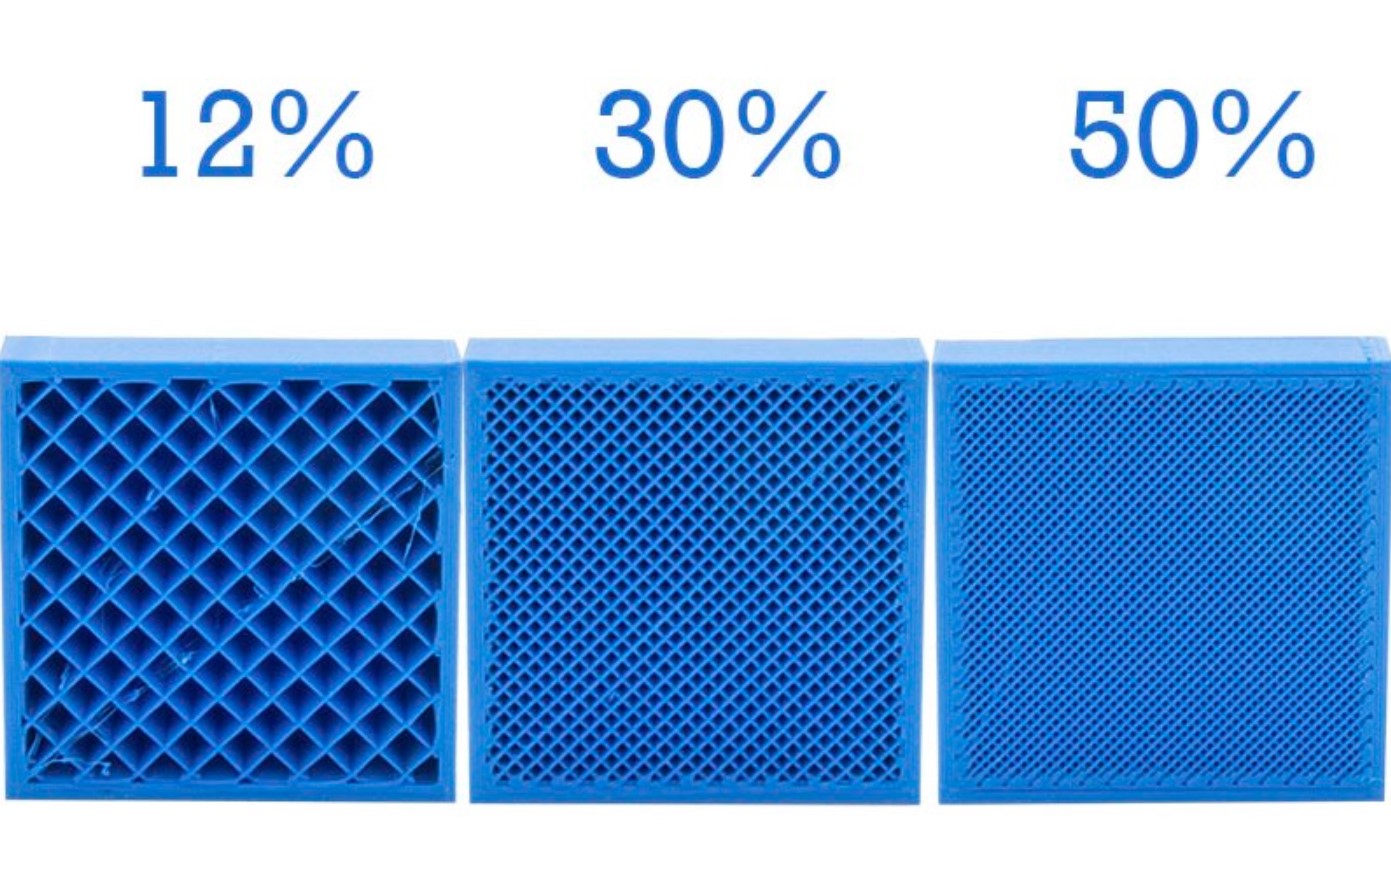
Infill density is one of the two super-important slicer settings related to infill, and it controls how “full” the infill section of a 3D print is. The infill density setting is usually expressed as a percentage in your 3D slicer software, and ranges from 0%, hollow, to 100%, completely solid.
As you might have guessed, parts printed with a higher infill density are generally stronger. It’s worth noting that the strength of a 3D print isn’t as dependent on the infill density as other settings, like layer height or nozzle temperature, but its effect is still noticeable so don’t forget it!
Increasing infill density will also increase the print time and weight of your model.
So what infill density percentage should you use?
For 3D prints that don’t need to be super strong (e.g. “standard” models, miniatures, and display pieces) 15-25% works perfectly! This level of infill density provides a great mix of fast print times, low material usage, and decent part strength.
If you’re printing functional models or parts that require strength, however, I recommend using a much higher infill density, between 60 and 100%. While your prints will take a lot longer and weigh a lot more, there is a much less likely chance of the prints snapping.
Infill Pattern
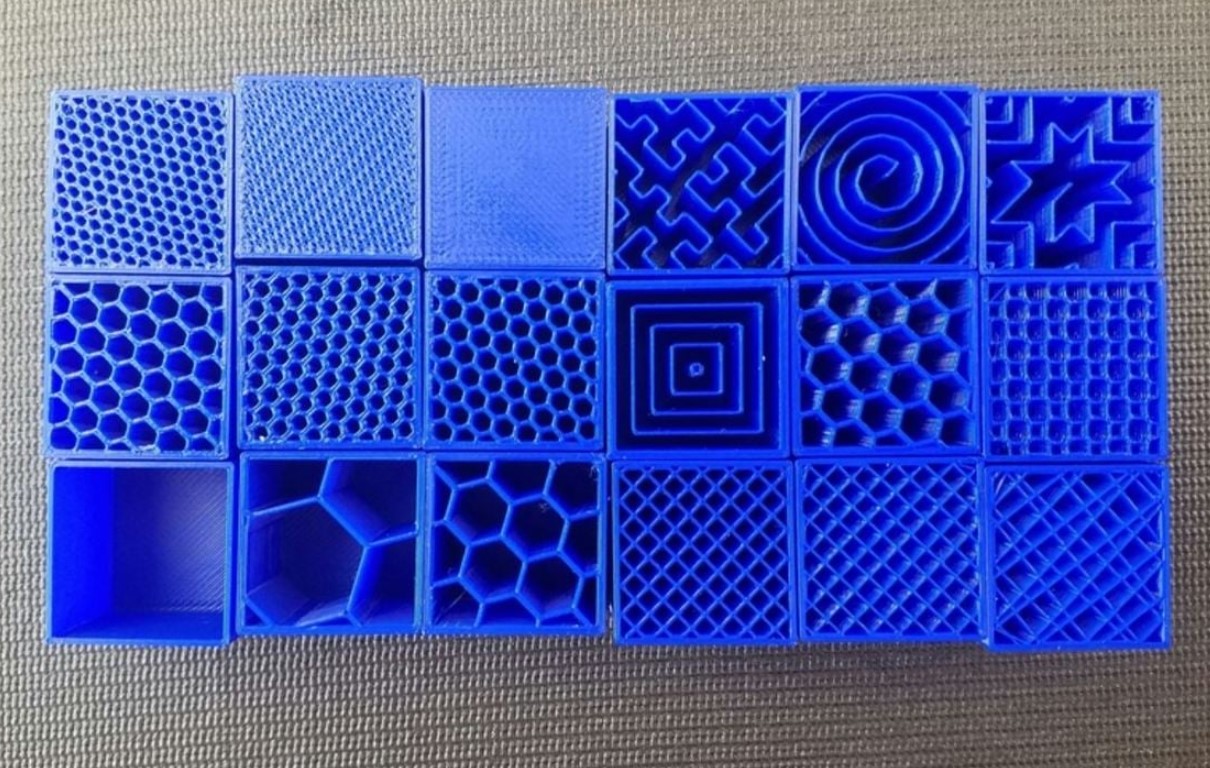
The other major infill setting in 3D slicer programs is the infill pattern. This setting is a bit more complicated to understand than infill density, so let me explain:
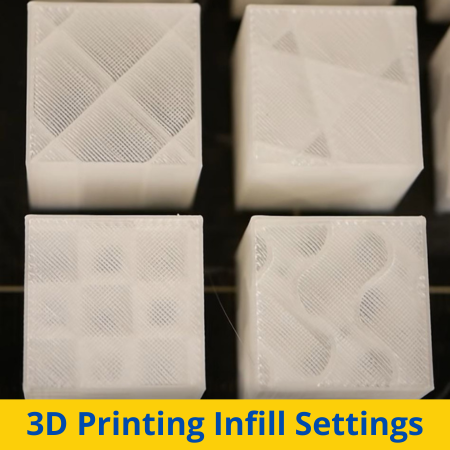
Infill pattern describes the structure or pattern that the infill material on a model is printed in. It answer’s the question “What will the infill look like?”.
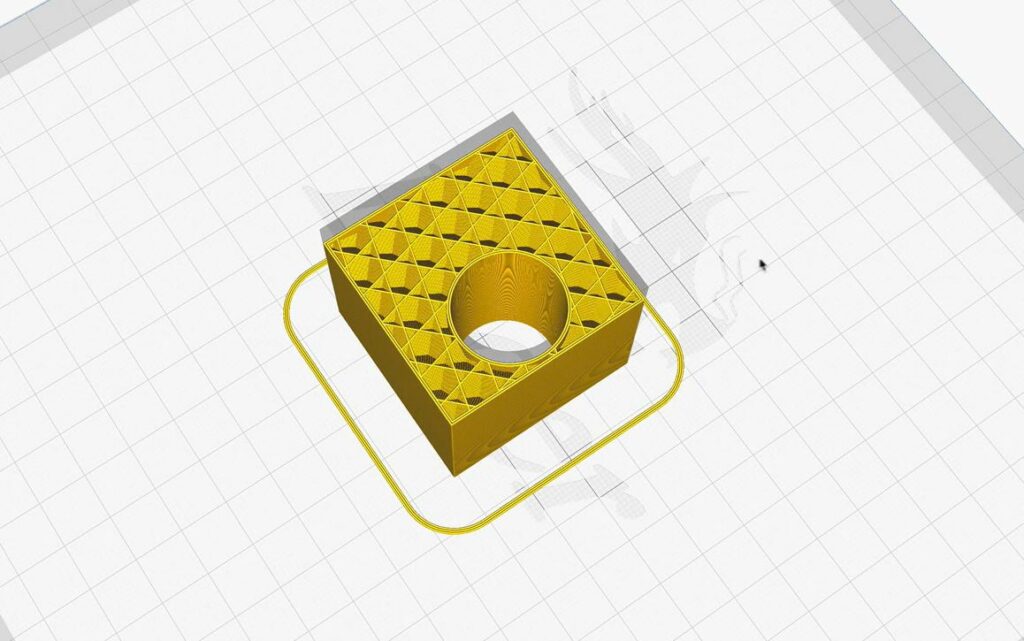
There are many different infill patterns for 3D prints, and popular ones include grid, lines, cubic, and honeycomb. To provide a more visual description of what an infill pattern is, I’ve provided a mid-print image of a 3D printed part with a honeycomb pattern.
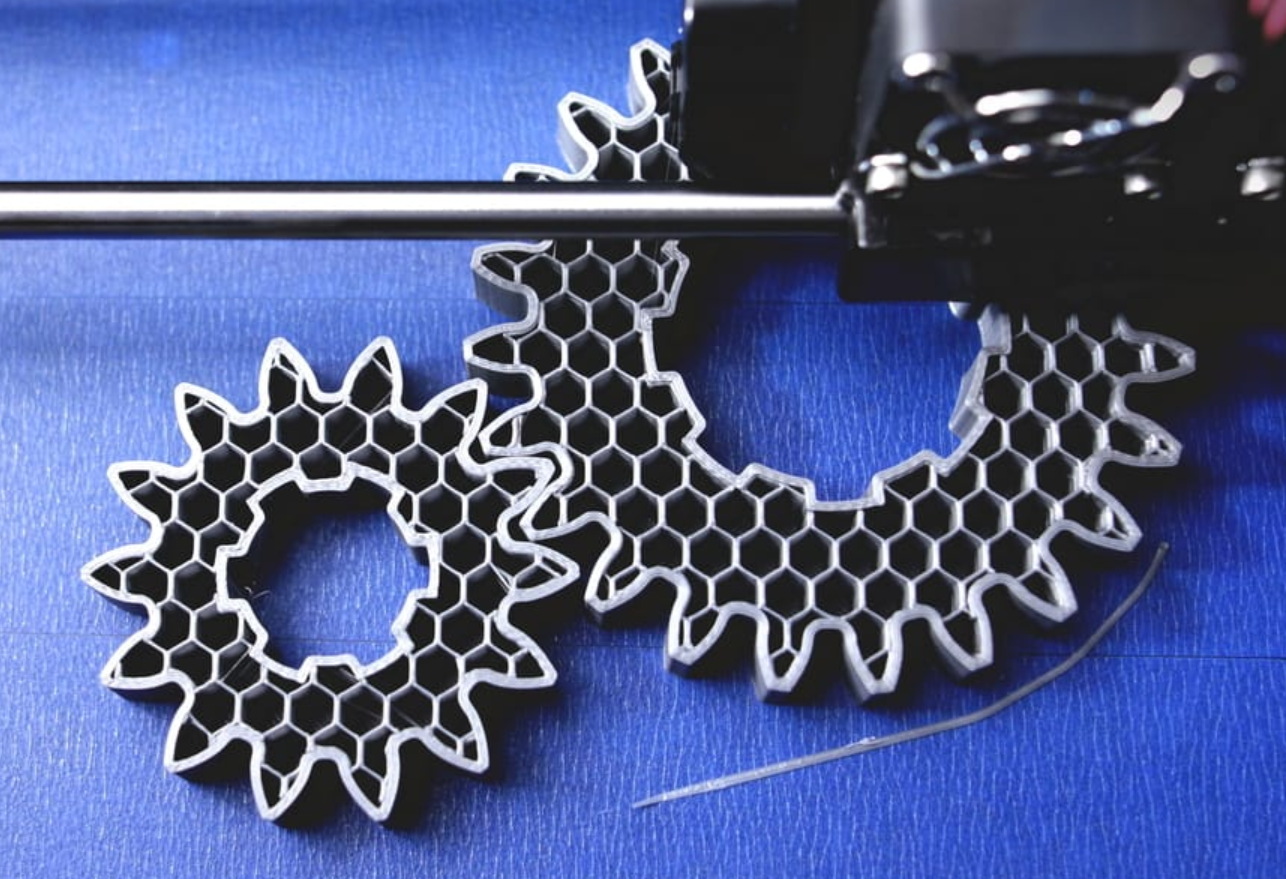
And just like infill density, infill pattern has notable effects on the print time, strength, and weight of a model. But, unlike the other setting, the pattern setting isn’t a percentage 0-100; Instead, it’s a selectable option on a 3D slicer, and different infill patterns offer different benefits. I’ve gone over the most popular infill patterns in the sub-sections below:
Cubic
First up, we have the cubic pattern, perhaps the most popular option.
The cubic pattern is essentially a series of closing and opening interconnected triangles. As such, the 2D pattern looks different at each layer as it builds off of the previous one.
This 3D-encompassing quality of the cubic pattern gives it exceptional three-dimensional strength, meaning parts printed with this pattern can withstand force more equally from every direction. In other words, three-dimensional strong infill patterns, like cubic, make parts durable no matter their orientation.
Besides strength, the cubic pattern is about average when it comes to part weight and print time. It’s a very great option for any type of print, including functional, display, and standard models.
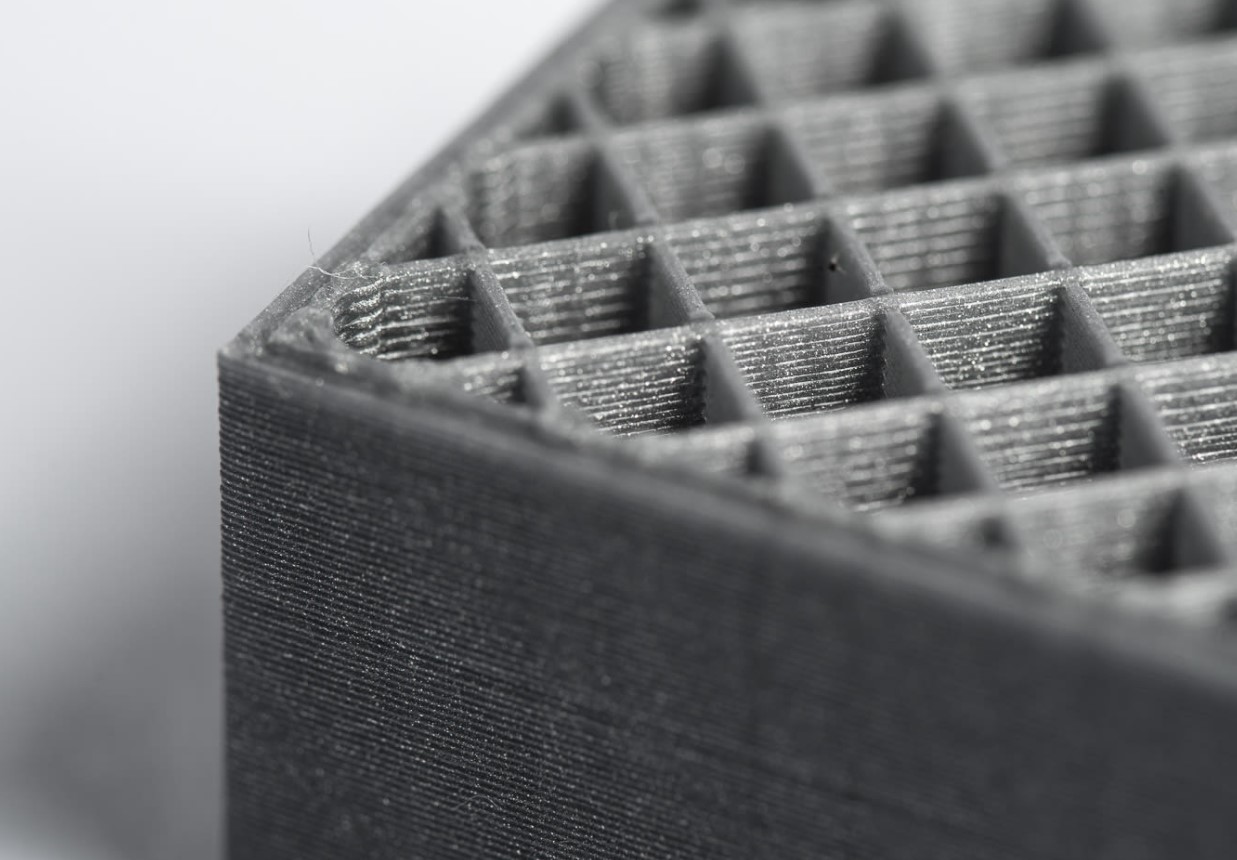
Grid

Second, let’s dive into the grid infill pattern, one of the easiest infill patterns to exist. As the name indicates, the grid pattern looks like a 2D grid. Moreover, each layer has lines going in perpendicular directions, resembling a series of stacked 2D squares.
What I like about the grid pattern is that it offers a good compromise between strength and print time.
Moreover, because the grid structure doesn’t cross the third dimension, the grid pattern isn’t three-dimensionally strong, but it provides a lot of 2D strength. As such, it’s a great option for parts that only need to be strong in the perpendicular direction (force from the top or bottom).
And, as a result of the pattern being very simple, it won’t give your machine any trouble, slices fast, and yields lower print times than other infill patterns, like cubic or gyroid.
With all of this in mind, the grid pattern is a reliable choice for a wide range of prints, including miniatures, standard models, cosplay or display objects, and more!
Lines
Next up, let’s explore the lines infill pattern, a simple yet effective choice.
The lines pattern consists of parallel lines running in a single direction, alternating at each layer. When it comes to printing and shape complexity, it really doesn’t get more basic than the lines pattern, and it’s available on many popular 3D slicers, like Cura, PrusaSlicer, and IdeaMaker.
As for part strength, the lines pattern fares well along the direction of the lines (perpendicular orientation). However, it may not offer the same level of strength in other directions compared to patterns like the cubic infill. So, if your part requires strength in specific orientations, consider other options.
But the lines pattern boasts a relatively fast print time, which makes sense considering the nozzle doesn’t have to move in many directions to make the pattern.
Because of these properties, the lines pattern is an excellent choice for standard and display prints, where some strength is preferred but not necessary. Plus, this pattern’s structural simplicity makes it unlikely to give your machine an issue and reduces print time.
Gyroid
Moving on, we got the Gyroid infill pattern, which is easily the sexiest pattern I’ve ever seen. I can’t even begin to describe the structure of the gyroid pattern…so I won’t; just look at the image of the pattern below!

But its astonishing squiggly look isn’t the only reason the Gyroid pattern is included in this article. Its strength properties are also super cool!
Moreover, the pattern yields exactly equal strength for parts, meaning they are just as strong when compressed or pulled from one direction as they are from a perpendicular direction. As such, the gyroid infill pattern is popular for prints that need to be strong from all directions, like a dice!
Of course, the gyroid pattern is pretty complex and some printers, especially older ones because of their slower processor, can struggle to properly print this pattern. As such, you’ll want to make sure your printer’s movement systems are running smoothly before attempting to print a model with this pattern.
Another surprising quality of the gyroid pattern is that it’s pretty lightweight and results in fairly mediocre print time.
All-in-all, the gyroid pattern is a great option for standard models!
Triangles

Lastly, let’s talk about the triangles pattern! This pattern is similar to the grid pattern, but instead of looking like a series of stacked 2D squares, it’s triangles, hence the name.
If you ever took an engineering class in high school, then you probably know that triangles are considered the strongest shape to exist, so it makes sense that this pattern is commonly used for 3D printing functional parts and models that require strength. Furthermore, the triangles pattern is known to provide much better perpendicular (2D) strength than other infill patterns, though you should know that this pattern isn’t great for 3D strength.
In terms of print time, the triangles pattern falls on the slower side. The pattern’s slightly more intricate nature and interlocking structure require more movement from the nozzle, increasing the overall print duration. And part weight is also higher with the triangles pattern than with some other options.
However, the additional weight and extra time investment are often worth it for the enhanced strength it provides.
Best Infill Settings
The best infill settings for a print will depend on the model itself and your intended purpose for the part. Obviously, the recommended infill settings will be different for a part that you want to be strong and sturdy versus one that you need to be printed as fast as possible.
In the bullet points below, I’ve listed the main different types of prints and the best infill settings for each. It’s worth noting that for each of the below points, I provided my specific individual recommendations, and not ranges, but feel free to adjust each value as you see fit!
- Functional Prints:
- Infill Density: 75%
- Infill Pattern: Cubic
- Display Prints:
- Infill Density: 10%
- Infill Pattern: Lines
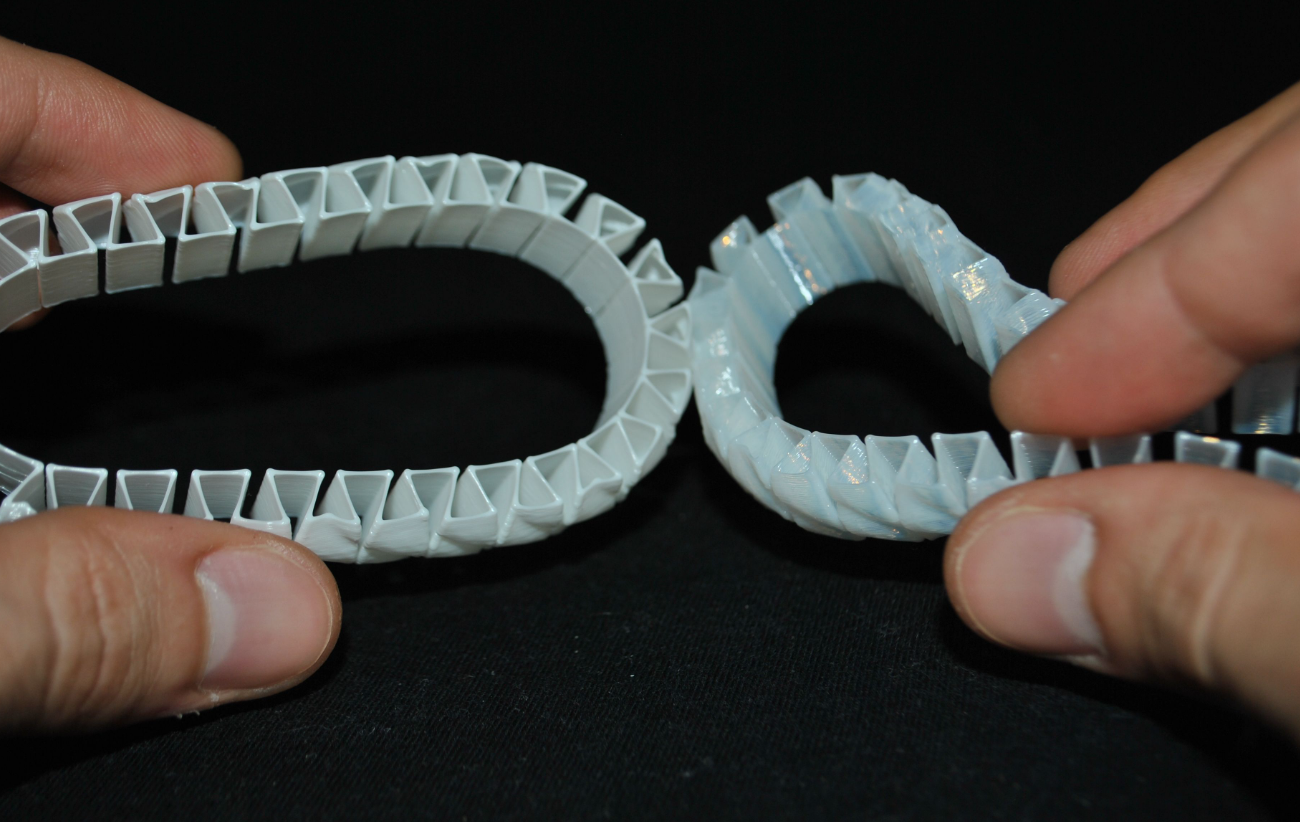
- Flexible Prints:
- Infill Density: 10%
- Infill Pattern: Concentric
- Standard Prints:
- Infill Density: 20%
- Infill Pattern: Grid (or Cubic)
How to Adjust Infill Settings
Adjusting infill settings is super easy on any 3D slicer software.
While the process for adjusting infill settings varies from platform to platform, the general steps are the same. Moreover, you can find the density and pattern infill settings usually in the “Infill” section of a 3D slicer.
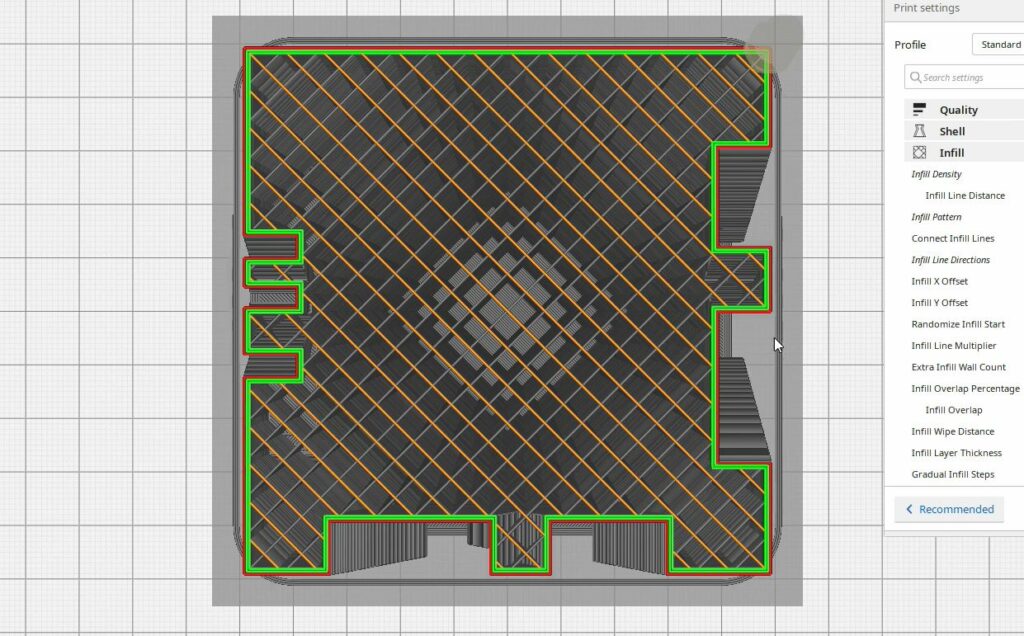
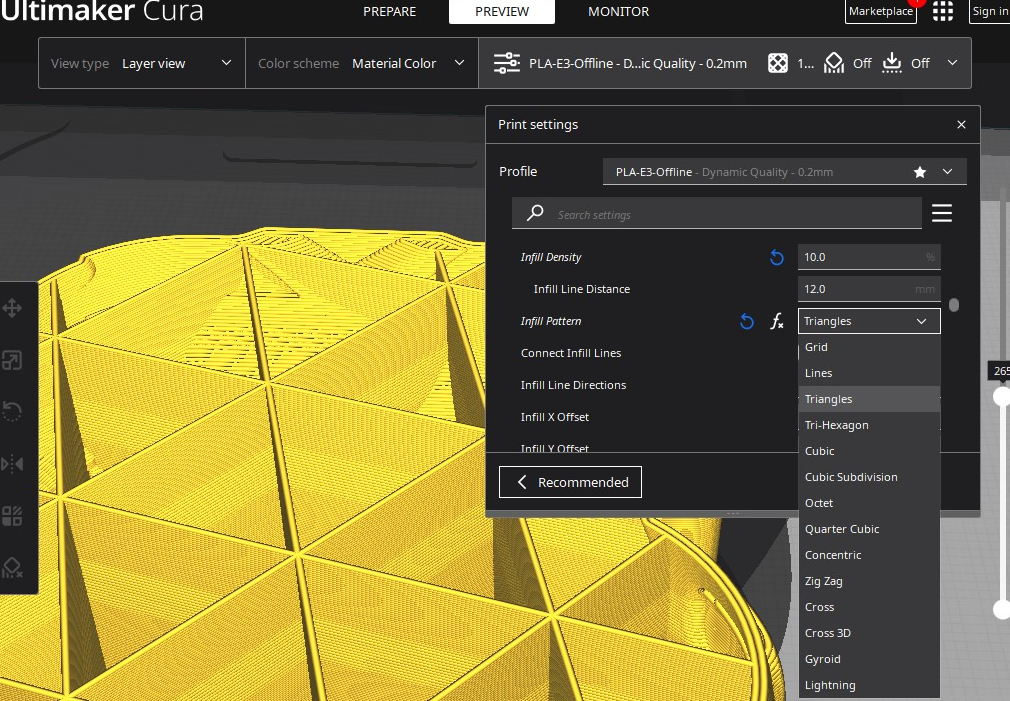
In the steps below, I’ve gone over the exact steps for adjusting the infill settings in UltiMaker Cura, the most popular FDM 3D slicer program:
- Grab your computer and open Cura.
- Click the “Print settings” tab in the top right corner of the interface.
- Either search or scroll to the “Infill” settings section.
- Click the hamburger icon (three lines) at the top right of the “Print settings” pop-up tab, and choose “All” to show all of the available infill settings.
- Below the “Infill” settings section title, you’ll find all of the relevant infill settings, including “Infill Density” and “Infill Pattern”. The former is a box for a percentage while the other setting is a drop-down menu with many pre-defined options, including those we previously discussed.
Of course, there are many other infill slicer settings here too, and feel free to mess around and read the descriptions of each, although they likely won’t be as significant as the two we discussed today.
Conclusion
Overall, infill is one of the most important elements of a 3D print, affecting its strength, weight, and print time. Even if you can’t see infill, you should pay close attention to the two major relevant slicer settings, infill density, and infill pattern, before 3D printing a part.
For standard prints, like a phone stand or a trinket, an infill density of 10-20% in the cubic, grid, or triangles pattern will work perfectly. For display prints, like cosplay armor, you can get away with a lower infill density, between 0 and 10%, with an uncomplicated pattern, like lines or grid, to minimize print time and filament usage.
But, if you’re 3D printing a functional part that needs to be decently strong, make sure to use a high infill density, like between 40 and 100%. While this will increase your filament usage and print time, it will make parts much stronger and more sturdy. As for the pattern, a three-dimensionally strong option like cubic or gyroid is perfect!
Hope this helps!