


3D printing has been on the come-up in the past decade, and resin 3D printers are becoming more and more popular.
While resin 3D printers were once super expensive and out-of-reach to the everyday hobbyist, today, you can find one for under $200. And resin 3D printing technology is far better than traditional FDM 3D printing when it comes to printing small, high-detail models. The print quality of a modern resin 3D printer is just incredible!
But is getting started with resin 3D printing difficult? What do you need to do? How does it work? What options are there?
Today, I’ll answer all of these questions and many more, so you can dive right into this incredible hobby!
Table of Contents
- What is Resin 3D Printing?
- What You Need for Resin 3D Printing
- How Resin 3D Printing Works?
- Advantages of Resin 3D Printing
- Best Resin 3D Printers
- What is Resin?
- Is Resin Toxic?
- What Resin Should You Use?
- Where to Find 3D Models?
- What Slicing Software to Use?
- Considerations Before Buying a Resin 3D Printer
- SLA vs DLP vs MSLA
- Conclusion
What is Resin 3D Printing?
Resin 3D printing is a form of additive manufacturing that uses UV light to solidify liquid plastic resin in an extremely precise manner to form your desired 3D model. Resin 3D printing actually predates traditional FDM 3D printing, but it’s only become popular among makers and hobbyists in recent years now that the price of resin 3D printers has dropped significantly.
It’s worth noting that resin 3D printing is generally considered more precise than FDM 3D printing. Even consumer-grade, sub-$200 resin 3D printers are capable of an insane level of detail on 3D prints. And, unlike parts made on an FDM printer, resin prints have practically invisible layer lines.
Under the umbrella of resin 3D printing, there are a handful of specific resin printing technologies, such as stereolithography (SLA), LCD, and DLP. Each resin printing technology differs slightly (e.g. how light is projected), but they all follow the same general process of projecting UV light at a tank of liquid resin (the VAT) to create a 3D model, layer by layer.
What You Need for Resin 3D Printing
To get started with resin 3D printing, you need a few more things besides simply a resin 3D printer. Most resin 3D printers, especially consumer-grade ones, come with a handful of accessories to get you started, but here is the full list of what you should have in case you’re missing any:
- Resin 3D printer (check later sections for good options)
- Resin material
- Resin filter
- Gloves and mask
- Isopropyl alcohol or acetone (unless you have a water-washable resin)
- Empty tub (for washing prints)
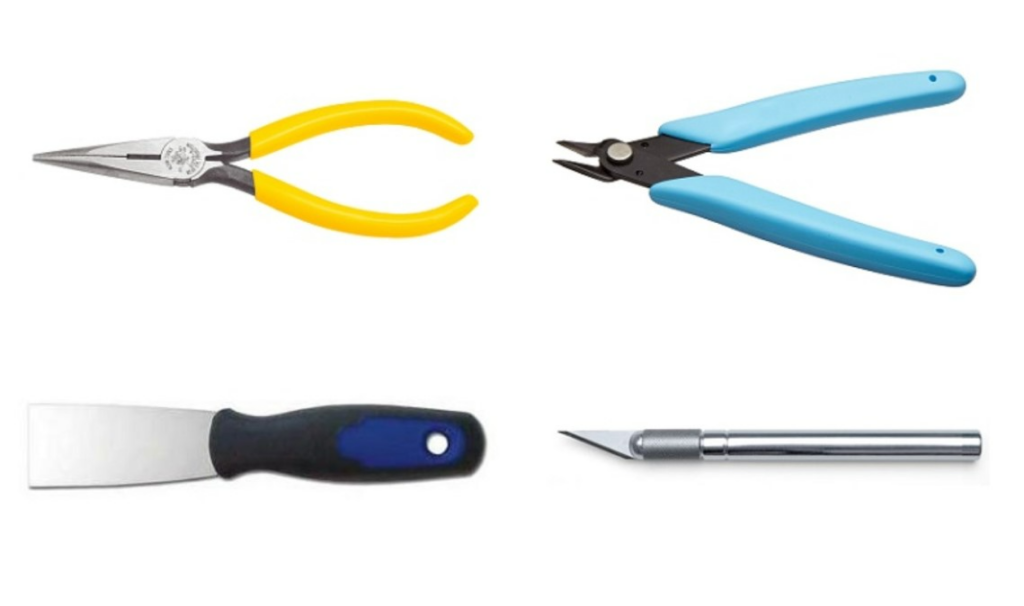
- Scraper tool
- Allen key set (for adjustments)
- USB stick
- UV curing light
- Pliers and tweezers
- Utility knife
- Computer (for slicing; can be a PC, laptop, etc.)
How Resin 3D Printing Works?
While resin 3D printers may seem 100 times more complicated than an FDM 3D printer like the Ender 3, they’re actually super easy to use. In fact, most resin 3D printers require less tuning, adjusting, and set up than FDM machines. In this section, I’ll give an overview of how you can start using a resin 3D printer!
1. Set Up Printer
First, you’ll want to set up your resin 3D printer. Most resin machines, like the Elegoo Mars 3, come 95% pre-assembled, with only a few screws that you have to put in place. After that, plug the printer in and power it on!
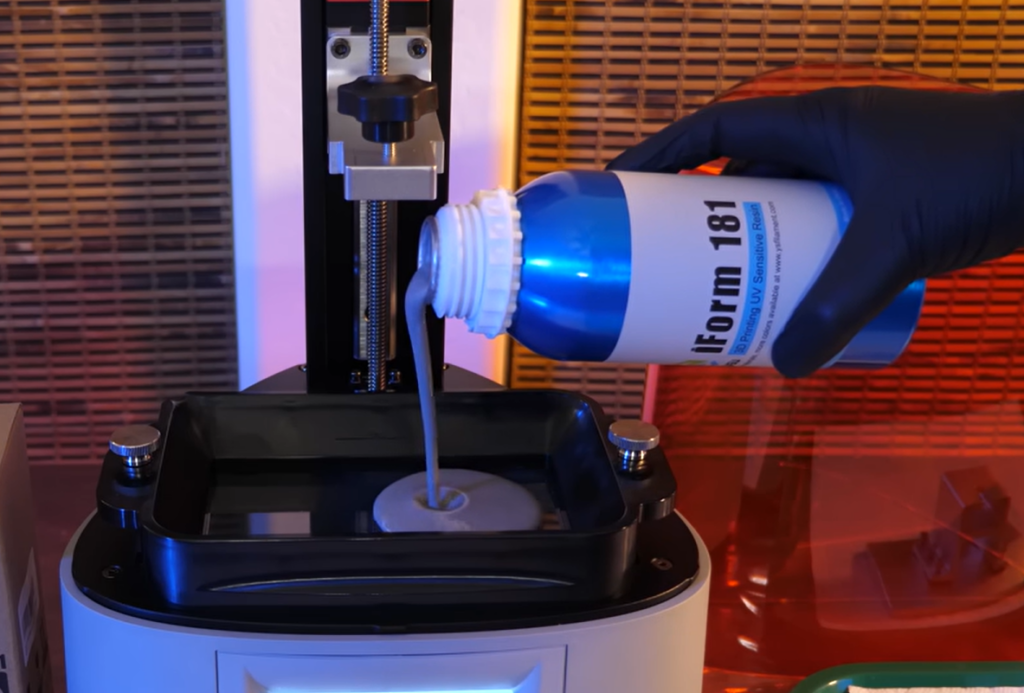
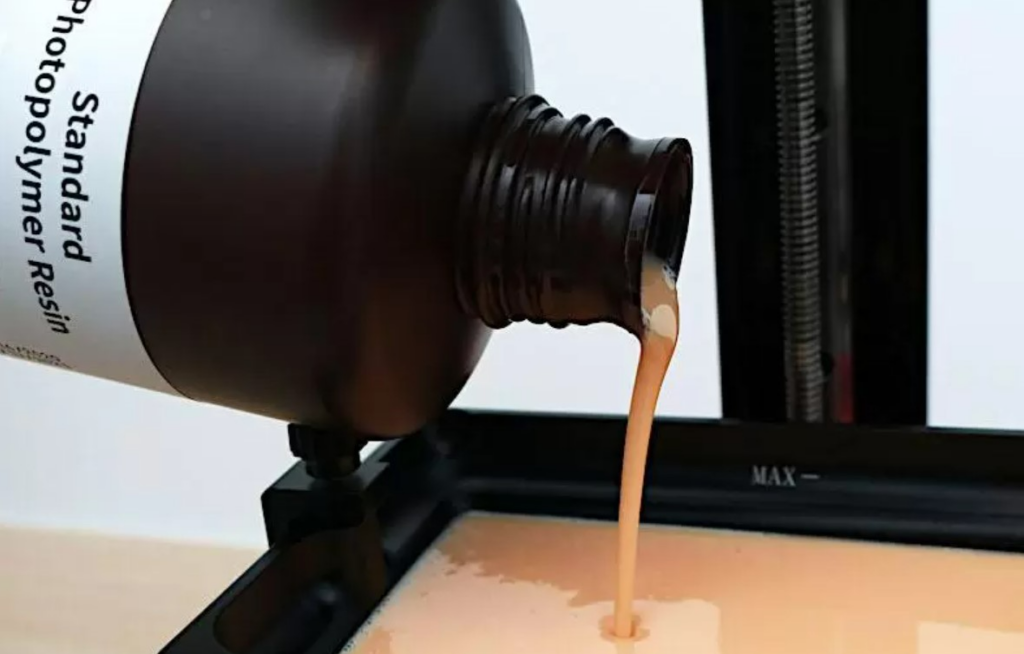
2. Pour Resin Into the VAT
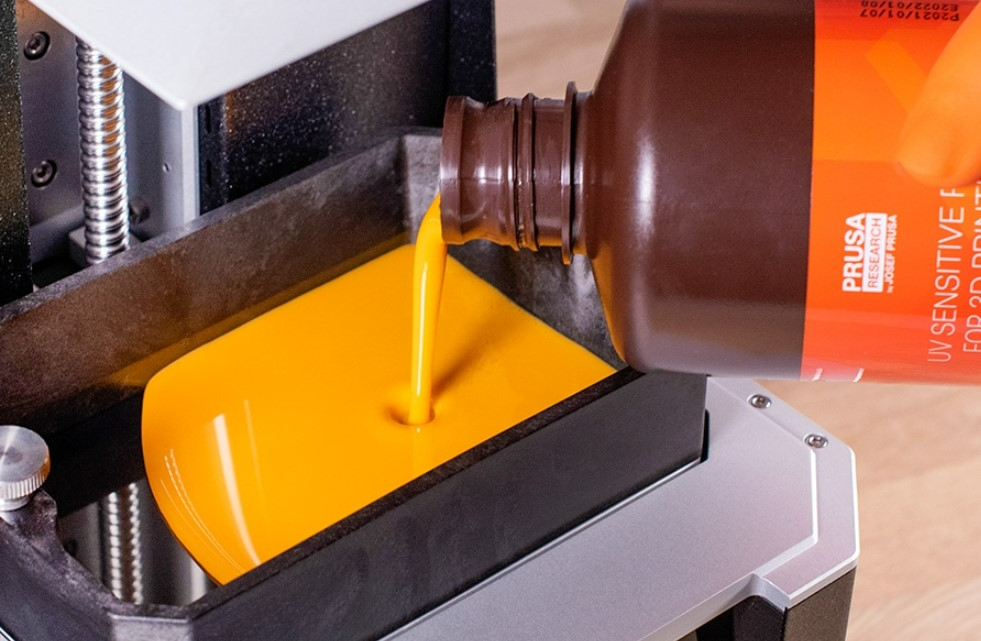
Next, it’s time to load some resin into the VAT, the tank where the liquid resin is stored on the printer. I recommend removing the VAT from the printer and pouring resin from a (new) bottle into the VAT over a sink. Moreover, resin is toxic and has an intense smell, so you wouldn’t want to accidentally spill it anywhere.
On another note, make sure not to fill the resin higher than the limit line that should be on the VAT. If there isn’t a limit line, then try not to fill the VAT more than 75% full just in case.
3. Configure the Slicer
Once you’ve reattached the VAT to the base of your resin printer, you’ll have to make a slicer profile for your machine.
If you’re unfamiliar with slicers, they are a special type of software that converts 3D models (e.g. STL files) into 3D printable G-code scripts. If you don’t already have a resin slicer, don’t worry; I’ll go over more about slicer software and the different options in a later section!
After you’ve downloaded a resin slicer, configure the program to your specific printer by either selecting or uploading a pre-configured profile for your machine or entering in the printer’s specs (e.g. dimensions, resolution) manually. The former option is easiest and most slicers offer pre-made profiles for all of the somewhat-popular printers, like the Phrozen Sonic Mini 4K or Elegoo Saturn.
4. Slice & Load Print File
Next, find a model that you want to print. I’ll go over more about where you can find 3D printable models in a later section, but some good repositories include Thingiverse and Printables, so check these out if you need ideas about what to make.
After you find the right model, download it in the STL file format and upload it to your slicer software. Now, adjust the slicer settings in the software based on how you want the print to come out. For example, lowering the layer height can yield higher-detail parts, while increasing the exposure time can make prints stronger.
Once you’re ready, slice the model, export the generated G-code file to your printer’s USB drive, and insert it into your printer’s respective port.
5. Print Model
Now that you’re ready, start that print! You can do this by clicking a few buttons on the printer’s display screen.
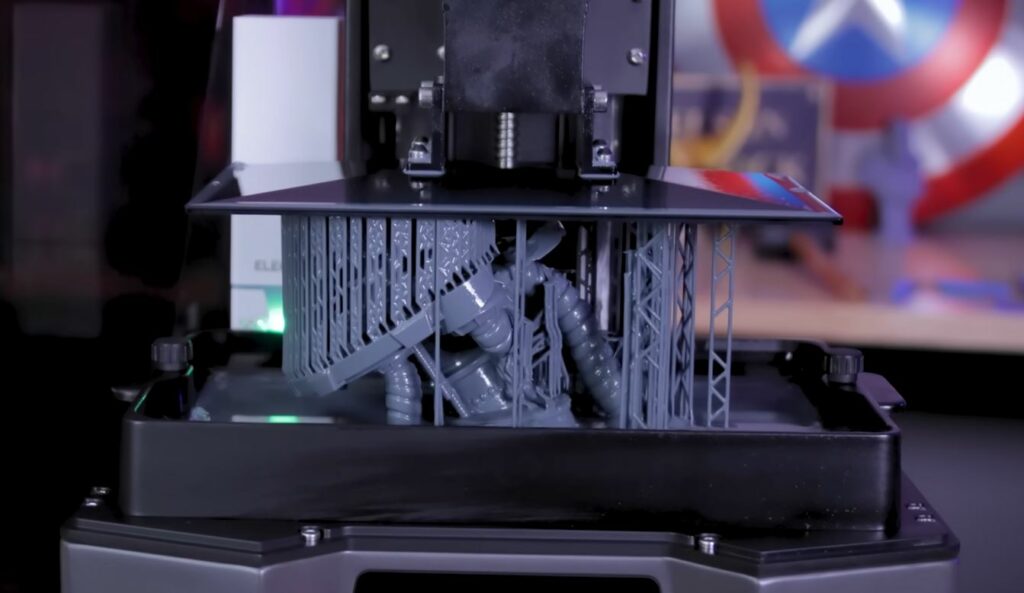
6. Remove the Print
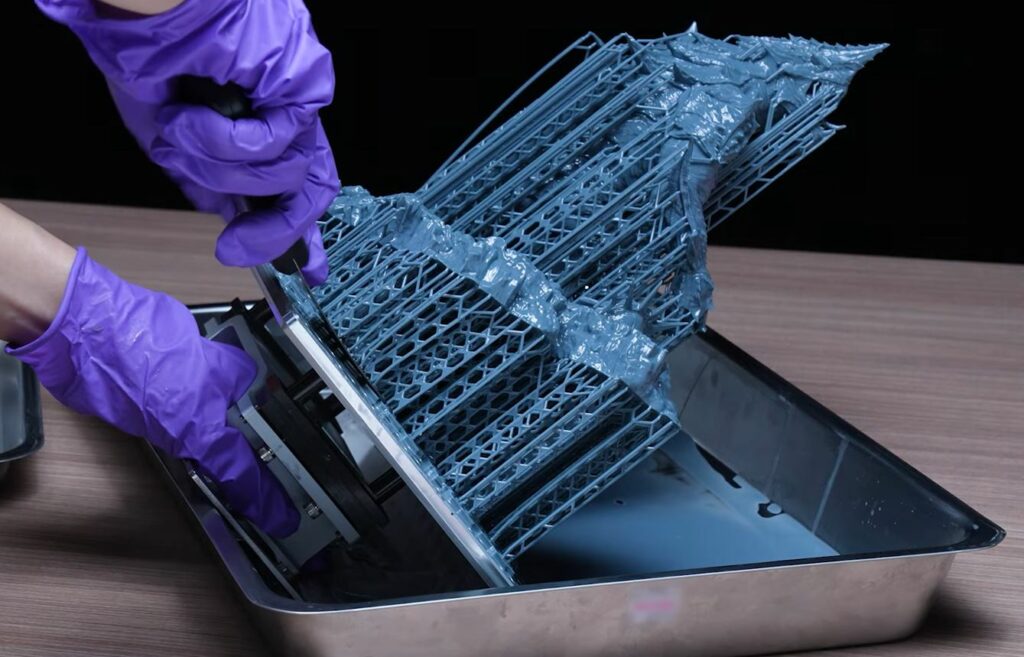
Before we post-process your print, we’ll have to first remove it from the print bed. To do this, firmly push the spatula tool toward the bottom of your print until it comes off the build plate. Make sure you are holding it with a gloved hand so it doesn’t fall into the VAT and so that any substances on your fingers don’t contaminate the model.
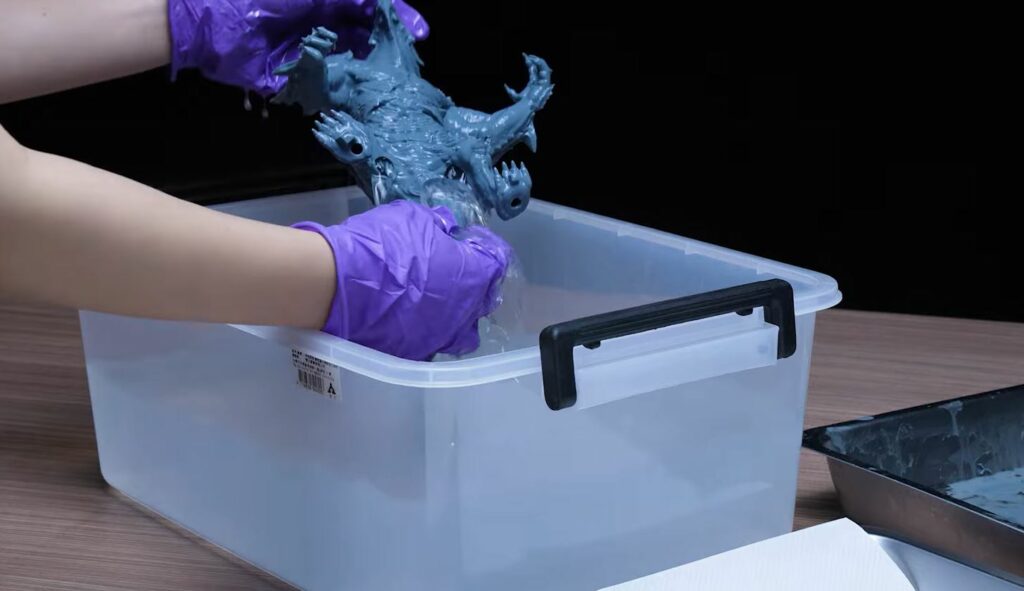
7. Wash & Cure Print
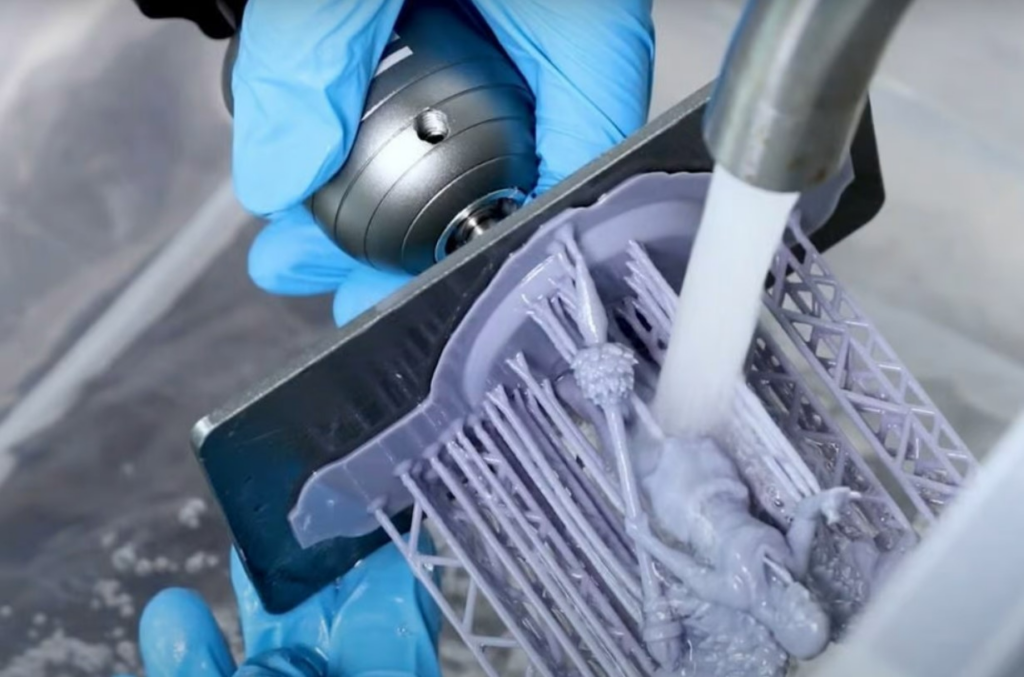
Now that your model is printed and off the bed, you’ll have to post-process the model; specifically, you’ll need to wash and cure the part. Unlike with FDM 3D printing, post-processing prints aren’t optional for resin prints. It’s an absolute must if you want a high-quality, non-sticky part.
To wash the model (this comes before curing), find an empty Tupperware container and fill it with isopropyl alcohol or acetone as both of these chemicals act as solvents for photopolymer resin. And, if you are using water-washable resin, you can use water!
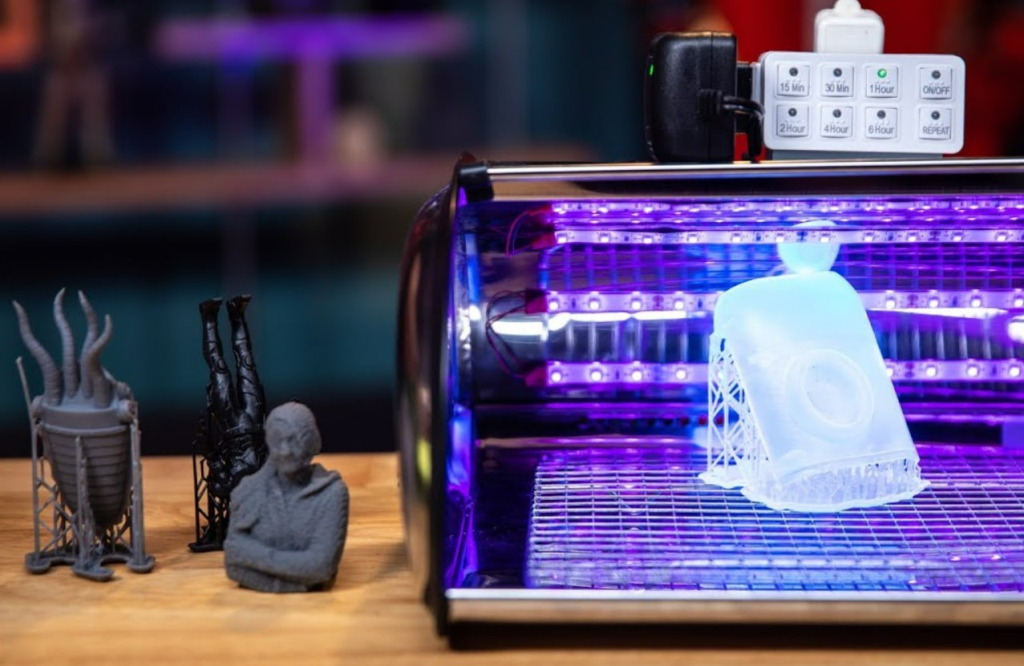
Once the part is washed, pick it up (still with a glove), and place it into your UV curing chamber. If you don’t have one, these are practically a must and they only cost about $50 on Amazon. You can check out our article about the best UV curing chambers to learn more.
You’ll only have to leave the part in the UV light for 2-5 minutes in order for all of the resin on the print to properly cure and solidify. After that, you’re all set. You’ve now successfully resin 3D printed a part!
8. Cleaning Up
After you’ve finished post-processing your model, it’s time to clean up everything.
Start by pouring the excess resin in the VAT back into your resin bottle. Note that you don’t have to do this after every 3D print, but, if you’re not going to be printing for more than a few days, then you should in order to preserve the quality of the resin. When pouring it from the VAT to the bottle, make sure you use a filter so that the resin is clean, and also try to pour over a sink.
As for your excess IPA or acetone (or water), you can either let it sit in the container or dump it out. It’s up to you! But, if you choose to let it sit, make sure the container is sealed shut so the solvent doesn’t evaporate; it will also help make the smell less intense.
Advantages of Resin 3D Printing
Resin 3D printing offers many advantages over traditional FDM 3D printing that make this style of printing very attractive.
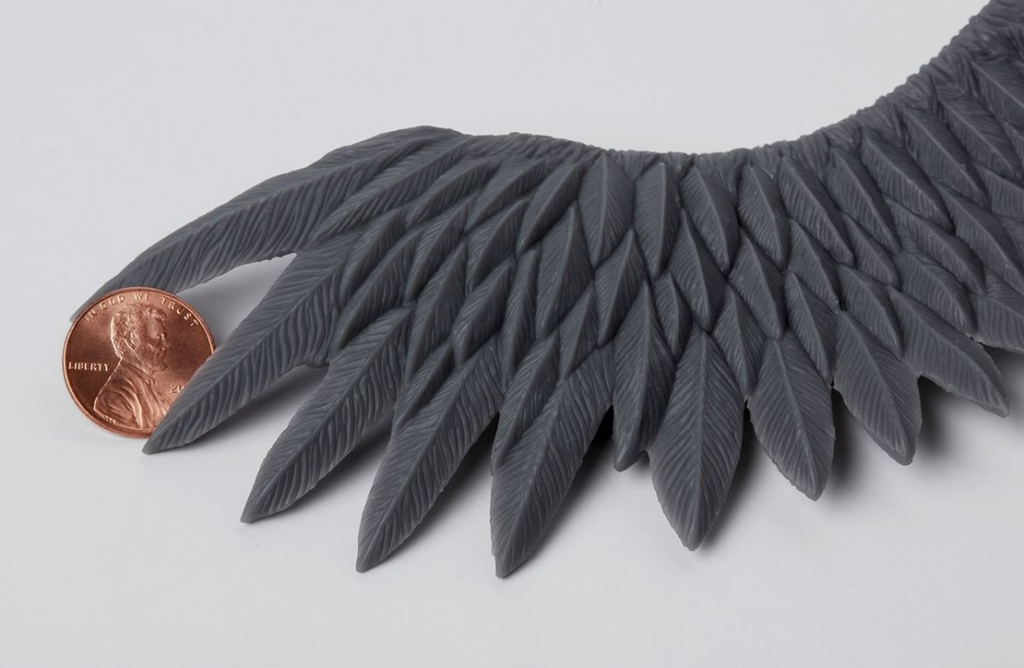
The main advantage of resin 3D printing is the level of detail and precision possible on these type of printers. While FDM printers struggle with printing any features on a model that are smaller than 0.2 mm, most resin printers can handle detail as small as 35 microns (0.035 mm). This makes resin 3D printers an excellent option for producing intricate models, like miniature figurines, jewelry, and other small-scale objects.
Another advantage of resin 3D printing is its ability to produce smooth surface finishes on models. Unlike FDM 3D prints, it’s practically impossible to see or feel layer lines on a resin 3D print. This not only makes resin prints look naturally better than those made on FDM machines but also means that you don’t ever have to sand a resin 3D print. Painting is also way easier on a resin 3D print compared to an FDM print.
Next, resin 3D printing also offers a wider range of materials to choose from than FDM printing. There are tons of different resin options available, each with its own set of properties. Some resins are designed for high-resolution printing, while others offer flexibility, durability, or even transparency. This versatility makes resin printing suitable for a wide range of applications, from creating prototypes and molds to producing end-use parts and products.
Best Resin 3D Printers
Interested in getting a resin 3D printer? I’ve got you covered! Here are some of the best resin 3D printers:
Phrozen Sonic Mini 8K
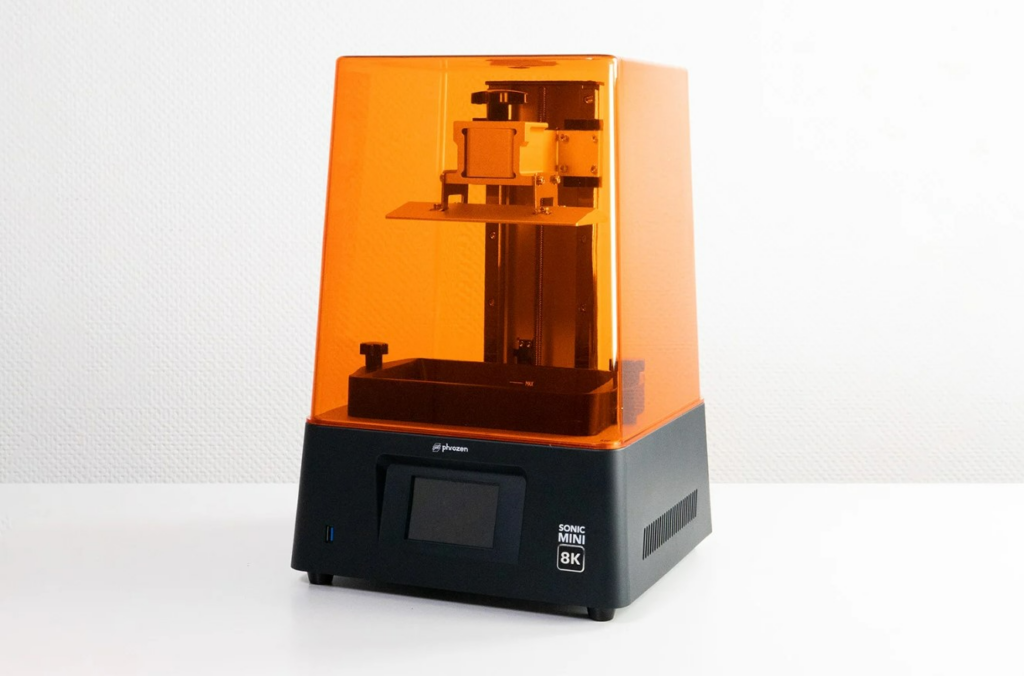
Phrozen is a leading manufacturer of resin 3D printers, and the Phrozen Sonic Mini 8K is one of their best printers, offering out-of-this-world print quality.
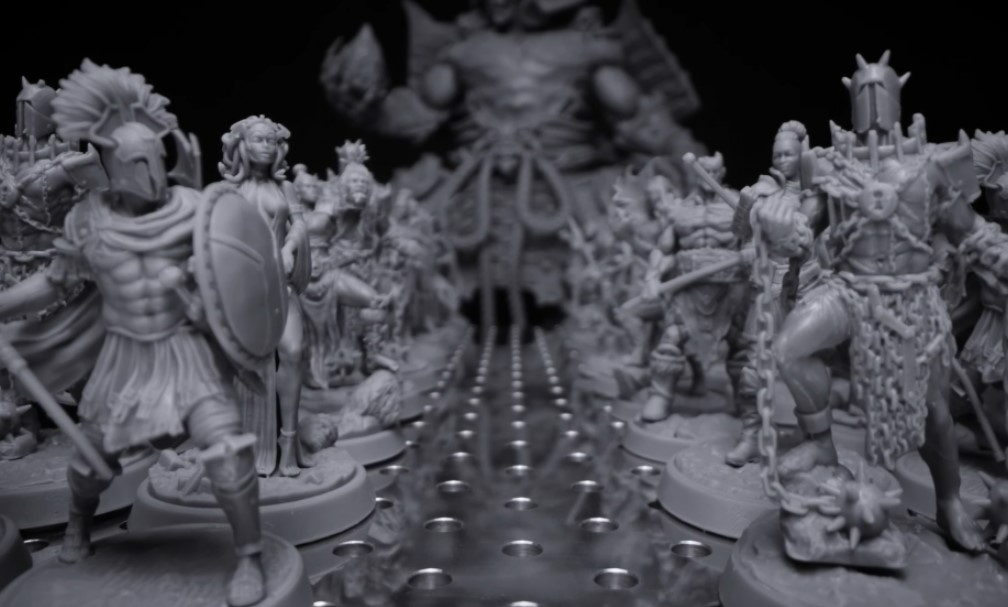
As indicated in the name of the printer, the Sonic Mini 8K features an 8K pixel resolution LCD screen. For reference, 8K resolution is about as high as you can get on a consumer-grade resin printer, and it’s actually insane how much detail 8K printers can handle. Just check out this miniature print made on the Sonic Mini 8K:
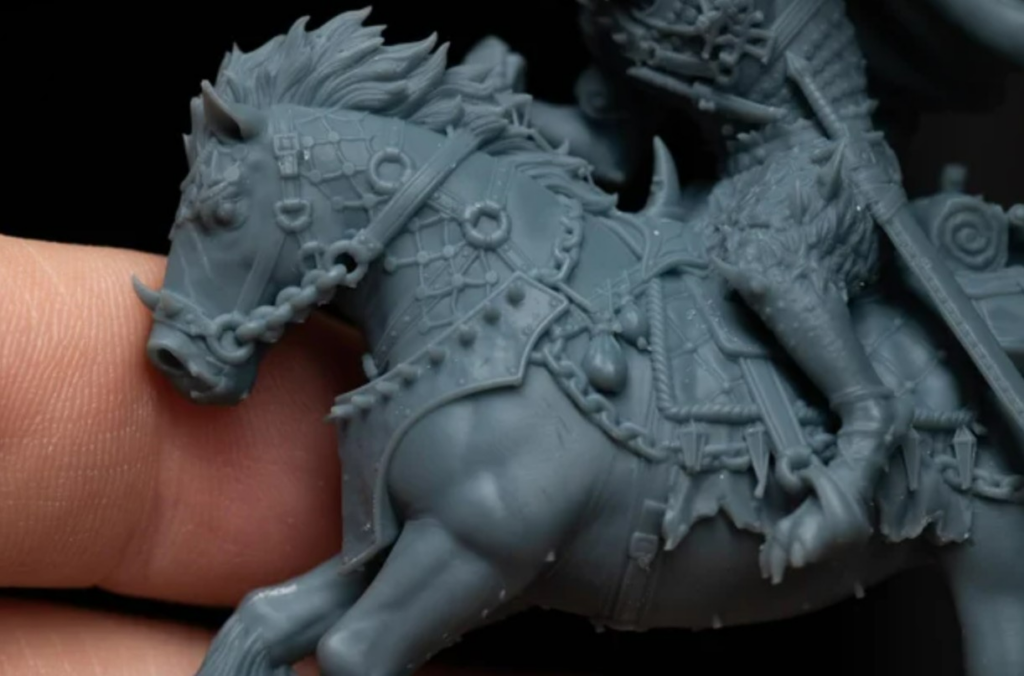
Furthermore, the Sonic Mini 8K has an X/Y resolution of just 22 microns, which is extremely low for its sub-$1,000 price tag, and is about five times lower than a typical FDM printer. Because of this, the Sonic Mini 8K is a great option for printing small, detail-packed models, like miniatures (e.g. Warhammer figurines) and jewelry.
On a different note, the Phrozen Sonic Mini 8K doesn’t offer a lot of print space, with a usable volume of only 165 x 72 x 180 mm. But, if you’re planning on using the Sonic Mini 8K to print small models such as jewelry pieces or miniatures, then this shouldn’t be a problem.
Elegoo Mars 3 Pro

Elegoo is one of the most popular manufacturers of consumer-grade resin 3D printers, and the Mars 3 Pro is one of their best options. The Mars 3 Pro brings the perfect mix of print quality, print space, and affordability, with a sub-$300 price tag.
The Mars 3 Pro is equipped with a 4K LCD screen. While this won’t yield the same level of detail as the Phrozen Sonic Mini’s 8K LCD screen, it’s still very good. And, any model you print on the Mars 3 Pro will still look ten times better than if you printed it on an FDM machine, like the Ender 3.
As for print space, the Elegoo Mars 3 Pro offers 143.43 x 89.6 x 175 mm. This isn’t incredibly high, but it’s definitely enough for printing small and medium-sized models, like miniatures, functional parts, and decorative designs.
So, if you’re looking to get into resin 3D printing but don’t want to break the bank, then I strongly recommend the Elegoo Mars 3 Pro. It can handle very detailed prints, has a mid-size print space, and, of course, is super affordable.
Phrozen Sonic Mega 8K
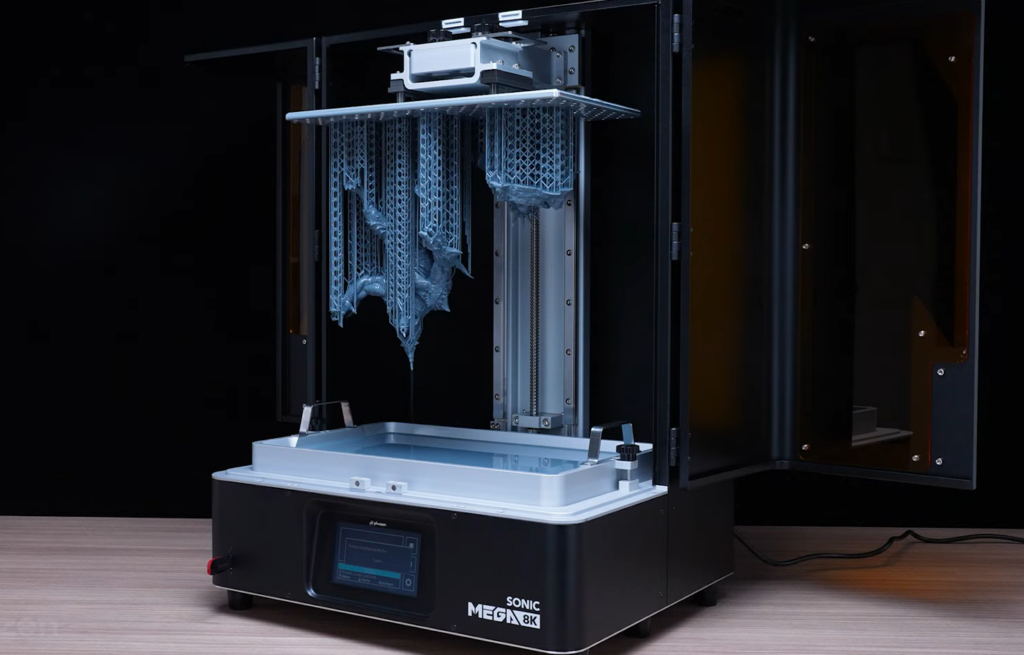
Another excellent resin 3D printer from Phrozen is the Sonic Mega 8K. The Sonic Mega 8K is an absolute beast of a machine, with a gigantic print space, incredible print quality capabilities, and a sturdy frame.
With a tremendous maxim print volume of 330 x 185 x 400 mm, the Sonic Mega 8K is one of the largest resin printers on the market. With this much space, you can print even the largest models or many small parts at once.
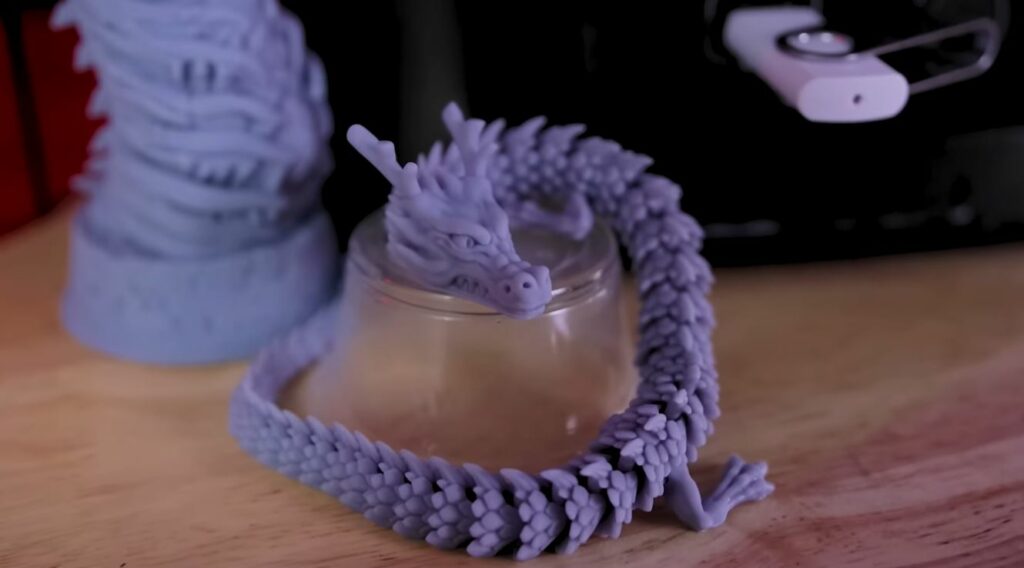
And, despite the typical assumption that a larger printer means lower print quality, the Phrozen Sonic Mega 8K is capable of super-detailed prints. With an 8K monochrome LCD screen and a ParaLED Matrix 3.0 lighting source, this printer can handle some of the most detailed models I’ve ever seen with ease. Don’t believe me? Have a look at some example prints
Some other features of the Sonic Mega 8K worth mentioning are its easy-to-use touchscreen display interface and sturdy frame. Of course, with all of these features, it makes sense that the Sonic Mega 8K has a pretty hefty price tag. But, honestly, it’s still a great deal.
So, if you want to have both a huge print space for making large resin models and next-gen print quality for super-detailed parts, then the Phrozen Sonic Mega 8K is for you!
What is Resin?
Resin is the photopolymer liquid material that’s used by resin 3D printers to make parts. In other words, resin is the ammo of any resin (SLA, LCD, DLP) 3D printer, just like filament is the ammo for an FDM 3D printer.
As it’s a photopolymer material, 3D printer resin solidifies when exposed to UV light, which is the whole basis for how resin 3D printers work. It’s also worth mentioning that most resins are meant for 405-nanometer wavelength light, which is the industry standard.
Is Resin Toxic?
Yes!
3D printing resin is considered a toxic material by numerous health agencies. It’s strongly recommended that you always wear gloves when dealing with resin and even wear a mask to make sure no fumes from the material enter your lungs.
What Resin Should You Use?
There are a wide variety of 3D printing resins that you can choose from, and each offers a different set of properties. Some of the properties that resins can have include flexibility, high tensile strength, impact resistance, transparency, ease of printing, water washability, and more.
You should choose the resin material that has the properties you desire for your 3D printed parts. Also, I suggest that you don’t choose a resin that’s super hard to work with unless you have some experience with resin 3D printing.
You can check out our article about the best 3D printing resins to find some terrific options!
Where to Find 3D Models?
The best places to find designs to print are 3D model repositories that are specific to 3D printing. Below, I’ve gone over some of the best options:
- Thingiverse: Thingiverse is by far the most popular repository for 3D printable models. With over 2.5 million designs, all of which are free, Thingiverse is the first place I suggest going if you’re looking for something to print.
- Printables: Printables, developed by Prusa Research, is another one of my favorite 3D printable model repositories. There are hundreds of thousands of designs available on Printables and all of them are free. Plus, Printables has an excellent user interface with many useful search filters.
- MyMiniFactory: MyMiniFactory is another great place to go to find designs. While not all of the designs on MyMiniFactory are free, because the platform allows creators to make money, you can find some super-detailed designs on the site, which are perfect for resin 3D printing.
- Cults: Cults is another popular 3D model repository that’s meant for 3D printing. Many of the designs on Cults have a price tag, but there are still tens of thousands of designs that are free. Cults is also home to many miniature and small-but-detailed designs.
- Yeggi: Lastly, Yeggi is an aggregator tool that allows you to search across all of the other four repositories I mentioned plus many more. While most search requests yield many duplicate results, it’s a great site to use because it saves you a ton of time.
What Slicing Software to Use?
Unfortunately, most of the popular FDM 3D slicer programs, like Cura and Simplify3D, don’t offer resin-slicing capabilities. However, there are still a handful of great options for slicing software for resin 3D printers. Here are some of my favorites:
- ChiTuBox: ChiTuBox is one of the oldest resin 3D slicer programs out there, and it’s equipped with tons of awesome slicing features. Plus, the platform has hundreds of pre-configured slicing profiles for different resin 3D printers. The free version works just fine, but, if you’re looking for even more adjustable slicer settings, the Pro version might be worth it.
- Lychee Slicer: Lychee Slicer is my favorite free 3D slicer for resin printers. It’s got a very easy-to-use and visually appealing GUI, offers plenty of slicing tools, and it’s got over 120 pre-made profiles for different resin printers on the market.
- PrusaSlicer: PrusaSlicer is one of the most popular FDM 3D slicer programs, and, after Prusa released their own resin 3D printers, it got its own set of resin slicing features. That’s right; you can slice models for both FDM and resin machines on the same platform. Of course, PrusaSlicer also has tons of great features too, like a simplistic GUI, tree supports, and more!
- Z-Suite: Lastly, Z-Suite is another completely free 3D slicer software for resin 3D printers. Its user interface, in my opinion, is a bit bland, but it’s got more than enough features to make up for it, such as a wide array of support structure control settings.
Considerations Before Buying a Resin 3D Printer
No matter what resin printer you’re looking at or what brand it’s coming from, there are a few factors you should consider before purchasing. I’ve explained the most important ones below:
Print Resolution
Print resolution, sometimes called print quality, is the level of detail, quality, and precision that a 3D printer is capable of. For resin 3D printers, you can usually tell how good the print resolution is based on its LCD screen quality. For example, an 8K LCD will yield higher-definition prints than a 4K LCD.
But, if you’re comparing two resin printers with the same LCD pixel resolution, then you can use the X/Y and Z-axis precisions of the printers for further analysis. User reviews and pictures of typical prints also will help you make a decision.
Print Volume
The print volume is another super important factor to consider when selecting a 3D printer. For reference, the print volume is the maximum size of an object that you can print on a machine.
Obviously, a larger print volume is considered better than a smaller one because it gives you more options for what models you can print. However, if you have limited space in your house, then a small or mid-size resin printer might be more up your alley.
Speed
Speed is another critical factor for any 3D printer. The faster your machine can pump out models, the better, assuming there isn’t a drop in print quality. When choosing a resin printer, check the manufacturer’s website and reviews to see the maximum speed of the printer.
Budget
Lastly, it’s important to consider your budget before making any purchase, especially one like a 3D printer.
If you’ve only got $500 to spend and want to get into resin 3D printing, I wouldn’t recommend spending more than $350 on the printer itself. That’s because you’ll also have to purchase a UV curing chamber, resin material, and a solvent (for washing prints).
SLA vs DLP vs MSLA
As I mentioned previously, there are three main types of resin printing technology, including SLA, LCD, and DLP. All three resin printing styles follow the same overarching process of using UV light to solidify liquid resin in a specific shape, but each differs slightly in how the UV light is projected and pointed. To help you understand the differences between SLA, LCD, and DLP, I’ve briefly gone over each of these technologies below.
Firstly, stereolithography, or SLA, is the oldest form of resin 3D printing, invented all the way back in the ’80s. SLA 3D printers use a laser in conjunction with a singular moving mirror to point the UV light at every point in a layer that needs to be solidified. It’s worth noting that while many consumer-level resin printers are advertised as “SLA”, they are typically LCD (MSLA), as this technology is increasingly popular and less expensive.
Secondly, liquid crystal display (LCD), sometimes called MSLA, is another popular style of resin 3D printing and it’s very popular in the consumer market for its low price and high detail performance. LCD 3D printers use a high-power LCD (often monochrome), not too far off from the one you might find in a tablet or smartphone, to project and mask UV light. The LCD screen displays the shape of each layer and allows UV light to pass through where the resin should be cured while blocking it where it shouldn’t.
Lastly, digital light processing (DLP) is the third most popular form of resin 3D printing. DLP 3D printers create models using a UV light projector alongside an array of super small mirrors, known as micromirrors. The micromirrors move super precisely so that the UV light only cures the area of resin that you want, yielding super high-detail prints.
So which resin printing technology is best? Well, there’s none in particular. All three options are capable of making incredible, detailed 3D models that will easily look and feel better than any FDM 3D print.
Conclusion
Overall, resin 3D printing is a terrific way to make custom-designed, high-quality, detailed models. Resin printing technology is far superior to traditional FDM printing when it comes to print quality and detail, and most consumer-grade resin printers don’t cost more than your average FDM printer, like the Ender 3.
If you’re looking to get started with resin printing, you should start by getting a resin printer. I strongly recommend the Elegoo Mars 3 Pro as it’s a good entry-level machine with a low price tag and a high-end 4K LCD display for making detailed prints.
After you figure out what resin printer you get, make sure to follow all the steps I laid out for using a resin 3D printer for the first time! Hope this helps!