
Are your 3D prints tilted, shifted, or resemble a staircase structure?
If so, then you, my friend, are experiencing layer shifting.
Layer shifting is a problem on 3D printers where layers of a model are printed at an offset. In other words, the layers are shifted from their expected position, causing prints to look nothing like what they should be and also have terrible dimensional accuracy.

Luckily, you can solve layer shifting. The most effective solution is to tighten the belts on your 3D printer to eliminate slack in the belt line. Lowering the printing speed and lubricating the moving parts on the printer also helps!
Want to learn more about 3D printer layer shifting and how you can solve it?
Keep reading!
Table of Contents
What is Layer Shifting?
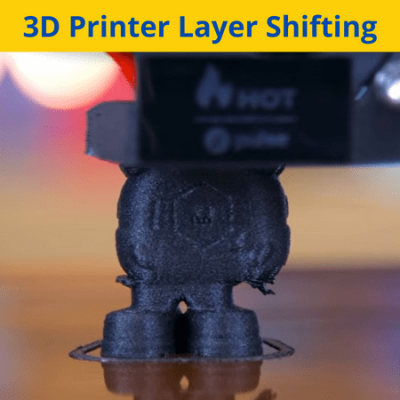
Layer shifting is a 3D printing issue where each layer is offset from the previous one. The resulting 3D print is dimensionally inaccurate and looks nothing like the model you thought you would get.
Usually, layer shifting occurs in one direction, with each layer moving a little bit in a single direction. This results in a staircase effect on your 3D model, as seen in the image below:

However, some cases of layer shifting have the layers moving back and forth (not just in one direction).

Additionally, layer shifting can vary in its severity. For more extreme cases of layer shifting, the top layer will be inches away from the bottom layer, with sharp changes in the position of each layer. For less severe cases, each layer will only be a tiny bit off of its expected position.
But, no matter the case, layer shifting is a serious issue for 3D printers, and it’s necessary that you fix it!
What Causes Layer Shifting?
Anything that might cause the printer to move when it’s not supposed to can cause layer shifting. In the sections below, I’ve gone over the most popular causes of layer shifting, including loose belts, poor lubrication, and more.
Loose Belts
Easily the most likely cause of your printer’s case of layer shifting is loose belts.
For reference, most printers use rubber belts to move the printhead and print bed across their respective axes. This is done by attaching the part to the belt loop and having a stationary pulley on one end of the axis and a pulley attached to the motor shaft on the other side.
When there’s too much slack on the belt loop, the attached part (e.g. printhead, print bed) has space to move freely. This results in layer shifting on the print because the layers aren’t positioned correctly due to imprecise movements.

Unstable Working Surface
Where your 3D printer is also placed matters. If it’s on an unstable surface, such as a wobbly table, layer shifting might occur due to the vibrations absorbed by the printer’s moving parts.
Poor Lubrication
There are many moving parts on a 3D printer, from the roller bearings to the motor shafts. If they’re not properly lubricated, then layer shifting might occur due to the increased friction for the moving parts.
Rough Tracks
The tracks on a 3D printer refer to the part of the frame on the machine where components move along. For example, on the Creality Ender 3, the tracks are aluminum extrusions where the roller bearings move along.
If the “tracks” on your 3D printer are rough or not smooth, then layer shifting might occur. That’s because rough tracks will cause the respective moving component (e.g. printhead) to move less precisely.
High Print Speed
Next, a high print speed could cause layer shifting. That’s because a high print speed means the components, like the motors, belts, and bearings, will be moving faster. And, if they’re moving too fast, the motion might be less precise, potentially causing layer shifting.
Clips Do Not Have a Good Grip
Finally, if the clips that hold the build plate on the 3D printer don’t have a good grip on the bed, then layer shifting might occur. That’s because if the bed, which the first layer of a print sticks to, is moved, then all of the subsequent layers will be offset.
How to Solve Layer Shifting? 5 Simple Ways
Now that you know what causes layer shifting, it’s time to get to how you can fix it on your 3D printer! In the sections below, I’ve gone over the most effective solutions that you can use to improve the quality of your prints!
1. Tighten Belts
The best way to stop layer shifting on your 3D printer is to tighten the belts.
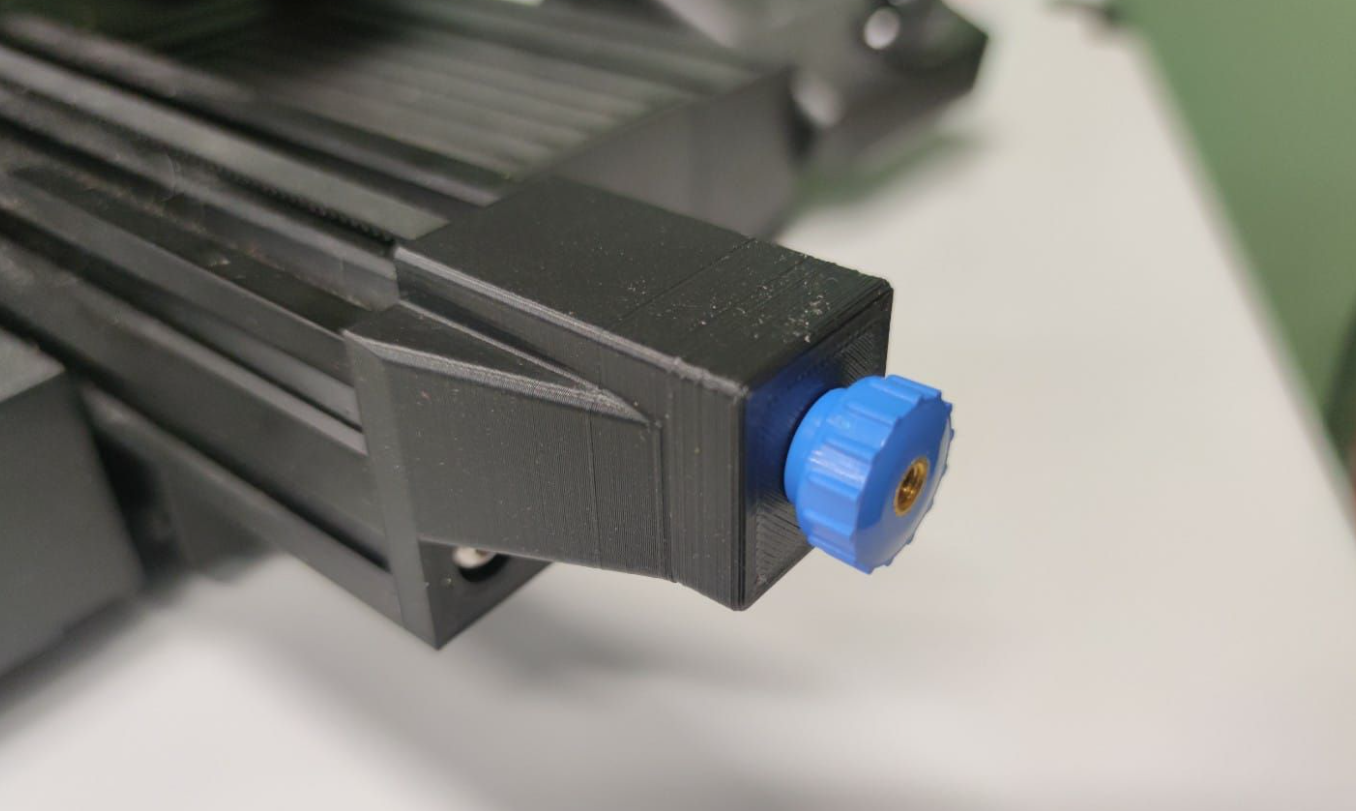
On 3D printers with adjustable belt tighteners, such as the Ender 3 V2, you can simply rotate a thumbscrew to tighten the tension of the belts.
For other printers, like the Original Ender 3 or Ultimaker 2, you’ll have to use an Allen key to loosen the belt pulley’s position, then pull it back, and then retighten the pulley to lock in its position. For these printers, I highly recommend installing adjustable belt tensioners on your 3D printer to make adjusting the tension of your belts super easy. Creality sells a pretty good option!

When tightening the belts, try getting it so that the belt has minimal slack when you push it down with one finger. But don’t tighten it too much, as this will cause the belt to wear much faster than it should.
2. Stable Surface for the 3D Printer
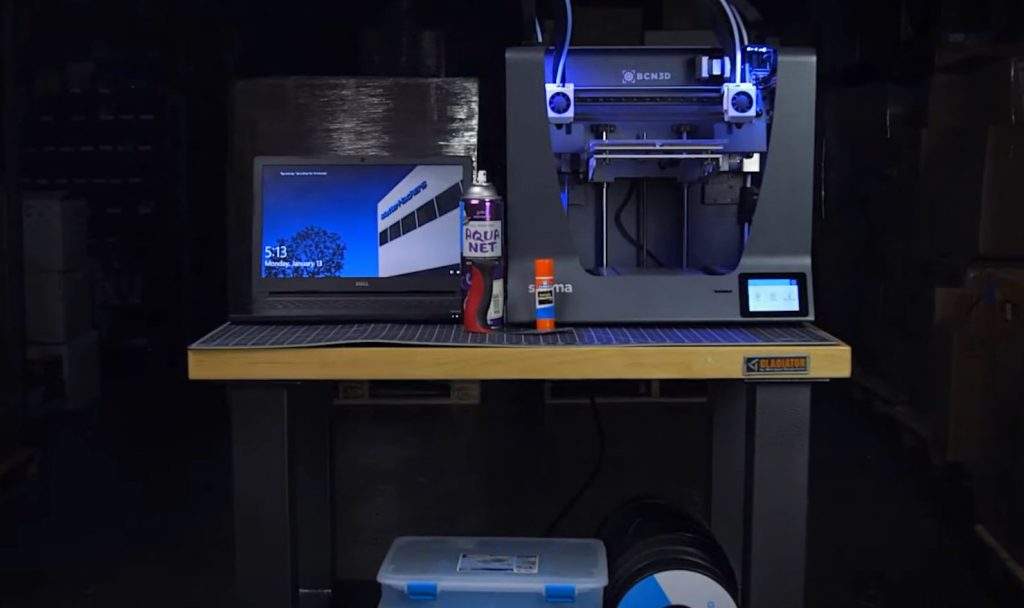
Another easy and effective way to get rid of shifting layers on your prints is to place your machine on a stable surface. If it’s on a wobbly table, you can try to put some napkins underneath one of the corners of the table to fix this.
Check out our article on the best and most stable tables for 3D printers here.
I also suggest putting rubber feet under the frame of your printer to reduce the vibrations absorbed by the machine. This can improve the quality of your prints as well as reduce the chances of 3D printer layer shifting.
3. Clean & Lubricate Track
Cleaning and lubricating the axis tracks on your printer can also help eliminate shifting layers.
To do this, get a damp towel and wipe the axis tracks on your printer. Then apply a light coat of WD-40 or a similar lubricant to the axis track to ensure minimal friction for the respective moving component.

While you’re at it, you might want to also lubricate the Z-axis lead screw on your printer. This can improve the quality of your prints by stopping problems related to the Z-axis, like Z-banding.
4. Lower Print Speed
I also suggest lowering the print speed for your machine, as this can also help fix layer shifting.
You can adjust the printing speed in the 3D slicer program for your printer, such as Cura. I suggest dropping the speed by about 25% first and then in increments of 5% until you’re at 30 mm/s. That’s because if you’re printing at 30 mm/s and still see layer shifting, then the speed likely isn’t the cause of your issue.
5. Secure Print Bed

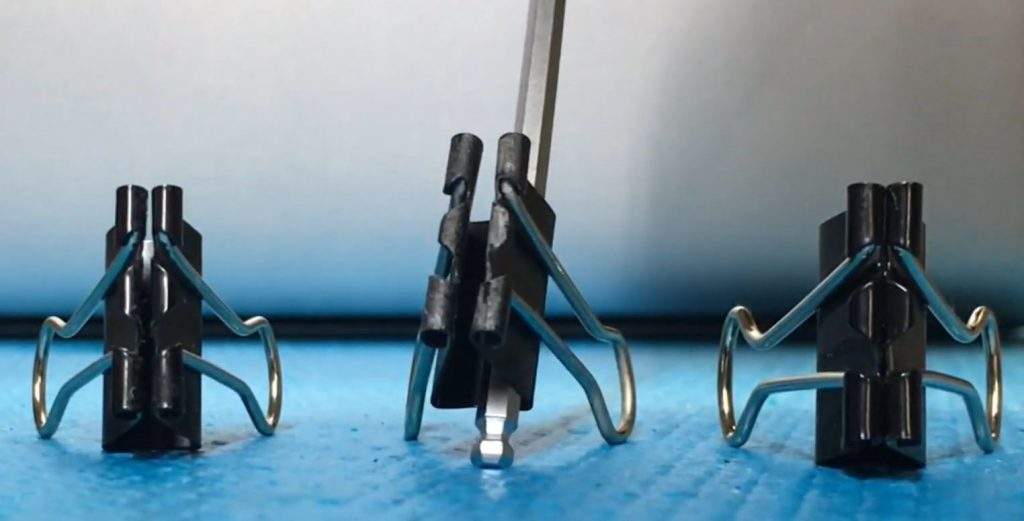
Lastly, you should secure the print bed on your 3D printer. You can do this by replacing the clips that hold the build plate down.
I suggest getting some 5APlusRepRap clips, as I’ve found that these clips hold down the print bed super well and prevent layer shifting.
What’s the Difference Between Layer Shifting and Layer Separation?
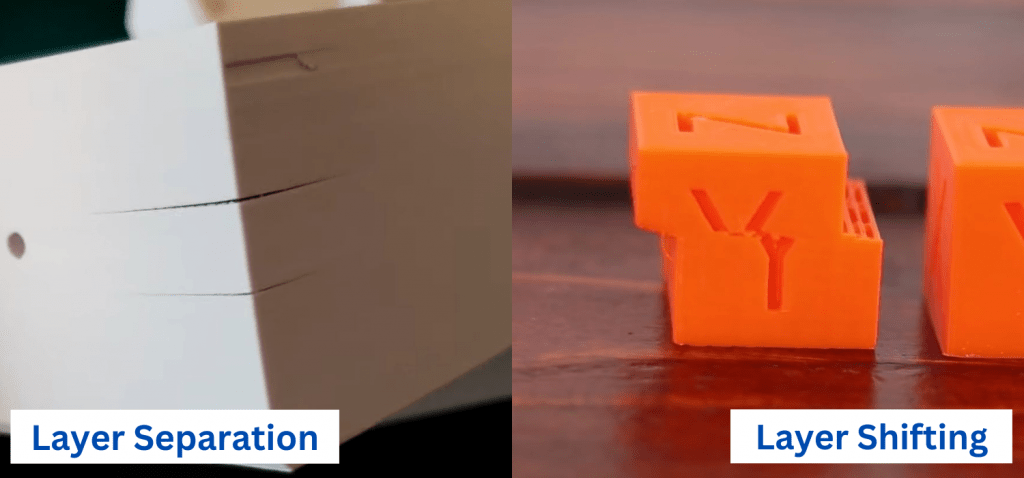
It’s worth pointing out that layer shifting is not the same thing as layer separation. As we’ve explained, layer shifting is caused by issues with the printer’s movement components (e.g. belts) and leads to each layer of a print being offset from the previous one.
On the other hand, layer separation is caused by insufficient heat and poor layer-to-layer adhesion, resulting in the layers of a print splitting.
Conclusion
Layer shifting is a super noticeable issue for 3D printers, resulting in both ugly and severely dimensionally inaccurate prints.
To solve 3D printer layer shifting, I suggest first tightening the belts on your printer and putting the machine on a stable and non-wobbly surface. These solutions usually do the trick.
And, if that doesn’t work, try lubricating the axis tracks and replacing the print bed clips. Finally, you can try lowering the printing speed.
Hope this helps!