


The Creality Ender 3 S1 is one of the best budget 3D printers on the market, offering basically every feature a hobbyist can ask for. From auto bed leveling to direct drive extrusion, it’s difficult to find flaws with the Ender 3 S1!
But not impossible! The Ender 3 S1, like any 3D printer, isn’t perfect and there are many ways you can improve this machine.
Upgrades like a special fan duct or linear rails can go a long way in improving the print quality of the Ender 3 S1. But, if the quality isn’t the problem, you might be more interested in ease-of-use and visual upgrades, like an LED light bar, cable chains, or a tool organizer.
Whatever the case, definitely keep reading if you’re looking for the best Ender 3 S1 upgrades! Enjoy!
Table of Contents
Best Ender 3 S1 Upgrades
In the sections below, I’ve gone over the best Ender 3 S1 upgrades. Many are simple 3D printable projects, but others might require some extra hardware that can be purchased in the provided links.
1. OctoPrint (with Webcam)
First, we have OctoPrint, perhaps my all-time favorite upgrade for any budget 3D printer. If you haven’t heard of OctoPrint before, it’s a remote printer control hub that runs on a computer board, like a Raspberry Pi and connects to your 3D printers. OctoPrint not only enables remote printer control, but you can also monitor your machine via a connected webcam and use other features.
Some of OctoPrint’s standard capabilities include remotely starting and stopping prints, controlling your Ender 3’s movement, streaming a webcam feed, and setting temperatures. But OctoPrint, as an open-source platform, has been gifted many additional features by the community of developers that back the project.
Moreover, through downloadable OctoPrint plug-ins, you can remotely control the auto bed leveling sensor on your Ender 3 S1, customize the online interface, and integrate OctoPrint into your 3D slicer (e.g. Cura, PrusaSlicer).
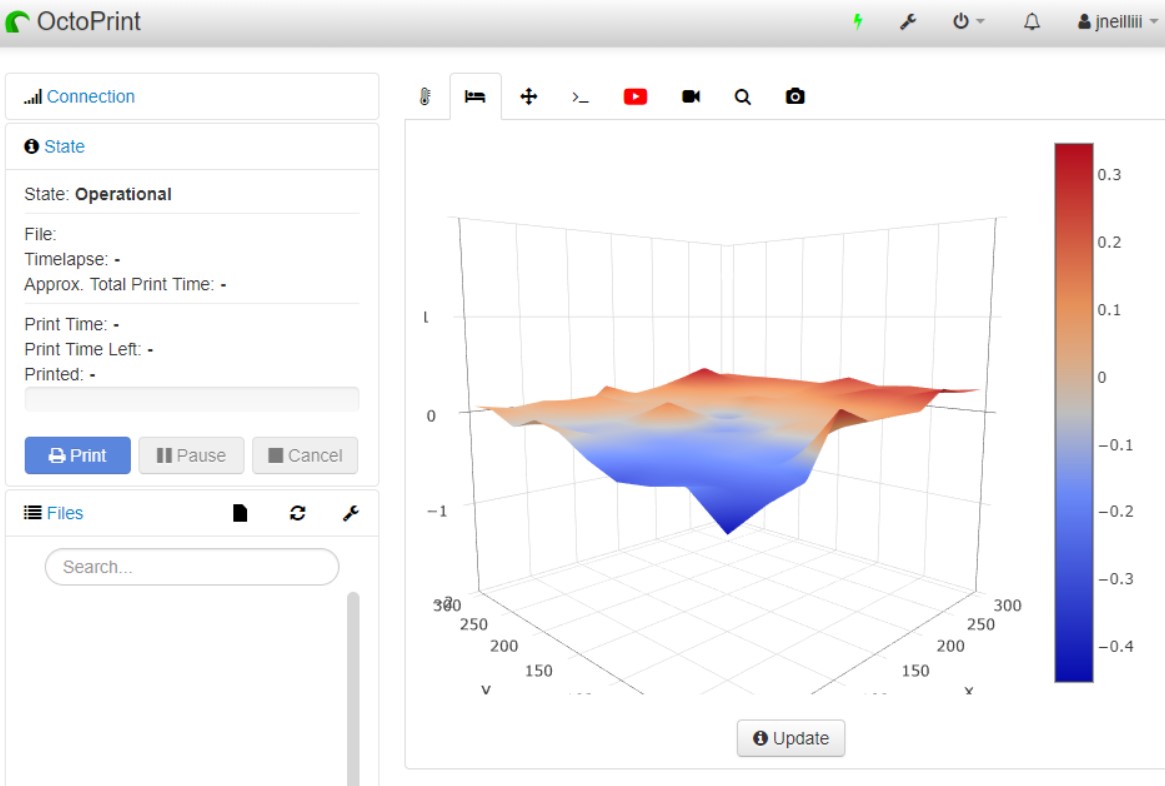
It’s also worth noting that OctoPrint is compatible with many different 3D printers, including the Ender 3 S1. All you need to do is use a USB Type-C cable to connect your OctoPrint host computer (e.g. Raspberry Pi board) with your Ender 3 S1’s motherboard. You can check out my detailed guide about setting up OctoPrint on an Ender 3 to learn more about this process.
As for setting up a webcam, that is also covered in my guide, and the process is super simple: just turn on the “Camera” functionality on your host computer and plug that bad boy in!
2. Tool Organizer
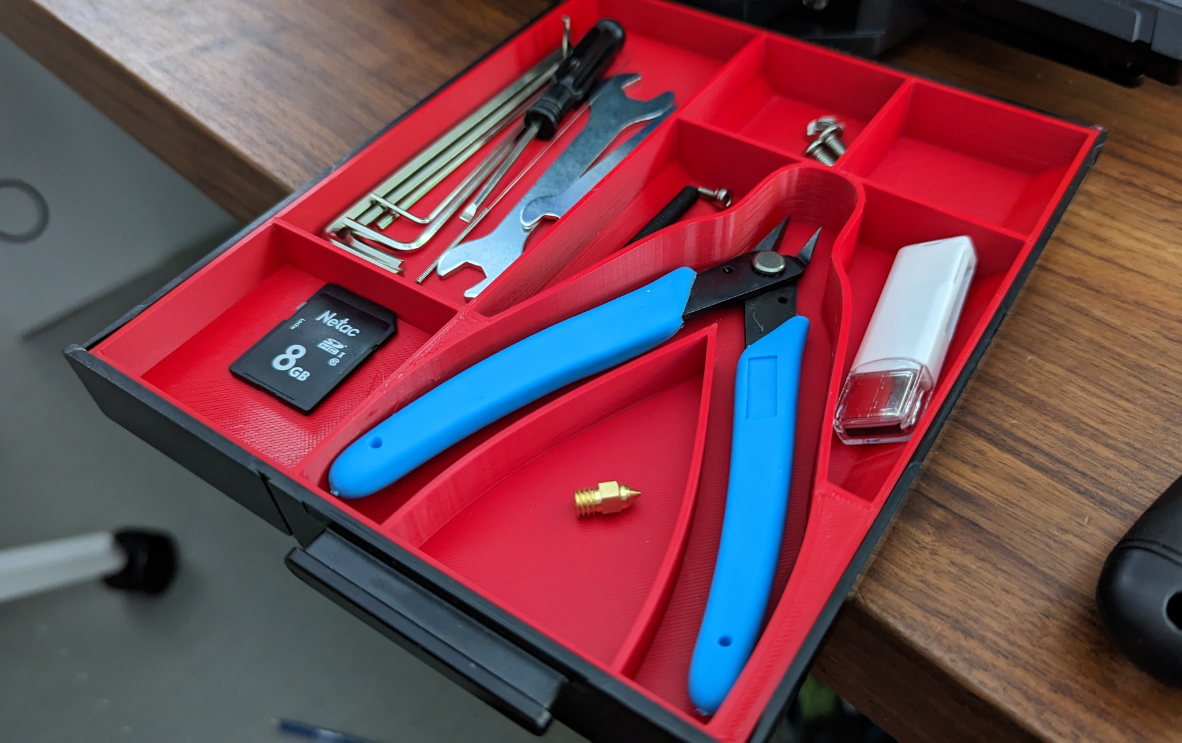
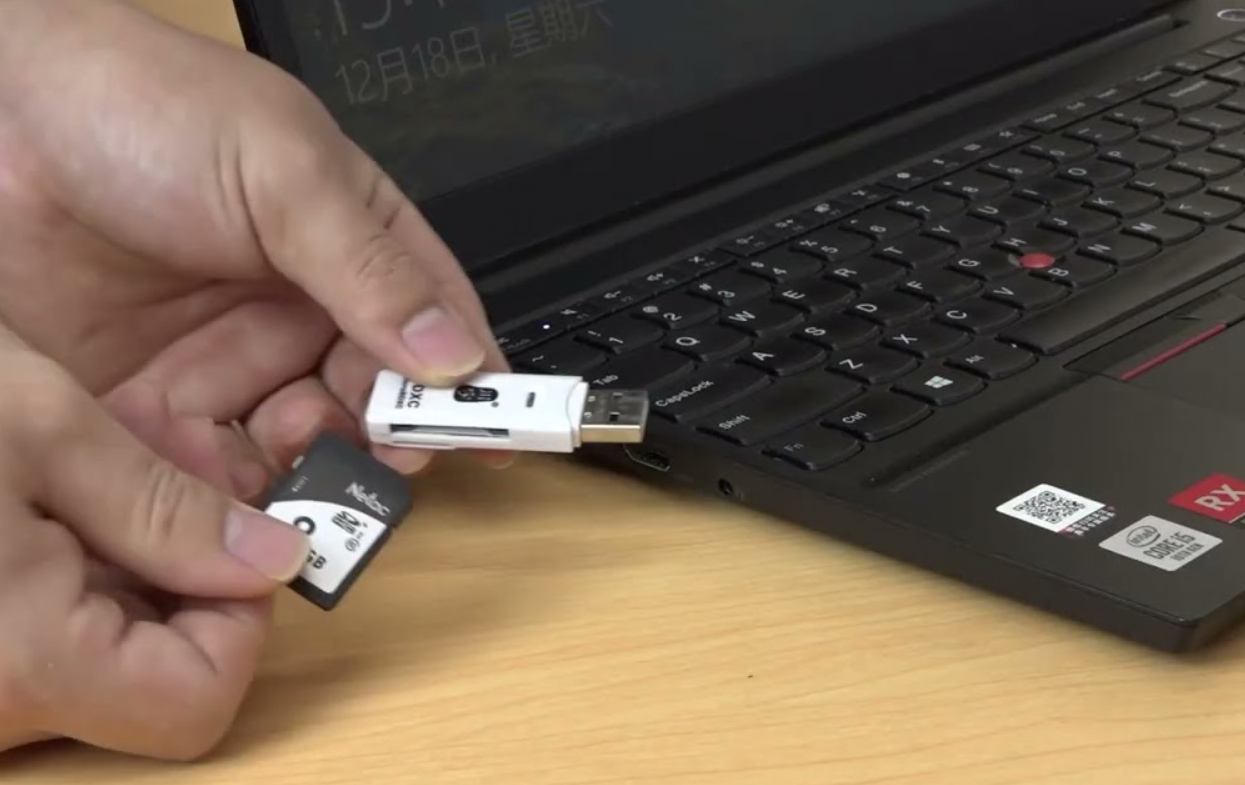
Can’t find a good place to put all your tools and spare parts? This 3D printable tool organizer is a great way to tidy up the space around your beloved Ender 3 S1!
This tool organizer is meant to go inside the Ender 3 S1’s designated tool drawer, and it’s basically a mold for all the different tools that come with the machine. That way, when you open the drawer, you’re not searching around for one tiny Allen key; you can just see them all neatly laid out and pick the right one for the job!
As you can see from the image above, this tool organizer mold can hold every tool that comes with the Ender 3 S1, including the pliers, screwdrivers, Allen keys, wrenches, and even some spare SD cards. There’s also room for extra nozzles, PTFE tubing, and anything else you might want to have near!
3. LED Light Bar
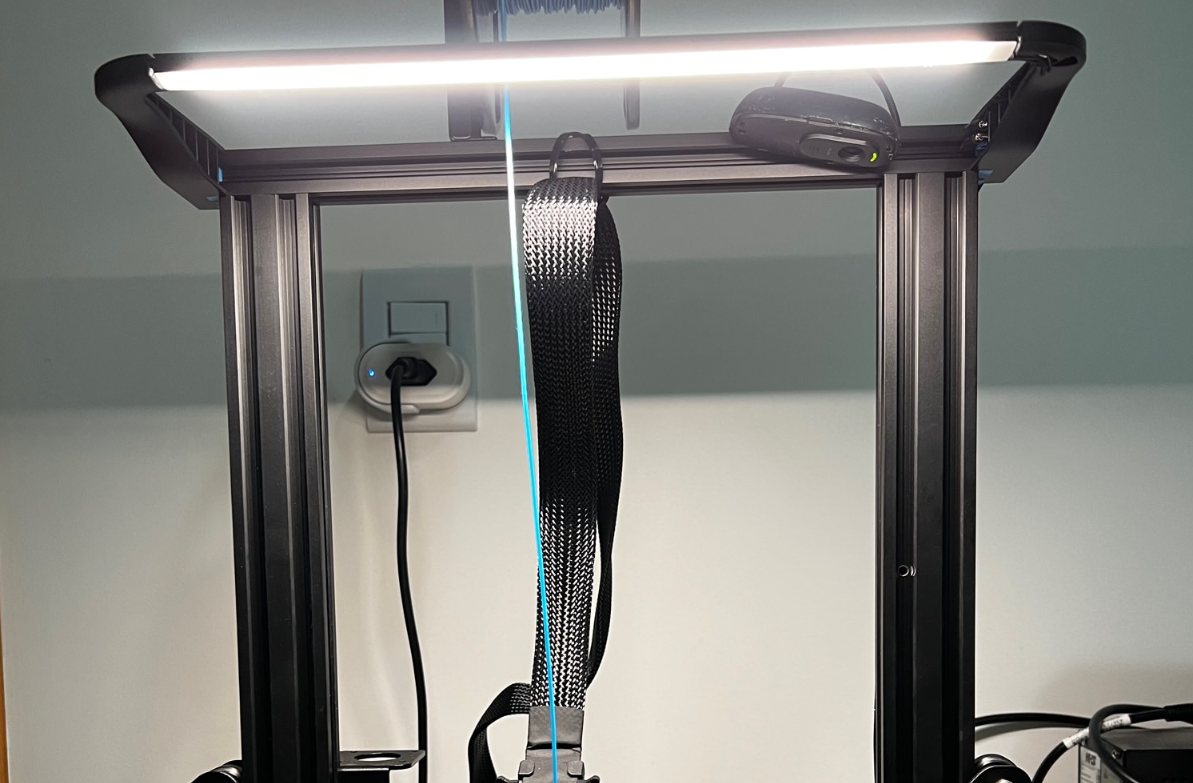
An LED light bar is a terrific upgrade for any 3D printer and makes it so much easier to start prints and fix your machine at night. And though Creality included one in their Ender 3 S1 Pro package, you’re left in the dark with the regular Ender 3 S1! But don’t worry, because buying or DIY-ing your own light bar for your 3D printer is super easy.
The most convenient LED light option for an Ender 3 S1 is Creality’s official Ender 3 S1 light bar, which mounts directly onto the Ender 3 S1’s frame and can be powered by the printer itself. However, it costs $25, which is a bit much for just a small light.
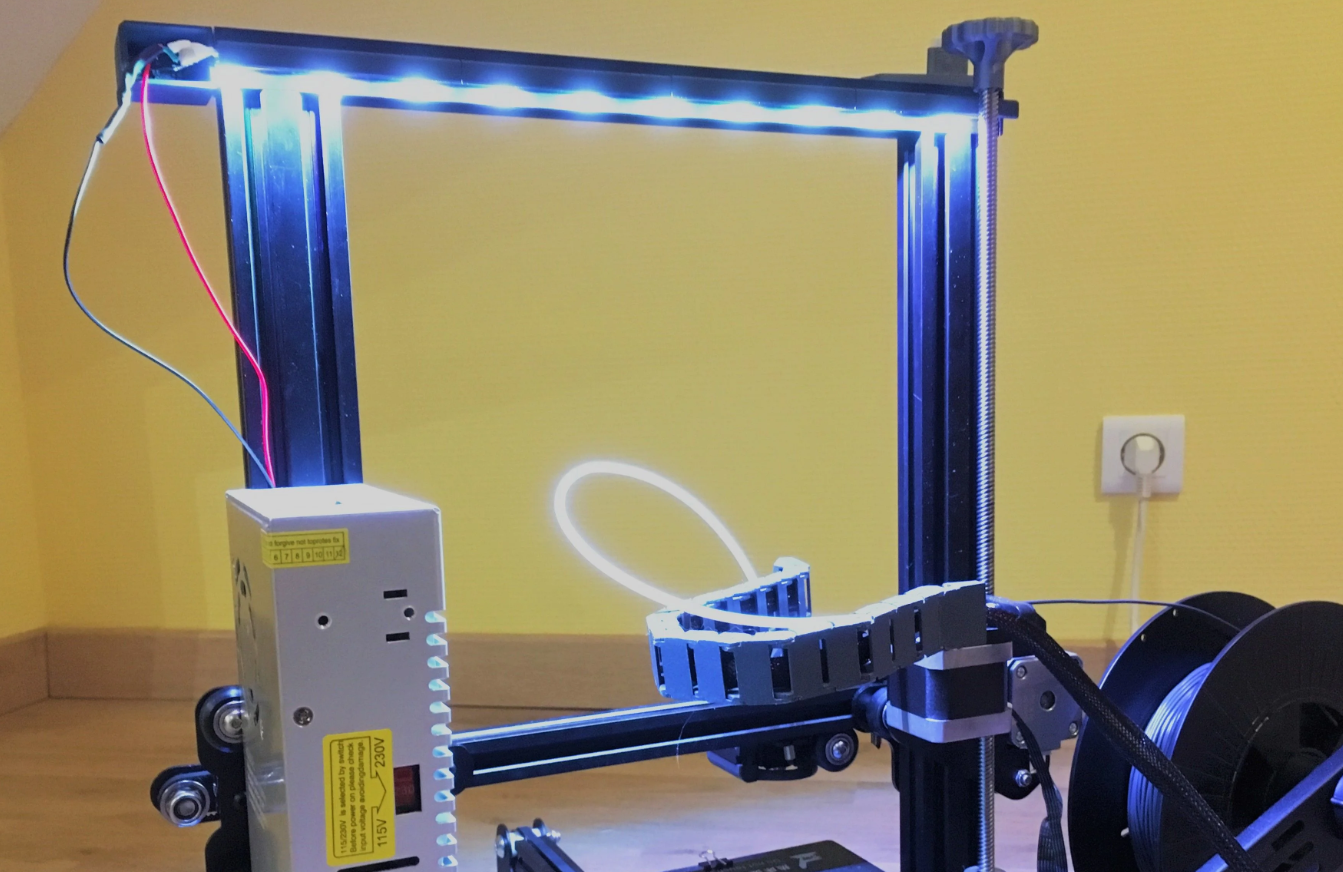
Instead, I suggest buying a third-party USB light bar and 3D printing a special mount to fit your printer. This 3D printable mount option is perfect for the Ender 3 S1 and the designer even provided all of the hardware he used to make it. And, you can power the light bar from a separate outlet, which isn’t as convenient as the Creality option, but at least you save some dough.
Alternatively, you can cut off a strip of LED strip lights and adhere them to the top of your Ender 3 S1’s frame.
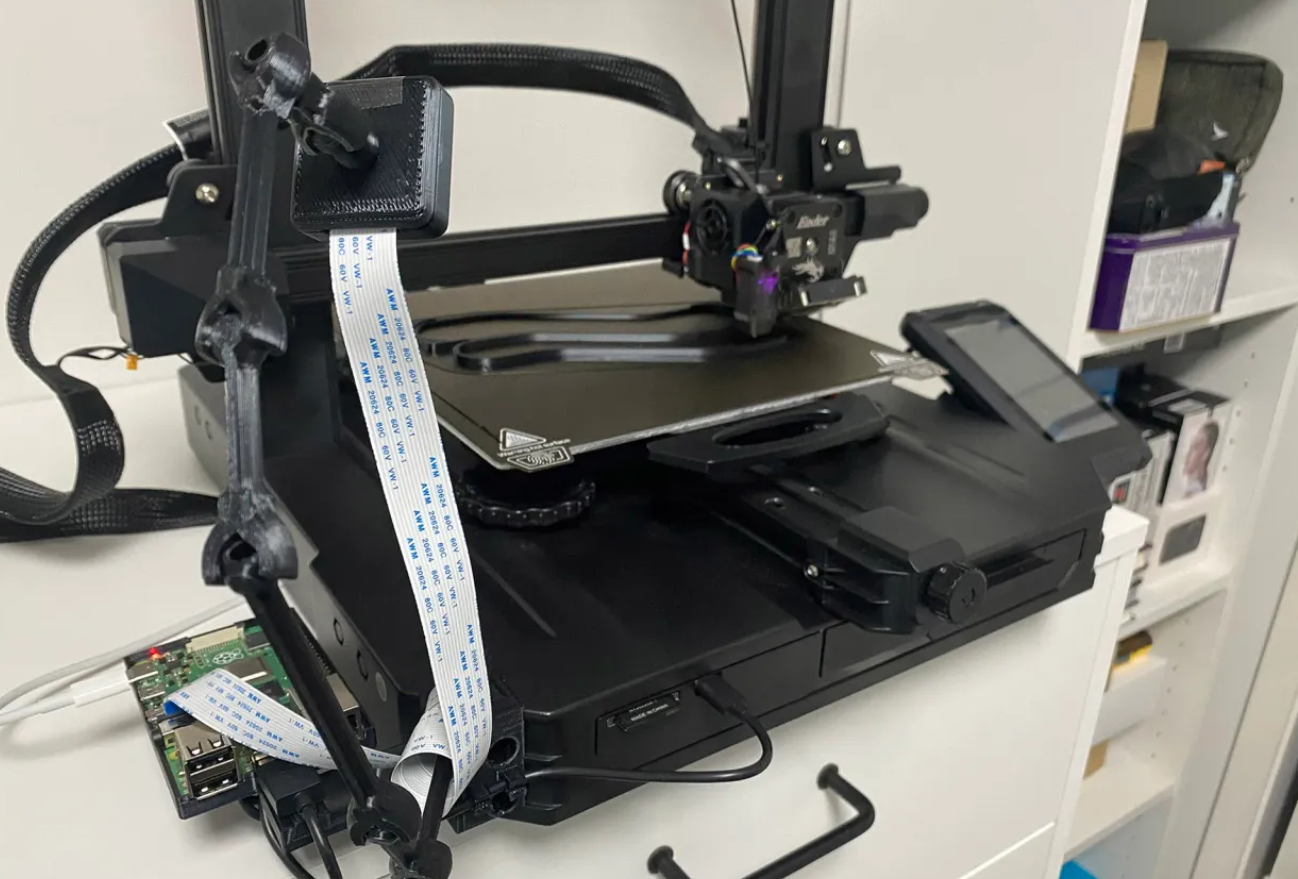
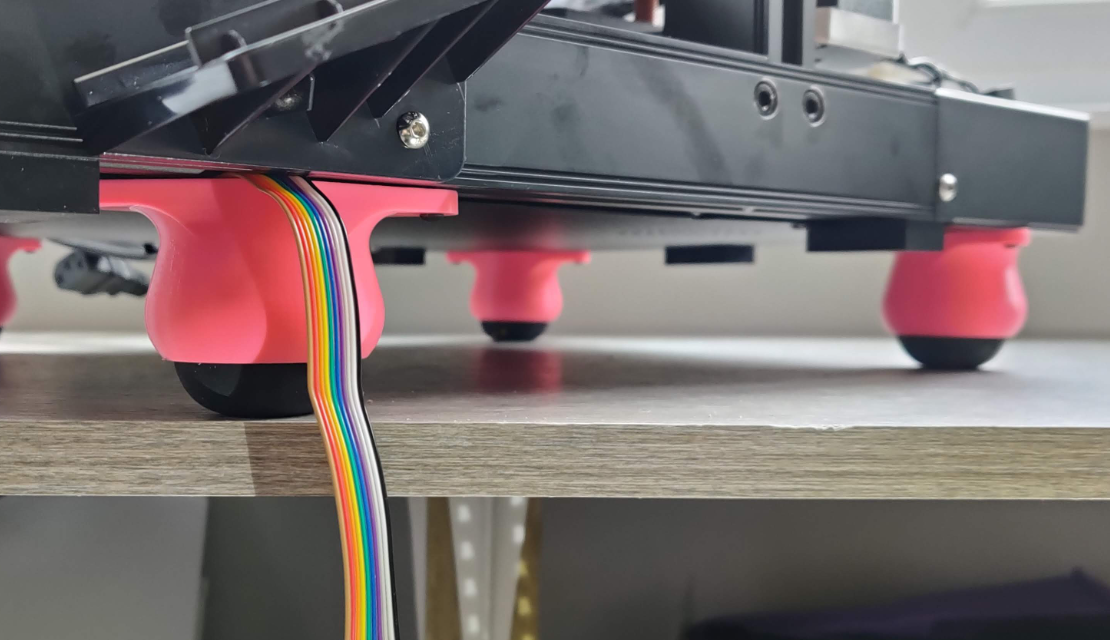
4. Cable Chains
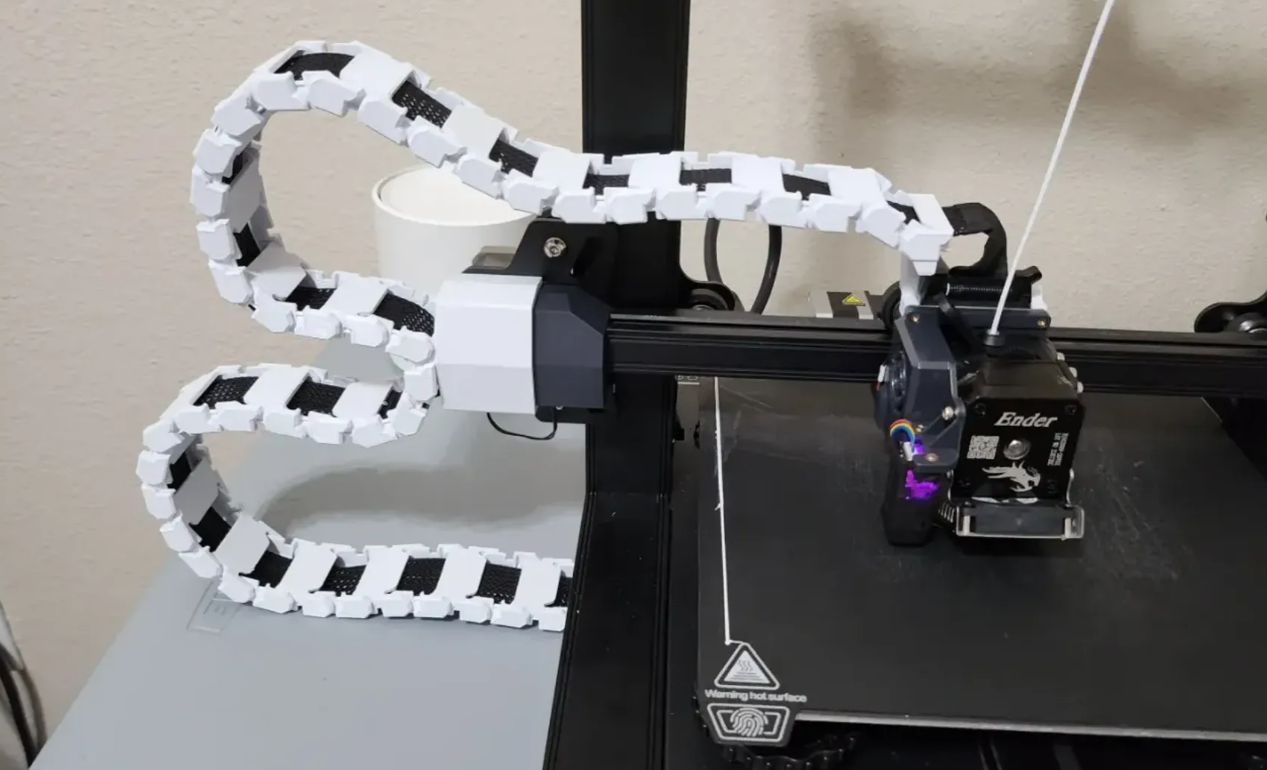
Want to make your 3D printer look pretty? No upgrade does that better than cable chains!
Cable chains are hinged, connectable links where you can house all of the wires of your 3D printer inside. I recommend 3D printing cable chains because there are many projects that are meant for a specific 3D printer’s movements.
I recommend this project as it’s specific to the Ender 3 S1 and looks terrific and super neat!
5. Fan Duct
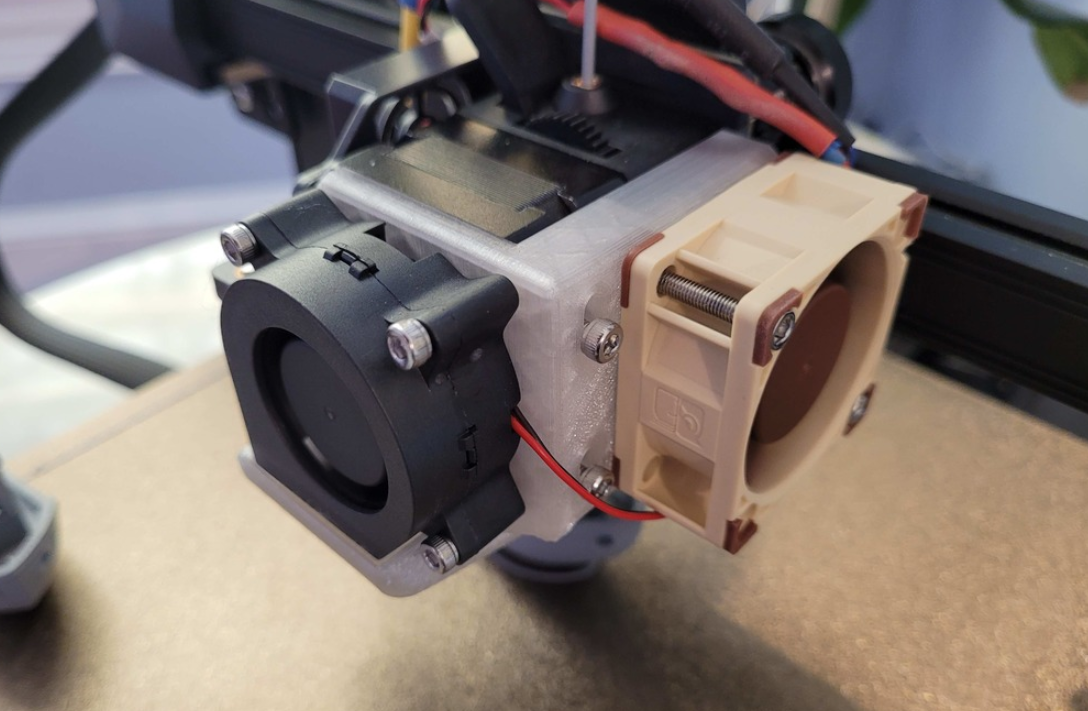
Although often overlooked, cooling is one of the most important elements of the 3D printing process. Too much, too little, or misguided cooling can yield low-quality prints, with issues such as stringing, over-extrusion, and poor overhangs. This 3D printable fan duct is meant for the Ender 3 S1 and provides much better part cooling than the stock fan duct on the printer.
The fan duct works with a 5015 aftermarket cooling fan, much more powerful than the Ender 3 S1’s stock 4010 fan. But don’t worry because 5015 fans are very inexpensive (under $15) and widely available, so making this upgrade shouldn’t be difficult.
The fan duct design itself is also much better than the stock design on the Ender 3 S1, with airflow pointed closer to the nozzle to provide more precise cooling to the printer. So, if you want to achieve higher-quality prints, then consider this fan duct upgrade!
6. Linear Rails
Linear rails are one of the most intensive upgrades you can make to a 3D printer, but they are also one of the best ways to improve the quality of your prints. And, luckily, some makers have figured out how you can add linear rails to an Ender 3 S1.
For reference, linear rails are a motion system where a highly precise bearing carriage moves along rigid metal beams. Compared to the typical bearing roller motion system, such as the one on the stock Ender 3 S1, linear rails are much smoother, more precise, and can function at much higher speeds.
However, linear rails are a bit of an intensive upgrade as they cost a pretty penny ($50+) and require a lot of installation work. But, if you’re looking to maximize the quality of your Ender 3 S1’s prints, then it might be a perfectly practical upgrade.
If you’re interested in adding linear rails to your Ender 3 S1, I recommend finding a project or kit online and following that person’s steps as the process is a bit difficult. But, if it helps, here is a 3D printable Y-axis rail bracket that’s compatible with the Ender 3 S1.
7. Glass Build Plate
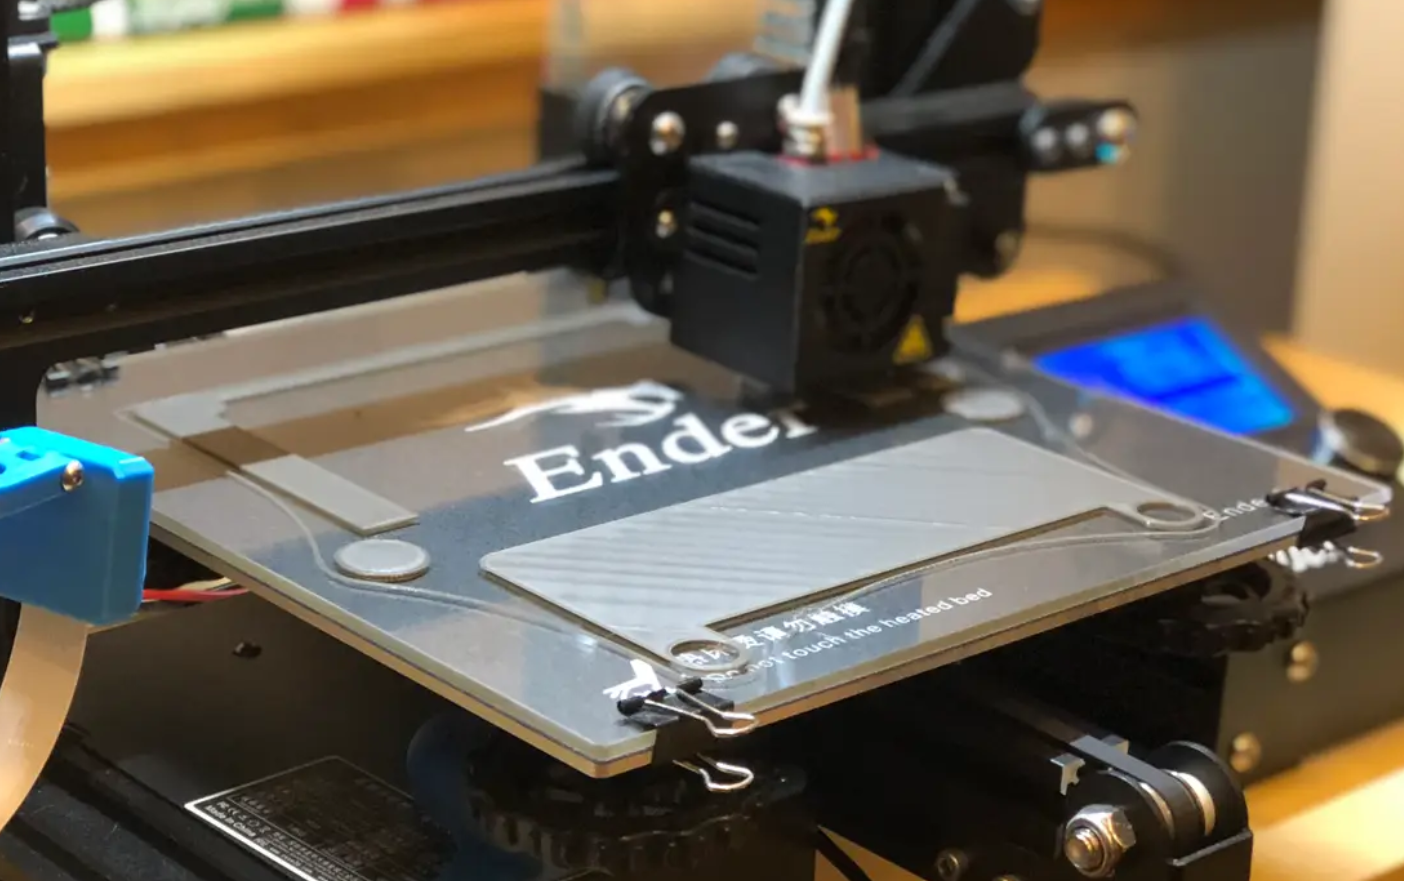
One of the best features of the Ender 3 S1 is its spring steel PEI build plate. This bad boy is flexible, magnetic, and has a textured surface finish coated in PEI to make both part adhesion and print removal super easy. But, if you’re looking to print models with a super smooth bottom, then you might want to consider switching to a glass build plate.
While a glass build plate isn’t flexible or magnetic like the Ender 3 S1’s stock build plate, it has a super smooth surface finish. Because of this, any models printed on a glass bed will have a glossy and smooth bottom.
Plus, a glass build plate is a very easy upgrade for the Ender 3 S1, and you can use any glass bed that matches the machine’s 235 x 235 mm bed area.
8. Squash Ball Feet
Vibrations are a 3D printing enthusiasts worst nightmare. The more vibrations your 3D printer absorbs, the more likely your 3D prints are to experienced ringing and other quality issues. Squash ball feet are a great way to dampen the vibrations on your 3D printer to prevent ringing from occurring.
The Ender 3 S1, like most printers nowadays, comes with rubber feet meant to prevent excessive vibrations. However, if you’ve ever used a Creality 3D printer, then you probably know how bad of a job these rubber slabs do.
Squash balls make for the perfect vibration dampener because of the special rubber compound they are made of. Plus, you can very easily attach squash balls to the feet of your Ender 3 S1 or other printer using a 3D printed holder, such as this free one.
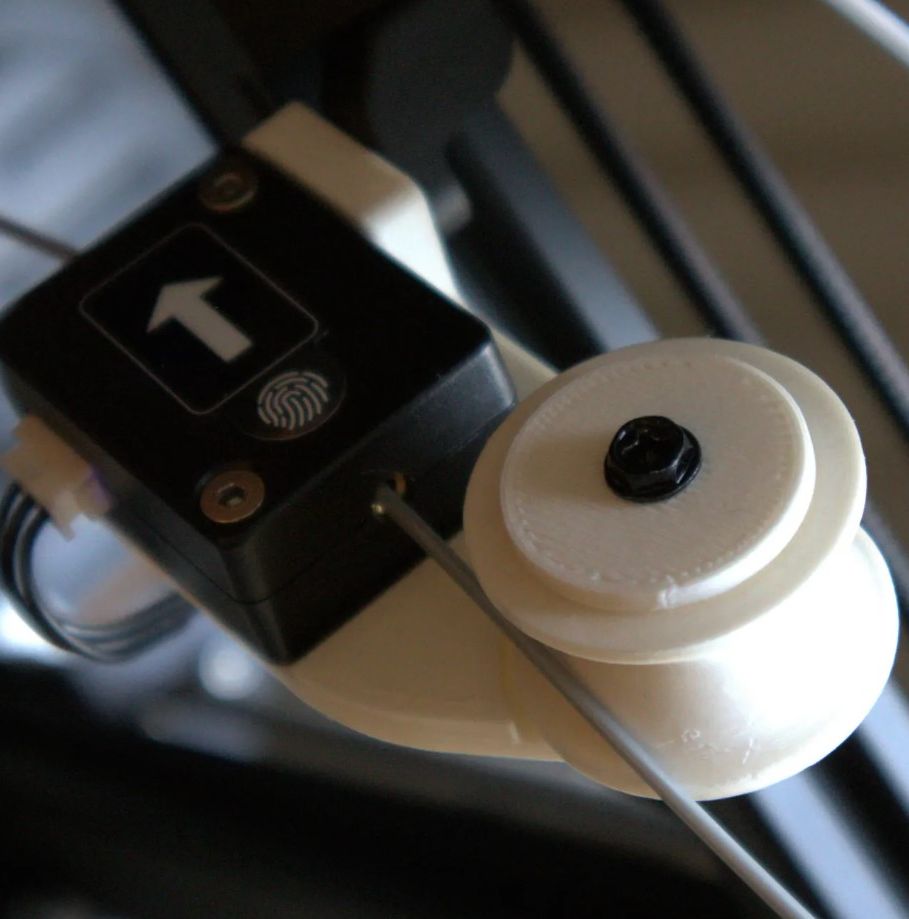
9. Filament Roller Guide
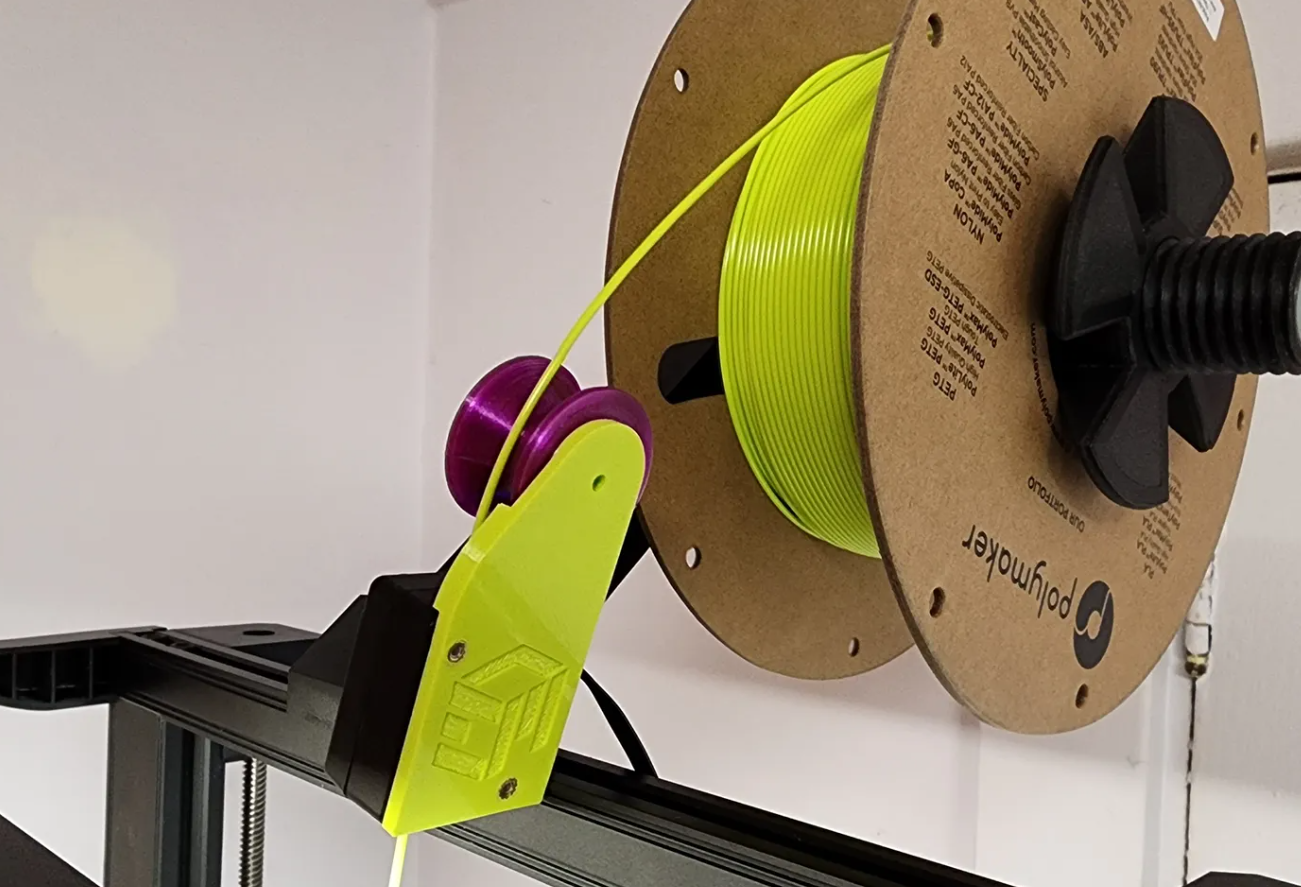
Next, a filament roller is a small pulley-like mechanism that ensures that filament is flowing fluidly to the printer’s extruder and isn’t getting tangled. This specific project is meant to attach to the filament runout sensor and uses a bearing to ensure the inserted filament flows smoothly.
The project involves a 22-mm bearing (skateboard bearing), a few 3D printable parts, and a couple of common screws. Plus, assembling the mechanism should be very simple and the designer ever provided some instructions on the project page.
So, if you want a little upgrade to your Ender 3 S1 that will make sure that your filament isn’t getting stuck anywhere, then this filament roller guide project is a great option!
10. Extra: Firmware Upgrade
Although not a physical modification, upgrading your Ender 3 S1’s firmware is another surefire way to improve the machine’s printing performance and usability.
If you’re unfamiliar with the term, firmware refers to the program that runs on the printer’s motherboard that’s responsible for telling the motors, sensors, and other connected hardware how to operate. Often overlooked, the firmware can significantly impact the quality of prints.
To ensure you’re using the best, most stable firmware, you can download the compatible firmware package from Creality’s download page. The firmware available here will be very stable, meaning errors and glitches are unlikely.
But, if you want to get the most features possible and try out the latest innovations in 3D printing firmware, you can go to Marlin’s firmware page and download the most recent nightly build of the program. But, if you choose to go this route, you’ll have to configure the firmware package for the Ender 3 S1 on your own and compile it in Microsoft VSCode.
As for flashing the firmware on your Ender 3 S1’s motherboard, it’s super easy. You can learn about the process in my guide to flashing firmware on the Ender 3 S1!
Can Ender 3 S1 be Upgraded to Pro?
Kind of! While you can’t make your Ender 3 S1 exactly like an Ender 3 S1 Pro, you can give it a few new features and upgrades that will make it basically on par with the S1 Pro.
The first major upgrade you’d have to make to turn your Ender 3 S1 Pro is replacing the stock Creality Sprite hot end with the Creality All-Metal hot end. All-metal hot ends can reach much higher temperatures than the stock Ender 3 S1 hot end, so this upgrade is critical if you plan on printing higher-temperature materials, like nylon or polycarbonate.
Unfortunately, it’s easier said than done to change the hot end on your Ender 3 S1. If you want to make this upgrade, the best way to do so would be to upgrade the entire Sprite printhead to Creality’s Sprite Pro printhead. Of course, this is a bit uneconomic because you’re replacing the entire assembly for just one higher-quality component, but, hey, you asked!
The other major change you need to make is upgrading the Ender 3 S1’s LCD to the S1 Pro’s touchscreen LCD. While this won’t affect the machine’s print quality, it will make your Ender 3 S1 much easier and more fun to use. And it’s not too expensive an upgrade, with the official and compatible Creality Touchscreen LCD costing well under $50.
What Makes the Ender 3 S1 Upgradable?
The Ender 3 S1 is so easy to upgrade because it benefits from a massive 3D printing enthusiast community.
Moreover, while the Ender 3 S1 isn’t technically open-source, its predecessor, the original Creality Ender 3 is. And because the Ender 3 S1 is very similar to the original Ender 3, many of the upgrades meant for the original Ender 3 work with the Ender 3 S1, or can be easily modified to suit the S1.
Another reason the Ender 3 S1 is so easy to upgrade is its aluminum extrusion frame. Aluminum extrusions make attaching items to the S1 super easy, making it easier for enthusiasts to design mods and upgrades for the printer.
Conclusion
Overall, the Ender 3 S1 is a terrific 3D printer, packed with all the features you could possibly want from a hobbyist-level FDM printer. But even the S1 has its fair share of flaws, and there are many ways you can upgrade the printer.
My personal favorite upgrade for the Creality Ender 3 S1 is OctoPrint, the remote 3D printer control server that connects to the S1 via its motherboard. OctoPrint servers don’t cost much to set up and give you the tools for controlling and monitoring your 3D printer without being in the same room.
I also really suggest adding some 3D printable cable chains and an LED light bar to your printer. While these upgrades are more aesthetic than functional, it’s always nice to make your printer visually appealing.
Hope this helps!